A squeezing mop is indispensable in the household - it is convenient to use due to its long handle, it is multifunctional - it can be used for washing the floor, wiping off dust and cobwebs on the ceiling and in hard-to-reach places.
There is no need to touch water with detergent, which protects the skin of your hands. But owners of such devices know how often they break down and require replacement.
In order not to buy a new mop every time, it is possible to repair it and continue to use it. We'll tell you in this article how to fix a wringer mop if it's broken.
How to replace a sponge on a mop ~ Do it yourself or how to make it?
Unfortunately, due to frequent use, the sponges on squeezing mops tend to wear out and over time they become unsuitable for further use. Washing the floor with a mop with an already worn-out sponge can be not only inconvenient but also unhygienic. But what should you do, you ask, don’t throw away the mop because of this? Of course not, because these mops are designed for reusable use with the ability to replace worn-out attachments with new ones.
If it happens that you need to replace the sponge on a squeezing mop and you don’t know how to do it, then this article is intended just for you. By now, I hope you have already purchased a spare mop head with a telescopic handle, which we will be changing. I also advise you to arm yourself with a Phillips screwdriver. Now, using the example of my mop, on which it is already necessary to replace the sponge with a new one, I will tell you and clearly show each stage of the replacement.
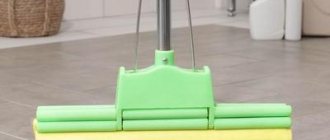
So, let's begin. As you and I can see, the sponge on the mop is already quite worn out and requires replacement.
We will be replacing the old washcloth with a new one like this. Such attachments are sold in any hardware store, and sometimes in supermarkets in the household department.
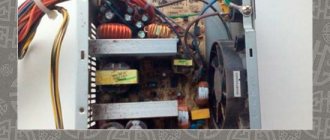
First of all, we need to unscrew the old nozzle. Typically, it is secured with four screws, which are shown in the figure. Our task is to unscrew them.
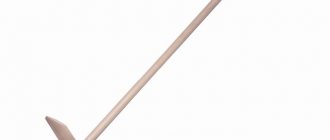
And this screwdriver will help us with this. It is called “phillips” because the tip of the screwdriver is made in the shape of a cross.
Now we try to unscrew the screws shown in the photo above. If, suddenly, you forgot, then to unscrew the screws, you need to turn the screwdriver COUNTERclockwise. Most likely you will have to make an effort, because the screws are covered with rust and are tightly seated. If the screws do not budge, you can use any anti-corrosion agent. I used WD-40.
If you don’t have anything like that, then you can use any kitchen scale remover, aerosol or bath cleaner; at worst, this will do. We process the screws and wait a couple of minutes for the maximum effect of our product.
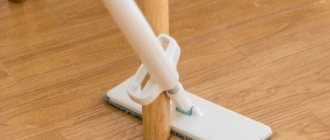
Now you can safely unscrew the screws and remove the old nozzle. If you succeed, the mop will look like this (if you can’t unscrew it, process it and wait again):
It's time to take our new nozzle and replace the old one. At the same time, try to make sure that the holes on the new jaw coincide with the holes on the iron fastener to which it will be attached.
Installing screws into a new attachment may be just as difficult as removing them from an old one. Let me remind you that we are twisting clockwise. Well, when all the screws are in place, you can admire your work.
I hope you are convinced that changing the sponge on a mop is really very easy. You can do this yourself and it will take no more than 5 minutes. But the result is worth it.