Share on social media networks:
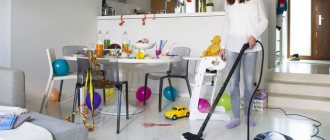
Washing floors on all fours with a rag is not very comfortable or convenient. Especially if you remember that this is, after all, the twenty-first century. Of course, we are not talking about an automated scrubber dryer, but we should not neglect such an effective technical tool as a mop. The mop helps to clean the floor quickly enough without applying much effort. In the article we will talk about how to make a mop with your own hands so that it is simple and at the same time effective to use.
How to make a wooden mop
So, you're about to do some deep cleaning in your apartment, but you find that you don't have anything for it, not even a mop. Don't rush to go to the store to get it. In this master class we told you how to make it yourself. By the way, it will take you a couple of minutes to do everything about everything, besides, to implement the task you will need all the simplest things, but let’s talk about everything in order. And if anything happens, you can wash windows without the risk of falling out of the window. How? Everything is simpler here. You can use a little helper for this. We mean robot. Yes, you heard right. You can buy a window cleaning robot on the website https://thehobot.ru. Let us note that Hobot robots, namely the ones we are talking about, are distinguished by their high efficiency, ease of control and, importantly, they are very durable, at a relatively low cost.
Instructions - how to wash, wring out?
The rules for using a spin mop are simple and intuitive. The algorithm of actions is as follows:
assemble the mop if it is disassembled;- holding it by the handle, lower the washing surface into a container of water;
- wring out the rag - most often this requires pulling the lever, the water will be removed from the nozzle automatically;
- perform cleaning, repeat the rinsing and spinning procedure if necessary;
- rinse the nozzle under running water, squeeze and dry;
- put the mop away for storage.
These instructions apply to mechanisms with semi-automatic spin mode. You can also find autonomous mops on sale.
To perform a spin, you need to press the button located on the telescopic handle, or simply put the device in a bucket. The built-in system will remove moisture on its own.
Electric and steam models have this function . All of them come complete with a cleaning container.
Read about attachments for wringer mops here, this article will tell you how to change the attachment, how to repair the tool - this one, how to assemble it - this one, how to use it - this one.
What materials are needed to make a mop?
Of course, this tutorial is about making a wooden mop.
To create mops you will need the following:
• cutting from a garden tool; • a lath or board 25 mm thick and approximately 3-4 cm wide; • sandpaper; • pencil; • roulette; • drill; • drill; • nails; • hammer.
To connect the parts, and there will be two of them, you can use not only nails. You can also use a wooden dowel and much more, including glue. Decide for yourself what to do.
Price
Wooden mops are inexpensive. Minimum price – 50 rubles. The products are available for sale in both retail and online stores. When buying a mop in the hardware department, you can evaluate it not only visually, but also tactilely. However, purchasing from large online markets allows you to choose a mop from trusted manufacturers.
Top 3 models with photos
The most popular models of wooden mops:
Wedge
Wooden mop with handle, 120 cm. The length of the handle is minimal, so the product is more suitable for people of short stature. Manufacturer: Klin. Price – 240 rubles.
Tool world
Wooden mop for washing floors, 1.2 m. Wooden mop with handle. The length of the handle is 120 cm, the width of the block is 35 cm . Brand – World of Tools. Price 300 rubles.
ECOMOP
ECOMOP wooden mop with handle, 115-130 cm (083770). Comfortable and durable mop. There are products on sale with handles with a height of 115 to 130 cm. The width of the base is 33 cm. Price is 400 rubles.
How to make a wooden mop with your own hands
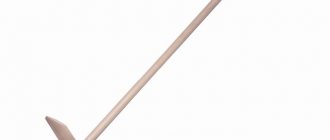
In the image above you can see our recommended sizes. The length of the seam should be approximately 1200 mm, the thickness of the handle should be 20 mm, and the length of the working part should be about 25 cm. Let us note again that in this case we are talking about approximate dimensions.
So, first you need to start creating the working part. In the board, the thickness of which must be at least 25 mm, you need to drill a hole for the handle. If the thickness or otherwise the diameter of the handle is 20 mm, then the diameter of the hole should be the same. To drill such a hole you will need a petal drill. Of course, markings first.
Having arranged the hole, grind the working part using sandpaper, of course, if necessary. Then start assembling. If the cutting is longer than the value we indicated earlier, you need to trim it. When it comes to connecting parts, everything is as simple as shelling pears. You need to insert the cutting into the hole, and then drive a couple of nails into it.
How to make a mop with your own hands?
Washing floors on all fours with a rag is not very comfortable or convenient. Especially if you remember that this is, after all, the twenty-first century. Of course, we are not talking about an automated scrubber dryer, but we should not neglect such an effective technical tool as a mop. The mop helps to clean the floor quickly enough without applying much effort. In the article we will talk about how to make a mop with your own hands so that it is simple and at the same time effective to use.
Folding bucket with two compartments
First, by searching for “Cinderella cleaning kit” (as it was written on my mother’s box), I found this device. After reading user reviews on the Internet, I decided that due to its folding design, it is still not very convenient to use. For example, how to move it from place to place when the bucket is filled with water? Fold and unfold every time? You can learn more about this set from the promotional video - perhaps I just couldn’t appreciate this model, but you will really like it:
Wooden mop for cleaning floors
The simplest device for cleaning floors is an ordinary wooden stick with a crossbar. Making a mop with your own hands from wood is quite simple:
- You need to take 2 wooden slats. Their length will vary depending on your height. The handle can have a size from 80 to 135 cm, try it on to make it comfortable for you. The standard working surface is about 30-40 cm long.
- Sand the surface thoroughly so that there is no risk of getting a splinter when cleaning the house.
- Fasten both parts with screws or nails.
However, it has a number of disadvantages. It is no coincidence that she received the name “lazy woman”. It can only be used to wash the floor in the middle of the room, and in the corners, in narrow passages, near the baseboards, the “lazy one”, alas, is useless. Industrial products equipped with a metal crossbar and a rag clip are no better. In addition, the crossbar in such products often scratches the floor.
Using a mop with a homemade attachment
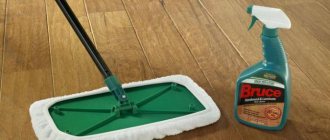
I like to mop my floors with a little white vinegar and citrus essential oils added to the water. This creates a natural floor cleaner. This keeps my laminate flooring clean and the room smelling nice. Once your removable attachment gets dirty, simply throw it in the wash on a normal cycle and then air dry. And once the case becomes too worn or dirty to use, recycle it.
Found a violation? Report content
Rope mop
In appearance it resembles a giant paint brush. It easily penetrates into hard-to-reach corners that are difficult to reach with your hand. Such products are on sale, and many have appreciated their convenience. This is much more convenient than making a mop from wood yourself.
You can try to make a rope product yourself. The task is to secure a bundle of lengths of cotton rope to a stick.
Option 1
To bring such an idea to life, you can proceed as follows:
- If you have metal working skills, it is enough to complete three simple parts for the tip of the product:
- Disc with slots.
- Clip.
- Clamp clamp.
- Now cut the cotton rope into pieces of 40-60 cm. The bundle should be quite thick (the more rope pieces, the better).
- Place a bundle of rope on the disk and press it with a metal bracket.
- An even more high-quality and durable product will be obtained if you replace the rope part with old cotton knitwear, cut into strips in a spiral.
Important! This product will last for quite a long time. Caring for such a mop is quite simple: after each use, the ropes are washed in a soapy solution.
Option 2
There is an even easier way to make a mop with your own hands. You won't need any metal work, so almost anyone can handle this task.
- Round wooden stick.
- Screws or nails are 20mm longer than the diameter of the stick.
- Thick cotton rope or knitted strips.
- Twine or wire.
- A pair of old children's socks.
The work order is as follows:
- Stepping back 4-5 cm from the end of the stick, drive two nails crosswise at a distance of 1.0-1.5 cm from each other. The heads of the screws or nails should protrude outward. They are necessary so that the rope bundle does not slip off the stick.
Important! To prevent the wood from cracking, dull the nails or screws slightly by tapping the point with a hammer. A sharpened nail delaminates the wood, causing a crack to form. A nail or screw with a dull end will paint the wood without cracking.
- Pull the sock over the nails and wrap the rags around the end of the stick so that the nails cannot be felt.
- Place another sock on top and tie tightly.
- Cut the rope into 40-50 cm pieces and lay it out in an even layer on the floor.
- Place the prepared stick on top of the ropes so that the toe bandage is in the middle of the rope pieces.
- Tie the lengths of rope around the stick using a piece of twine or wire.
- Before finally tightening the knot, distribute the rope pieces evenly.
- By placing the stick vertically, you will see that a large brush has formed at the end. Trim the ends of the rope evenly.
- Fold the elastic band of the first sock down, placing it over the head of the brush.
- Tie the product with twine over the edge of the sock elastic.
The mop is ready to go!
A rope product will help keep your floors clean.
Important! A good alternative to a rag is a DIY mop head made from microfiber or crocheted from leftover yarn. The microfiber product allows for both wet and dry cleaning. When cleaning without using water or detergents, dust is removed due to the electrostatic effect.
A mop in its simplest form is a stick with a crossbar
Details
Washing the floor, climbing on all fours, and moving with a mop, does not suit a resident of the 21st century - the century of technological progress.
It's high time our designers invented a household scrubber dryer.
In the meantime, don’t neglect at least such a technical device as a mop. It allows you to work standing up without getting your knees dirty, without exerting much effort and moving much faster.
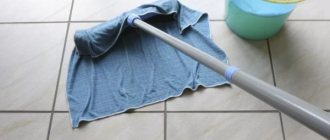
Its simplest version - a stick with a crossbar on which a rag is thrown - is popularly called "lazy" . And they call it right.
With this “mechanism” only the middle of the room can be somehow washed. The “lazy one” will not penetrate into corners, narrow walls, or baseboards - its wide crossbar does not allow it.
The mops produced by our industry with a metal bar and a rag clip are no better. In addition, the metal crossbar sometimes scratches the floor.
The most convenient mop is a rope mop, which looks like a huge paint brush. This brush easily penetrates into any place where your hand cannot reach.
Many countries produce such comfortable mops, and no one would think of cleaning the floor while climbing on all fours.
Rope mop - rope brush
You can try to make a similar mop yourself . Of course, this is just simple in words: - a rope brush.
But how do you actually secure a bunch of cotton strings firmly to the end of a stick?
- clip 1
- disc with slots 2
- and clamping bracket 3
A thick bundle of cotton ropes cut into 40-50 cm pieces is placed on the disk - the larger the better, and clamped with a bracket.
That's all..!
This rope mop lasts a very long time, just wash it every time after use in a bucket of soapy water and dry it upside down.
It will last even longer if, instead of ropes, you use old cotton knitwear cut into spiral strips.
There is an easier way to make a rope brush
It does not require metal work, and anyone can handle it.
For this we need:
- round stick,
- two nails or screws 2 - 3 cm long longer than the diameter of the stick,
- a skein of thick cotton rope or knitted strips,
- a piece of wire or strong twine,
- unnecessary rags and... a pair of old small socks.
First, two nails are driven crosswise into the end of the stick, at a distance of 4–5 cm, at a distance of 1–1.5 cm from each other (or screws are screwed in). To prevent the stick from cracking when driving nails, the tip of the nail must first be dulled by tapping it with a hammer.
Why is that? The fact is that a sharp nail pushes apart and separates layers of wood, forming cracks, while a dull nail simply crumbles it.
The heads and ends of nails and screws should protrude outward. They are needed to prevent the bundle of rope from slipping off the stick.
Pull an old sock over the nails and tightly wrap the end of the stick with rags so that the nails cannot be felt under them (Fig. 2, a). Put the second sock on top and tie it tightly (Fig. 2,b).
How to make a wooden mop
So, you're about to do some deep cleaning in your apartment, but you find that you don't have anything for it, not even a mop. Don't rush to go to the store to get it. In this master class we told you how to make it yourself. By the way, it will take you a couple of minutes to do everything about everything, besides, to implement the task you will need all the simplest things, but let’s talk about everything in order. And if anything happens, you can wash windows without the risk of falling out of the window. How? Everything is simpler here. You can use a little helper for this. We mean robot. Yes, you heard right. You can buy a window cleaning robot on the website https://thehobot.ru. Let us note that Hobot robots, namely the ones we are talking about, are distinguished by their high efficiency, ease of control and, importantly, they are very durable, at a relatively low cost.
Cutting
You must cut out two pieces in the shape of the letter H - one from cotton, the other from a terry towel. Try to work carefully so that the parts match completely.
"Dad is offended." Agata Muceniece about her relationship with Priluchny after the divorce
It’s good to wash often: myths about shampoo and hair care that only harm
Why French children behave well: eight ways to raise them
How to make a wooden mop with your own hands
In the image above you can see our recommended sizes. The length of the seam should be approximately 1200 mm, the thickness of the handle should be 20 mm, and the length of the working part should be about 25 cm. Let us note again that in this case we are talking about approximate dimensions.
So, first you need to start creating the working part. In the board, the thickness of which must be at least 25 mm, you need to drill a hole for the handle. If the thickness or otherwise the diameter of the handle is 20 mm, then the diameter of the hole should be the same. To drill such a hole you will need a petal drill. Of course, markings first.
Having arranged the hole, grind the working part using sandpaper, of course, if necessary. Then start assembling. If the cutting is longer than the value we indicated earlier, you need to trim it. When it comes to connecting parts, everything is as simple as shelling pears. You need to insert the cutting into the hole, and then drive a couple of nails into it.
Washing the floor with a mop is not only more convenient than crawling with a rag, but it is also much healthier - your back does not get tired or hurt. Of course, in the 21st century, many people resort to using electronic scrubbing devices, but a regular mop is no worse, and sometimes even more effective. Thanks to such a simple tool, you can make cleaning better and less labor-intensive. The most primitive mop can be made with your own hands without any problems, but how to make a mop is worth considering in more detail.
The market is flooded with cleaning tools. The following types of mops are popular now:
- rag;
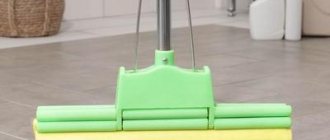
- with sponge attachment;
- butterflies;
- with microfiber;
- rope;
- flat;
- steam.
It is important to know! At home, the easiest way is to make a rag wooden mop or a rope mop.
Kinds
Mops with microfiber attachments
The market is overflowing with cleaning tools. The following types of mops are popular now:
- rag;
- with sponge attachment;
- butterflies;
- with microfiber;
- rope;
- flat;
- steam.
It is important to know! At home, the easiest way is to make a rag wooden mop or a rope mop.
How to make a wooden mop
Wooden mops are very simple in their design (they consist of two parts) and functionality. Place a rag on the base and you can get to work. This mop is used mainly for tiles or linoleum. Despite the fact that its cost is quite low, sometimes it is simply more convenient if you make a mop yourself.
You will need to prepare the following tools in advance:
- a handle (handle) from any unnecessary garden tools;
- a board 4 cm wide, 2–3 cm thick and about 30–40 cm long;
- sandpaper;
- pencil or chalk for drawing;
- roulette;
- drill with drill bit;
- nails;
- hammer.
If you rely on the standard dimensions of wooden mops, then the handle size is 1.2 m, and the working base is 25 cm. Of course, if you make it yourself, the dimensions can vary based on your own preferences (it may be more comfortable with a longer base or due to your height with a larger handle).
When everything is prepared, you can get down to business. First of all, you will need to deal with the part on which the rag will be hung. Mark the center and, using a drill with a petal drill, drill a hole into which the handle will fit (accordingly, the diameter of the handle is equal to the diameter of the hole). Next, you need to take sandpaper and carefully sand the entire base.
Attention! The cutting most often does not require any work. But it may happen that its original length is longer than necessary, in which case it will need to be sawed off.
Once both parts are prepared, you can begin assembling the mop. The handle is inserted into the hole and then several nails are driven in at the joint to hold the structure in place. The mop is ready for use.
Varieties
You might think that all wooden mops are the same. Actually this is not true. Products differ in handle size:
- With a long handle. This design is best for tall people. Its height can be 140-150 cm.
- With an arm of medium height. It is equal to 130 cm.
- With a short handle. A small handle on a mop will help a short person clean up faster. Its height will be 115-120 cm.
Not only the height, but also the thickness of the cutting is important. The thinnest diameter is considered to be 24 mm. If it is smaller, the mop will quickly break. These standards are approved by GOST.
In addition to the size of the cutting, the width of the base is important . The size of the working surface should correspond to the tasks that the mop will have to cope with, namely:
- For cleaning in small rooms, for example, in apartments, a width of 30 cm is considered optimal. With the help of such a product, you can quickly and easily get rid of dust without making much effort.
- For cleaning rooms with a medium area, it is better to opt for a mop with a working surface of 40 cm.
- For large rooms, you should purchase a mop measuring 50-55 cm.
When purchasing a mop with a wide base, you must take into account that their maneuverability is worse than that of smaller products. However, they are capable of covering large areas.
To purchase a high-quality and durable mop, you need to pay attention to the thickness of the wood from which it is made . If it was created from brittle wood, then such a product looks rougher and more massive. They have more weight, but are inexpensive.
Mops made from strong wood species are lightweight, comfortable and durable. The manufacturer will not try to compensate for the fragility of the product by making it rougher and heavier.
How to make a rope mop
Externally, a rope mop looks like a huge brush. The advantage of such a tool is the ability to reach all hard-to-reach places. Now this type is one of the most popular and in demand. Their price in stores is an order of magnitude higher than that of wooden ones. That’s why it makes sense to get confused and try to implement one yourself using improvised means. The design is not complicated enough - you will need to attach a bunch of ropes to the handle. The ropes themselves are made of cotton material.
There are two ways to make such a mop.
First
This option is more complex and requires certain skills in working with metal. Three parts need to be made:
- disc with slots;
- clip;
- clamping bracket.
Next, you will need to take a cotton rope (or any other cotton knitwear) and cut it into strips 40 to 60 cm long. The more ropes you get, the better; the mop should be as thick as possible. Then a disk is useful on which this bundle is put and pressed with a metal bracket. This cleaning base is attached to a wooden handle.
Advantages and disadvantages
Some of the benefits of using a wringer mop include:
hands remain dry and clean during cleaning;- the devices are lightweight and maneuverable;
- the mechanism is easy to operate;
- The angle of rotation of the nozzle allows you to wash even hard-to-reach places;
- devices with a telescopic handle can be adjusted to your height;
- cleaning using a mop is faster;
- the attachments are replaceable, so as they wear out you won’t have to spend money on buying a new mop;
- high cleaning power - modern nozzles collect dust, wool, hair and other contaminants well.
Among the disadvantages of a wringer mop:
- cheap models break down quickly;
- products with mechanical extraction are expensive;
- if the handle does not fold, you will not be able to adjust the mop to your height;
- The product requires a separate storage location.