Does your wallpaper look a little tired? Over time, dust and moisture can discolor them, leaving wallpapered walls dirtier than the day they were wallpapered.
Someone accidentally smeared a wall in a loved one’s hallway, a little artist decorated the wall upholstery with his “art,” and a greasy stain in the bedroom remained unexplained. But there is no need to give up panic.
We'll show you how to properly clean any dirt from your wall trims.
How to clean wallpaper? Let's first look at the type of wall covering: cleaning paper and tapestry wallpaper will be fundamentally different from cleaning vinyl wallpaper. Rolls of wallpaper are usually marked depending on how much the material can come into contact with water.
Why do you need dust removal from walls?
The need to get rid of dust is due to the fact that dust can be dangerous, especially construction dust. Parasites and pathogens can multiply in it. However, dust can also pose other dangers. It is important not to forget that construction dust can not only be soft, but also contain small and hard particles. They can have an extremely negative effect on things they come into contact with, for example, scratching glass or plastic surfaces.
Therefore, in most construction and renovation work, it is recommended to protect the respiratory tract using respirators.
Only a specialized team with the appropriate skills and equipment can quickly and fully cope with such a task. However, some of the useful work can be done with your own hands.
How to remove dust from walls after renovation: practical options
Important! An effective way to combat dust is to take preliminary measures, which makes it possible to prevent or reduce the volume of dust formation.
In order to remove dust from walls and other surfaces, after finishing work, you can use the following options:
- Vacuum cleaner.
- Dry broom.
- Dry rags.
- Brush.
- Wet cleaning.
- Construction vacuum cleaner.
In each case, the tools for dust collection will be different. It depends on the reason for the formation of dust, the surface where it settled and its quantity. But it is generally accepted that moistened construction dust is much easier to clean. However, the degree of moisture should be moderate so that dirty stains do not form on the surfaces.
When dry cleaning, you should carefully select products and tools. In this case, the main goal will be to avoid the formation of a dust cloud that may arise when attempting to clean, and then settle again when finished.
Bread crumb
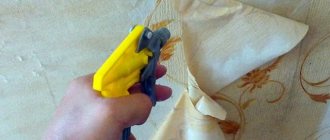
Bread, this “holy cow” of our cuisine, can be used for other purposes than its intended purpose. For example, it perfectly cleans wallpaper. Moreover, any, even delicate, paper ones:
- Take the bread crumb and press it onto the stain for a few minutes. Bread gluten will gradually begin to absorb fat and other dirt.
- Change the crumbs and repeat the procedure several times. The stain will not disappear immediately, but after two or three such “squeezes” of the dirt.
An alternative to crumb is stale white bread. Go over the stains with it a couple of times, and the walls will become pleasant to look at again.
You may be interested in: How to clean a suede jacket at home
Dust removal of very high walls after renovation
If there is a need to clean up a room with high walls, then one of the best options in this case would be a brush with a long handle. In addition, you can use a mop, using a dry or damp cloth if necessary.
In order to facilitate the task of removing dust from high walls, it is recommended to carry out thorough preliminary preparation. This means that the walls should be tightly covered and dampened underneath a layer of film to facilitate dust collection.
Tips and tricks
As already mentioned, correct preliminary and preventive measures play a decisive role in the fight against construction dust.
Before starting work, do the following:
- Remove everything possible from the work area.
- Cover surfaces with film, including windows and doorways.
- Cover furniture and other objects that cannot be moved.
- Use a respirator.
- Use dust collectors.
- Humidify the air regularly.
It should be understood that complete cleaning can only be carried out by a team with the necessary equipment and cleaning products. When cleaning on your own, a certain percentage of dust will remain and will continue to bother you for some time.
It is obvious that the dust removal operation is a necessary process that, one way or another, must be carried out. In each case, the actions may be different, but their goal is the same.
How and with what to remove dust from wallpaper after renovation without damaging it?
It is not easy to remove dust and household dust from wallpaper, not to mention construction dust.
How - with a vacuum cleaner, if the wallpaper is not washable, and by washing, if it is washable.
The third option is to “tear off” the old ones and stick on new ones.
Change the design and get rid of the dust.
By definition, after repair there should be no dust on the wallpaper.
Wallpaper is a finishing finishing material; all “wet” and dusty work is done before gluing it.
Plus, the wallpaper is glued after finishing the ceiling and after laying the flooring on the floors.
But if this happens, then decide on the type of wallpaper. There are washable wallpapers, you can remove dust from them using the wet method, and there are non-washable ones (paper).
The most effective and fastest option is cleaning with a vacuum cleaner, but you need a brush like this with long and most importantly soft bristles,
We turn on the vacuum cleaner and start cleaning the dust from top to bottom; if there is wallpaper on the ceiling, then first we clean the ceiling, then the vertical surface (walls).
If the wallpaper can be washed, then using a slightly damp cloth (sponge) in the same sequence (from top to bottom), first remove the dust with wet wipes (sponge, rag), then wipe the wallpaper with dry wipes.
You can, of course, sweep away the dust with a brush and then remove it from the floor with a vacuum cleaner, look at the place as it is more convenient.
I would advise vacuuming the wallpaper right away.
Removing dust from the surface of wallpaper directly depends on what kind of wallpaper it is.
If the wallpaper is paper, then it is afraid of water and cleaning must be dry. In this case, you can use a broom, a soft bristle brush for cleaning clothes, or a vacuum cleaner. Carefully pass the wallpaper over the entire surface, removing dust.
But it’s best to first familiarize yourself with exactly how to care for wallpaper. If there is still an unopened roll or “information tag”, then look at the symbols:
- 1 wavy line means that the wallpaper can be gently wiped with a damp cloth without getting it wet;
- 2 wavy lines indicate that the wallpaper can be washed;
- 3 wavy lines indicate durable, durable wallpaper that can be washed with the addition of detergents.
Based on this, you can decide whether the wallpaper can be wet cleaned.
If possible, then first remove dust from the wallpaper using the dry method so that
there were no divorces.
Add detergent to a basin of warm water and wipe the wallpaper with a damp, well-wrung out sponge.
Source
Removing stubborn dirt
If the wallpaper needs to be cleaned, then in order to remove serious dirt from its surface, you can use the following means:
- Oxygen powders.
- Special gels and pastes.
- Lemon acid.
- Water with starch.
If there are no available funds at hand, then all this can be purchased at a hardware store. But no matter what product is chosen, cleaning must be done very carefully. Using a soft sponge or a piece of cotton wool with a product applied to it, carefully treat the stain. The procedure is carried out until the contamination is removed. As a rule, this method removes many stains, including those from pens, felt-tip pens, juice and coffee.
Why does dust need to be removed?
The light suspension that remains after repairs is harmful to health and very dangerous. When a person inhales it, it enters the lungs. There it settles on the bronchial mucosa. This can lead to serious inflammation or even disruption of organ function. It is not for nothing that there are safety precautions: during repairs it is necessary to wear a respirator that will prevent particles from entering the lungs.
In addition, the suspension easily gets into the eyes. This causes serious irritation. And can cause conjunctival diseases. Therefore, in addition to a respirator, it is recommended to wear special glasses. Plus, don’t forget about your ears: there are special protective headphones.
The suspension may contain various chemical components. Because of them, a severe allergy can begin, the symptoms of which will be a rash, various redness, runny nose or even asthma. To protect yourself from this, purchase special protective clothing in addition to a respirator, goggles and headphones. This one usually covers most of the body.
From the listed facts we can conclude that the suspension is very dangerous. Therefore, you need to beware of it not only during repairs, but also after: the remaining particles will negatively affect the body. In this regard, the premises must be thoroughly cleaned of dust.
Source
How to clean the air from dust in a room?
How to clean your house of dust: 7 simple tips that work
- Tip #1: Get out a little at a time...
- Tip #2: Wipe the dust thoroughly...
- Tip #3: Wash floors only after vacuuming...
- Tip #4: Use a microfiber cloth or similar...
- Tip #5: Don’t forget to change the filters in your vacuum cleaner
Interesting materials:
Juniper is drying up, how to save it? Special mass gainer how to take? What does a call to a session help with? How to calculate the average number of employees in 4 FSS? Cost item material costs what does it relate to? Electronic sick leave status 020 what is it? What is the refinancing rate? Stepper how long to practice? What is a state pension insurance certificate? Holy Week, what can you eat?
Step-by-step work plan
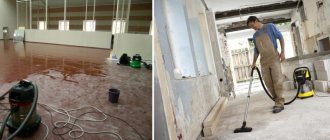
One of the secrets of professional cleaning is that for each type of work there is a technological map - a clear step-by-step plan. It helps to clean the room better, faster and with less money. A certain sequence should also be used when cleaning an apartment with your own hands after renovation. It consists of the following stages:
- Preparing for cleaning, planning work.
- Collection and removal of construction waste.
- Cleaning dust from all surfaces.
- Wet cleaning and washing of surfaces that require it.
- Removing specific stains.
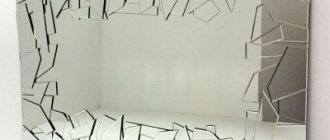
- Polishing mirrors and glass.
- Cleaning and arranging furniture, carpets, curtains.
You may want to deviate from the recommended sequence. This will make the job more difficult, but the cleaning will still get done. The only rule that cannot be broken is: first remove dust, then wash surfaces. At first glance, it seems that it is easier to remove dust with a damp cloth, but in fact it will only turn into stains. It is then extremely difficult to get rid of them.
Advice! Start all work from the upper parts of the room, moving from the ceiling to the walls and further to the floor.
Final stage
After washing the doors and windows, you need to wipe everything away from dust again. It is no longer necessary to use a vacuum cleaner - at this stage of work, an ordinary soft rag can handle the dust. Particular attention should be paid to objects that have a complex shape and are multifaceted (chandeliers, lamps): the dust found on them gets clogged into all the corners and crevices, and therefore it is not easy to remove it from there. Treat wooden surfaces with polish.
The final stage involves wet post-repair cleaning of the house. It is advisable to start with the bathroom: a room tiled with ceramic tiles after renovation requires not only cleaning, but also treatment with disinfectants. After finishing cleaning, the apartment needs to be properly ventilated.
Getting ready for cleaning
There are several important points here:
- Plan your actions.
- Pick up everything you need to clean the apartment after renovation - tools, equipment, equipment.
- Take care of your protection from dust and chemical detergents.
First, about planning. We usually send a team of 2–4 people to clean after renovating an entire apartment. These are experienced specialists with a whole arsenal of professional tools and equipment. It takes them a full shift to complete the task. Now evaluate your physical capabilities: you won’t be able to do such a volume alone in a day.
Therefore, firstly, it is better to involve assistants in cleaning. Distribute responsibilities between them: who can vacuum, wash windows, move furniture or carry heavy garbage. Secondly, decide how you will divide the work over several days - by rooms or by stages. If you clean one room at a time, make sure that dust and debris do not get from dirty rooms to clean ones. Construction dust is very fine and tends to quickly spread throughout the apartment.
Next, you need to assess the degree of contamination of the apartment after renovation and make a list of cleaning products. Approximately you will need:
- Durable garbage bags (for large construction ones, polypropylene, for smaller, household ones - dense polyethylene).
- A powerful vacuum cleaner, preferably with a water filter. Ideally, rent a professional unit that can accurately handle large amounts of fine dust. Please note that household vacuum cleaners often break due to such work; they are not designed for it.
- Mops or brushes (for floors, walls, ceilings, glass), 2-3 buckets for water and cleaning solutions.
- Large set of microfiber cloths and sponges. Be prepared for the fact that after such cleaning you will have to throw away almost all your equipment - rags and brushes will be full of dust.
- General purpose detergents. Here, focus on the finishing materials: washing should not harm them. Usually, after repairs, there is no need to use highly specialized “chemistry” to remove grease and heavy dirt. All-purpose detergent for floors and plumbing, glass cleaning spray, and furniture polish are enough. If there is limescale on the plumbing, also use an acidic solution to dissolve it. To care for parquet you will need special wax.
- “Chemistry” and special tools for removing stains from building materials - grout, polyurethane foam, primer, glue, paint. It all depends on the type of contamination; usually acetone and white spirit are enough, and for mechanical cleaning - a stiff brush and a small plastic or wooden spatula.
- A stepladder, which will be convenient for wiping ceilings, cornices, lamps, etc. It can be replaced with a stool, but this is more dangerous. Using telescopic mops and brushes for “height work” requires some training.
Advice! A broom should be used only if the rooms have a lot of small but heavy debris and little dust. If there is a thick layer of dust on the floor and other surfaces, foam or glass wool is flying (which is even worse), use only a vacuum cleaner. Otherwise, cleaning may harm your health.
Washing process
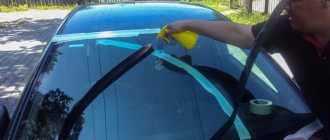
Soak a sponge in the soapy water, wring it out well and wipe the wallpaper with it. Any wallpaper should be washed quickly and not allowed to become limp. Do not wet the walls too much, especially painted wallpaper.
It is not recommended to apply force, otherwise the top layer of PVC may be damaged. Better try adding foam or experiment with detergents. If after washing the stain still does not go away, wait until not only the top layer, but also the inner layer dries, this usually takes about five hours, depending on the degree of ventilation of the room. After washing, be sure to wipe the wallpaper dry with a cloth.
The wallpaper must dry on its own - ventilation and drafts can cause the wallpaper to peel off. Remember that each wash you make will constantly destroy the structure of the wallpaper, which will ultimately lead to complete wear and tear and the need to re-glue it.
Getting rid of trash and unnecessary things
So, you are completely ready to go. Where to start cleaning an apartment after renovation? Of course, from “clearing the territory.” What you can find in newly renovated rooms:
- Work tool. Collect it, wipe it with a cloth soaked in soapy water and put it in its place (in the closet or garage).
- Remains of building materials. Sort them out. Decide what can and is worth keeping, and what is better to throw away or give as a gift to someone. Send the necessary materials for storage, put the unnecessary ones in a pile - they will become the first garbage.
- Large construction waste. Brick and concrete scraps, scraps of tiles, laminate, plastic and metal profiles - all this needs to be collected in large bags. It is more convenient to stack large pieces of drywall, boards, fiberboard, and linoleum. Such waste cannot be thrown into garbage containers (there is a fine for this), but should be taken directly to a landfill. To prevent bulky waste from interfering with cleaning, store it at the exit or, if possible, immediately take it outside.
- Small construction and household waste - pieces of cardboard, paper, tape, etc. Collect everything in bags and throw away.
Advice! First, get rid of hazardous debris. These are scraps of glass wool, paint cans, remnants of solvents, antiseptics, and impregnations. Take them out of the apartment immediately or pack them in bags, tying them tightly. This way you won't have to breathe in harmful fumes.
Dust all surfaces
How to effectively remove dust after renovation throughout an entire apartment?
Only with a vacuum cleaner and, if possible, a professional one. Do not try to wipe off dust with napkins, sweep with a broom or collect with a brush. And even more so, do not wet the surfaces “to reduce dust.” When vacuuming with a regular vacuum cleaner, use disposable bags and change them more often than usual. For example, after cleaning one very dusty room, replace the bag before continuing to work in another room. The fact is that the filters of household vacuum cleaners are not designed for fine construction dust. When the bag is filled, it can break through its walls and gaps in the parts, and fly out through the air outlet hole. This type of cleaning is not very effective.
Be sure to treat all surfaces in the room, starting with the ceiling. Dust can be invisible on wallpaper, vertical walls of furniture, on doors and window glass. But it’s definitely there, and it needs to be removed. Clean corners, grooves, and crevices behind baseboards very thoroughly. The dust cannot be removed from there with anything other than a vacuum cleaner.
Be careful when vacuuming painted walls, ceilings (especially glossy stretch ceilings), polystyrene and polyurethane decor (ceiling baseboards, stucco), and lacquered furniture. They are easy to scratch with a regular brush, even without pressure.
Advice! If there is furniture in the room with protective covers, vacuum them too. Did you just cover your sofas and cabinets with film or old bedspreads? We'll have to take it all off and take it out at once. If you first clean and wash the walls and floors, and then start removing the dirty bedspreads, the whole room will be dusty again.
Necessary tools and cleaning products
Before starting general cleaning, you need to prepare what to use to remove dust after renovation in the apartment - cleaning products and tools. It is better to prepare everything you need with a reserve. After all, it is advisable not to leave the room while cleaning so that dust particles do not fly away. Necessary:
- In order to collect and remove construction waste, you will need gloves, a respirator and many large bags.
- It is better to first put curtains, carpets and other items in bags or boxes and cover them with film. Place those items that have already been wiped with a damp towel separately from dusty curtains, carpets and other textiles.
- To spray dusty surfaces, you will need a spray bottle with a fine spray.
- Of course, the king of cleaning is the vacuum cleaner. To remove construction dust after renovations, you need an option with high suction power.
You cannot vacuum construction dust with a regular vacuum cleaner. Also, in addition to power, it is important that the waste collection container is made of plastic or paper. Fabric will not work. A construction vacuum cleaner will do the job perfectly. You don't have to buy it - it's quite expensive. Can be rented. If this is not possible, you can vacuum up construction dust with a powerful home vacuum cleaner.
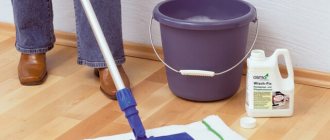
For wet cleaning you will need:
- Water containers.
- Rags, sponges, pieces of cloth (cotton). Rags made from so-called “smart” material are also perfect. The dust particles seem to stick to it and do not scatter throughout the room.
- Detergents for floors, windows (alcohol-based) and walls.
If there is wallpaper or paint on the walls, the product must be appropriate. For tiles, the same as for windows is suitable. The most important thing here is that you can never have too many rags and water. It is necessary to change and wash as often as possible.
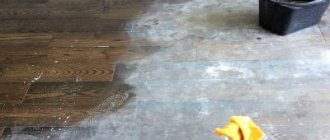
Wash and clean
If you have dealt with the dust remaining after the renovation yourself, then wet cleaning of the apartment will no longer be a problem. Here it is important to correctly assess the condition of the surfaces and decide which of them really need serious cleaning. Not all finishing materials can even be wiped, much less washed. Cleanliness must be ensured so as not to damage them.
Like dust removal, wet cleaning should start from the top, from the ceiling, and gradually move down. Frequently change the water or cleaning solution in which you rinse your wipes and brushes - this will help avoid streaks. If you are not sure whether a detergent is suitable for a particular surface, try it on a small area in an inconspicuous place. And only after making sure that there is no harm, wash the entire area. Further separately about the different surfaces in the apartment.
Ceilings
- A painted ceiling, if it is well cleaned with a vacuum cleaner, does not require additional cleaning. The same applies to fabric tension structures.
- Plastic seamless ceilings, coatings made of laminated polystyrene foam or polyurethane foam should be wiped very carefully with a damp cloth. If the coating is glossy, with a mirror effect, immediately wipe it dry to avoid leaving streaks from moisture.
- PVC stretch ceiling structures can also be wiped with a soft, damp cloth. Do not use detergents if there are no stains on the film. Heavy dirt can be washed off with soapy water; the main thing is not to scrub the ceiling with a hard brush.
Chandeliers, lamps, switches, sockets
Lighting fixtures are wiped with a very well wrung out damp cloth and then wiped dry. Be careful - be sure to turn off the electricity before working on electrical appliances. Moisture should also not get inside. If possible, it is better to remove the lampshades and wash them separately. Wipe glass and chrome elements immediately dry; if necessary, you can use a window cleaning spray. Carefully wipe sockets and switches with a clean damp (not wet!) cloth.
Walls
Painted walls, decorative plasters, liquid, vinyl and paper wallpapers cannot be washed. They can only be gently wiped in areas of heavy dirt or stains. In other cases, vacuuming well is sufficient.
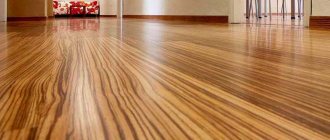
Glossy surfaces (wooden panels, lining, mirror and plastic coatings) need to be wiped. Use a well-wrung out damp cloth to remove any remaining dust. Then wipe the coating dry.
Ceramic tile
There are two problems here: grout residues and dust stains, which appear even after the second or third wash. How to effectively wash tiles and remove all dirt remaining after renovation?
- Before washing, the tiles must be cleaned of dust with a vacuum cleaner. Then you should also wipe it with a dry cloth - this will make it easier to clean. Throw away any rags used for dry cleaning immediately.
- Carefully remove large pieces of putty, cement, grout, tile adhesive with a spatula (preferably wooden or plastic, not steel). Be careful, although the glaze on the tile is strong, even it can be scratched by metal and sand.
- If there are stains of primer on the glazed surface, treat them with acetone. But first, be sure to try its effect on the tiles in an inconspicuous place.
- Small remnants of grout can be carefully removed with a spatula or try to wipe off with a napkin. If there is a lot of grout and the cladding area is large, there is no need to waste energy. Buy special foam for tiles. It can be found in construction stores and among professional cleaning chemicals.
- Wash the tiles with acidified water (2 cups of vinegar per 10 liters). Rinse the napkin frequently and change the water when it gets dirty. Clean tiles are wiped dry. If it is very glossy and large-format, you can use glass cleaning liquid after washing. This will make it easier to avoid divorces.
White vinegar or bleach
For vinyl stains caused by water damage, whether mold or tannins, try a bleach or white vinegar solution. Start with a weaker solution and add more bleach or vinegar as needed. Mix ¼ cup of bleach with 1 cup of water. First, test the solution on a small, inconspicuous spot on the wall behind the door.
If the method appears to work after five to ten minutes, continue. Dip a soft sponge into the mixture and remove excess water. Apply the sponge to the stain and leave for five minutes. Remove any remaining bleach with a clean, damp sponge.
For dirt or grease stains on fiberglass wallpaper: Use ½ cup white vinegar mixed with 1 cup water. Apply this solution to the painted part of the wall and place it in the same direction as the wallpaper pattern. Wipe the surface with a sponge soaked in clean water. Next is a dry towel.
We remove stains and specific contaminants
How can you remove the remains of building materials from different surfaces with your own hands? This is perhaps the most difficult question for cleaning an apartment on your own after renovation. Here are some tips for removing the most common stains:
- Drops of enamel paint and varnish are wiped off hard surfaces with solvent or alcohol.
- Cement, tile adhesive, and polyurethane foam are removed with an abrasive sponge.
- Scotch tape, glue, and paint can be removed from a plastered or painted wall with white spirit.
- Rust is dissolved with a solution of copper sulfate.
- Grease stains from laminate and parquet are removed with turpentine or alcohol.
Melamine sponge
This abrasive removes various “fresh dirt” well. But he can’t cope with the old-timers:
- The sponge is great for cleaning vinyl surfaces.
- Non-woven wallpaper cannot be cleaned without damaging the texture and pattern.
- And melamine abrasive is generally the worst enemy of paper.
The melanin sponge perfectly removes fresh stains
arrow_left
The melanin sponge perfectly removes fresh stains
Shutdown
Now you know how to properly clean an apartment after renovation. When everything is clean, all that remains is to ventilate the rooms well and put things in their places. And if the smell of paint, varnish or other “chemicals” remains in the premises, try to get rid of it using improvised means:
- Lay damp towels and sheets over the surfaces, leave them for several hours, then collect and wash.
- Pour roasted coffee, coarse salt or soda into wide plates. These are excellent sorbents, leave them for a day and then throw them away.
- To remove particularly strong odors, it is worth using more sorbents - charcoal, a commercial odor and moisture absorber. They are sold in bulk packs. Spread the sorbent in a thin layer on a paper or fabric mat and leave it in the room for a day or two.
- To eliminate the smell of solvent (acetone, white spirit), light several candles in the room. Solvent vapors will burn, and combustion products can be easily disposed of by well ventilating the room.
After eliminating the unpleasant odor, you can enjoy a comfortable life in a clean, renovated apartment. And if you don’t have the desire and time to clean up all the construction dirt yourself, call us for help. Dom Cleaning specialists know how to clean an apartment after renovation; they will clean it quickly and with a quality guarantee.
Source
Eraser
Feel free to use the eraser on any surface, including paper “sissies” too.
- Traces from various insects and fountain pens can be easily removed with an eraser: just rub over them, and that’s it. You don't need any special equipment.
- But to remove grease or glue, you will have to soak the eraser in kerosene for several hours. The rubber band will become saturated with fuel, become an all-powerful super-eraser and clean everything clean.
Where else you can effectively use an eraser, find out from the material How to wash roller blinds.
Another useful article: How to clean a glass-ceramic stove