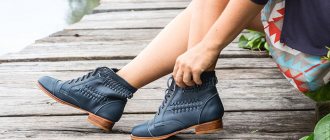
Finding a pair of shoes in which you will feel comfortable is quite difficult. Therefore, favorite shoes that have become unusable upset us. After all, you will have to search again for suitable shoes or boots. Of course, you can use the services of a qualified shoemaker, but this applies to complex repairs. In addition, not every shoe shop undertakes to eliminate minor problems, citing the fact that repairs are impossible or will cost you a pretty penny. Therefore, if you need to seal the sole or restore it, you can do it yourself. This way, you will put off throwing away your old shoes.
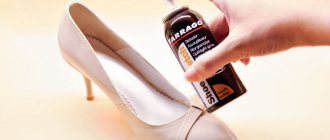
Types of glue that are often used to repair shoe soles
It is immediately necessary to dispel the myth that most people believe: professionals never use superglue or PVA when they see a cracked sole in front of them.
Often, craftsmen resort to introducing one of these mixtures:
- A transparent polyurethane-based solution called Desmokol.
- Special glue “Moment”, designed for repairing boots that have a hole in the sole.
- Epoxy resin is an excellent void filler.
- The fixing composition called “Shoemaker” is no less popular and contains rubber.
- When looking for a universal model, you should pay attention to Bonikol; this product is used in factories and workshops.
You can choose a manufacturer and model at your personal discretion, depending on the volume of repairs and financial capabilities; the range of products will pleasantly surprise you.
| Name | Description |
| Moment Marathon | Advantages:
|
| Nairit | The seam is flexible, resistant to water and heat, durable. The main advantage is the absence of harmful compounds in the composition.Repair methods:
|
| Eva | Suitable for any shoe repair.Advantages of the composition:
|
| Kenda Farben | Requirements for work:
|
| Contact | High quality product, significant savings |
| UHU "Schuh & Leder" | Distinctive features of the glue:
|
Suede
In case of severe contamination, it is recommended to use a soap solution: add a little liquid soap, shampoo or grated toilet soap to the water. Add ammonia (1 to 5) and stir until foam forms. Wipe the shoes with a sponge soaked in the solution, then remove any remaining soap with a damp cloth, treat with a clean damp cloth, and dry at room temperature. This method can also remove stains and greasy areas. There are various special products for cleaning suede shoes (sprays, foams) that are more effective.
If the shoes have lost their color, you need to use special coloring agents that should be chosen to match the color of the shoes. If you can't decide on a shade, there is a clear dye for suede. All these products can be purchased in specialized stores.
To eliminate scuffs and restore the pile, you should dissolve vinegar in water in a ratio of 1 to 4. Clean the desired areas with this solution, then wipe them with a damp cloth. After drying, treat the shoes with a slightly damp sponge dipped in a weak solution of vinegar (1 teaspoon per liter of water).
To update light suede shoes, you need to prepare a solution of skim milk (1 glass) and soda (1 teaspoon). Then apply the composition to the sponge and wipe the product.
How to repair shoes at home: cold and hot method
Understanding the details of the question of how to repair a hole in a sole, anyone interested in common methods for solving the problem will notice two effective approaches to implementing the idea.
The cold method requires a minimum of skills in working with the material; before applying the mixture, the joints are cleaned, after which you will need to press the two parts tightly, liberally lubricating the crack of the boots with a fixing liquid.
The hot method will be relevant for working with too hard soles, the composition is applied to the damaged surface and heated with a hairdryer, even a cosmetic copy will do, you don’t have to look for a construction model.
It is important not to overheat the layer, otherwise it will lose its qualities; 30 seconds is often enough, but before performing manipulations you should read the instructions from the glue manufacturer.
Do-it-yourself sports shoe repair: sealing the sole of sneakers
There is no need to panic, thinking about how to repair your favorite thing that fits perfectly on your foot and does not restrict movement.
Sports models are exposed to stress every day, so when performing the method, you should be as careful as possible and complete all the steps efficiently, so that the first time you step on the treadmill or into the gym, the soles of your sneakers do not have to be repaired again.
Dirt and debris are completely cleared from the problem area, after which the surface should be degreased with solvent or white spirit. When working with large holes, the cracked sole will have to be pre-reinforced with fiberglass mesh.
Upon completion of these stages, you can proceed to filling the space; construction tape is glued over the layer of fixing liquid; it will make the outer side more even and prevent the mixture from spreading.
What shoe glue to use to seal a hole in a sneaker
When thinking about how to restore the model and how to seal the sole, it is important to give preference only to proven brands of fixing mixture, otherwise the result of the work will upset the master.
Among the products that are popular among professional shoemakers are the following product samples:
- EVA.
- Desmocol.
- Super Moment (second).
- Kenda Farben SAR 306.
To repair a cracked sole at home on sports sneakers, it is better not to skimp on buying glue, because the reliability and durability of the installed patch depends on this component of the repair.
How to repair a hole in the sole of winter boots
If you look at the element in cross-section, each craftsman will notice one important feature: in the structure of the component of seasonal shoes there are voids, similar to honeycombs, that need to be filled.
Without such additional actions it is impossible to talk about high-quality restoration; these places can be filled quite well with small pieces of rubber, after which the area can be filled with a fixing mixture of the most liquid form.
Often the insole also has to be changed; it simply gets pressed in, especially on the heel, and walking becomes very unpleasant. While waiting for complete polymerization, the item is placed under a press; if there is no vice, you can press the area with the leg of a table or cabinet.
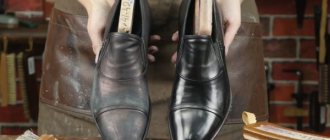
Leather boots: how to restore a broken sole
Models of this type usually cost the owner a tidy sum, so people are in no hurry to throw them away, but rather wonder what to do and how to seal the problem area. Liquid leather copes well with the problem if the sole has cracked and touched the top layer of material.
You need to work with the product according to the instructions, and also devote sufficient time to leveling the applied layer.
The torn, cracked or burst area is coated with an ear stick; if necessary, you can use a thin brush to help; there is no need to rush, it is important to lubricate all sides, then press them tightly, leaving them under pressure for a certain time.
We repair the soles of rubber boots
In such models, you need to create a sealed and durable base, otherwise water will penetrate inside the product and your feet will get wet.
To achieve a better result, you can use step-by-step instructions that look like this:
- The surface is thoroughly cleaned of dirt and degreased with specialized compounds.
- A matte texture is created using fine sandpaper.
- Coat both parts with glue and wait 5 minutes.
- After time, another layer of the fixing mixture is applied and the gap is tightly compressed.
Most often, complete polymerization takes at least 24 hours; there is no need to check the reliability of the grip or disturb the boots so that the rubber sticks well to each other.
If you follow this sequence when repairing shoe soles, the item will last for many more years and will reliably protect the owner’s feet from moisture even in heavy rain.
How to restore the adhesive fastening of a sneaker using a patch
The process is quite painstaking, but even beginners who have seen the sole burst or the material come off for the first time can realize their plans.
To achieve a positive result, it is difficult to do without an overlay; this auxiliary element will fit onto the sole and the main frame of the sneaker, thereby creating a reliable connection between the two parts.
All areas are thoroughly wiped with acetone or white spirit; without degreasing, the glue will not be absorbed so well into the structure of the material, and adhesion between the planes will certainly suffer.
A lot depends on the strength of the initial compression; you need to squeeze the repair site very tightly, and then leave it in that position for several hours. Over time, the load will need to be reduced so as not to deform the model; sneakers can quickly bend and become uncomfortable during subsequent wear.
How to glue the soles of shoes
Women's models with high wedges are much more difficult to restore, but manipulation is still possible.
It is important not to spoil the appearance of the shoes with smudges or damage; all excess squeezed out mixture is wiped off in a timely manner before the composition sets and penetrates into the structure of the base material.
Accuracy at each stage will not hurt, initially the problem area is cleaned of dirt and dust, all kinds of threads or pieces of foam rubber are cut off with a sharp knife.
To fix a torn heel, you should buy glue based on rubber or polyurethane; such product samples are popular with professional shoemakers.
The adhesive is spread with a brush after degreasing the surfaces; after leveling the element, you need to place the model under pressure not exceeding the standard weight of a person so that the heel does not simply break from excessive load.
Spikes on the toes of the soles
A. Rubber sole. At the repair site, carefully level the sole.
The width of the joint should be at least 15 mm, and it should fade smoothly (Fig. 267). Glue the joint in the usual manner using 88H glue.
B. Leather sole. In this case, carefully level the sole at the place where the joint is installed. The joint itself is cut to nothing. Everything is degreased with pure gasoline. Apply 88H glue, let it sit for 10-15 minutes, and glue the joint as it should.
Next, the jamb is either nailed or sewn to the welt with grit rubbed with varnish (see Fig. 262). The edge of the joint is smoothed out, cutting off the excess. Finish with a rasp and abrasive sandpaper. The edge is painted over.
The nuances of repairing shoes with voids
The unique honeycombs can wear off over time, and it is this exposure that often leads to significant damage, moisture on the feet and dust. Before applying a patch or filling the space with pieces of polyurethane, as well as pieces of rubber, the surface must be trimmed with a knife.
Such manipulations will protect the foot from excessive load, as well as bevel to one of the problem sides, and the repaired model, although it will become a little lower, will look more presentable.
Before using one of the solvents, you need to find out the composition of the sole; ignoring such measures, the master, without knowing it, is capable of causing irreparable harm to the product; foam versions are easily burned through with potent reagents.
Materials and tools to fix shoe problems
The list of accessories and components for repair can be changed depending on the chosen method for implementation, but most often on the table of a professional shoemaker you can see such things as:
- A sharp knife with a thick and thin blade.
- A roll of sandpaper.
- Liquid for degreasing surfaces.
- Glue.
- Heat source, veins or paraffin candle.
- Marker for marking.
- Rubber scraps of different thicknesses.
- Tweezers.
- Brush.
- Heavy objects or vices.
The place where manipulations are carried out should also be taken seriously; it is prepared in advance by placing several lighting fixtures.
Since the work is sometimes very delicate, when viewing the surface it is important to notice all the nuances, and the room must be constantly ventilated and dry so that the material does not become saturated with moisture.
We will need:
1) A tube or jar of good Nairite shoe glue.
2) A ballpoint pen for drawing the outline of the future patch on the sole of the shoe and outlining the template on the prophylaxis (material for patches).
3) A sheet of paper for creating and cutting out a patch template.
4) Wide transparent or white masking tape for convenient transfer of the patch template from the boot to paper.
5) Sharp scissors for cutting out the template and the patch itself from the material (prevention).
6) Prevention - rubber-like material for patches: a sheet of rubber ( Bissell , Vibram , Spider , etc.), purchased at a specialized shoe store or something similar to a piece of KAMAZ/car inner tube, 2-3 mm thick.
7) A stick (toothpick, match, needle) for spreading glue over the surface.
A cotton swab with acetone/alcohol for degreasing the surfaces to be bonded.
Recovery methods
Depending on the degree of damage, the location of the crack or the volume of the hole, a person must independently choose a technique that will be relevant in a given situation.
To make it easier for a beginner to solve the problem, it is worth citing several popular methods that most experienced craftsmen resort to; relying on them, the question will no longer look so complicated.
Installing a patch
The rubber element is used in the repair of a wide variety of shoe models, from sneakers to winter boots with large treads.
Most often, such drastic measures are provided to eliminate volumetric defects, holes or significant damage that extends to the main frame of the model.
In order to apply the method and not spoil the appearance of the shoes, and also not make them uncomfortable for walking, you need to clearly measure the dimensions of the patch, then trim the base, and also adjust the element until the mixture hardens.
Gluing the area with special glue
Strong samples of fixing compounds are very popular; with their help, you can reduce the time required to perform manipulations, as well as obtain high-quality adhesion between planes.
Such adhesive models are not cheap, but the result is worth it, the composition was developed at the manufacturer specifically for shoe repair, so the structure of the solution completely fills the gap or hole. At the moment of implementing the technique, zigzag strips are cut out on the base with a knife, they will be filled with glue.
You must work with purchased products exclusively according to the instructions; there is no need to deviate from the manufacturer’s recommendations; in the process, the technician protects his hands, respiratory organs and ensures ventilation of the room.
Partial replacement of the damaged area
In difficult cases, you cannot do without cutting a certain area, but such manipulations will need to be done carefully so that the knife does not jump off and the person does not remove excess part of the material.
A polyurethane piece or rubber is applied to the free space, this element must be adjusted to size, and the edges must be perfectly cleaned; sandpaper creates a matte surface texture to which the fixing mixture adheres.
In rare cases, over time, the insert disappears, but to avoid such an excess, you need to choose the right glue and follow the advice of experienced shoemakers when performing the work.
How to repair cracked leather
If you do not pay proper attention to shoe care, cracks will appear on its surface.
To prevent shoes from deforming during storage, the toe is usually stuffed with paper, and thick cardboard is placed in the boot.
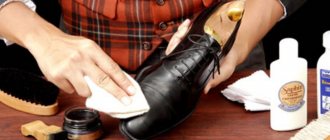
After each wear, wipe your shoes with a damp cloth and mask cracks with a special cream.
Fish oil can make shoes more water resistant. Light-colored boots and boots are treated with a soft brush, pre-moistened in warm water. Afterwards, the shoes are washed and dried naturally. As a preventive measure, it is worth wiping some steam with castor oil. The remaining oil is removed with cotton wool and rubbed with a velvet sponge.
You can get rid of cracks in any shoes using shoe care products. Water-repellent agents prevent the formation of cracks. The product is covered with a thin layer of cream to remove moisture. After this, the shoes are polished. A traditional means for treating leather products, shoe polish, protects it from external irritants.