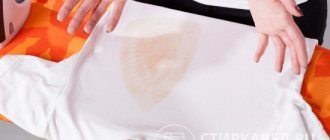
Colorful appliqués have always been used to decorate clothing, place logos, and even to hide defects such as stains, holes, and tears. With the advent of thermal stickers, all these operations became easier, and a whole new industry for decorating and repairing clothes was formed.
This is especially true for children's clothing. Problems can be solved very simply: you need to pick up thermal transfers (that’s what stickers on clothes are called) in a sewing supply store and stick them on yourself. You can also decorate other clothes and make them easily distinguishable so that children do not lose their things in kindergarten or at camp.
Why do you need a thermal adhesive?
This patch is a lifesaver for those who want to refresh their boring wardrobe without significant financial investments.
Thermal decal is an inexpensive and effective way to revive your favorite item. This is especially true for children's clothing. Images of your favorite fairy-tale characters will help you disguise stains and cuts on children's T-shirts and save the family budget.
Using thermal stickers, you can diversify not only your wardrobe, but also your interior. If you stick a patch on decorative pillows, curtains, bedspreads, the interior will immediately turn into exclusive.
Features of thermal stickers
You should choose a thermal appliqué for clothing based on the following parameters:
- Material. The basis of the sticker is thick flock fabric. The design can be fabric or embroidered.
- Design. Thermal appliqués are available in children's, lace, rhinestone, sports, and with the logo of famous brands.
- Size. Stickers come in different sizes: small (1 cm wide) and large (up to 25 cm wide or more).
In addition to classic stickers, you can use thermal film. A design is applied to it with special ink. Using high temperature it is transferred to fabric. Film stickers stick to things for a long time.
Depending on the adhesive used, embroidery can be permanent or temporary. Permanent ones cannot be removed from a thing without damaging it.
The sticker can be purchased at a fabric or accessories store.
Types of stickers
In stores that sell sewing supplies, the selection of stickers is quite varied. All of them can be divided into several groups:
- thermal stickers;
- thermally printed stickers;
- vinyl stickers;
- stickers painted on fabric.
Stickers also differ in the material from which they are made. It can be satin, cotton, silk, velvet.
What types of applications are there?
The decor is presented in the form of elements of various sizes and textures - from small embroidered compositions to inserts crocheted or woven using the macrame technique.
You can decorate various clothes with applique:
- coat;
- skirts;
- shirts;
- blouses;
- shorts;
- dresses;
- jackets;
- sleeveless vests.
Moreover, it does not matter what fabric the item of clothing is made from. Embroidery or sequin decor looks good on denim items. Knitted T-shirts and tops are in harmony with knitted and woven compositions. Dresses made of flowing fabrics (organza, chiffon, tulle) are decorated with hand-embroidered and assembled flowers. Applications with rhinestones and stones will effectively complement products made from dense materials.
Features of selection and gluing
You need to choose which applique to glue on a jacket or other clothing yourself. It is important that the picture fits well into the overall appearance of the item. The features are:
- Fine cotton and jersey. It is recommended to choose the thinnest possible applique, but you can give preference to an option with increased elasticity. By gluing it on a T-shirt or light sweater, you can forget about it forever, because it will stick very well. Warm-up time – 10 seconds.
- Thick fabrics. It is best to choose thick thermal appliqués made from other fabrics for such clothes. They can be glued to jeans, jackets, bags and other things made of dense material. Warm-up time: 2–3 minutes.
- Workwear, children's and winter clothing. It is worth giving preference to stickers with a reflective and phosphorescent effect. You can stick them on a bolognese jacket in winter, children's or work clothes. Warm up – 30 seconds.
- Delicate and fashionable clothes. Appliques with various effects that decorate the appearance of silk, leatherette or synthetics are great for such things.
Any stickers on clothes should be checked in advance by applying them to the item. This will help make sure they fit well together. It is also important to check the quality of the material.
Ways to label things
There are many different ways to designate the owner of a particular item.
The easiest way is to sign with a pen. However, not all types of pens write well on fabric; the writing may turn out illegible. In addition, during washing, some ink may be erased, while others may fade and ruin a good item. In such cases, it is necessary to purchase a special fabric marker. You can do as our grandmothers did in the old days - embroider the baby’s name on clothes. However, this will be a rather long process, even with a sewing machine. In addition, products made from thin fabrics (such as tights) will not tolerate this very well. This method also does not apply well to shoes. In most large sewing stores you can find ready-made tags on which the name is written, and they can be easily sewn or iron-on into things.
Some mothers write on adhesive tape or paper stickers and remove them before washing. This method does not apply well to tights, underwear and shoes. In addition, traces of glue may remain on the clothing and ruin the item. The most progressive and convenient way to label a child’s things today are stickers on clothes.
How to apply iron-on adhesive to clothes
Before fixing products on clothes, you need to know exactly what rules and how to apply a thermal sticker to a jacket with an iron or to any other products. By the way, other methods are also suitable, which will be discussed below.
A large selection of images makes it possible to choose the right sticker for each occasion.
Iron
To glue with an iron, you need to clearly fix the sticker in the desired place, and then:
- Holding it with one hand, use the other to place fairly dense material on top.
- At the same time, make sure that the correct position does not change.
- Then, turning on the iron at medium power, carefully begin to apply it on top of the fabric where the sticker is located.
- There is no need to wait long - otherwise you can ruin the surface. But, at the same time, the lower the temperature of the iron, the longer it needs to be applied.
- It is necessary to clearly understand that movements should be light, sliding, and in no case pulling the fabric along with them. Otherwise, the result will be unsatisfactory.
- Select the holding time depending on the fabric on which the thermal sticker will be fixed. The fact is that, for example, jeans take a long time to warm up, so you need to fix it here longer so that everything is glued exactly as it should.
- But thin fabrics need to be processed very carefully, firstly, so as not to damage them, and secondly, so that everything does not begin to wrinkle and shrink.
The iron must be heated to the required temperature in accordance with the type of fabric, having first turned off the steam generation mode.
Plastic bag
If the sticker is a three-dimensional picture, then it is not always possible to do everything correctly if you do not follow the instructions:
- If there are plastic tips on it, for example, in the form of eyes, inside of which beads-pupils dangle, you need to heat the heater very carefully, and only from the wrong side, so as not to melt the thermoplastic.
- Be sure to straighten the fabric evenly before fixing the image of the sticker - otherwise it may wrinkle and you will have to throw away the sticker and completely redo everything.
- The movement of the iron must be done only in the form of application. Manipulation from side to side or up and down is not suitable here, since in this case the image may shift due to its volume.
Having achieved the desired result, you need to turn the clothes inside out and run a heated iron over the place where the image was transferred from the inside out.
Printer
Using a printer, you can print an image. But for this you need to clearly understand that if this is a text inscription, then it must first be mirrored. Otherwise it will be unreadable.
It is important to select smooth areas on the product to transfer the image, as this will ensure more reliable fixation.
Print the selected picture on thermal fabric paper. It is necessary to understand that there is thermal paper suitable exclusively for dark or light fabrics. Therefore, it is necessary to think through this point in advance.
To decorate clothes using appliqué on fabric, you must follow the instructions for working with thermal film.
Types of reflective stickers
Thermal adhesives on clothing reflect any light that falls on their surface; the main task is to provide the driver of the vehicle with visibility of the pedestrian, as well as a better view of the road and obstacles on it. They can have various types and forms:
- Special stickers that are attached with Velcro.
- Iron-on adhesives that require the use of an iron to secure.
- The bracelets are made of hard material and are attached to the arm or leg by twisting onto them.
- Pendants and keychains can be attached to a bag, jacket, or anywhere where they can be seen.
- The badges are attached using a pin attached to them.
- Laces are the smallest and most inconspicuous, but with proper fastening they can be widely used in clothing.
When light hits the reflector, the beam is directed back, in the case of a road, to the car’s headlights.
Methods for fixing a pattern depending on the type of fabric
If the material on which you plan to affix the sticker can withstand high temperatures, feel free to choose the option with adhesive mounting. If not, you shouldn’t experiment, it’s better to sew it on.
- Bologna. The appliqué definitely needs to be sewn onto a bologna jacket. It is not even recommended to dry bologna in the sun, not to mention using a well-heated iron. Please note that in this case you need to attach the sticker by fixing it from the wrong side with a second layer of fabric.
- Leather. The verdict is the same - sew it on.
- Stretch fabrics. Knitwear and synthetics, as a rule, are easy to stretch, so some skill will be required to properly fix the applique. It will be easier to sew.
- Jeans. Due to its density and ability to hold its shape, appliques are convenient to attach both by sewing and gluing. In the second case, clearly define the place of fixation, cover the sticker with a layer of natural fabric. It’s good if it is a little transparent - you can check the correctness of gluing. The following is a standard procedure.
Pasting stages
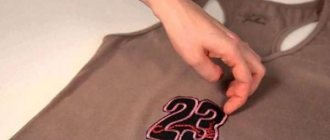
To apply an applique to a T-shirt, trousers, jacket and other items, follow four steps.
- Preparation of the workplace. Clear the ironing board or any other flat surface that needs to be covered in several layers with thick fabric.
- Preparing clothes. Lay out the fabric so that the fixation point is in the center of the work surface (ironing board). Carefully straighten the edges so that there are no folds, folds or waves. If necessary, iron the item of clothing first. Clearly determine the location and angle of gluing. It will be very difficult to move the sticker to the side even a couple of centimeters after fixing it, so there shouldn’t be any mistakes here.
- Gluing. Place the applique on the fabric, cover with tracing paper or just a sheet of white paper. Iron for the first time with a well-heated iron. When doing this, make sure that the steamer is turned off. Press the sticker firmly with the iron for 15 seconds.
- Expectation. Do not remove the tracing paper or white paper immediately. Allow the application to cool. After 10-15 minutes, carefully remove the protective layer of paper.
A number of images are simply transferred to fabric. Thermal paper is used for this. For light fabrics it is transparent and after fixing it has no background - only the pattern remains on white clothes. Before transferring thermal stickers to clothing, be sure to iron the fabric thoroughly to avoid unsightly wrinkles. And then proceed according to the above scheme.
Items with thermal stickers should be washed at a temperature of no more than 40°C. When drying, smooth the fabric as much as possible with your palms to avoid using an iron. If this is still necessary, turn the item inside out and then iron at moderate temperature.
Application to a bolognese jacket
Applying a decal on a bologna jacket is more difficult than on a T-shirt. Bolon is a synthetic material and will melt under high temperatures.
Applying a thermal decal to a bologna jacket is more difficult
Outerwear contains insulation, which makes gluing the appliqué difficult.
Rules for applying thermal stickers to jackets and pants:
- Dry the jacket thoroughly.
- If there is a hole, sew it up first.
- Make the surface level; If the applique is applied to a sleeve, then insert a folded towel into it.
- Attach a sticker.
- Cover the sticker with cotton cloth.
- Using a heated iron without steam, press the sticker for 5 seconds. The soleplate of the iron must be on a protective cloth.
- For reliability, you can secure the sticker with threads, sewing it over the edge.
Types of decals
Before gluing the applique onto the fabric, you need to select it and purchase it from a specialized store that sells sewing supplies. There are several fundamentally different types of thermal application, which differ from each other in the base and material of the design element. The table below lists all existing types of thermal adhesives, indicating their features.
Table - Types of thermal decals
| Type | Peculiarities |
| Flex | — Thermal film; - has a smooth front side |
| Phlox | — Thermal film; - has a velvety “face” |
| Thermal adhesive with increased elasticity | — Stretches well on fabric; - used for silk, guipure, synthetics and other delicate materials |
| With effect | — Shiny surface (glitter); — with 3D drawing; - holographic |
| Reflective | — With special coating; — the “face” of the application shines when exposed to light in the dark |
| Phosphorescent | — Has the ability to accumulate sunlight; - glows at night |
Tips for choosing
If you intend to apply a iron-on adhesive to clothing, but do not know what type of product to prefer, answer a simple question: “What exactly do you want to apply the applique to?” The choice of sticker type depends on the type of fabric on which it will appear in the future.
- Knitwear and items made from fine cotton. To decorate or “save” these elements of your everyday wardrobe, thermal film with a thin base is suitable. It is easy to stick to a cotton base. During use, the applique will shrink and stretch along with the product, without a single hint that it is not “native” to it.
- Jeans, bologna jacket, fabric bag. Thermal films with a thin base are not suitable for thick clothing. The best option for this case would be applications with a thicker base. For example, thermal stickers made of fabric.
- Overalls or child's clothing. In this case, you should give preference to phosphorescent thermal stripes on clothes or applications with reflective elements. At night, these details will attract the attention of others to their wearer, which is especially important for road safety.
- Fashionable wardrobe items. If your goal is to decorate your favorite item, use holographic applications or thermal stickers with a 3D effect. They are suitable for skirts made of leatherette, synthetics, and silk.
How to remove an image from fabric
Over time, even the highest quality applications lose their presentation. If the item of clothing is still in good condition, then you can remove the pattern from the fabric. Again using an iron. Prepare an ironing board, several sheets of white paper and a napkin for the procedure. Next, proceed in three steps.
- Preparation. Place the product on the ironing board so that the sticker is in the center of the work surface. Place two sheets of clean white paper under it, and another sheet on the front side.
- Treatment. Iron the gluing area well to warm up the sticker. Repeat the procedure until it begins to stick to the paper.
- Department. Now carefully remove the applique from the clothing.
If the item is made of white cotton, then excessive ironing may cause the fabric to turn slightly yellow. In this case, remove the sticker by heating it with a stream of hot air from a hair dryer.
If the application was applied using thermal printing, it can be removed with alcohol. Soak a tight gauze swab in it and remove the pattern with light swiping movements. The same alcohol or acetone can be used to erase a drawing made using a special marker or paint. It is even easier to peel off the rubber thermal sticker. Cover it on both sides with four layers of gauze, then go over it with a hot iron.
How to make a thermal sticker with your own hands
To have an original applique, you should make it at home yourself. You will need a drawing, dublerin and an iron.
The work flow is as follows:
- Cut out the image you like from flock or other dense material.
- The parts of the picture are pre-sewn together.
- The finished applique is placed on dublerin and stitched along the edges. When the fabric frays, the edges are treated with an overlock or decorative stitch.
- Place a sticker on the item.
- Iron the sticker with a hot iron using a protective cloth.
- Inspect the drawing for defects.
Homemade thermal adhesive differs in durability from professional ones. The service life will be up to 5 washes, then the adhesive layer will need to be renewed. To avoid this, thermal appliqué can be additionally sewn onto clothing.
Plastic bag
To create a thermal sticker, an ordinary bag with the desired design is suitable. The application procedure is simple, but this method is short-lived. The sticker will fall off after a few washes. How to quickly remove glue from a sticker from clothes and the iron-on sticker itself.
How to create an application from a package:
- Cut out the picture and put it on the item.
- Cover with protective paper. Iron the entire applique for 30 seconds.
- Carefully remove the top material, being careful not to damage the design.
- If the bag comes off at the edges, repeat the procedure.
Printer
To create original stickers, 2 types of printers are used:
- for printing on thermal film;
- for printing on fabric.
Thermal transfer can be ordered from professionals or done yourself. For home creativity, you will need an HP inkjet color printer and special paper for printing thermal stickers.
To create a thermal sticker, an ordinary bag with the desired pattern is suitable.
Printing stickers at home allows you to create original decorations for clothes and add any inscriptions. A graphics program is used to create the drawing.
Before sending for printing, you should mirror the image so that when applied to clothing, the image will appear correctly.
Making a Fabric Sticker
To create a sticker you will need a fabric printer and a web of glue. If you don’t have such a printer, you can contact a printing house.
To get a sticker on fabric, you must follow these steps:
- Print the sticker.
- Carefully cut along the contour.
- Place on clothes with adhesive web.
- Heat the sticker area with an iron through the protective material.
It is better to glue a fabric applique onto clothes made of cotton fabric. This will prevent the picture from stretching and increase its service life.
Applications without adhesive layer
In every store you can find applications that do not have an adhesive layer. You can also glue them on with your own hands. They are usually sewn into fabric in professional ateliers. But with the help of a special adhesive tape you can easily solve the problem.
How to make stickers and appliqués on clothes - video:
How to proceed:
- Connect the adhesive-based tape to the back of the applique.
- Press both materials with a hot iron for a few seconds.
- Remove the protective layer of the tape.
- Apply the sticker to your clothing. A homemade thermal patch should be face up.
- Press it with a hot iron for 20 seconds, placing gauze between them.
If the iron-on adhesive does not adhere well, you can spray a little water on it from a spray bottle, and then repeat the steps with the iron. For the transfer, this has the effect of increased heating, which causes the glue to permeate the layers of fabric even more strongly.
Rules of care
To ensure that the thermal adhesive lasts as long as possible, you must adhere to the following recommendations:
- It is better to wash a product with a patch by hand. Or, if we use a washing machine, we need to choose the appropriate gentle mode.
- The water temperature should not be higher than 40°C.
- Since most patches are bright, you may want to avoid using bleach.
- The product with the applique should be dried on a flat surface.
- It is better to iron such things either from the wrong side or through gauze.
Video instructions for applying thermal stickers
Doing something for the first time is always difficult and scary, but when applying a thermal transfer pattern to a thing, you don’t have to worry:
- if the fabric is covered, it is almost impossible to ruin it with an iron;
- if scorch marks or shiny areas do appear, then you can soak the item for a day or pour cold water in a basin overnight, all traces should disappear;
- if the picture is not imprinted into the fabric, then you can always increase the exposure time to high temperature;
- if during wearing the edges begin to peel off, then use a hot iron again;
- if the picture has deteriorated, then a new one can be applied on top, but larger in size and with a denser, overlapping base.
Sources
- https://chistayrabota.ru/kak-prikleit-zaplatku-na-dzhinsy-utjugom/
- https://trg-market.ru/chistim/naklejka-na-kurtku.html
- https://ld58.ru/garderob/kak-prikleit-termonaklejku-na-odezhdu.html
- https://imerica.ru/lkm/termoapplikaciya-svoimi-rukami.html
- https://TutMnogo-go.ru/kraski-i-laki/kak-prikleit-naklejku-na-tkan.html
- https://Otbelim.com/uhod-za-veschami/glazhka-i-sushka/termonaklejki-na-odezdu.html
- https://TrubyMaster.ru/kak-prikleit-zaplatku-na-shtany/
[collapse]
