Some people find ironing difficult because they don't follow the basic rules. Burnt fabric, unsmoothed folds and creases, broken or torn buttons after dry cleaning, do you recognize yourself?
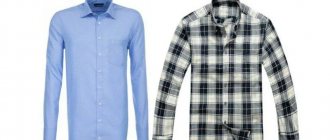
Then this article is for you. The first thing to keep in mind is that the composition of the fabric determines the way in which it should be ironed.
Combinations on your iron will help you achieve your ideal heat setting. Secondly, you need to use an ironing board to iron your clothes.
In addition, clothes should be ironed so that wrinkles are removed and new ones are not formed. Below are tips on how to iron a shirt using the correct technique.
How to iron a shirt correctly
Proper ironing of men's shirts is performed in the following sequence:
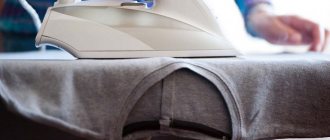
- The ironing process begins with the collar because it is the most visible part, especially when worn with a suit. To iron the collar, you need to unscrew it and start from the bottom, and then, slowly pressing the iron, move it from the corners to the center. The next thing to do is to turn the shirt over and repeat the process on the other side of the collar;
- Cuffs, when worn with a suit, are the second visible part of the shirt and require a lot of attention. Just like the collar, they are ironed on the inside first, then turned over and ironed on the outside. When ironing cuffs, you need to be careful not to iron over the buttons;
- the front of the shirt. Ironing the front should begin from the side on which the buttons are located, gently pressing the iron around the buttons;
- back. To properly iron the back of a shirt, you need to place the back of it on the ironing board so that one shoulder is placed on the tapered edge of the ironing board, this helps keep the back in the desired position for ironing. The same should be done by changing the sleeve and ironing the second part of the back;
- sleeves The sleeves are the most difficult part of ironing a shirt. The problem with sleeves is that without a special board with a cutout for the sleeves, you will have to iron two layers, so you need to be careful and make sure that the fabric lies flat.
Ironing modes for shirts by fabric type
Cotton shirts
Cotton items should be ironed slightly damp, and the part being ironed should be sprayed with water. You need to work the iron longitudinally, and not in a circular motion, so as not to damage the material.
- A 100% cotton shirt will require a temperature in the range of 130-160 degrees with strong pressure and wet steam;
- from pressed cotton - 110°C and without moisture;
- a cotton item with linen will require a temperature of 200°C and wet gauze with strong pressure;
- For synthetic cotton, 100°C with low steam will be enough.
Made from polyester
These definitely require the use of gauze or a thin cotton cloth to avoid the soleplate of the iron coming into contact with the fabric because polyester is an extremely heat sensitive material.
You need to iron such a thing at a temperature of no more than 80 degrees with light pressure to avoid melting the fibers and using weak steam.
Linen shirts
For high-quality ironing of a linen shirt, it is recommended to heat the iron to a temperature of 200°C with intense moisture, fairly strong pressure and jet steaming.
Chiffon and silk shirts are ironed at a temperature of no more than 70°C without moisture or steam.
Viscose and knitwear - 120 and 80°C, respectively, using gauze and low steam. Items made from these materials should be ironed from the inside out.
For thicker fabrics, ironing both sides of the fabric will give the best results, and you can also check the product label for what temperature to iron your shirt at.
If there is no label, you can determine the temperature yourself by setting the minimum temperature and increasing it until the wrinkles begin to smooth out.
Dark-colored items, regardless of material, should always be ironed inside out to avoid shine caused by the iron.
For products containing other materials
The composition of the fabric from which the shirt is made determines not only the behavior of the item when worn, but also what temperature it is permissible to expose the material to.
Very often, for blouses and shirts, a mixed fabric is chosen , which contains not only cotton.
You can check the composition of the fabric on the label, which is usually located on the inside of the product in the side seam.
If there is no label, and there are doubts about the composition of the fabric, it is necessary to start ironing with a minimum temperature , increasing it gradually if necessary.
| Material composition | Ironing temperature, ºС | Peculiarities |
| Cotton | 150-200 | It is possible to apply pressure with an iron and use the steam function. |
| Cotton "reaper" | 110 | No steam. |
| Cotton and linen (cotton more than 50%) | Up to 200 | You can apply pressure to the iron and apply steam. |
| Cotton and polyester (cotton more than 50%) | 110 | The use of steam is limited. |
Preparing the shirt for ironing
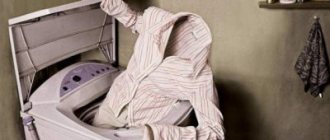
- The shirt should be ironed only after washing, as some dirt after ironing the item will forever remain in the fabric;
- if your washing machine has an “easy ironing” function, then use it;
- There is no need to wait for the item to dry completely, let it be slightly damp. If you decide to iron a dry shirt, it is better to moisten it with a spray bottle and briefly (for about 10 minutes) place it in a bag or wrap it in a towel, this will help it to be moistened equally throughout the entire fabric;
- read the information about the shirt on the label and adhere to the specified temperature regime that is necessary for the material;
- On the collars of men's shirts there are plastic bones in small pockets, the so-called retainers, they need to be removed before ironing, but it is better to do this before washing.
Additional features
The steamer not only irons things, but also helps when cleaning the apartment. Under high pressure, steam breaks down dust, removes bacteria and cleans the room. Let's consider some of the capabilities of the unit in everyday life.
- Steam can be used to clean tiles in the kitchen or bathroom. The brush attachment removes heavy dirt without the use of detergents. The surface is treated with steam and wiped with a dry cloth.
- In the kitchen, a steamer will clean the stove, sink, hood, corners and hard-to-reach places on the radiator.
- During repairs, hot steam will help remove old wallpaper on the walls.
- Disinfection of upholstered furniture and toys.
- Cleaning the interior of a car.
- Removing greasy and old stains in the kitchen.
How to iron a long and short sleeve shirt
The basic principle that should be followed is that small and double parts begin to be ironed first.
Using the following instructions, in the given sequence, you can perfectly iron a long-sleeved shirt and not leave wrinkles on the already ironed surface.
- Gate. Its fold does not need to be smoothed, it should be natural.
- Cuffs. First, the wrong side is smoothed, and then the front side.
- Sleeves. First of all, the seam is smoothed out, and then the sleeve itself.
- Shelves. You need to avoid folds on the pockets and carefully go around the buttons.
- Back. Move the shirt along the board to help iron the back from seam to seam.
Shirts with short sleeves are ironed in the same way, only a little faster. The sleeve must be pulled over the narrowed edge of the ironing board or onto a special sleeve holder and ironed on all sides.
Security measures
To use a handheld or vertical steamer, you must follow safety rules. When working with the device, you must pay attention to:
- According to the instructions, assemble the device correctly;
- do not direct hot steam onto the body;
- fill the container with water after disconnecting from the network;
- do not carry out repairs yourself;
- After use, wipe all parts and attachments dry;
- do not give the steamer to children;
- Do not clean the device with brushes or detergents.
How to iron a shirt collar correctly
It is advisable to iron the collar of a man's shirt while damp. You should start from the reverse side from the corners of the collar to the center.
The front side is also smoothed. You need to iron without pressing so that the fabric does not move to the sides, forming folds.
It is not recommended to iron it along the curve in a bent position; it should be natural and take its shape when the shirt is put on.
How to iron a shirt collar so that it stands up?
It depends on the fabric. If the material is of good density, it is enough to simply smooth it on both sides; if the fabric is soft, you can starch the collar with a solution, dry it and iron it in the desired shape.
Ironing the sleeves
Shirt sleeves should be ironed without arrows. This is done like this:
- the sleeve is folded in half, seam up and it should be located in the middle;
- the seam is smoothed, the sleeve is turned over and also ironed;
- The sleeve is folded along the seam and ironed from it to the edge, starting from the shoulder and down.
Are arrows needed on sleeves?
Many have wondered: is it correct to iron shirt sleeves with or without arrows? According to etiquette, it is customary to wear a shirt without arrows.
But if a person does not plan to take off his jacket, arrows on the shirt are acceptable. It follows from this that arrows on the sleeves are in bad taste.
Ironing the shelves and back
We place the shelf on the board, shoulder to the narrowed part. You need to start ironing the shelf from the front side. The spaces between the buttons are ironed from bottom to top.
The seam is ironed at the collar and further down. Place the shirt with the armhole side seam onto the board and iron.
Then you need to move the iron to the side seam and back. Lastly, the left shelf is ironed.
How to iron a shirt without an iron
Let's consider such tricks as the ability to iron a shirt without an iron.
Method number 1 - Wet hands
If the item is not too wrinkled, you can smooth out the wrinkles with damp hands by running your hands over the fabric from top to bottom. Then shake the shirt and let it dry. Linen products are well suited to this method.
Method No. 2 - Steam bath
Hang clothes on hangers in the bathroom and run hot water, close the bathroom door. The water must be so hot that steam is formed, since it is under the influence of steam that the unevenness disappears. The fabric will be smoothed in 15-20 minutes. Splashes of water should not fall on the item.
Method number 3 - Put it on yourself
Put a wet shirt on your body. The tension and body heat will smooth the fabric.
Method No. 4 - Leveling solution
A solution of vinegar and fabric softener is added to water 1:1:1. Shake the resulting solution and spray the surface of the clothing. Then dry it, preferably in the open air. The method does not work with synthetics.
Without steamer
If you don’t have a steamer or iron at home, or, for example, there’s a power outage, you can straighten the curtains using steam. You need to get steam by simply boiling water. For this method you will need a kettle (gas or electric) or a small saucepan filled with water. Bring the water to a boil and continue boiling for another 5 minutes. Then take a container of boiling water and bring it to the hanging curtain. Direct the steam so that it hits the fabric. Use your hands to straighten the fabric and remove creases. The material smooths out before our eyes and has a neat appearance. For better results, you can slightly wet the curtains with a clean damp cloth; they will smooth out much better and faster.
Iron alternative
Among the unusual methods for removing wrinkles from things, the following can be noted:
Steam generator
This device is quite similar to an iron, but in terms of the specifics of its operation it differs in that it constantly supplies dry steam with a powerful jet. Capable of smoothing out fairly wrinkled items.
Steamer
The steamer removes wrinkles by supplying hot steam, and at the same time disinfects the item. You can iron in a vertical position. However, not all fabrics are suitable for this method.
Steam manken
An ironing robot, a mannequin, in the shape of a human torso, is designed for quick drying and smoothing of all clothes that are worn on the torso.
The better way to iron shirts, with a steam generator or a steamer, depends on the frequency and amount of poorly ironed (complex, unusual cut, decor on things) clothes. The first option is preferable.
Ironing complexly shaped clothes
Most of the methods described above are suitable for straightening simple items of clothing, such as a T-shirt. It is much harder to tidy up a shirt or pleated skirt.
The following ironing methods are most suitable for such products:
- Its complete absence. Things are completely wetted and carefully secured on hangers, tucks and other devices to avoid creases and bends. In this position, the shirt or blouse is left until completely dry.
- Ironing with a hot lamp. This method is suitable for extreme situations when it is urgent to get rid of wrinkles. Take a light bulb and carefully wipe it from dust and dirt, then screw it into the lamp. It is advisable to first remove the lampshade from it. Plug it in and wait for the light bulb to warm up well. Apply this “iron” over the surface of the product and remove all irregularities.
The use of the last available means is associated with some danger to humans. It is necessary to ensure that the lamp does not overheat too much, as bright scorch marks will appear on the product. Clothes must be completely dry and the lamp must be in good condition.
Useful Tricks
- A man's shirt should be ironed right side out.
- If you cannot iron the item, moisturizing and pressing firmly on the iron will help.
- Fabric that is difficult to iron can be made more pliable with a solution of conditioner, water and starch.
- The print on the product or embroidery must be ironed from the inside.
- For easy and efficient ironing, shirts can be hung to dry by hanging them and ironed when damp.
- To avoid wrinkles on knitwear, it is better to store such products with a roller.
Don't forget to share the article with your friends and join us on social networks.
Comfortable conditions are not luxury
Ironing is not hard work. Nevertheless, many housewives do not like it, putting it off for later and collecting whole piles of unironed linen. To eliminate unpleasant emotions, first of all, you should properly organize your workspace and process.
Workplace requirements and useful organization tips:
- The height of the ironing surface must correspond to the height of the person. Modern ironing boards have multi-stage or smooth height adjustment, allowing you to set the device to a comfortable level. For comfortable conditions, the working surface should be 10–15 cm below the elbow. Deviation from these parameters in any direction will lead to rapid fatigue during work and general discomfort.
It is not necessary to iron things while standing. Many housewives successfully handle ironing while sitting on a chair or sofa. You just need to adjust the height of the working surface for this position.
From the secrets of folk wisdom: if you don’t like ironing, place the ironing board in front of the TV while watching your favorite TV series. You yourself will not notice how a mountain of crumpled linen will miraculously turn into a neat stack of ironed things.