Category: Children's page, Creativity on the windowsill Published 10/13/2021 · Comments: · Reading time: 7 min
Greetings, dear readers of the Domovenok-Art blog! I took up the old thing again: gardening experiments in a city apartment. So in this article I will tell you how to germinate and how to grow beans at home, that is, on the windowsill.
Did you know that the very first article written on this blog was also devoted to growing a garden on a windowsill, namely tomatoes? Now you know))) But here there is a whole series of articles on this topic. But we will return to our legumes.
Laboratory work in biology in the 6th grade prompted me to write this article. It was necessary to germinate beans for school, so that later we could examine them from the inside. It turned out that not everyone was able to awaken the grain; I will consider possible reasons at the end of the article. But we did it very easily. In addition, we decided not to stop there and planted our seedlings in pots, watched the process, and it was very interesting. In the end, I realized that I needed to talk about it.
So, what awaits you in this article:
- how to germinate beans at home for school and more;
- how to grow beans on a windowsill, our experience;
- everything written above in video format)))
- possible difficulties and what to do.
Bean sprouting experience
Elena Aleksandrovna suggested that we conduct an experiment on germinating beans at home, record the results of the experiment and prepare a report based on them. We decided to go further and prepare an online report from the scene of the events. Meet us! “Fa-fa-sol” or “Where life begins”!
Beans (lat. Phaséolus) are a type genus of plants of the Legume family, uniting about 87 species growing in the warmer regions of both hemispheres. They are bred for their fruits and seeds – and some species also for their flowers. Of the cultivated species, the first place is occupied by the common bean with many varieties and varieties, some of which are climbing, others are bush. The homeland of this species is Latin America.
Home growing technology
Beans can be planted in a pot or flowerpot. She feels great on the open balcony, in the glassed-in loggia. The northern side is not recommended; in this case, you will have to organize additional lighting for the bush so that it can fully develop. A climbing plant will decorate a winter garden or home greenhouse. With proper care, you can get a good harvest of fruits.
Selection of varieties
Low-growing bush hybrid or self-pollinating varieties are suitable for home and balcony cultivation. Early ripening asparagus produces compact bushes that are easy to care for. Usually, varieties with different bud colors are chosen, and several types of plants are planted at once. In addition to technological varieties, decorative varieties of beans are selected.
They resemble thickets of vines. The seeds do not differ in taste and rarely ripen, but the lush flowering lasts a long time. Popular varieties: Violetta, Krapinka, Rumba are resistant to diseases and pests.
Planting and care
Agricultural technology for home cultivation is no different from garden cultivation. For the aesthetic design of the balcony, it is recommended to plant seedlings in stages at weekly intervals. The plant needs a light interval of at least 12 hours; in winter, seedlings for balconies and loggias are illuminated at home. The optimal time for planting seeds is mid-May. To obtain early flowers and fruits, beans are planted in early April. Then the plant is gradually accustomed to balcony conditions: first taken out into the air for 20 minutes, then brought in only at night; when the weather is warm, the beans are left in the open air.
Fertilizers are applied during watering. The fertilizer is diluted according to the instructions, then the volume of water is doubled. Seedlings and bushes love evening spraying; a lot of dust settles on the leaves; there is no natural airflow or dew formation in an apartment or balcony.
It is important to monitor the condition of the trellises. Under the weight of the fruit, thin threads and garters periodically break
Part I: Preparation
For the experiment, we chose red bean seeds to see how the color of the seeds would change during the germination process. We measured the beans and looked inside
Get a 25% discount and an additional cashback of up to 30% on the wholesale price of the product!
More details
The beans bought at the nearest store turned out to be approximately the same size, about one and a half centimeters. Each of them can be split into two halves - cotyledons - these are nutrients for the future sprout until it gets stronger. The photo shows a plant embryo with a pair of leaves. The cotyledons and embryo are covered with a dense membrane. The inside of the cotyledon is the same color in both white and colored beans. The only difference is the color of the shell and the size of the beans.
We will have three samples participating in the experiment: Sample 1 - will simply lie in the light and heat. Sample 2 – will lie in a glass of water. Sample 3 – will lie on a piece of cotton wool moistened with water. Thus, we will find out which conditions are best for bean germination.
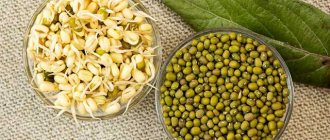
The benefits of sprouts and how to add them to the menu
Sprouted beans have high nutritional value; they are eaten as an independent dish, used to make salads or as a component of more complex treats. In their raw form, beans go well with fresh herbs, berries and fruits. Bean sprouts are also a main ingredient in many Asian recipes, be it Chinese, Indian or Korean. They are even used for baking.
The most useful combination is considered to be sprouted beans and oat sprouts. They complement each other perfectly and provide the body with a large supply of nutrients, minerals and vitamins.
When using for the first time, you need to be careful and not get carried away with a large number of sprouts. First they are tasted, for example, in the form of a sauce, then as an ingredient in a salad
After each test, you need to observe the body's reaction.
If an allergic reaction occurs, sprouted beans should be discarded. If no unpleasant reactions occur, then the portion of sprouts is gradually increased, but you should not abuse it, 100-150 grams per day is enough (this is about 2 tbsp. L).
The first day
The first day has passed. There are no visible changes in sample No. 1. The beans in sample No. 2 increased in size to two centimeters, and the color became paler. In sample No. 3, the beans also increased in size. On the side in contact with the wet cotton wool, the beans swelled more and the color became pale, as in the 2nd sample.
We cut the bean from the 3rd sample and immediately noticed that the root of the embryo became thicker and the leaves increased in size. The bean skin has become softer.
Planting germinated material in the ground
The seeds should not be allowed to outgrow, otherwise the roots will begin to intertwine with each other. When separated, fragile seedlings may break, which will affect the germination of grains. Beans are planted in the second half of spring. By this time the earth is warming up, and the threat of return frosts has passed. This is important because the legume crop is not frost-resistant; even minor frosts can destroy it. The place for planting beans is chosen to be well-lit, with loose, breathable soil. The grains are planted sideways in the ground so as not to damage the roots.
Holes are dug 5-6 centimeters deep, watered, seeds are placed in them, and covered with earth. The distance between plantings is 20-30 centimeters. If the grains are planted in dry soil, there is no need to germinate them.
Additional Information. According to popular wisdom, beans can be planted after the chestnuts begin to bloom.
Second day
The second day has passed. We didn't see any big changes. The 1st sample has not changed at all. The 2nd and 3rd samples increased slightly. The water turned slightly pinkish from the bean skin dye. We cut the bean from the 3rd sample. The root of the embryo became a little larger and, after cutting the peel, began to stick out a little to the side.
Day three
The third day has passed. And in our third sample, two beans hatched! The first and second samples are still without visible changes.
Day four
In the third sample, two more beans hatched! Yesterday's roots had greatly increased in size, and the skin around them began to tear. The first and second samples are still without visible changes.
Day seven
The first part of our experiment has come to an end. The first sample, which was kept warm but without water, did not germinate. The second sample, which was completely immersed in water, increased in size, but did not produce a single shoot and the water deteriorated. And only in the third sample, which was lying on a damp cotton wool, beans sprouted, and one grew especially strongly and even sent out lateral roots.
conclusions
As a result of our experiment, we saw that some of the seeds that were simply lying in the light remained unchanged. Those that lay in the water did not sprouted, but died. Those seeds that were on cotton wool moistened with water gave early and friendly shoots. Thus, we concluded that water, air, and heat are necessary for the development of the seed. While working on the project, we learned how a seed works. It consists of a seed coat, cotyledons and an embryo. The seed coat protects the seed from damage and drying out. The cotyledons contain nutrients for the embryo. And the embryo gives life to a new plant.
Healing composition of vegetable fat
The composition of camelina oil is very similar to that of cedar, so it can be called a worthy replacement for expensive pomace. And also – an alternative to sunflower oil. In terms of the content of compounds beneficial to the body, camelina fat is several times higher than it.
The main active ingredients of the product are lipid-containing polyunsaturated acids. The most significant concentrations belong to linoleic and linolenic acids. They are also called Omega-3 and Omega-6 acids or vitamin F. These compounds have the following qualities:
- positive effect on lipid metabolism;
- reducing the concentration of cholesterol in the blood;
- normalization of blood viscosity;
- optimization of blood composition;
- anti-sclerotic effect;
- strengthening vascular walls;
- participation in the functioning of the immune system;
- regulation of hormonal balance;
- elimination of free radicals;
- ability to stimulate regeneration;
- active elimination of inflammation.
Vitamins and minerals
The benefits of the product are due to the high concentrations of vitamin E in the composition. If we consider which oil is healthier - camelina or flaxseed - then the first will win precisely thanks to tocopherol. In addition to its active antioxidant effect, which prevents the process of premature aging of the body and the appearance of cancer, the vitamin has an anti-inflammatory effect. It optimizes the functioning of the male and female reproductive systems, is responsible for normal fertility, as well as stable libido. Vitamin E is involved in metabolism and the functioning of the immune defense system, and also increases the ability of other compounds to resist radicals.
The oil also contains a lot of beta-carotene. This is a provitamin that precedes the formation of vitamin A in the human body. Its functions:
- improvement of skin condition;
- acceleration of epithelization of mucous membranes;
- strengthening the immune system;
- maintaining the youth of the body;
- improved absorption of calcium, potassium, magnesium;
- optimization of the visual apparatus;
- production of steroid hormones.
Among the minerals in camelina oil, magnesium is the most abundant. At the same time, it is easily and fully absorbed by the body, preventing deficiency and creating the necessary reserves in the tissues. Thanks to magnesium, camelina oil stimulates metabolic processes, normalizes digestion and insulin production. The mineral is necessary for the normal functioning of the heart, muscles, and nervous system.
Magnesium is required to support bone strength. In camelina juice, a particularly active combination against osteoporosis is observed - with vitamins K and D. The mineral has anti-inflammatory and anti-allergic properties. Its value increases for women during pregnancy, at the onset of menopause, and also during age-related decreases in libido. A sufficient amount of the element in a man’s body ensures the prevention of problems with the prostate gland.
Chlorophyll
The chlorophyll of camelina oil has active antiseptic properties, which helps stimulate damage healing and regeneration processes. Other “abilities” of the product of photosynthesis:
- stimulate an increase in hemoglobin;
- increase leukocyte counts;
- improve immune function;
- prevent the development of disease complications;
- normalize the condition of the digestive tract;
- prevent the occurrence of kidney stones.
Lipid components
Camelina phytosterols can have a positive effect on male and female hormonal levels. They have antitumor, anti-inflammatory and anti-sclerotic properties.
The benefits of camelina oil are also based on the content of phospholipids. These are substances that stimulate the metabolism of fats and carbohydrates in the body, act as building materials for cell membranes, and also have a clear positive effect on the functioning of the liver. They:
- prevent fatty degeneration;
- normalize the structure of hepatocytes;
- improve gall function;
- promote the excretion of bile;
- cleanse the liver of toxins;
- improve the detoxification functions of the organ.
Unrefined oil also contains volatile compounds. They have a mild antibacterial effect and stimulate the body's secretory functions.
Part II: Germination
Our experiment does not end here. Now we have to find out what conditions are necessary for a young sprout to turn into a full-fledged plant. To do this, we selected sprouted beans from the third sample. We divided them into three groups. We placed the first group, together with the largest sprout, in a glass jar so that we could observe the growth of the root through the side wall. We will place this sample in a warm and bright place. We will place the second group next to the first, but cover it with a lid, i.e. deprive access to sunlight. We will place the third group in a sunny place, but on a cold windowsill, i.e. in a place where there is less heat than the first and second samples. We will observe which group of seeds will develop better.
Features and scheme of planting bush and climbing beans
The planting pattern and method depends on the type of bean. Bush varieties are planted a little denser than climbing varieties.
Planting pattern for bush/climbing beans:
- The intervals between plants are 20-25/25-30 cm.
- The distance between rows is 40/45-50 cm.
Beans are grown in rows or holes. The planting method is chosen taking into account the varietal characteristics of the beans and personal preferences.
Planting methods:
- In rows. The simplest and most popular option. Plants are placed in one row, leaving wide row spacing. This method is used if there is no shortage of space on the site.
- With ribbons. This option is also called multi-line. Beans are planted in 2-3 rows (lines). The distance between them is less than between the rows - approximately 25 cm. This allows you to use space more economically.
- Nests. This option is especially convenient for climbing varieties. A stake is placed in the center, and several plants are planted around it - 5-6 pieces, which will weave along it.
The first day
One day has passed since the sprouted beans were planted in the ground. There are no big changes yet. We planted the beans shallowly, so it is possible that the beans were slightly exposed as a result of the heavy watering.
Preparatory work
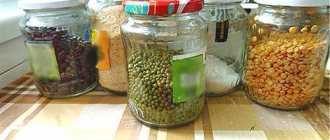
It doesn’t matter whether you are going to germinate beans for eating them in this form or for further planting in the ground - you need to prepare the seed.
First, the beans need to be sorted to weed out those that are wrinkled, moldy, or damaged. Then carry out the soaking procedure. It is not recommended to soak beans in ordinary water, since then the seed can quickly rot in cold soil. Although some people use this particular technique: they immerse the beans in water for a very short time, then the liquid is drained, and the container with the seeds is covered with a damp cloth. This avoids the formation of mold on the seed due to excess moisture. This method is usually used when sprouting beans for food.
Did you know? Dhal
-
Indian vegetarian puree soup from traditional cuisine, made from shelled mung beans (dhal) and other legumes with the addition of curry, coconut milk, lemon, tomatoes, garlic and onions. Basically, it is recommended to use the following method : place the beans in a small container and pour in a hot (+70°C) solution of potassium permanganate. The seed treated in this way must be immediately sown in the soil, and the remaining solution must be poured into the soil.
Second day
Yesterday, when we photographed the first sample, a tiny edge of a bean could be seen between the lumps of earth. And this evening a sprout 8 cm high grew in this place! It's amazing! Such progress in just one day of light! The first pair of leaves are well formed and ready to open. The cotyledons began to shrink. In the second and third samples, the beans barely emerged from the ground. The development of sprouts occurs with a noticeable lag.
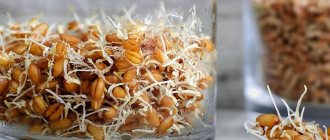
Bean seed germination stage
Favorable conditions are required for beans to begin to develop. The germination phase of beans begins at a temperature of +15...+26 degrees. In this case, they begin to sprout after 2-3 days.
Observation of the germination of bean seeds shows that the beans include 2 cotyledons and a root, which is subsequently transformed into a full-fledged root system. Also at this stage of germination, a plume appears, which forms the shoot, and a hypocotyl, which subsequently develops as a stem. All these fragments are located in the seed coat.
The germination process begins at the stage of swelling of the beans. This occurs under the influence of moisture. As a result, the seed coat ruptures and a root appears.
Important! This stage of bean growth is of great importance. Sprouting grains helps produce strong sprouts that help withstand cold temperatures and develop into a powerful plant.
Before starting the process, you need to select the highest quality seeds. In this case, damaged, moldy or wrinkled grains must be removed. There are several germination methods. However, they all boil down to providing the bushes with sufficient moisture and light. This helps soften the hard skin and speed up the swelling of the seeds.
Day three
The first sample exceeded all our expectations. During the night it rose another 5 centimeters, and during the day the first pair of leaves unfurled, the leaves became larger and the color darker. Between the first pair of leaves there was a sprout for further growth. Through the glass of the jar, the elongated roots of the white plant are visible. In the second sample, the bean barely rose in the ground. Compared to the first sample, the lag is two days. The third sample never changed.
Seed germination
For a high crop yield, it is necessary that there be a certain number of plants per unit area. To do this, you need to know the germination rate of seeds - the number of seeds that will germinate.
Take a sample of 100 grains of rye, corn or wheat. Place the seeds in plates on a layer of damp cloth or paper. Cover the plates with glass to prevent moisture evaporation. Count the number of sprouted seeds in the first 10 days. This figure is the germination percentage. Normally, it should not be less than 95%.
Day four
In the first sample, the first pair of leaves increased. The cotyledons gradually dry out and are about to fall off. The root system has grown and filled the free space in the jar. The sprout in the second sample was never able to rise above the ground. In the third sample, growth stopped completely.
conclusions
For plant growth, it is very important that there is plenty of sunlight, warmth and moisture. When all three conditions are met, the sprout very quickly strengthens in the soil and opens its leaves in a matter of hours. From this moment on, the plant can independently obtain nutrients and water through the root system and obtain energy through photosynthesis in the leaves.
Look in fast motion at how our sprout grew. First, it grew roots, absorbed moisture and nutrients from the soil, and then quickly developed a strong stem with the first pair of leaves.
Selection of location and soil
To properly germinate bean sprouts, they need to be planted on light and neutral soil. Seeds cannot be germinated in soil enriched with nitrogen, since the plant’s tuber system reproduces it itself. If the soil looks crumpled, it needs to be loosened or agents added to help loosen it.
Since beans are a heat-loving crop, it is worth choosing a planting site on southern slopes and where there is little chance of blowing. In such areas, the ground will be sufficiently warmed up and will have greater access to heat, even on a cold night. In dark places, the sprouts do not stop developing, but germinate at a slower pace and, as a result, ripening is late.
If seedlings are being transplanted, the sprouts must be buried to a depth of 5 cm. Bush beans should be placed at a distance of 15 centimeters, other types - 8-10 centimeters. To provide the crop with a sufficient amount of useful substances, place compost or humus at the bottom of the bed, and water it with water after planting. If the grains are planted directly in open ground, then before planting, the soil must be shed with warm water and only then the seeds must be placed in the beds at a shallow depth.
Advice!
In order to provide future shoots with nutrients and thus provide them for the entire flowering period, it is recommended to put humus in the grooves.
A month after planting, bean sprouts need fertilizing in the form of a complex fertilizer, which can be mixed with the soil during the process of loosening it. The question often comes up about how to properly place seeds in the beds in order to quickly germinate beans. There is no general answer, so many gardeners place grains horizontally
Part III: Life after the experience
The germination experiment has been completed, the results have been received, and conclusions have been drawn. But we were curious whether it would be possible to grow an adult plant at home. To do this, we purchased a couple of flower pots and transplanted all the sprouts from the previous part into them. Exactly a month has passed since the start of the experiment. Our sprouts have not only grown large, the first flowers have already appeared on them!
Another week passed and we noticed that tiny bean pods appeared in place of several flowers. This means that our beans have self-pollinated! We will continue to water and monitor growth.
And now, 3 months after the start of the experiment, the decisive moment came. One of the pods grew and dried up. We decided to open it up and see if we were able to grow new beans at home. When we carefully separated the slices of the pod, we found only one bean inside, about the same size as the original ones, but brighter in color. We assumed that there were so few beans in the pod due to insufficiently favorable conditions for growth: most of the time during the experiment the weather was cloudy, the flower pots have a small volume and the soil in them dries out very quickly. But we got the most important result - with proper care of the plant, it is possible to grow beans at home ! This concludes our experiment. Thanks to everyone who followed our online reporting for three months.
Did you like the project?
Then you can
thank
the author for his work and download the presentation! Give thanks
Harvesting
Beans are grown in two ways: for blade and for grain. The harvesting steps depend on your preferences.
Germination time and harvesting of beans for blade and grain
Beans in open ground sprout about two to three weeks after planting. The exact period depends directly on the variety used, for example, bush will sprout in 15-20 days, and asparagus - in 9-14. Shovel beans are harvested when they want to get not the beans themselves, but the pods (asparagus or green beans). Harvesting begins 7 days after the appearance of the ovary. Peculiarities:
- Fruits need to be collected when the pods have reached a size of 5-15 cm and their width is 0.7-1.3 cm;
- collected every 3-7 days;
- if harvested irregularly, the pods will become hard and the quality of the beans will noticeably decrease;
- The fruits are picked in the morning, at which time they contain more juice.
Harvesting beans for grain
The fruits are harvested for grain during ripening. The pods are already becoming soft and dry. Features of the collection:
- Fruits are also collected in the morning; if collected in the evening, ¼ of the harvest may be lost, as the pods will crack;
- The bushes themselves are pulled out and piled into sheaves. This will dry the beans faster;
- After collecting, the sheaves need to be tied with a rope and placed in a dry place to dry. If the weather is dry, you can leave them in place, but be sure to place film or any other material on the ground under them so that the beans do not fall to the ground;
- after 4-18 days of drying, the beans are threshed.
After all the steps, you can store legumes for up to one week, legumes for up to a year.
Beans can be sprouted for two purposes: eating sprouts or planting seedlings. Each option differs in cultivation methods and must be produced using its own technology. When growing for seedlings, you have a choice: wait for the grains themselves to appear or consume bean pods, which are no less beneficial for the body. In any case, you need to correctly approach the process of germination and then growing beans. Only in this case will you be able to get a good harvest.