Paintings are an integral part of any room, making it cozy, complementing the interior, helping to maintain a certain style.
In this regard, the problem often arises of attaching a picture to the wall without nails, but at the same time achieving the desired effect without spoiling the wallpaper. This has become easier than ever, thanks to the availability of modern developments and technologies. Previously, attaching a picture was accompanied by some difficulties - not every nail could be driven into the wall, especially if the wall was solid. In addition, only a man could cope with such a task, especially if a hammer drill was required. Thanks to modern technologies, the situation has changed radically.
Below are the 5 most common ways in which you can find the answer to the question of how to hang a picture without nails without damaging the wallpaper. You can see one of these mounting options in a video tutorial that allows you to carry out the entire process yourself.
Method one: pin
Of course, you can hang a picture on the wall without drilling. If it is light and small, then improvised means are used as fasteners: push pins and paper clips, sewing pins and needles.
Paper clips are also useful, but they are no longer pinned, but glued to a wall covered with wallpaper. One edge of the paperclip is bent, making a hook out of it.
- In the place where you decide to hang the picture on the wall, two small cuts are made on the wallpaper with a sharp knife: one vertical to the length of the paperclip and the second horizontal in the middle of the first.
- The edges of the cut wallpaper need to be carefully lifted to free up a piece of the wall and create empty space.
- Glue is squeezed into the gap between the wall and the wallpaper, and a paper clip is placed on it so that the hook looks out.
- The flat part, pressed against the wall, is covered with wallpaper, returning their bent edges to their place.
- When the glue is completely dry (within 24 hours), the wallpaper will tightly fix the paper clip to the wall.
- For additional security, you can paste another piece of the same wallpaper over the cut, carefully aligning them according to the pattern.
Buttons and pins are good for attaching children's drawings, posters or photographs. The main advantage is that after removing the thin, sharp fasteners, the puncture marks on the walls are almost invisible. Holes in plaster or paint can simply be wiped with a rag.
But such fasteners cannot be used on concrete walls and cannot be considered reliable for paintings.
To achieve better fastening, it is advised to take a sewing needle, bite off the eye with pliers and drive the sharp end into the wall. The puncture will be very small, and the strong steel of the needle is quite capable of supporting the weight of a small, light frame.
Beautiful examples
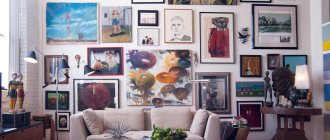
The wall, originally decorated with frames, looks very unusual, giving the room a cozy feel. Even people ignorant of these issues can implement such a solution. There is no need to be afraid to experiment - you should try to make the room much more interesting by eliminating empty space on the walls.
In a room made in a classic style, panels in the shape of a square or rectangular shape will look great. It is better that the frame repeats the shape of the composition.
Photos placed on the shelf look very interesting and unusual. To ensure that the frames are securely fixed and do not fall, it is better to choose shelves with a limiter. As an experiment, you can stage the paintings in different ways. For example, you can hang some of the images and place the second part on shelves.
To balance the composition on the wall, in addition to paintings and photographs, you can hang a clock, a mirror, a panel, and the overall picture will be even more interesting.
It is not at all necessary to choose products in one size or one shape.
If you have a large-sized reproduction, it is better to additionally hang photo frames on the walls to give a competent accent.
It is important that the storyline and color scheme of the canvas be supported
The combination of black and white in the design of a room always looks very organic.
Empty frames on the wall themselves look very stylish. You can leave them as is or fill them out. To do this, you can use photographs, paintings, fabric, herbariums or wallpaper with an elaborate pattern.
To learn how to decorate a wall using frames, see the following video.
Method two: glue
The easiest way to hang a picture on the wall without drilling, nails or other sharp objects is to use various gluing options. It is important to understand here that it will not be possible to remove or reposition it painlessly.
All adhesive fastenings leave noticeable marks on both the painting and the wall decoration.
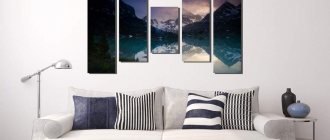
- A modular painting is a painting that consists of several parts (modules). The number of parts varies from 2 to 4-5, sometimes more.)
How to choose the right place for a modular painting
In order for a composition of several segments to harmonize with the interior of the house, you need to choose the appropriate place for this. We also note that it is better to use abstract subjects on canvases if the rooms are made in a modern style, and still lifes look good if there is a classic design or Provence.
Harmonious combination of modular canvas with interior items
In rooms with low ceilings, it is recommended to choose modules that are oriented for vertical placement. This will visually make the room taller. If you hang canvases that are designed to be placed horizontally, the walls of the rooms will appear wider.
As a rule, modular compositions are fixed at a height of 1500 mm from the floor. This is the optimal placement, which is normally perceived by the human eye. If you plan to install canvases with a vertical orientation, the central segment of the image should be at this height.
Large canvases above the sofa in the living room
You should not hang compositions with large dimensions near cabinet furniture, as this creates a feeling of congestion in the space. It is better to place such modules on walls with open space. Large canvases look good over sofas and beds.
Liquid Nails
“Liquid nails” will provide the greatest reliability and durability of gluing. They are applied to the frame (from the wrong side) in drops every 4-5 cm or in a thin snake around the perimeter of the picture and press it against the wall for several minutes.
The glue sets quickly and holds any surface very securely.
It can even be used on ceramic tiles and in conditions of high humidity, that is, with such “nails” it is easy to hang a picture on the wall in the kitchen or bathroom.
Hot melt adhesive is also used instead of silicone nails.
Its advantage is that it does not leave greasy marks. The glued picture should be pressed down and held with your hands for 10-15 minutes, and then supported with a long stick, such as the handle of a mop, and left in this form to securely fix it overnight.
Height
It is important to choose the right height for hanging paintings so that they are clearly visible. In this case, you need to focus on an imaginary line passing exactly through the center of the picture
The classic, “museum” version of hanging paintings is 152 cm from the floor to this midline. When placing a group of paintings, accordingly, it is necessary to take into account the height of the frames, the passport and the spaces between the paintings. Thus, the center of the picture should be located just below the eye level of a standing person (that is, at approximately 150 cm). Small paintings and photos can be hung a little lower so that they are easy to see, larger ones - higher, approximately at a height of 160 cm from the floor.
Reminder: it is better to hang paintings in the dining room and kitchen a little lower, since you will most likely admire them not standing, but sitting at the table.
Asymmetrical composition of paintings of different formats
If you do not plan to place a large canvas or poster directly on the floor (a decorative technique sometimes used with modern paintings and graphics), hanging pictures below 60 cm is not recommended.
Wine cork and clove
What is necessary:
- an ordinary wine cork;
- carnations;
- glue “Moment” (or equivalent);
- knife.
Peculiarities:
- only for light images;
- average degree of reliability.
Execution algorithm:
- take any cork from a wine bottle and cut it into circles with a thickness of at least 10 millimeters;
- glue the resulting fragments to the wall and insert a nail of suitable length into them (it should not go into the wall);
- the image is hung on nails, its weight is evenly distributed over all four corners.
Be careful: very heavy paintings require a different method of mounting on the wall.
Selecting posters for walls in different rooms
When choosing which drawing is best to take, you need to take into account the room in which it will be hung. Because the image must correspond to the purpose of the room and fit the theme.
The image must correspond to the purpose of the room and fit the theme.
Kitchen
For the kitchen, of course, posters with fruits, flowers, and vegetables would be appropriate. That is, with a food theme, you need to choose a pattern that will add coziness to the room. And they will be combined with the kitchen set. Complement it.
For the kitchen, of course, posters with fruits, flowers, and vegetables would be appropriate.
Living room
Abstract images with a city landscape are perfect for a modern living room interior; modular paintings are also suitable; their images can be different.
Abstract images with a city landscape are perfect for the modern living room interior.
Bedroom
In this room, neutral landscapes, images of flowers, sunsets are more appropriate, Japanese themes are also suitable, it is possible to choose paintings with lightly erotic scenes.
In this room, neutral landscapes, images of flowers, and sunsets are more appropriate.
Children's room
The children's room should be gentle, and the images are suitable with various animals, children's drawings, scenes from cartoons. Boys will love dinosaurs and cars. Girls will appreciate flowers, cute animals and more.
The children's room should be gentle, and the images are suitable with various animals, children's drawings, scenes from cartoons.
Ceiling plinth and fishing line
What is needed:
- molding (ceiling plinth);
- fishing line;
- hooks;
- glue.
Peculiarities:
- not recommended if there are pets in the house;
- the mobility of the fixed image is maintained;
- you can attach several paintings at once;
- allows you to quickly change boring images.
Execution algorithm:
- take any ceiling plinth and secure it with glue;
- attach a very strong and elastic fishing line to it;
- hang the picture by hooking the fishing line onto the hooks on it.
One of the simplest and at the same time interesting ways to hang a picture on the wall and do without drilling. True, it is worth placing them in such a way that they are out of reach of your pets - otherwise there will simply be no way to guarantee the safety of the paintings.
Mobile system for paintings on boards
All of the above methods of attaching paintings to walls and wallpaper are, as a rule, a one-sided option. That is, you won’t be able to change your interior too often. Thanks to modern technology, however, there is another way that will allow you not only to hang a picture without damaging the wallpaper, but also to change the exposure as often as you like.
This system is a so-called gallery suspension, which, however, can also be used in apartments. It can accommodate not only paintings, but also posters, photographs and all kinds of interior items that may be on the wall. You only need to install the kit once, but you can change the composition of the paintings as often as you want.
In principle, one fastening with nails will still be required here; it concerns a metal rail (board), which will be located directly under the ceiling using special washers. Metal cables or ordinary fishing lines are then inserted into this rail. It is on these cables that the hooks for attaching the pictures will be located. Their number may vary depending on the composition of the kit.
- Durability and reliability;
- Wallpaper and walls are not damaged;
- Reusable and easy to assemble;
- Sizes are adjustable;
- The composition can be multi-tiered and change at the discretion of the owner;
- The profile is invisible.
Another undoubted advantage of this system is its classic style of execution. Thanks to this feature, the mobile system can be placed in a room of any style without compromising its integrity. The color scheme may also vary, but white remains the preferred color.
Thus, modern technologies offer a large number of ways to answer the question of how to hang a picture without nails without ruining the wallpaper.
Polymer glue
What is needed:
- any polymer glue.
Peculiarities:
- suitable for both heavy and light paintings;
- does not leave any marks on wallpaper, paint or any other finishing.
Execution algorithm:
- if you are dealing with heavy frames, then you should glue completely around the entire perimeter;
- if the image is light, then it is enough to just apply glue to the corners;
- It is best to organize a small press immediately after this and leave it to dry in this form for about a day.
In this option, the main thing is to choose an adhesive that does not leave greasy marks on the walls. Be sure to check this before purchasing, so as not to become an eyewitness to damaged wallpaper or paint.
Professional solution
If “artisanal” hanging methods are not satisfactory and you want to know how to properly install the fasteners – following the example of art galleries – it’s worth remembering special hanging systems.
They consist of three main elements - a rail, a strong fishing line or cable, and a hook with a regulator. Thanks to this regulator, you can set the desired position of the hook - at a greater or lesser distance from the rail.
The systems are complemented by connecting, end and corner elements, which makes it possible to position the rail along the entire perimeter of the room, not excluding corners, bay windows and protrusions.
For large and heavy images, craftsmen advise using two hooks: this helps to hang the frame evenly and is especially suitable for heavy products.
Spider hook
What is needed:
- spider hook;
- hammer.
Peculiarities:
- maximum weight up to 2 kg;
- ready solution.
Execution algorithm:
- take the purchased spider hook;
- hammer it into the wall.
And although real spiders have far more than just 4 legs, this cunning and interesting device received just such a well-established name.
Largely due to the visual similarity. In general, this is a resourceful solution for those who do not know how to hang a picture on the wall without damaging its surface: if you want to remove the hook, you will see that there will be practically no traces left of it on the wallpaper.
Backlight
Everyone has seen the decorative lighting of paintings in museums and galleries.
Directed streams of light focus attention on the image, forcing you to stop and examine it in detail. It is recommended to use natural lighting in residential areas, because sunlight helps any story to fully unfold
Decorative lighting is needed only in two cases:
- On the glass protective surface of the painting there are reflections that make it difficult to see the plot.
- This decorative element should become the center of the interior composition. Perhaps due to the neutrality of the plot or pastel colors, it is slightly lost in the setting.
It is better to use LED bulbs as lighting. They will last a long time and do not heat up during continuous operation. A group of light bulbs in a metal “frame” against the background of a brick loft wall will look stylish and unusual. One above each picture.
Special Velcro
What is needed:
- Velcro Command, KREPS.
Peculiarities:
- maximum weight up to 2 kg (more is possible if the number of strips increases);
- Suitable only for flat surfaces with wallpaper without texture;
- very fast and reliable installation;
- environmental Safety;
- leaves no traces.
Execution algorithm:
- degrease the surface and frame;
- form pairs of Velcro, the number depends on the weight;
- remove the protective paper and lean it against the wall in the right place, as well as in the right place on the back of the picture;
- connect the strips, hold for 30 seconds and release.
Today this solution is positioned as one of the most reliable on the market. However, there are often cases when, after six months or even less time, images unexpectedly fell. Apparently due to the peculiarities of the temperature in the room or high air humidity.
However, this does not affect the popularity of such products in any way.
Interior posters
On the advice of designers, when decorating walls with posters, all rooms in the apartment should be used. Each room should have wall posters of different themes, but in general they will be in harmony throughout the entire apartment in the same style. Combine any little details in your interior with posters
If this is a room in classic white, then the posters on the wall should be diluted with warm tones, but without taking all the attention to themselves
Posters of partners with different images, but in the same theme are often placed in a row, for example, above a sofa or chest of drawers. In this case, you can add a combination of colors with decorative pillows and no longer overlap colors in other parts of the room. Thus, with the help of posters and a small addition of a matching color, you will get a zoned space.
Poster on the wall in the living room
When choosing posters for the wall for the living room interior, it is important to focus on dynamics - this is a room of life, and it should have energy. It is fashionable to order watercolor posters for the wall with images of all family members
When choosing posters for the living room, it is better to rely on the content of the picture, and not on the color scheme; colors can be supplemented with small things: pillows, curtains, candy dishes.
A ready-made fashionable solution for the living room is posters on the wall in an industrial or urban style, with graphic elements. If the interior of the room does not have a specific theme, and the guideline when choosing is entirely based on colors, then opt for abstract posters on the wall, with the necessary color gamma.
Posters on the wall in the bedroom
For this room, the option of unobtrusiveness and harmony in the interior is suitable. The poster on the wall should rhyme with the surrounding style. You shouldn’t hang cool teenage posters on the wall in your bedroom; it’s better to opt for calm, peaceful, gentle paintings. For example, in a bedroom decorated in an oriental style, in black, pink and scarlet colors, a Japanese-style painting on the wall, perhaps with images of a geisha or a branch of cherry blossoms, will look good. In the most classic version, flower posters on the wall are suitable for the bedroom.
Posters on the wall in the kitchen
When choosing a poster for the kitchen wall, it is important to decide on the size of the paintings. For an interior filled with small things: vases, napkins, storage jars, miniature posters framed with wooden frames are suitable
For a high-tech kitchen, a large framed poster on the wall would be an effective solution. You can select artists' reproductions in their original size. In this case, the picture is stretched onto a baguette.
Partner posters with images of food, drinks or spices look impressive if there are bright details in the picture in the same color scheme on a white background. For example, in this way you can design several posters with bright red peppers and tomatoes
If you prefer a black background color, then pay attention to wooden posters on the wall
Posters for the wall in the nursery
For a nursery made in any of the colors, leave the poster palette in the background, the main thing in it is the illustration and content. A good solution would be partner posters or a simple modular set. Today, children's wall posters depicting naive hand-drawn drawings are popular. Make sure that the color scheme is different from the main colors in the interior. For a Scandinavian nursery in white colors, this could be a set of three posters with animals. For a nautical children's room, choose posters with ships, masts, corals and sea life.
Posters for the office wall
A good design for posters in the office would be reproductions of famous photographers. You can use posters on the wall in black and white or in retro style, matching each other in style and content. Such designs will not distract from business meetings and conferences, but will emphasize status and a serious attitude.
For creative companies that need to demonstrate individuality and spontaneity, cool pop art wall posters are a good choice. You can hang voluminous posters of cities, such as the famous London telephone booth, or acrobats on the roof of the infamous Twin Towers in New York. This solution is suitable for small rooms where volume will give the illusion of space.
Cornice rail
A curtain rail is another reliable way to hold weighty objects. And if you have an old cornice, you can borrow it from there. We also need a strong fishing line or nylon thread. We will make a hanging system that will allow you to place several objects at different heights at once and will not be conspicuous.
Inside the rails there will be small plastic hooks to which you need to attach a fishing line or thread, taking into account the desired length and distance between objects.
Now you need to glue the rail to the wall and secure the picture threads to the ends. The improvised installation is ready. The advantage of this design is that at any time you can add or, conversely, remove several items.
Side walls
An important part of the office are the windows. This is not only good daylight, it is also its limitation at the right time, so there must be blinds or blackout curtains
In addition, good windows retain heat during the cold season and also provide ventilation at the right time. In modern rural schools, windows continue to be a big problem.
Special illustrations and teaching materials should be placed on the opposite wall.
Didactic stands
You can make several stands on which you can place useful and interesting information for children, for example, about interesting scientists or your students who have achieved success in studying your subject (victory in competitions, olympiads, and possibly further career success).
Entering the classroom, the child should immediately feel himself in the world of the subject being studied, but one must remember that unnecessary objects can distract the student from what the main source of knowledge—the teacher—is saying.
Various visual aids for classroom design
How to hang a picture without nails on wallpaper using a paper clip and glue
The fastener allows you to hang a small frame weighing up to 2 kg. However, this figure is approximate, and it largely depends on the strength of the wallpaper. It is this finishing material that will bear the entire load. The materials you need are a paper clip and glue. To cut the wallpaper you will need a utility knife.
- Take a metal, elastic paper clip. First, they unbend it in the shape of the letter “L”.
- As a result, the paperclip looks as if it was used to fasten a thick stack of sheets of paper.
- A place is prepared for the resulting hook.
- Use a utility knife to make a cross-shaped cut on the wallpaper.
- The horizontal slot is 5-10 mm longer than the length of the paperclip.
- The vertical cut is equal to the width of the fastener.
In the cross-shaped slot, the corners of the wallpaper are folded back. First they try to make a paper clip without glue. It is turned under the wallpaper to create space. The paperclip is removed. The part that will be immersed under the wallpaper is generously lubricated with glue.
You can squeeze it a little inside the prepared nest.
Advice! Regular PVA glue is suitable, but it is better to use polymer glue. Firstly, it is transparent and leaves no traces. Secondly, polymer glue adheres reliably even to plaster, which allows you to increase the load on the hook.
The treated part of the paper clip is placed in the slot with glue. The protruding tongue is turned so that it “looks” towards the ceiling, otherwise it will not be possible to hang the picture on the hook. The edges of the wallpaper are pressed with your finger. When pressed, the glue will fill all the voids and even protrude a little through the slot. The fastener without drilling is ready.
The glue is allowed to harden for a day. After this, you can hang a light canvas.
Rule #1
Posting rules.
• Horizontal row. This type of hanging can decorate any empty surface. It is better if the number of posters is odd. A horizontal row of posters will balance out the free space and give it volume.
• Rectangle of four posters. This placement is suitable for a room with a high ceiling. Place them closer to each other so that they visually look like a single unit, and a “window” effect will appear. The main thing is that the pictures are light and the frames are thin. You can not limit yourself to four posters, but take six or eight - the number depends solely on the size of the room.
• Symmetrical arrangement. Posters with similar images, the same size and the same frames are suitable for this. Symmetrical hanging will balance the interior of the room - the reflection effect will work.
• Asymmetrical arrangement. In asymmetrical hanging, it is better to use posters of different sizes. Here you can experiment - arrange them according to plot or theme. The distance between them should not exceed the size of the palm, otherwise the overall composition will be disrupted.
Tailor's pin
The simplest method, it is suitable only for very light objects: posters, any drawings on paper and photographs without a frame, maximum - with paper. You can use either a tailor's pin or, alternatively, a button from a stationery store.
The product is simply stuck into the wall, so this method is only suitable if it is covered with wallpaper or made of plasterboard.
A pin or button won't cut through paint and concrete. By the way, before use, you can remove the decorative ball from the safety pin using pliers. So only a thin, hard needle will remain, which will be almost invisible.
Mounting methods depending on the wall material
We nail the nail at an angle and hang the picture. The simplest and most common right for everyone
Pay attention to the features of the walls to avoid mistakes and spend more time eliminating unpleasant consequences
Wooden walls
When working on this material, the metal enters smoothly and easily. Even if there is plaster on top. For fastening, you can use a nail suitable for the weight of the painting or a screw. In the case of a screw, for accurate work, you can first make a hole and insert a screw with an “L” shape.
Driving a simple nail into a wooden wall is not difficult. Even an ordinary housewife can handle this.
Concrete walls
The concrete version of the wall has a high level of complexity. Tools you will need: a hammer drill or a bolt. You need to insert a plastic dowel into the extended hole and only then screw in the bolt hook.
For massive paintings, use an expansion anchor. The length of such a tube is about 5 cm; inside you can insert a hook or a bolt that can be tightened with a screwdriver. At the moment when you tighten, for example, a hook, it will expand the anchor (tube) and fix it in the wall.
With a concrete wall everything is more complicated. In order to fix the painting on a concrete wall, you can invite a specialist. He will do all the work carefully and will not damage the wall.Brick walls
What to hang a picture on a brick wall:
- Hot nail.
- Expansion anchor.
- Dowel.
You can drive a nail into the wall with a hammer or a nail gun. Making a hole with a drill in a brick wall is easier.
When placing a painting on a brick wall, you can use a hammer, drill or mounting gun.
Plasterboard walls
The difficulty of fastening a plasterboard wall is that the wall material is fragile. It will be especially difficult if you need to attach a massive image. Tools for different paintings:
- Special anchors for massive ones.
- Plastic plug, dowel anchor, butterfly expansion anchor for small sizes (up to 15 kg).
Working on a plasterboard wall should be done with extreme caution. This material is very fragile
Decorative tape
To aesthetically decorate a picture on the wall without drilling, you can use a wide decorative tape or cord. Suitable for small and light paintings. For work you will need: hook, ribbon, scissors.
Choose a regular needle, pin or paper clip as a hook.
In the latter case, a special hole is made in the wallpaper into which a modified paper clip is inserted. One side should be larger, the other smaller. To do this, it is bent in the appropriate direction. After placing one side under the wallpaper, the structure is secured with glue.
You can also use professional means for fastening: a spider hook or special adhesive tapes. After the first fastener is made, you need to hang a decorative ribbon on it. As a result, two edges of the tape should hang down. The pictures are attached using glue.
If the image is hung in a frame, polymer glue or liquid nails are used.
How to make a “gallery” from photographs or paintings
Nowadays, “collages” of several images located in a certain order close to each other are very popular. What's the best way to hang several pictures? You can use one of these methods.
Suspended structure
To make such a structure, you will need a wooden plank (the rail of an old cornice) and strong nylon threads. If you are using a curtain rail, attach nylon threads of the required length to the inner hooks. In the case when the basis of the structure is a plank, the threads can be secured by simply “tying” one end around the device.
After this, the base of the structure is installed on the wall, and hooks, paper clips or other devices are attached to the ends of the threads, on which the paintings will be hung.
Wide tape
In sewing accessories stores you can purchase satin ribbons of various widths and colors. We fold the material in half and attach it to the wall using a small nail. You can mount a hook into the wall and hang the tape on it, having first sewn a loop to its back side.
A small hook is attached to the frame of the picture, by which it is hung on a ribbon. It should be noted that this method is suitable for small and light images; it will not be possible to hold a heavy decoration on the wall with tape.
Picture board
This method will give your room a unique look. Choose a board whose color contrasts favorably with the main tones in the interior and attach it to the wall. Boards that are not close to the wall, but at some distance from it, look original.
The base of the structure can be placed in this way using special brackets located in the upper and lower parts. You can hang images on the board in any way convenient for you, it all depends on your preferences. The wall will remain undamaged.
Button
To hang a picture on the wall without drilling and without damaging the wallpaper, you can use modern pushpins with a colored head or regular pushpins with a round flat head. True, the first option is suitable only for plasterboard panels, plastered walls or walls covered with thick thick wallpaper for painting. In this case, it can simply be driven well into the surface with the tip.
But the protruding part of the head will be the very hook on which you can hook the picture.
If we are still dealing with a concrete wall, then we can use the second option of the button. Here we do this:
- On the wall in the wallpaper in the designated place we make a cross-shaped cut. The length of the cut should match the diameter of the button head or slightly exceed it.
- We bend the corners of the wallpaper and fill this space with superglue.
- We press the button into it with the head facing the wall. The sharp tip should stick out.
- We return the ends of the wallpaper to their place and carefully decorate everything. Let the button dry for an hour.
Now you can fit the back of the panel frame onto the point.
Mobile system for paintings on boards
All of the above methods of attaching paintings to walls and wallpaper are, as a rule, a one-sided option. That is, you won’t be able to change your interior too often. Thanks to modern technology, however, there is another way that will allow you not only to hang a picture without damaging the wallpaper, but also to change the exposure as often as you like.
This system is a so-called gallery suspension, which, however, can also be used in apartments. It can accommodate not only paintings, but also posters, photographs and all kinds of interior items that may be on the wall. You only need to install the kit once, but you can change the composition of the paintings as often as you want.
In principle, one fastening with nails will still be required here; it concerns a metal rail (board), which will be located directly under the ceiling using special washers. Metal cables or ordinary fishing lines are then inserted into this rail. It is on these cables that the hooks for attaching the pictures will be located. Their number may vary depending on the composition of the kit.
- Durability and reliability;
- Wallpaper and walls are not damaged;
- Reusable and easy to assemble;
- Sizes are adjustable;
- The composition can be multi-tiered and change at the discretion of the owner;
- The profile is invisible.
Another undoubted advantage of this system is its classic style of execution. Thanks to this feature, the mobile system can be placed in a room of any style without compromising its integrity. The color scheme may also vary, but white remains the preferred color.
Subtleties that allow you to hang decor without drilling
Mounting tape is a good solution in situations where you need to place paintings, photos, calendars on plasterboard walls. The craftsmen explain the expediency of such a move: the adhesive tape does not affect the internal structure of the plasterboard sheets, the absence of points of integrity has a beneficial effect on the strength characteristics of the finish.
While each new hole reduces the reliability of the gypsum board.
- In order for the picture to look aesthetically pleasing, especially if it does not have a frame, it should be glued on all sides. This measure prevents the edges from curling over time.
- To attach a small composition or photo to the wall, neat centimeter strips of mounting tape are glued to the edges of the object. The length of the pieces of adhesive tape increases in proportion to the dimensions of the picture.
- You should create markings on the wall - indicate how the decor will be positioned, checking the horizontal position using a building level.
Important! If you rely solely on the eye, there is a high probability that during the work you will have to tear off the already glued frame in order to hang it more evenly. In such conditions, you can inadvertently tear off a piece of paint or wallpaper from the wall.
It is better to remove the protective layer from the tape at the very end before fixing the element, so that dust does not have time to accumulate on the sticky surface and fingerprints do not remain while the search for the ideal place is carried out.
For optimal adhesion, the wall surface should be free of dust, smooth and dry, the picture should be applied and pressed tightly.
Mounting tape with a fabric base is more convenient to use compared to the classic version, since it can be removed from any coating without a trace; ordinary double-sided adhesive tape must be removed from the surface strictly at a right angle. Moreover, the most difficult thing here is to peel off a small area from the edge, by which you can pull the tape.
If you plan to hang a picture in a plastic or small wooden frame, foam mounting tape will come in handy, as it can consistently withstand such loads.
Rules for placing modular paintings
Before you start installing the picture, you need to decide on its location. And this stage must be approached with all responsibility, since the perception of the image and its harmonious combination with the interior of the room directly depend on the correct choice of location for the canvas.
Rules and recommendations for placing a picture:
- A painting that depicts a vertical pattern will visually increase the height of the ceiling, while a horizontal pattern will make the walls wider;
- It is not recommended to hang massive modular paintings in close proximity to a large amount of furniture, as this can introduce disharmony into the interior of the room;
- The place for the painting must be selected taking into account the lighting. If the picture is painted with oil helmets, then you need to make sure that a lot of sunlight does not fall on it, in order to avoid premature aging of the paints. It is also worth making sure that artificial or natural lighting will not create glare on the surface of the canvas;
- Paintings should be placed at least 1.5 meters from the floor so that the image is completely within the field of vision of the eye.
Important: To make sure that the modular painting will look effective in the chosen place, harmoniously combining with the interior, you should first place the composition on the floor and visually assess the proportionality of the canvas and the overall design concept of the room
Alternative fastening methods: important conditions
In order to easily avoid the use of screws and nails, you need to take into account that mounting tape will not always be enough to solve the task. What matters here is the type of wall decoration and the weight of the item that you plan to hang.
Mounting tape is designed to work with small-sized objects whose weight does not exceed 1.5-2 kg.
Important! The first consideration should be the base material in the area where the alternative fastener will be located. Mounting tape does not interact well with textured wallpaper and does not adhere uniformly. Reliable and tight fixation is formed on plasterboard surfaces and artificial stone - they are smooth and do not have an abundance of pores.
It is necessary to think not only about how to properly secure the picture, but also about how it should be positioned relatively evenly. Harmoniously hung frames will create a cozy atmosphere and highlight the taste of the residents in the right light.
During the work, it is advisable to use a building level and take care of preliminary markings.
Double sided tape
If the picture with which you plan to decorate your interior is light, and its format does not exceed A4 standards, it is not difficult to attach it to the wall without drilling or damaging the wallpaper. For this purpose you will need double-sided tape. It is worth considering that in this method, it is advisable to give preference to a fabric-based structure, since its physical properties allow it to withstand a decent weight.
Scotch tape is not a capricious material for fastening, because it is perfectly fixed on any surface, even if the wallpaper has a convex pattern. The composition of the wallpaper does not matter either - the sticky layer will have equally reliable adhesion to both paper and vinyl and non-woven coverings.
It will be especially successful to use adhesive tape on a plasterboard surface, which itself is very sensitive to any mechanical stress. Simply put, using such a sticky product is the real way out of the situation, hanging a picture without drilling or nails, without damaging the wallpaper and the wall.
It is worth considering one feature when working with adhesive tape: you can remove it at an angle of 90 degrees, then not a trace will remain on the surface of the wall, and the wallpaper will not be damaged. But this advice is only useful if you plan to rehang the painting.
Before you begin the process of attaching the painting, you should outline the location of its future location. After this, the tape must be attached at one end to the picture. Having released the second sticky part, you can place it on the previously designated place on the wall and press firmly for a few seconds. For reliability, it is advisable that the tape is fixed on the frame in several places, for example, in each corner or on the top and bottom sides.
Features of fastening to different surfaces
- If you attach pictures to a wooden wall, you can safely hammer in a nail or screw a self-tapping screw into it.
- In a fragile brick wall, you can drill a hole, fill it with cement mortar to prevent cracks from forming, and only then use a screw.
- If you have a concrete wall, if possible, it is best to use the options given here. If this is not enough, you will have to punch a hole for the dowel with a self-tapping screw.
- If you hang a picture on a plasterboard wall, you must avoid heavy loads or damage. Otherwise, the wall may be damaged. It only makes sense to use the methods mentioned here.
Tips and tricks If you are planning to hang a painting on the wall in your apartment, try to take into account what material this wall is made of and how much weight this painting has. Based on this, choose the most suitable method.
Before hanging, decide where and how many paintings you need to hang on the wall. It’s better to plan carefully than to redo it several times later.
Modern fastening systems
Today, more modern and functional accessories and tools for repairs and modern design are released almost daily. Progress has also affected fasteners for paintings and photographs.
Velcro for attaching pictures Command
This system can be used to hang a picture if it does not have a mount, without damaging the wall surface. Velcro Command
They are plastic fasteners that are attached to any type of covering.
Such Velcro consists of two parts and can be reused. In order to attach a picture using such fasteners, you should attach one part to the wall, the second to the picture.
Before installing such fasteners, you should prepare the surface and degrease it. Thanks to this, you will further increase adhesion to the wall.
Hook for fastening the Kreps system
This system is intended for paintings, photo frames and other decorative interior items that have special ropes or cables as part of the fittings. This is due to the fact that the design provides for the presence of special hooks on its surface, which do not leave traces after dismantling and make it possible to hang the picture even on a concrete wall.
One such hook can withstand a weight of 1-1.5 kilograms. But if you want to hang a large and heavy item, you can use several hooks at once. The most important thing is to correctly calculate the number and placement of these fasteners. The picture should fit tightly to the wall.
In order to install such a hook, you will not need much time, since this is a fairly easy operation, and even a child can cope with it:
- You need to remove one side from the protective layer and glue it to the wrong side of the hook.
- After this, remove the protection from the other side and attach it to the wall.
- Hold in this position for about 30 seconds, after which you can safely hang decorative elements.
Dismantling is even easier. You just need to pull out the tab, thanks to which the unsticking will occur.
As you can see, there are many methods for hanging a painting, photograph, poster or other decorative elements without drilling huge holes in the wall. We have offered you the most popular and proven methods. Therefore, you can easily complement the design of your room and change it at your discretion at least every day.
Since ancient times, people have sought to decorate their home with a variety of decorative things: panels, photographs, masks, decorative hanging figurines, amulets, paintings.
Pictures have always been hung on walls, and sometimes situations arise when it is not possible to drive a nail or screw into a wall or there is no one to do it.
We will talk further about paintings, or more precisely, about their mounting on walls. Shall we look at ten options? how to hang a picture correctly using different fastenings.
Factors influencing the choice of fastening
Previously, the problem was solved simply. A hole was drilled in the wall, a wooden plug was inserted, a nail was driven in or a screw was screwed in. Dust fell on the floor, sometimes the plaster fell off, the damaged area was sealed with cement or alabaster mortar. Everything was troublesome and unaesthetic.
Today there are enough fasteners that allow you to hang pictures without drilling.
When choosing a mount, two factors are taken into account:
- weight, size of the item;
- finishing wall covering.
There is nothing to discuss about the mass of the subject. Everything is obvious. No sane person would think of hanging a picture in a heavy frame with double-sided tape.
The second factor is not decisive, but it must be taken into account. Different mounts hold differently.
Determining the weight of the painting
This is the first thing to do before choosing a mounting method. Massive canvases in wooden or - especially - plaster frames sometimes weigh 10...30 kg. Even relatively light options (canvas on cardboard, canvas on a wooden stretcher) with dimensions of more than 40x30 cm weigh 300...500 g. One such painting is not much, but what if you need to hang two dozen of them?
So, the first stage is an approximate calculation of the weight of all paintings and other decorative elements that will be hung. It is worth considering that it will not be possible to weigh accurately (of course, unless you check everything down to the gram on special scales), so you need to add at least 10% to the final figure. Based on the results of the calculations, it can be determined whether the wall will withstand such a load. Partitions made of plasterboard, when evenly distributed, can easily withstand 30...50 kg, but attaching a suspension for several heavy frames at two or three points is fraught with breaks in the fasteners and damage to the cladding.
If the paintings are hung one at a time and each weighs less than 500 g, you can consider options for hidden fastenings without drilling into the wall. If the weight is more than 500 g, it is better to use more reliable fastenings or use so-called gallery hanging systems.
Features of attaching paintings to the wall without drilling
Frames with family photographs and paintings are attached to the wall with nails or dowels. The method is reliable, but has a significant drawback. To drive in the fastener, drilling is performed.
Considering how much was spent on new renovations, there is no desire to make a hole in the wall.
This option is especially unacceptable if the cladding is tiles, expensive plaster, or panels. In the future, it will not be possible to seal the hole without leaving a trace. There is only one way out - to mount the picture on the wall without drilling using the hanging method.
There are many clever ways to hang a canvas without drilling into the wall.
However, to choose the right method, you need to take into account two important parameters:
- weight of the painting;
- type of wall cladding.
If you do not take into account the first parameter, then a heavy picture from the wall can fall off. The fact is that most fastening methods without drilling are designed for a load of 1.5-2 kg. Only some of them allow you to hang a large canvas weighing up to 9 kg.
The type of wall cladding also affects the strength of the fasteners.
For example, double-sided tape and suction cups stick well to tiles, but they do not stick to a rough surface. It is optimal to attach canvases to plaster, decorative stone and other materials with a textured surface using adhesives.
The drilling method is also advantageous in that the frame can be turned on the nail to align it. With a picture glued, this number will not work. To ensure that everything works out smoothly the first time, markings are applied on the wall and a place for each item is thought out.
Advice! When marking, you need to use a level, a plumb line made from a long thread with a weight attached. The devices will help you accurately determine verticality and horizontality.
Briefly about the main thing
On an empty wall you can arrange your own art or photo gallery. It will look stylish if you use a few simple rules when placing images.
For visual perception, it is important to choose the correct proportions of the composition. It should be proportionate to the furniture above which it is located.
The exception is a special option when the entire wall space is filled with art objects.
How the frames will be placed depends on their number, shape and relative sizes
In order for the composition to look harmonious, it is important that there is a unifying point: symmetry, line alignment, a common theme or a similar frame design.
This can be done in two ways: fix them on the wall with masking tape or make a general template on a large sheet of paper
In order to place the gallery evenly and beautifully the first time, designers recommend making blank frames out of paper and using them when searching for the optimal location. This can be done in two ways: fix them on the wall with masking tape or make a general template on a large sheet of paper.
Useful tips
At first glance, each method of fastening without drilling seems simple. However, a minor defect or mistake will not allow you to achieve the desired result. To ensure that the painting hangs securely on the wall and is pleasing to the eye, it would be a good idea to listen to the following advice:
- Do not use expired glue or dried out tape;
- I wipe the adhesive surfaces from dust and degrease them with alcohol;
- The markings are applied according to the level, taking into account the dimensions of the frame of each picture;
- It is optimal to place the paintings above 1.5 m from the floor so that they hang at eye level;
- exposure to the sun is undesirable, since bright rays fade the colors of paintings, and the heat dries out the tape or glue, weakening the fasteners;
- a large composition of paintings looks beautiful with backlighting, and lanterns are installed on one or more sides so that the shadow is reflected on the wall.
Art lovers organize compositions in the office. In such cases, you first need to hang the main picture, and then distribute the remaining canvases with a slight indentation from it.
Orientation and angle
As mentioned above, horizontal paintings visually expand the boundaries of the walls. They work well in combination with wide pieces of furniture: the back of a sofa or bed, chest of drawers, table, bedside table. Vertical paintings, on the contrary, make the walls taller and extend the space along a conventional line from floor to ceiling. They do not have to be tied to furniture elements. Typically, groups of such decorative objects decorate ledges or short walls of corridors, irregularly shaped rooms, and side walls on both sides of wide doorways. Modular paintings, consisting of several vertical parts forming a single composition (diptychs, triptychs, polyptychs), look unusual. They should be considered only as a whole, that is, as one large horizontal canvas divided into sections.
The angle of inclination is another important nuance that can affect the perception of the picture. It is adjusted using the tension of the fastening rope. Paintings located below and at eye level should lie in the same plane with the wall, that is, have no angle of inclination at all. If the image is hung higher, then it can be slightly tilted so that the canvas seems to “fall” on the beholder. You will have to experiment with the angle of inclination to determine the optimal value.
The picture should not “put pressure” on a person, only unobtrusively attract his attention
Drilling time clock
Working with a drill is very noisy and it must be carried out in an apartment building at certain hours according to the law. Repair work is prohibited on weekends. On weekdays, you can break the silence from 9 am to 7 pm, in some until 8 pm. In some regions, from 1 pm to 3 pm there is a period of silence. For violation, fines of 500 rubles and above are provided.
Federal Law N - 52 has existed from March 12, 1999 to the present, it specifies noise standards at different times of the day. Amendments are made periodically, and different regions of the country have their own rules.
Working hours for repair work, which also includes work with a drill, differ in different regions of the Russian Federation.
