How to remove scratches and dents from furniture
For these purposes, there are both professional and folk methods. The latter have an important nuance - before using them on a visible surface, you need to try the method on an inconspicuous area so as not to create even more problems.
Furniture touch
Used to mask small scratches. It is a tube that is closed with a cap with a brush, like nail polish. Apply in one or several layers until the defect is completely eliminated. Excess is removed with the edge of a plastic card, and the surface itself is polished with felt or a soft cloth. It is difficult to choose the ideal color, so you can fill in the missing texture with a regular felt-tip pen and cover it with furniture varnish. For this purpose, it is better to use spray varnish. It is applied evenly and does not leave a visible edge of the composition.
Furniture wax
Can be soft or hard. The first one has many more colors, and it is easier to apply. But the hard one is more reliable in further use. It can be used for large dents or even chips. Soft furniture wax is easily warmed up with your fingers and applied in excess to the problem area. The excess can be easily removed with a plastic spatula. Then the surface is sanded and varnished with a composition with the appropriate degree of gloss.
Acrylate/acrylic putty
An option that is more suitable for deep dents. The putty is applied using a rubber or plastic spatula to the surface of the furniture, and after complete drying, it is sanded first with the finest sandpaper and then with felt. If the color does not match, the stain can be tinted with a marker or felt-tip pen, but it is better to take a composition one tone darker, because the light spot will stand out strongly against the general background.
stain
This is a universal composition for removing shallow scratches. The stain penetrates the structure of the wood, coloring it in the desired tone, but retains the texture of the wood, unlike paints and enamels, which give a solid, dense color. The stain should first be tested on an inconspicuous area of furniture, because... the shade may not match the one you want to see in the end. Take your time so that you are completely satisfied with the end result.
Walnut
This folk method is used in the presence of shallow scratches. The problem area is carefully treated with half a nut, and then sanded with a soft cloth to remove the oily sheen. Pecan nuts are also used for this. It should be clarified that this method will not help with deep unevenness; it only makes small scratches invisible that do not go deep into the structure. In addition, for dark wood, craftsmen suggest using a weak iodine solution. It will also help cover micro scratches. But remember that this masking will not even out the surface, but will simply visually hide the flaw.
Recommendations
Leading furniture manufacturers claim that it is easier to protect their products from damage in a timely manner than to restore them, and recommend:
- Use protective accessories. This is especially true for wooden countertops. Tablecloths, cutting boards, and hot pads minimize the risk of mechanical damage.
- Remove excess moisture. Wood can become deformed when exposed to water.
- Use only soft sponges and rags without an abrasive layer for cleaning. They leave micro-scratches on furniture, which will become a big problem over time.
- Choose only care products intended for this material. Compositions with aggressive and abrasive components are strictly not recommended.
It is necessary to remove stains from wooden surfaces in a timely manner, otherwise damage will appear after attempting to remove old stains.
If you are interested in how to remove small and deep scratches from various surfaces and objects, take a look at this section.
How to remove chips on furniture
A chip is a much more serious problem than an ordinary scratch. But you can also deal with it quite simply at home. Not all of the methods described below are suitable for furniture that is actively subject to use.
Furniture putty
This is exactly the case when you should not use this material on countertops and other actively used surfaces. It’s quite possible to putty the table leg or the corner of a chest of drawers, but the edge of a drawer or the top is unlikely. However, this does not apply to nitro- and polyester-based putties. They cost more, but they hold up more reliably. Putty is carried out in two stages - first the main chip is repaired, and after drying, the finishing layer is applied, with a slight excess. After this, the area is sanded and, if necessary, tinted with any dye, then treated with spray varnish.
Hard wax for furniture
With its help you can disguise very impressive flaws, such as chips on the corners of tables or drawers. If you cannot find a suitable shade, then you should buy two or three similar ones, and then mix them, adjusting the required amount. This wax is melted using a lighter or soldering iron, and then applied in excess to the problem area. The excess is removed with a plastic spatula or card, then sanded and varnished. If the texture does not correspond to the original one, it can be completed with a thin felt-tip pen, and only then varnished.
Furniture edge
An edge made of melamine or polyvinyl chloride is useful if the old one is damaged due to chipping. Then, before restoration, the previous edge must be heated with a damp cloth and an iron, and then removed. Sand the cut. After restoration, it is necessary to glue on a new edge that matches the color. Fortunately, ribbons of standard colors are always available in furniture and construction stores. This will protect the repaired area and give the furniture a fresher look. In addition, traces of repair will not be so visible if they are covered with a new tape with a hot-melt base. It is very easy to stick it on, again using a simple household iron, but without steam, placing a dry cotton cloth.
The most popular types of adhesives
- Animal glue. This glue has long faded into the background, but is still used today for manual veneering. It looks like grains or granules. They can be melted in water and turned into glue using a glue maker. This is the most time-consuming of the proposed options. Animal glue is non-toxic. If you glue your furniture with it, then in a hundred years restorers will warmly thank you - it is surprisingly easy to work with. It regains its adhesive properties when exposed to high temperatures and when wet.
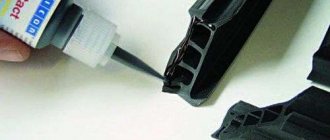
- Hot melt adhesive. Known primarily for its shape. The gun is most convenient when working in hard-to-reach places, in crevices. It also hardens very quickly, making it a lifesaver for immediate furniture repairs. There is another, less common type of it - glue in the form of sheets for making plywood. It is very convenient to lay it between layers and fasten, for example, a loose corner.
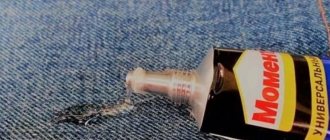
- PVA glue. It gained universal popularity due to its low cost. The photo of his glue line is flawless. Non-toxic, has a wide range of applications. Everyone knows him and loves working with him. Woodworkers are no exception. When choosing, you should take into account the specifics of the glue. There are special ones that are especially durable. These are quite suitable for furniture. There is thick PVA. Its difference is its yellow color. It is developed on the basis of aliphatic compounds. When it dries, it gives less noticeable elasticity to the seam. The three adhesives listed above are contact adhesives. When using them, a certain procedure is usually followed.
- Urea-formaldehyde glue. It is used when filling containers and potholes. Chemical reactions in the substance occur in such a way that it hardens slowly when the dry powder is mixed with water. Apply it to both surfaces. Sometimes hardeners are used. The glue is very toxic and has little use in an ordinary apartment. In any case, to maintain health, careful ventilation is necessary to remove its decay products.
- Resorbent glue. It has much in common with the previous version, but complements the existing version with certain advantages: water resistance and lack of weathering. Photo of this glue is a powder and a liquid, in some cases two liquids. One of them is the hardener, the other is the glue itself. If you glue furniture with this glue, you should regularly ventilate the room. Resorcinol-formaldehyde resin is mixed with the hardener immediately before use. The color scheme of the frozen seam is brown with a reddish admixture. So it is not recommended to use it on light wood. And on red it’s the other way around. Its peculiarity is that it hardens poorly at low temperatures. If the temperature during gluing is -15 or below, the mixture may not set at all.
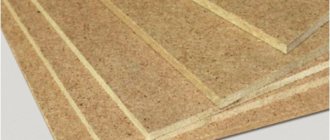
Chipboard, plywood or natural wood may have higher or lower moisture levels. This always affects grip. The lower the humidity, the better the glue is absorbed into the surface. But it may be absorbed before it hardens.
Choose furniture glue carefully, because its quality determines how long the product will serve you.
How to remove scuffs from furniture
Soft furniture wax
The appropriate shade of wax is applied to a soft wool or felt cloth and gently rubbed into the surface in a circular motion. If you are not sure whether you have chosen the right shade, start with the lightest one that you think is suitable for the restoration. As it absorbs and dries, the problem area can be darkened with wax of a more saturated shade. To do this, wait about twelve hours, then the wax will definitely take on its final color.
Furniture marker
Sold in almost all major supermarkets for construction and renovation. The most difficult thing about this is choosing the right shade. If the abrasion is large in area or the scratch runs across the fibers, then you need to purchase two felt-tip pens, one a shade darker than the other. The second, darker one, will imitate the texture of wood after the first has dried. Apply the light color using a napkin colored with a marker. If fabric paint does not stick to the furniture, then the napkin can be moistened with cologne or vodka, but just a little. The finishing touch will be varnishing with glossy or matte varnish, depending on the overall texture.
How to remove cracks from furniture surfaces
The most serious damage - cracks - can occur on chipboard or MDF only if this type of product is used incorrectly, i.e. with sudden and noticeable changes in humidity or temperature. In such cases, you can use both radical methods, such as putty or hard furniture wax, and easier ones that use the internal resources of the material.
PVA glue
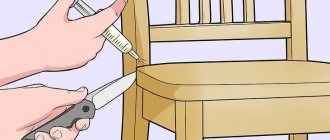
Acetate glue, which contains natural substances, does a good job of sealing cracks in fiber boards. To do this, fill a syringe with it and inject it deep into the cleft using a needle. The glue must be applied carefully and strictly to the crack so that lumps do not form. After this, the part is tightened with clamps and waited until completely dry. The adhesive composition saturates the slab and it swells in the right place, and the adhesive particles hold the parts together. After drying, detailed repairs are made and scratches are repaired as in the first point.
Mayonnaise
Oddly enough, this rich egg sauce can work real miracles. Of course, if the crack is not through. Mayonnaise is applied carefully and only to the crack itself, without affecting the surrounding areas, otherwise you will also have to get rid of greasy stains later. The composition is left on the problem area overnight, and the excess is polished with a soft cloth. If necessary, the remaining scratch or unevenness is masked with furniture wax or other suitable material.
Whichever method you choose, remember that it is better to first try it on an inconspicuous area, such as the inside of a countertop or drawer. This way you will definitely save your family budget from additional expenses, and yourself from unnecessary hassle and running around in search of new concealers.
Furniture made from chipboard is a budget option, and there are many more problems with its operation than structures made from other materials. In today's review we will look at what breakdowns are most common and how to fix them yourself at home.
Door repair
The most common breakdown of cabinet furniture is the failure of doors. This could be a simple misalignment due to unaligned hinges, wear, tearing out of the fasteners from the base, or spontaneous opening.
Often, door misalignment occurs due to improper adjustment of the fittings. Its design provides for the presence of 2 auxiliary bolts. One is responsible for the fit, the other regulates the position of the doors relative to the front plane. By experimenting with them a little, you can return the doors to the correct position.
If this step does not bring a positive result, the loop will need to be replaced. There is nothing complicated about this. You just need to buy another loop and put it in a given place, screw it in with self-tapping screws and adjust it.
To keep the doors closed, magnetic strips and response blocks are used. The first thing to do if spontaneous opening occurs is to clean both halves or correct their position relative to each other. It didn’t help, which means they need to be replaced.
And the most difficult thing is that the integrity of the slab has been compromised, and the screws that held the hinges in place have been torn out. You can try filling the holes with PVA glue or silicone, which does not lose elasticity after drying. After drying, secure the curtain again. But in most cases, you will have to move the fittings to another place, slightly higher or lower than the previous one.
Types and causes of damage to chipboard furniture
The most basic defects that appear during the operation of laminated chipboard furniture are scratches, chips, loosening, deformation, peeling edges, torn hinges and fallen off facades. The reasons for their occurrence can be very different:
- chips, scratches, peeling edges - caused by careless transportation, improper operation, manufacturing defects;
- loosening - frequent disassembly, improper operation, manufacturing defects;
- fallen-off facades, torn or creaking hinges - weak fixation of fasteners, improper installation, heavy door weight, frequent opening (closing).
Furniture made from chipboard can be restored in several ways, namely:
- Restoring the color of a worn laminated surface.
- Masking scratches and chips.
- Label the new edge.
- Restoration of fastener and hinge locations.
What you might need for cosmetic restoration of chipboard furniture
Each type of defect and restoration requires its own approach, materials and tools. Let's look at what you might need to repair laminated chipboard furniture:
- furniture wax (soft and hard). It has moisture-repellent properties and is used to seal scratches, cracks, chips on wooden and laminated surfaces of furniture, doors, parquet, etc.;
- retouching agents. Markers or felt-tip pens, with the help of which the texture of the material at the restoration site is completed after treatment with furniture wax. You can also use paints, office corrector, iodine and even shoe polish;
- varnishes and polishes, to restore the coating after removing scratches and abrasions;
- PVA, two-component glue, wooden cokes for filling holes and recesses from fasteners and hinges;
- tools: utility knife, chisel, rubber spatula, fine sandpaper, iron or industrial hair dryer and rags for finishing.
Set for restoring furniture with wax pencils
How to glue chipboard (glue review)
- PVA Furniture Lux. Often used in the woodworking industry and in work where it is necessary to achieve strong bonding of parts subject to high dynamic loads. Developed on the basis of aqueous dispersion, it provides a strong hold. This adhesive is effective in joining all types of wood together, including chipboard, and with other materials. Cost: 119 rubles for 900 ml.
- Moment Joiner. Reliable product from the German manufacturer HENKEL. Moisture- and heat-resistant, high-strength and quick-setting adhesive, intended for use during the repair and assembly of furniture made of chipboard, all types of wood, laminate, veneer and many other materials. Gives a transparent adhesive seam. Cost: 124 rubles for 250 ml.
- Krass PVA D3. Special waterproof adhesive for all types of wood, chipboard, fibreboard, veneer, plywood. It is suitable for garden, kitchen furniture, doors, windows and bathroom furniture. Does not contain organic solvents. After drying, it leaves a transparent adhesive line. Cost: 125 rubles per 200 ml.
VIDEO INSTRUCTION
What glue should not be used for chipboards
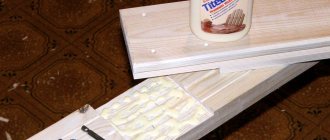
Never use modified furniture grade PVA or Titebond wood glue. These types of glue are characterized by excessive capillary properties. They create voids inside uneven chipboard sheets, and this can lead to poor adhesion of materials.
Restoration of chips and scratches
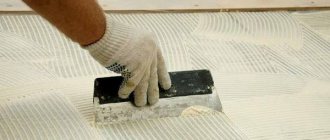
At the ends and surfaces of countertops, especially at corners and radii, chips are not uncommon. They can be easily removed, especially if a melamine edge was used when processing the ends. For restoration, you will need to purchase new material for processing edges, preferably PVC, of the required length and color, from a specialized store that sells chipboard and furniture fittings. Using an iron or an industrial hair dryer, remove the old edge, clean the chipboard from chips with sandpaper and, while also warming it up, stick on a new one. Cut off excess edges with a utility knife and sand with fine-grained abrasive paper. Often, after installing the edge, traces of glue remain. They can be disguised with tinting.
Restoration of a dent on the end of the facade
If the chips, scratches and dents on the furniture are quite deep, they can be disguised as follows:
- Treat the defect, clean it from dirt and, using a chisel, give the recess a more or less rectangular shape.
- Choose furniture wax to match the chipboard. Sometimes you need to mix several different crayons to find the right shade, since you are unlikely to find the desired color in a pure color.
- Using a rubber spatula and softened wax, fill the recess and compact well.
- After the wax has hardened, you need to carefully cut off the excess using a utility knife or rubber spatula. The wax should be flush with the surface of the chipboard.
- Sand and polish the wax with a rag. If necessary, use retouching agents to restore the texture of the material. The final step will be to fix the result with a fixing varnish.
Related article:
How to remove scratches from furniture using: furniture pencil and stroke, wood wax and mastic, oil polish, using walnut kernels, nut oil, mayonnaise, tea leaves, machine oil, iodine, vinegar with vegetable oil, stain - in our publications.
Euro-sawing – flawless connection of tabletops without seams
Takes ~3 minutes to read
The guarantee of long service life of a kitchen work surface is the reliable connection of its parts. It is possible to connect the tabletop at a right 90 degree angle or in a straight line, if the kitchen footage allows for placement along one wall. There are three main methods of merging, but you should always adhere to one result - the surface should give the impression of a single whole:
- joint to joint without euro-saw;
- using a T-shaped metal profile;
- joint using a euro saw.
You will have to familiarize yourself with all the methods, not only with the euro saw. After this, you can decide how to connect the countertops to each other and make a choice among these options.
Tabletop connector - euro saw: hidden joining
A method of processing ends that uses patterns. To create it you need a milling machine. Only with high-quality equipment it turns out flawless.
A few words in conclusion
As you can see, if a façade hinge has broken out of its place, you can call a specialist or fix the problem yourself. This is not so difficult to do, especially since it requires a minimum set of tools and materials. We hope that the information we provide will help you easily cope with the repair of the facade of a cabinet or cabinet.
The appearance of defects on furniture is a common problem due to which the appearance of products deteriorates. There are many methods you can use to remove chips on furniture. To choose the appropriate option for restoring the headset, you need to take into account the type of surface and the degree of damage.
Advantages of homemade products
The advantages of a hand-made countertop are obvious:
- it can be any size;
- you will know for sure that it is made from a whole sheet and will not break at a critical moment;
- materials are very cheap;
- extremely simple design, which ensures strength;
- the opportunity to realize the most unexpected design ideas.
Important! It is very important to make a plane from one sheet. This dramatically improves the performance of the product. Since chipboard is sold in large sheets, you can buy a piece of any size. Factory-made products, as a rule, have seams that reduce strength - this cannot be compensated for by the plastic covering the product.
As for design ideas, sheet plastic with which you can cover your work comes in the most fantastic colors and textures, but the most interesting options are practically not used by furniture manufacturers. Besides, there are other solutions.
The main causes of scratches
Before you start eliminating scratches, you should find out the reasons for their occurrence. This is necessary in order to prevent the formation of defects in the future. The main reasons include:
- Exposure to abrasive substances, including sand and dust. For this reason, minor and barely noticeable defects appear on lacquered furniture.
- Damage caused by pets' claws or various sharp objects.
- External mechanical influence. The largest and most problematic chips appear from impacts from furniture.
How to remove scratches
Detected defects can be removed using improvised or specialized means. If there is serious damage, it is possible to combine several methods.
Special marker
A marker has been created for processing a polished surface, which allows you to restore the attractive appearance of the product. The principle of operation of the marker is the penetration of microparticles into cracks and subsequent filling of the scratch. The marker is colorless and has a consistency similar to paints and varnishes. The applied substance on the surface is not washed off with water and creates protection against new scratches.
Furniture wax is a universal remedy for removing scratches on wooden products. Wax can be used on laminated and varnished surfaces.
Soft
Soft wax makes the wooden surface smoother and gives the necessary shade to the wood structure. The product does not require pre-mixing and is offered in a ready-to-use state. It is enough to apply wax to the damaged area, remove excess and after 15-20 minutes finish polishing with cotton material.
Solid
The hard type of wax is suitable for restoring wooden furniture with large defects. Unlike soft wax, hard wax is thicker and is applied to material previously melted with a soldering iron. After application, excess material is removed with a spatula, and the coating is thoroughly polished.
Shoe polish
Minor scratches on tables and other furniture can be hidden using shoe polish. It is important to choose a cream that matches the shade of the surface being treated. This method is suitable as a temporary solution to the problem, since after a few wet cleanings the scratches will be visible again.
Rafter connection
Mating is a connection of parts in which they fully or partially fit into each other. The rafters are connected to the mauerlat or beams by cutting or using a tooth with a tenon, creating nodes.
The upper part of the rafter leg is laid on a ridge purlin with partial or complete connection with the other rafter leg. A simple rafter system assembled from boards turns out to be no less durable than one made using wooden beams and poles. The boards are built up or connected in a certain order, and in some cases their use turns out to be more advantageous compared to heavy timber, both in terms of versatility and economy.
You can give examples of rafter systems made from boards, such as a roof structure with an attic, which can be insulated and converted into an attic. To increase the length of the legs, rafters are sometimes used, connected by two boards with a gap. The peculiarity of this design is that it is enough to attach single rafters in the lower part of the system, and paired elements in the upper part.
In this way, you can save on building materials, and assembling the rafters with each other and with the crossbar is easier. Liners made from scraps of legs are laid between the rafters so that the distance between them is no more than seven heights of the connected boards. In this case, the flexibility of the rafters paired between the liners is zero, and it can work as a single element. In this case, the length of the liners should be twice the height of the boards or more (read also: “What is the distance between the rafters, calculation method”).
Folk remedies
Various products have become popular among people that also effectively eliminate damage to furniture. Most of the methods described do not require any special costs and are easy to use.
Walnut kernel
When rubbing scratches with a walnut kernel, the damaged area is gradually filled with mass and becomes almost invisible. The procedure can be performed several times in a row to achieve a better effect. It is possible to replace the kernel with nut oil and wipe the scratches by applying the substance to a napkin.
Mayonnaise
The effectiveness of mayonnaise is ensured by its strong penetration into the wood structure. Mayonnaise should be applied to the damaged area several times with an interval of 2 hours. After treatment, the wood will swell and the crack will fill on its own. This method can eliminate defects on any wooden furniture.
Vinegar with vegetable oil
It is recommended to treat light furniture with a mixture of olive oil and vinegar, using the components in a ratio of 5:2. The damaged area is wiped with the mixture and left for a day for complete absorption. Then the furniture is polished with a rag.
Sandpaper
Fine-grained sandpaper helps remove defects on steel furniture elements. The damage is smoothed over with sandpaper and, if necessary, treated with putty. After the material has dried, paint is applied to match the color of the product to mask the area.
Mastic
You can paint over small scratches on wooden products with mastic. The material is distributed on the surface and rubbed with a napkin. To make your own mastic, you need to melt 40 g of wax, add 30 g of turpentine and a teaspoon of alcohol, and then mix thoroughly.
Colored crayons
Colored crayons contain wax, which allows you to paint over scratches. To achieve the desired effect, you just need to choose the right color crayons.
Paraffin
Candle paraffin is kneaded, applied to the damaged area and rubbed until the defect is eliminated. When processing glossy furniture, you need to wipe the surface with a soft cloth after completing the restoration. It is enough to remove the remaining paraffin from the matte surface.
Eyebrow pencil
Applying an eyebrow pencil to scratches can visually hide them.
The disadvantage of using this method is that the pencil wears out quickly, which is why you have to constantly touch up defects on the furniture.
By mixing ground coffee beans with a small amount of liquid, you get a semi-thick substance to remove scratches. Apply the substance to the scratches using a cotton swab or disk. You can eliminate defects with coffee only on dark furniture.
Lemon juice and oil
A mixture of lemon juice with vegetable or olive oil in equal proportions is also suitable for treating damaged furniture. The mixed components are applied to a clean, lint-free cloth and the surface is polished, making movements in the direction of the scratch.
How to glue chipboard together?
They are nailed in a checkerboard pattern, one after another.
If the bevel cutting method is used, the touching ends of the rafters are cut at an angle of 45 degrees. Then the ends of the rafters are connected together and fastened in the middle with a bolt having a diameter of 12 or 14 millimeters.
As for how to build up rafters with an overlap, the wooden elements are placed on top of each other with an overlap of a meter or more; it is not necessary to observe the accuracy of the cut of the rafters.
Then, as in the case of end-to-end rafter connections, nails are nailed over the entire area of contact of the spliced elements in a checkerboard pattern.
Instead of nails, you can also use studs, secured on both sides with washers and nuts. The elements of the rafter system must be connected in such a way that the minimum load is placed at the junction points. To connect the rafters to the Mauerlat, rafter brackets are used.
How to hide deep cracks
Very noticeable damage to furniture cannot be easily hidden with improvised means. To restore the original appearance and restoration requires a comprehensive approach to solving the problem.
Preparing the site
Before starting work, you need to thoroughly clean the surface of the furniture from dust and dirt. The cleaned area is coated with a degreasing agent and allowed to dry. Also at the preparation stage, you need to decide what material will be used to hide defects.
Applying the material
The purchased material is applied with a suitable tool or cotton pad to the damaged area. When applying, try to ensure uniformity. Excess material is carefully removed with a spatula.
Grouting the surface
After treating the scratched areas, you need to wipe the surface. During this procedure, the furniture coating becomes smoother and more even. As a rule, fine-grained sandpaper is used for grouting.
Painting
A layer of paint is applied on top of the applied masking material, which matches the color of the rest of the furniture. Paint not only visually hides defects, but also provides additional protection against new damage.
Twin rafters
Paired rafters are made up of at least two boards, which are placed close to each other with their wide sides, leaving no gaps, and are stitched along the entire length with nails in a checkerboard pattern, one after another.
Lengthening rafters from paired boards occurs by simultaneously joining the parts end-to-end and overlapping to the second rafter board, due to which not only the length of the element increases, but also its strength. When choosing rafters, you need to pay attention to the fact that the distance between the joints of the joining boards is more than one meter and is located on the product in a checkerboard pattern. The hinge joints should not be opposite each other, and each joint should be protected by a solid board.
Sloping rafters are the longest elements of rafter systems, and the best material for their creation is a paired rafter board.
How to splice timber along the length, watch the video:
Features of working with glass surfaces
In order not to damage the fragile glass surface, you need to take into account a number of nuances during processing. The main rule is to be careful. It is also important to select suitable products that do not harm glass products to complete the work.
Paste GOI
Deep scratches on glass can be removed using GOI paste. If possible, glass should be removed from furniture for ease of processing. A small amount of paste is applied to the fabric and spread over the surface. Then rub the product in a circular motion into the damaged areas. Remains of GOI paste after treatment are removed with a damp cloth.
Nail polish
Minor scratches on the glass coating can be easily masked with nail polish. A prerequisite is the transparency of the varnish. The substance must be applied with a brush to the scratched areas and wait until the varnish fills the crack and dries. The remaining varnish is carefully wiped off the surface with a soft cloth.
Selection rules
To purchase suitable glue for furniture, you need to consider simple rules:
- type of surface: usually it is written on the packaging what materials the product is intended for;
- type of coating base: furniture glue can hold all parts together efficiently, but the base is damaged, so you should choose a product based on synthetic elastomers;
- composition: there should not be trichloroethane, which is very harmful to human health;
- presence of solvent: the components are harmless to humans;
- color: usually the product is presented in white or yellow, so it must be selected to match your furniture;
- density of the product: you need to choose an indicator not lower than 1.1 g/cm 3, which will be enough for high-quality work.
Simple rules will help you purchase the right product and properly repair the product.

