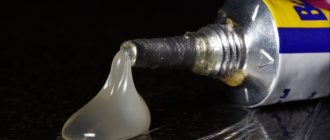
During work, superglue can get not only on the surfaces being joined, but also on your hands, clothes, chipboard and other surfaces. In addition, the materials may not bond properly. This article is devoted to how to remove superglue using improvised and special substances.
Method one
Superglue stains can be cleaned with acetone or nail polish remover. You need to generously moisten the stained area with liquid and after an hour, rub the surface with a cotton cloth or a soft brush, such as a toothbrush. In some cases, it is necessary to repeat the procedure several times until complete removal. When using acetone, check in advance on an inconspicuous area to see if the liquid will cause discoloration of the surface or other damage. When removing stains from the fabric with acetone (it is recommended to proceed only after the glue has completely dried), you should place cardboard or white paper under it so that during the cleaning process the fabric does not stick to the table or other surface.
Method two
There is a chance that hot water and soap will help remove the superglue. This method is most suitable for removing dirt from hands and clothes. You can use both liquid soap and bar soap, as well as various scrubs or rich creams for the face and body.
Method three
To clean superglue, you can use Dimexide solution (sold in pharmacies without a prescription). A small amount of liquid should be applied to a cotton swab, thoroughly rub the stain and rinse with warm water.
Method four
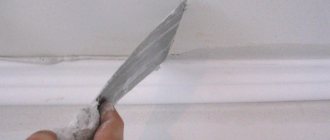
Another method for removing superglue stains from clothes is to heat the fabric with an iron, hairdryer, or cool it in the freezer. When exposed to high or low temperatures, the glue will become brittle and can be carefully scraped off, for example, with the blunt side of a knife. You can remove superglue with a pumice stone or a nail file, if treatment with abrasives does not lead to further damage to the base.
Method five
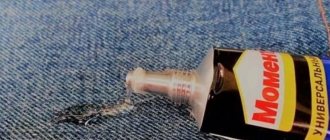
High-quality superglue is quite difficult to remove with improvised means, since it is resistant to moisture, chemical agents and exposure to high or low temperatures. In this case, you cannot do without a special superglue remover, which can be purchased at a hardware store. Anti-adhesive “Second” copes with its task “excellently”. It removes even old stains from instant glue of any brand, as well as traces of chewing gum. Thanks to a special formula based on propylene carbonate and colloidal silicon dioxide, the anti-adhesive is not only extremely effective, but also practically does not damage surfaces, including paintwork, and does not irritate the skin. To remove superglue stains from your hands, just apply the product for 10-20 minutes. For substrates such as plastic, fabric, wood and others, it is recommended to increase the exposure time to several hours.
I wondered how to remove superglue from the car body, because the badges on the trunk lid were partially set on the glue. I found a video on YouTube where they remove glue using Dimexide purchased at the pharmacy. It is inexpensive, about 17 thousand bel. rub. I warn you right away! Wear gloves, or better yet 2 pairs at once) The first time I rubbed for about 30 minutes without gloves, then my fingertips began to go numb and the skin shrank like after a shower) Then for 3 days the skin was in this state and was accompanied by unpleasant sensations...
Removing superglue from the car body
A friend and I were gluing moldings on a car door with superglue and accidentally covered the paintwork with it.
You cannot scrape off the glue; the paint will be damaged. Trying to wipe off the substance immediately after a mistake is also fraught - instead of neat transparent drops, you will get cloudy stains. There are a number of ways to solve the problem being discussed on the Internet - starting with treating the affected area with zero sandpaper, followed by polishing the body, and ending with applying a rag moistened with water to the dried glue for a whole day so that the glue soaks and comes off.
The first is too steep and expensive, the second is difficult in the conditions of the Siberian autumn and the lack of a warm garage. Someone else is trying to heat it with almost a construction hairdryer in an attempt to dry out the layer of glue so that it cracks and falls off. I don’t know, I don’t have a hairdryer, and I don’t recommend you try it.
What remains is chemistry. They sell special products for removing superglue from hard surfaces, but I didn’t even try to scrub them off; the reviews are contradictory. I found a proven folk solution. So…
How to remove dried superglue from a car body?
- “Dimexide” (an ancient medicine for external use, sold in all pharmacies in the country):
Packaging "Dimexide"
"data-medium-file="https://47-98.s.cdn13.com/wp-content/uploads/dimexid-300×176.jpg" data-large-file="https://47-98 .s.cdn13.com/wp-content/uploads/dimexid.jpg" loading="lazy" data-src="https://47-98.s.cdn13.com/wp-content/uploads/dimexid.jpg » alt=»Dimexid - packaging» width=»660″ height=»387″ data-srcset=»https://47-98.s.cdn13.com/wp-content/uploads/dimexid.jpg 660w, https: //47-98.s.cdn13.com/wp-content/uploads/dimexid-300×176.jpg 300w" data-sizes="(max-width: 660px) 100vw, 660px"/> Dimexid packaging. At the time of publication - 50-70 rubles per 100 ml bottle of 99% solution.
- Rubber gloves (medical or household):
Since I stopped at the pharmacy for Dimexide, I also took medical gloves.
"data-medium-file="https://47-98.s.cdn13.com/wp-content/uploads/medical-gloves-300×225.jpg" data-large-file="https://47 -98.s.cdn13.com/wp-content/uploads/medical-gloves.jpg" loading="lazy" data-src="https://47-98.s.cdn13.com/wp-content/uploads /medical-gloves.jpg" alt="Medical gloves" width="660″ height="495″ data-srcset="https://47-98.s.cdn13.com/wp-content/uploads/medical- gloves.jpg 660w, https://47-98.s.cdn13.com/wp-content/uploads/medical-gloves-300×225.jpg 300w" data-sizes="(max-width: 660px) 100vw, 660px"/> Since I stopped at the pharmacy for Dimexide, I also took medical gloves.
- Something like a large cotton swab (if there is very little unwanted superglue, regular hygienic cotton swabs will probably do):
In my case, the “cotton swab” was a stick from Chinese or Japanese cuisine with cotton wool wound around the sharp end.
» data-medium-file=»https://47-98.s.cdn13.com/wp-content/uploads/cotton-swab-300×183.jpg» data-large-file=»https://47 -98.s.cdn13.com/wp-content/uploads/cotton-swab.jpg" loading="lazy" data-src="https://47-98.s.cdn13.com/wp-content/uploads /cotton-swab.jpg" alt=""Cotton swab"" width="660″ height="403″ data-srcset="https://47-98.s.cdn13.com/wp-content/uploads/ cotton-swab.jpg 660w, https://47-98.s.cdn13.com/wp-content/uploads/cotton-swab-300×183.jpg 300w" data-sizes="(max-width: 660px) 100vw, 660px"/> In my case, the “cotton swab” was a bamboo stick from Chinese (Korean, Japanese) cuisine with cotton wool wound around the sharp end. Therefore, if you follow my path, do not forget to buy some cotton wool at the pharmacy.
- A small wooden or plastic scraper for carefully removing soaked drops of glue (in my case the scraper was the back end of a chopstick).
- Water and a clean dry cloth.
Dimexide is a nasty thing, so you should only work with it with gloves. This drug is used as an adjuvant to speed up the penetration of other drugs through the skin. On automobile forums they write that Dimexide is toxic, but this is a clear exaggeration. However, it is not recommended to work with it indoors. It’s better outside or in a large ventilated garage box, wearing a mask.
We put on gloves/mask, moisten cotton wool (if you don’t have a “q-tip”, a piece of clean, coarse cloth will do) with “Dimexide” and begin to rub the dried glue, trying not to touch the plastic. As soon as you feel that the glue has softened and become viscous, collect it on cotton wool (rags, a rag) or clean it off with a scraper.
A thin layer of glue begins to come off almost immediately, after two or three minutes; With the thicker ones, you will have to tinker, alternating chemical treatment and scraping. Be patient. Keep an eye on the cotton wool (fabric, rag) - the rags lined with the removed superglue must be changed periodically. Once finished, rinse off any remaining product from the surface to be treated with water and wipe with a dry cloth.
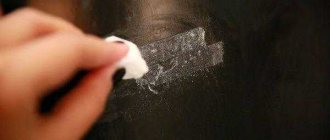
This is what my problem looked like before processing:
After processing, whitish traces remained, but the glue was practically invisible:
Most likely, the whitish traces are the remains of glue, smeared in a thin layer. Obviously, he didn't get it right. Based on its chemical composition, Dimexide should not damage the paintwork. In any case, remove the glue carefully, in good light, and have a clean rag and water ready to wash off the chemicals if something happens. And don’t forget about plastic - Dimexide corrodes it. Good luck.
Source
How to remove super glue from a car body
- To the beginning of the forum
- Forum Rules
- Old design
- FAQ
- Search
- Users
For example, I know that if you soak a super glued joint in water, it will quickly fall apart. It can just be soaked with water (if it hasn’t corroded the paint, of course).
I saw Contact superglue remover liquid on sale.
At a Karcher car wash, everything will fly off. At the same time, you’ll save the car.
PS: just don’t forget about the doors and locks, otherwise, as you put it, “the frost has hit.”
Here's what I found on the net: Since its appearance in the world, superglue has created legends and myths around itself. So, one of them says that this glue was invented for gluing combat wounds during the Vietnam War. In fact, cyanoacrylate superglue was invented by American Harry Coover, a soldier during World War II. Coover was searching for clear plastic for gun sights and accidentally came across a cyanoacrylate compound. This did not solve his problem, as the newly invented substance hardened and ruined all the laboratory equipment.
The new glue was patented in 1955, and in 1959 its unique capabilities were first demonstrated on American television in a famous TV show. The presenter of the program was lifted into the air using two steel plates connected to each other by one drop of superglue. And later, people never ceased to be amazed at the extraordinary properties of superglue. In America, public glue tests were held, where people, televisions, and cabinets were lifted into the air, gluing them to a tap with a few drops of superglue. The glue won, lifting the car up several meters (!)
Cyanoacrylate superglue (aka instant glue) instantly bonds non-porous surfaces, even when wet. It is great for metal, wood, ceramics, porcelain, cardboard, leather, rubber and cork.
Seconds superglue has gained immense popularity among people involved in modeling and miniature crafts. It is also great for small renovation projects around the home, cottage and office, and anywhere that requires heavy-duty instant bonding.
An interesting answer to an interesting question: - If superglue sticks everything together, why doesn't it stick to the inside of the tube? — In fact, cyanoacrylate superglue is a two-component glue. For it to harden, a component such as moisture in the air is required.
How to remove “super” glue on paintwork without consequences.
Why did I go crazy today)))Two entries at once) In general, yesterday I washed myself after the winter and since it was already too late, I didn’t really look closely at the condition of my car’s paintwork. In the morning, approaching the car, I saw the tires on the fender above, leaking... I thought it was varnish... then I turned my head on - no varnish, it wasn’t hot... and it’s unrealistic. A few minutes later it dawned on me - I had recently glued gum under the hood... and during the work it apparently dripped... and since the car was dirty, I didn’t notice it at all. This nasty thing turned out to be super glue. He froze quite strongly. The degreaser didn't take it.
I went online and read the advice of one car enthusiast - buy DIMEXID at the pharmacy.
and treat the area. I went to the pharmacy and bought this product and ear sticks.
I started treating it and it really is slowly rubbing off without causing any harm to the paintwork.
I advise you to work with gloves and in a warm room, because in the cold the liquid in the tube crystallizes. The method of application is simple - apply, wait, wipe off. And so on in several stages until you get the desired result. In general, I wiped it off and then polished it with paste and a machine.
You can also use this product in a salon.
Source
What will be needed for processing?
To remove glue, use universal glass cleaners, which can be purchased at any hardware store. However, if such a composition is not at hand, you can use simple analogues, for example:
- White Spirit;
- acetone;
- kerosene;
- petrol;
- ammonia solution (ammonia);
- paint solvents;
- vegetable oil (composition does not matter);
- regular dishwashing detergent;
- liquid soap.
In most cases, it is more convenient to remove glue from glass not by hand, but by using special materials that can be found in any home. It can be:
- thick microfiber cloth;
- sponge for washing dishes;
- an ordinary clean rag;
- cotton pad;
- stationery eraser;
- plastic spatula;
- bottle brush.
How to remove tint correctly (for the future)
To leave a minimum of glue from the film, you need to know how to properly peel off the tint from the glass. To carry out dismantling you need to prepare:
- Construction hair dryer;
- Stationery knife.
The procedure is performed as follows:
- Using a utility knife, pry up a corner of the tint film so that you can pick it up with your fingers.
- Heat the hairdryer to 300-400°C.
- Pre-warm the work site.
- Start pulling the film with gentle force. The heated glue liquefies and lags behind the glass.
- Cut off large pieces of the removed film with a utility knife, this will simplify the process.
You can easily wipe off the glue after removing the tint film if you choose the right method. To avoid damaging the glass, you need to use only proven methods and means . You can simplify the procedure and minimize the amount of glue residue by properly dismantling the tint film.
Car tinting is one of the most popular car service services. However, over time, the need arises to remove the tinting material due to its wear and tear, improper operation, adverse environmental effects, tightening of administrative sanctions for tinting, change of vehicle owner and other factors. Cleaning the glass from the film completely is not an easy task, since in most cases sticky adhesive stains remain on the surface, interfering with the normal operation of the car and worsening its appearance.
How to remove glue: top 5 ways
You can remove superglue or any other types literally in a moment, especially if the contamination is recent. However, there are also more complex cases - for them there are universal removal methods, which are described below.
Universal wiper
If the stain is already old, it is better to purchase a special product and apply it to the surface using a napkin or cotton pad. The further sequence of actions is as follows:
- Wait a few minutes until the composition penetrates the glue stain.
- Remove residues using a spatula with a non-sharp end or erase with an eraser.
- Wipe off any residue with a soft cloth. If necessary, carry out secondary treatment and rinse the surface thoroughly.
White Spirit
The composition of this product is very close to regular gasoline. It dissolves glue, drying oil, and fats well.
Instructions for using white spirit:
- Take a cotton pad and pour a little solvent on it.
- Lubricate the surface generously with the disk.
- Wait 15-20 minutes, repeat the procedure again if necessary.
- Wipe off any remaining glue using a soft cloth, eraser, sponge, etc., depending on how easily it gives in. In exceptional cases, you can use the blunt side of a knife blade (better than a stationery knife). But you need to work with it especially carefully so as not to leave scratches.
Ammonia and dish soap
In this case, proceed as follows:
- Take a tablespoon of ammonia and a teaspoon of any liquid dish soap.
- Mix both components until smooth.
- Apply the solution to the stain and wait about an hour.
- Remove dirt with an eraser, sponge or napkin.
- Wash off any remaining product and glue with water.
- Take 0.5 liters of water, pour in another 1 tablespoon of ammonia.
- Take a clean rag and wipe the surface with this mixture.
- Then rinse off and wipe dry with a microfiber cloth.
Vegetable oil
This is the most affordable product that also helps deal with simple glue stains. They work like this:
- Oil of any composition is applied to a cotton swab.
- Use it to wipe all surfaces stained with glue.
- They wait for an hour.
- Take a plastic spatula and scrape off the residue.
- If necessary, repeat the procedure again, and then wash the glass with window cleaner and wipe dry.
Liquid soap
Liquid soap is often used to wash hands. It is also good for removing glue stains:
- Take a regular bucket and pour warm water into it.
- Add 1-2 tablespoons of liquid soap and mix.
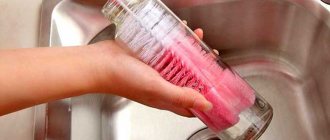
- Apply the solution to a sponge and carefully wipe the brush with it on all sides.
- Use this brush to wipe the glue stain until the remaining dirt is completely scraped off. Then rinse with the same solution and wipe.
Top 3 special tools
If simple home methods are ineffective, you can use special purchased medications. They are distinguished by high efficiency and quick achievement of results.
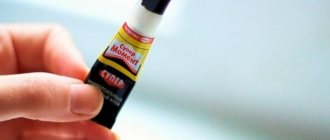
“Super Moment Antiglue” is one of the most popular and popular drugs that can dissolve superglue. It is produced in small tubes of 5 grams. The product is sold in a sealed tube, which costs about 120 rubles.
Right before use, a cap is screwed onto the tube, which pierces the factory sealed membrane. Using the thin nose of the nozzle, anti-glue is applied to the required area.
After the solvent has worked and the glue has softened, it is carefully collected with a plastic scraper and removed from the surface. To avoid streaks, the area where the stain was is wiped and dried.
The great popularity of anti-glue is explained by its advantages:
- efficiency;
- affordable price;
- ease of use.
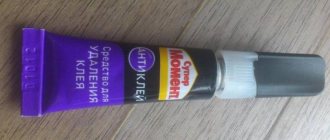
Second Anticley
The remover comes in small packaging – 3 grams per tube. Cost – from 60 rubles per tube. The product allows you to remove stains accidentally left by glue and eliminate improper gluing of materials.
Application is very simple:
- Apply to surfaces stained with glue.
- Wait 60 minutes.
- Clean the surface.
Cleaner Contact
The manufacturer produces the cleaner in two types of packaging:
- Bubble with a brush.
- Tube with nozzle.
In both cases, the Contact is well applied and distributed. The drug costs about 100 rubles. A small volume is sufficient for one use in most cases.
Contact is applied to the glue stain and left for several hours to allow the reaction to take place and the adhesive mass to become plastic. The product in the package is completely ready for use.
If the surface is not cleaned properly the first time, the application of the cleaner can be repeated. This situation can arise with thick, old superglue drips.
How to remove a sticker from a car window
Over time, it becomes necessary to remove the sticker from the car window. There are several ways to do this.
Hot water
Regardless of whether the sticker is vinyl or paper, it is attached to the glass due to the presence of an adhesive base. To completely remove it, you need to soak the glue. If the sticker was recently applied, then the adhesive layer is still fresh and can be removed with hot water.
You can remove a fresh sticker with hot water and a rag. The water should have a temperature of about 60–70 °C. Soak a cloth in water and cover the sticker for a few minutes. This procedure is repeated 2-3 times. During this time, the glue will soak and by carefully prying the edge of the sticker, it can be carefully removed. Remains of glue are removed with a rag and hot water.
Heat
This option is suitable for both fresh and long-pasted stickers. Briefly heating the glass with a hair dryer causes the adhesive layer to soften.
We suggest you familiarize yourself with How to remove sticky traces from adhesive tape on furniture?
After heating, which can be done using a household or hair dryer, the edge of the sticker is pryed off; for this you can use a plastic card. You must act carefully so as not to scratch the glass. Gradually remove the sticker and warm it with a hairdryer. If the glue has dried too much, then it will not be possible to soften it even with a hair dryer, then you need to use other options.
Use a hairdryer to warm up the sticker and then carefully remove it.
Auto chemical goods
There are special compositions in the form of aerosols or liquids, they are designed to remove stickers, labels, and traces of tape. It is recommended to use special products for cars, and not chemicals intended for cleaning regular windows.
Each such drug has instructions according to which you must act. Typically the liquid or spray is applied to the sticker and left for a few minutes. After this, the sticker should come off.
Using auto chemicals you can remove old stickers
Over time, exposure to the sun hardens the adhesive and makes it difficult to remove. In this case, you need to use the selected product several times until the sticker is completely removed and all the glue is removed.
If you urgently need to remove a sticker and it is not possible to use special means, you can do this with a solvent, alcohol, or nail polish remover. Moisten a rag with the existing composition and apply it to the sticker. If the sticker is vinyl, then first you need to peel off the top layer, and only then apply a cloth.
After the sticker has become wet under the influence of alcohol or solvent, it is removed using a plastic scraper
When using solvent or nail polish remover, you must act carefully so that it does not get on the car’s paintwork. After this, stains may remain on it.
Many car enthusiasts have such a universal product as WD-40 in their car or garage. It not only helps to unscrew rusted bolts. You can also use it to remove stickers from glass.
WD-40 is applied to the cloth, after which it is covered with a sticker that must be removed. If the top is vinyl, then it needs to be created. You can simply place a cloth above the sticker and the liquid will flow under the sticker. You need to wait 5-10 minutes and you can remove the old sticker.
Basic DIY film removal methods
You can have the tint removed by a mechanic, but there is a chance to save money by doing it yourself. Removal methods:
- Fast. You need to take the film by the edge, hook it with a sharp part, then pull it off sharply. Typically this method is used in emergency situations.
- Gradual. Tinting is removed slowly, with gradual heating. First, you need to pick up the film by the edge, then take a hair dryer and apply hot air. Heating to +40...+60 degrees is enough for the material to gently move away from the glass. Typically, most of the adhesive composition remains on the film when heated.
The second method is more effective; it allows you to remove the tint with a minimal amount of dirt remaining. Unfortunately, not everyone has a hair dryer, so the process is not always possible. Also, with strong heating, there is a risk of damage to the plastic on the doors; they will have to be covered with wet rags first. You cannot warm up the glass to more than +60 degrees, this will cause a violation of their integrity and deformation.
If it is not possible to warm up the glass, you can remove the tint from it with a soap solution. The film is lifted by the edge and slowly pulled off, pouring the solution over it. Add liquid liberally to the area where the adhesive joins the glass to reduce adhesion. Some of the glue will still remain, but no more than 10-15%. It is imperative to wipe it off: the side windows will begin to roll down poorly, and a lot of everything will stick to them.
Marks from masking tape
If the tape was applied a long time ago and has not yet been torn off, do not rush to remove it. First, you need to thoroughly moisten its outer layer with hot water so that it flows under the surface and soaks the base. After this, the remaining glue stain can be easily removed using ordinary detergent and a sponge, napkin, etc.
If the tape has already been torn off, you can use a regular office eraser, and use any of the described compositions as a means - vegetable oil, white spirit, etc.
Here are a few more remedies for removing glue in such cases:
The purchased products are used according to the instructions: apply to the surface for 15-30 minutes or longer, then remove any remaining dirt.
Aggressive means
It is necessary to use aggressive substances for cleaning with extreme caution, because... they can ruin the thing completely.
The most effective of them include:
Before using one of the above products, it is recommended to test on a small, inconspicuous place and only then begin work.
“Moment” and “Second” glues are considered especially durable. Therefore, the question most often arises is how to remove glue from plastic.
Effective ways to remove stickers
When removing a sticker from a car window, you must not only remove the sticker and adhesive residues thoroughly, but also not damage the glass.
When removing a sticker from glass, you must not:
- use boiling water. This may cause cracks to appear on the glass;
- use abrasive tools. This way you can remove the sticker, but the glass will be damaged;
- use sharp objects. They can also damage the glass, so to pry off the edge of the sticker, you need to use a plastic card or a plastic scraper.
There are several ways to remove a sticker from a car window. The simplest and cheapest is hot water, the most expensive is special auto chemicals. The choice of sticker removal method depends on the composition and age of the glue. By making the right choice and doing the job carefully, you can get rid of any sticker.
When asked how to remove stickers from a car, there are no clear instructions: the outcome of the process depends on many factors, in particular, the period it was on the car, the quality of the emblem itself and its adhesive, and location.
We suggest you read How to make white shoes white again
First, let's look at the options for removing a sticker from a car body. Professionals call the method of heat treatment of the surface as the most effective option for removing patterns from vehicle body parts, which will help soften the adhesive base, with the subsequent possibility of eliminating the sticker.
The process of removing the pattern must begin by cleaning the surface of the car sticker and the area around it from dirt accumulations. Next, you need to carefully start heating the sticker, without pressing the hair dryer too hard against the surface, so that the heat treatment does not damage the paintwork. It is recommended to work from the center to the edges, so that when heating is completed, the edging does not have time to cool; try to quickly pry off the edge of the sticker with a spatula or thin plastic device.
It is strictly not recommended to use knives or blades, the use of which has a high probability of damaging the paintwork with any incorrect movement. Ideally, the sticker will come off in one layer, however, if it has been on the car for more than two years, there is a high probability that the glue has already undergone a polymerization process, has shrunk, and the emblem will be removed in parts. In such a situation, it may be necessary to reheat the surface and take more time to completely remove it.
The second effective method of removing the emblem is the use of special solutions designed directly for removing vinyl stickers. To remove the film, it is enough, according to the instructions, to apply the product to the work surface, wait a while, after which it can be removed with a rubber spatula or cloth.
Regardless of the film removal option, after its complete removal, it is necessary to treat the surface with gasoline, degreaser or alcohol solution. If the sticker has been on the car for a long period of time, the car owner should be prepared for the fact that the place where the film was located will differ in shade from the main color of the car body. To even out the tone, you need to treat the car with a special polishing paste matched to the color of the vehicle.
Professional body polishes
Stickers on glass surfaces are often much easier to remove. Initially, you can try to remove the pattern from the glass, after preliminary cleaning the surface, using a spatula or a thin knife blade. If this option does not produce results, the object is firmly stuck to the surface, the question of how to remove a sticker from a car glass suggests similar options for carrying out the process, just as in the procedure for removing film from body parts.
When working according to the first option, heating with a hairdryer, it is important to take special care, gradually warming up the surface, which will avoid glass breaking due to temperature changes. If the glass on your car is not tinted, you can use acetone, which will quickly and effectively cope with the task.
Some car owners advise using folk, unconventional methods to remove old stickers, such as soaking with vegetable oil, vinegar and other household substances, however, the effectiveness of such methods has not been proven.
Materials required for work
Most modern car stickers, presented in a decent assortment on the market, are made on the basis of high-strength, reliable, moisture-resistant, temperature-resistant vinyl. Emblems and images are primarily intended for one-time use, have an adhesive surface, and have a decent service life, sometimes more than three years. Such super-positive quality characteristics position car stickers from the best side, which, from a different position, causes difficulties when they need to be removed.
Before starting to remove the sticker, the car owner should prepare accordingly: purchase the necessary materials and tools for the work, prepare himself mentally for a responsible, jewelry-making process that requires scrupulousness and diligence. Materials may vary depending on the method of carrying out the procedure, however, there is a clear minimum, which looks like this:
- Warm water and several small clean rags to pre-clean the surface from dirt accumulations and treat the surface under the sticker after its removal. Car shampoo or any other non-aggressive detergent may also come in handy.
- A professional or powerful household hair dryer for heating the adhesive base in order to soften it before removing the picture.
- To directly undermine the edge of the emblem and remove it, you will need a plastic spatula; as an alternative, an old plastic card or other durable, non-metallic, flat object may be useful.
- As a liquid for eliminating residual components of the adhesive base, you can use either special solutions, having previously purchased them at a car store, or gasoline and kerosene available to each car owner. You should be very careful when choosing a liquid so that it is not aggressive to the components of the paintwork.
- If you intend to remove an adhesive object from the body, polishing paste will be needed to smooth out the discrepancy in the color of the body with the area that was under the sticker.
In addition to preparing the materials necessary for direct work, it is important for the performer to focus on his safety. When working with aggressive components, it is important to take precautions, wear thick work clothes, gloves and safety glasses.
Glue on car glass
In this case, it is better to use special windshield wipers:
- WD-40;
- KERRY;
- KUDO;
- dimexide (leaves behind a rather unpleasant odor that takes a long time to dissipate), etc.
Gasoline solvents - gasoline itself and white spirit - are also quite suitable. When working, it is better to use only soft tools - a napkin, an eraser, a plastic spatula, etc. If you remove a stain with a knife, you can easily scratch the surface, and then repairing the glass will cost much more than cleaning it.
Common mistakes made by car enthusiasts
Auto chemical goods
The methodology for removing stickers, if they remain on the car for a long time, even with careful implementation of the process, can result in an unpleasant precedent, in the form of glue residues on the surface that cannot be eliminated. The question of how to remove glue from a sticker from a car is relevant among car owners, since the use of an unsuitable liquid can result in damage to the paintwork, with the need for a complete repainting of the car, or in a chemical effect on the glass, with its subsequent clouding and the need for replacement. None of the options is acceptable for car owners, as it involves significant financial costs.
We suggest you familiarize yourself with How to remove glue from a sticker on a refrigerator
There are a lot of alternative options to removing the glue after sticking. Professionals recommend using undemocratic means for this purpose, such as solutions for eliminating bitumen stains or special silicone-based substances designed to remove glue from body parts; amateurs position the effectiveness of budget options in the form of kerosene, gasoline and degreaser used when painting vehicles . After cleaning, it is necessary to wash the working surface with a soap solution, which will remove residual fragments of the adhesive base.
In a situation with tightly ingrained adhesive inclusions into the structure of a car's paintwork or when it is necessary to eliminate the paste after using adhesive tape to cover the boundaries of the paint surface during painting work, which is much more difficult to deal with than washing off the adhesive after sticking, more radical measures are used.
The fight against fragments of the adhesive base involves the use of sanding the problem area using zero-grit sandpaper or a rubber roller specially designed for such work, used as an attachment to a drill. The grinding method gives a 100% result, however, after this procedure, mandatory polishing of the vehicle body will be required.
An incorrect approach to removing stickers from the body or glass of a car can not only fail to produce results, but also result in serious problems. The most common mistakes when performing work on removing car stickers are the following mistakes with an unfavorable outcome:
- Heating the surface at high power with a hair dryer.
- Using metal-based tools to clean the surface.
- The use of mixtures that react aggressively with paintwork.
- Simultaneous use of chemical treatment methods on the sticker with heat treatment.
Such errors entail permanent damage to the paintwork, which results in the need for repainting or fragmentary painting of the vehicle.
Ignoring safety precautions when working with active chemicals poses a significant danger to the health of the performer. Working without protective equipment can lead to problems with the respiratory organs if special masks are not used, and contact of the performer with aggressive chemicals can cause burns.
Let's sum it up
Stickers and film vinyl coating on cars are actively used by car owners as an improvement in the appearance of the vehicle. The process of pasting, especially small-sized stickers, is one of the most affordable tuning options, which explains the popularity of this method of improving the design of a car.
Problems arise at the stage when the pasted pattern you like becomes boring or other reasons arise that imply the need to remove the emblem. Coping with this task is not always easy, since modern-made car stickers are distinguished by decent strength and durability. This article presents effective methods for dealing with stickers and glue fragments that remain when they are removed, using which any car owner can solve the problem at home.
The best prices and conditions for the purchase of new cars
Removing glue from hands
You should not “rip off” the remaining superglue from your hands - otherwise there is a real danger of scratching the skin and even tearing it off. Therefore, it is better to take a cotton pad and apply one of the following products with it:
- nail polish remover;
- petrolatum;
- vegetable oil;
- hand cream;
- White Spirit.
If there is water-based office glue left on your hands, simply wash your skin well with warm water and soap or dish soap. The same method helps remove superglue residue, but only if the stains are completely fresh. The remaining stain can be carefully cleaned out using a pumice stone.
How to clean the rear window of a car from glue
It is impossible to clean the heated rear window of a car using a scraper or blade. The heating filaments can be damaged, so it is better to use other methods.
When removing film from the rear window, proceed in the following order:
- Remove all seals from the window. This will provide free access to the edges of the tint film.
- Wet the glass with the prepared solution, paying special attention to the top part of the tint. The solution should penetrate under it.
- Separate the coating from the glass and carefully pull it down with both hands. Wipe off any remaining glue immediately.
How to remove superglue mechanically
Use a sharpened knife or thin blade to remove the glue layer by layer. After mechanical cleaning, small traces are washed off with water or soap solution. The method is used only on large areas of contamination with a significant thickness of spilled superglue.
A mechanical cleaner can be masking tape. It is glued onto the dirt and forcefully torn off the plastic. The technique is very controversial because it does not guarantee results, and the risk of damage to the plastic is quite high.
You can wipe off traces of glue from the plastic with a wire wool or a knife. To soften the adhesive layer, first place a container of boiling water on top of it for a few minutes.
Source
Non-aggressive cleaning methods
Non-aggressive substances are an excellent option for removing super glue from plastic, especially if the plastic is thin or of low quality. It is recommended to clean poor quality plastic from super glue with caution, because... there may be a risk of damage. In this way, gentle means are used, such as:
- water;
- soap solutions;
- ethanol;
- vegetable oil;
- wiper.
Plain water is a great option for removing super glue from plastic.
Place a damp rag on the damaged surface and leave it on the stain for about a day, periodically wetting it so that it does not dry out. During this time, the glue begins to soak and can later be removed.
In this case, it is worth taking into account the degree of contamination and age of the glue. Cleaning with water will only be effective if the stain has not yet become deeply embedded in the surface. Otherwise, you will have to remove the adhesive layer by layer. This procedure may take several days.
Soap solution is another method for removing super glue from plastic.
It acts on pollution much faster than water. Liquid soap, laundry soap, scented soap, etc. are suitable for it.
Fresh stains can simply be wiped with a soapy cloth. Old ones are soaked in the same way as with water, but the time for dissolving the glue is reduced to several hours.
After time has passed, the surface is thoroughly wiped with a coarse cloth. After this manipulation, the stain usually disappears completely.
Alcohol evaporates and dries quickly, so it can only soften the top layer of glue.
It is used when the area of contamination is small and the glue drop has a small thickness.
Vegetable oil is applied to the adhesive substance for half an hour, after which time it is washed off with water or soap.
To completely remove oily deposits from a surface that cannot be wet (for example, a laptop), it is treated with alcohol or acetone.
Windshield wipers get rid of fresh, not dried stains.
You may need to apply glass cleaner twice to completely remove the sticky substance.
More detailed information on how to remove super glue from plastic can be found in the video instructions.