The transparency of the headlight glass must be ideal, since a powerful luminous flux passes through it, which, if there are deviations in the optics of the deflector, can both reduce the driver’s visibility and blind oncoming cars. Cleaning and polishing the outer surface of the headlight, removing dirt from the inside, differ in the method and complexity of implementation, but their importance is the same.
Methods for cleaning headlights and necessary tools
Cleaning headlights can be chemical or mechanical. In the first case, various substances are used to either dissolve contaminants or significantly reduce their adhesion to the glass surface.
It should always be remembered that if the deflector is glass, then a much wider range of detergents can be used, while caps made of polycarbonate or other plastic can be irreparably clouded by the most unexpected cleaning agent.
When mechanically cleaning, you also need to remember the different hardness of glass and plastic parts:
- The former are much more difficult to scratch unless you use very coarse abrasives.
- The latter cannot withstand even just wiping with a rag, since any fine abrasive and dust will leave a network of scratches that can only be removed by deep polishing.
Tools and consumables you will need:
- detergents depending on the chosen cleaning method;
- technical rags that do not release fibers during use;
- masking tape and electrical tape, which are best checked to see if traces of glue can be easily removed from the surface;
- wire, nylon fishing line and magnets for penetration into hard-to-reach places;
- vegetable oil;
- a set of tools for assembly and disassembly operations;
- industrial adjustable hair dryer for softening sealant;
- toothpaste as a cleaning and polishing agent;
- knives of various configurations and sharpness.
Of course, the main cleaning agent will be plain water.
We fight yellowness and bluish bloom
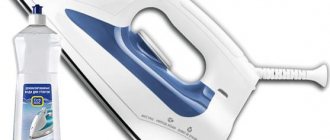
Plastic headlight polishing and protection kit includes cleaning abrasive paste, protective spray and microfiber cloth
To quickly eliminate cloudy deposits and yellowness, just pop into an auto chemical store and choose a DIY headlight polishing kit. Various manufacturers have been offering something similar in retail for a long time. For example, the German brand Autosol has in its arsenal a convenient kit called “Set for polishing and protecting plastic headlights.” It includes a cleaning abrasive paste, protective spray and a microfiber cloth.
In the end, everything is done right in the parking lot. First, as mentioned above, the contact surface must be isolated with masking tape from adjacent parts. Headlights that have been cleaned of dust and dirt (an important point, since remaining debris can severely scratch the surface when wiped) should be carefully coated with restoring paste and polished by hand using a napkin.
By applying some effort for 10-15 minutes, you will be able to notice that the picture changes and the body becomes more transparent. At the end of this stage, the plastic is thoroughly washed with a stream of water or cleaned with a napkin so that no abrasive particles remain on the surface.
Ideally, the headlights should regain their original appearance, as if the car had just come out of the showroom. But to consolidate the result, a mild spray is used. This preservative is applied to the cleaned surface, after which, if necessary, it is wiped to a glossy shine with a microfiber cloth.
How to clean the inside of a headlight without removing it from the car
When cleaning the inner surface of the deflector, especially reflective surfaces (reflectors), it is better to remove the headlights.
Moreover, on most cars this will not pose any significant difficulties; at most you will have to dismantle the decorative parts of the false radiator or loosen the bumper fastenings.
But if this is undesirable, then you will have to put up with the inconvenience and work on the spot.
Cleaning with magnets
To press the cleaning cloth with the product applied to it, you can use two fairly powerful magnets.
One, with the help of a wire tied around it, is inserted inside the headlight housing, from which the lamp sockets, lenses and additional reflectors have been removed, the second is brought outside.
The magnets attract each other, after which the inner one begins to follow the trajectory of the outer one, wiping the headlight glass. The operation continues until complete cleaning, after which the body is washed and dried.
Technology for removing dirt from the reflector
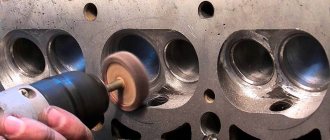
The reflector (reflector) is located inside the headlight housing. You can clean it using a piece of fairly stiff wire, bent in place and wrapped in a lint-free cloth.
The wire is inserted into the headlight through the holes for the lamps and, due to the bend given to it, allows you to press the napkin to the reflector.
Note: Reservation of headlights with film, photo and video instructions
You must act with extreme caution, without applying force or using aggressive substances. Deformation of the reflector is not allowed, as is damage to its reflective layer, which is usually made in the form of a very thin coating.
At the end of work, the reflector must be thoroughly rinsed and dried.
Causes
It is much more important to understand why oil is flowing through the breather in the engine, since this will allow us to establish the cause and eliminate it. On your own, or with the help of specialists, is no longer of fundamental importance.
It is interesting that some reasons may not be directly related to the ventilation system at all.
Among the main causes of oil in the breather are the following:
- Severely worn piston rings and piston rings. This leads to the fact that a large volume of gases enters the crankcase of the power unit, and standard ventilation does not have time to cope with them. As a result, increased pressure in the internal combustion engine and squeezing out oil through the breathing valve.
- The oil separator drain channel has become clogged over time. As a result, the separated oil has no choice but to mix with the gases passing by it.
- Problems with the air filter. Or rather its pollution. When operating, the motor requires a large volume of air. If the filter becomes clogged, the engine senses a lack of air and begins to suck it in from other available sources. This is basically a ventilation system.
- Excessive oil volume in the system. A common mistake made by beginners who change the oil themselves for the first time and fill in more than required. The excess ends up in the ventilation.
- Valve jamming. The breathing valve itself, that is, the breather, may jam. It ceases to perform its functions fully. Hence the oil.
- Worn timing belt or valve burnout. Because of this, gas from the crankcase may end up in the space above the valve. Then it enters the crankcase, the pressure increases, and the oil is squeezed out.
As you can see, you shouldn’t immediately blame the breather for all the troubles.
How to wash the inside of a headlight without disassembling it
To perform this procedure, the headlight will still have to be removed. But the quality of work will be significantly higher than more conservative methods.
But it is not necessary to disassemble it by removing the glass, especially since not all lighting devices provide for this.
Selecting a detergent
The simplest solution may be a solution of ordinary liquid soap. It works smoothly and effectively.
It is possible to use kitchen dishwashing detergents or car shampoos.
It is better not to take risks with the use of alcohol or other solvents; it can damage reflective surfaces.
Work order
You can do it manually or using a compressor.
- The headlight is removed from the car, all removable parts, sockets, bulbs, lenses, reflectors, fittings are removed from it.
- The cleaning composition is poured into the body, and all holes are sealed with adhesive tape.
- Washing is done by vigorous shaking until the liquid becomes noticeably cloudy. The process is repeated several times.
- Residues of detergent are removed by rinsing the body with distilled water; it does not leave streaks or stains.
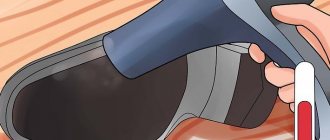
- The case is dried with a hairdryer at low temperature or compressed air.
- You can increase efficiency by placing a rag with the solution and supplying air from a compressor inside.
Cleaned surfaces should not be touched with unprotected fingers; this may leave fatty deposits, which will certainly appear due to the high operating temperature of powerful headlights.
Cleaning indiscriminately
The procedure for removing contaminants is much easier in situations where it is possible to remove the glass and disassemble the part into components.
Alas, many modern cars do not provide for the use of collapsible lenses. For the most part, they are non-separable. However, this does not mean that they do not need to be cleaned periodically. Owners of many cars are faced with the following need:
- VAZ 2110;
- Mazda 6;
- Volkswagen Passat B6;
- Renault Megane;
- Renault Duster;
- Honda Civic;
- Daewoo Nexia;
- Nissan Qashqai;
- Opel Zafira;
- Lada Vesta;
- Renault Kangu, etc.
If your car has xenon headlights, halogens, or LEDs, over time, layers of dirt and dust will still form on the optics.
All this has an extremely negative effect on the operation of the headlights. And if the optics begin to shine worse, this is a direct threat to your safety. Dim and diffuse light must be restored to normal.
To do everything correctly, and even without removal, you need to adhere to some rules and recommendations.
It will not be possible to carry out the work without removing the headlights, that is, the head optics housing itself. But it is not at all necessary to disassemble them. In addition, when it comes to non-separable lenses, you won’t be able to take them apart even if you wanted to. The maximum you will achieve is failure of the optics. Then you will have to buy a new one, the cost of which is far from small. For dismantling, use the instruction manual, since removal is carried out in different ways on different cars. For some, they are simply pulled out of the socket by snapping them off; for others, you first have to remove the bumper, radiator grille, etc.
Next, you should see step by step what this whole procedure looks like.
Don’t worry, even without removing the headlights, you can achieve a significant improvement in the quality of the glow of the optics.
Step-by-step guide to cleaning glass
First of all, be sure to clean the glass itself. It is on it that the largest amount of contaminants settles, which leads to a deterioration in the performance of lighting devices on the car.
The first step is to remove the headlight in the way specified in the operation and repair manual. And then:
Selection of detergent composition
The aggressive components of most products can damage the surface of the headlight and the reflector. When choosing, it is important to pay attention to the composition, as you can purchase a low-quality product without a degreaser.
Distilled water does not leave streaks on the surface of transparent plastic and reflector, but is not able to wash away stagnant dust or haze from burning lamps.
An excellent detergent is regular toothpaste diluted in purified water. However, such a liquid requires careful rinsing, otherwise the plastic will become covered with a white coating.
How to wash internal headlight parts:
- soap composition;
- dishwashing liquid;
- shower gel.
Cosmetic micellar water to remove makeup will also help to wash the headlight from the inside. When choosing, you should pay attention to the absence of alcohol, which can easily wash off the coating and render the optics unusable.
Quickly remove stain
There is another, faster way to clean the inside of a headlight without disassembling it. However, we immediately note that the method is not suitable for large contaminants. So, we need two magnets and a soft, clean cloth. We pre-moisten the latter in the cleaning liquid and attach it to a fishing line in the housing through the hole for the lamps. Using the second magnet we will move the internal one. Thus, we will go through all the necessary areas with a rag. At the end of the work, the rag can be pulled out by the same fishing line.
If this is not available, you can use thin wire. Please note that the second magnet (with which we will work from the outside) also needs to be wrapped in fabric. Otherwise, we will simply scratch the coating of the optics. The cleanliness of this rag is not necessary, the main thing is its presence.
Work order
Before cleaning the inside of the headlights, remove dirt from their outer surface. This will prevent dirt particles from getting under the lens glass. The next step is to turn off the lamps.
It must be remembered that during work you should not touch the glass of the lamp with your hands. This will damage the flask and the device will be damaged. All manipulations are performed without making significant efforts, so as not to damage the integrity of the components of the optical device.
The procedure for cleaning headlights from the inside requires:
If contaminants are not completely removed, the process should be repeated. Many car owners advise soaking the dismantled headlight by immersing it in a container with a prepared soap solution. The device is left in the bath with detergent for at least 2 hours, after which it is shaken and the liquid collected inside is drained.
A pair of magnets, each wrapped in a soft cloth, will help get rid of heavy dirt. One magnet is placed inside the headlight, and the other is placed against the glass outside. This way, the fabric fits tightly to the inner surface of the lens, moving the outer magnet can clean all the dirt inside the device.
It is no less effective to use a small piece of wire, which is wrapped with electrical tape up to the middle, and microfiber or soft cloth is fixed on top of it. This will be a brush that will allow you to reach the most distant areas of the surface.
After a positive result is achieved, you need to rinse the headlights by pouring distilled water inside. You can dry the cleaned inner surface using gauze, a dry cloth or a household hair dryer.
During the operation of the car, the headlights gradually become dirty not only from the outside, but also from the inside. At the same time, disassembling headlights is a rather complicated process. Therefore, many car owners are interested in whether they can be washed without disassembling them. Of course, this is quite possible, and further we will tell you how to cope with the task.
Let's get started
So, let's look at how to clean the inside of a headlight without disassembling it. Let us immediately note that dismantling cannot be completely ruled out. The optics will still have to be removed from the car. This applies to all brands, including Lada Priora. How to clean the inside of a headlight without disassembling the housing itself? After removing it from the car, you should remove all existing light bulbs from it. This:
- Low beam headlight.
- Parking lights.
- High beam headlight.
- Turn signals (if integrated into the headlight).
First you need to unscrew the protective plastic cover. By removing these elements, small holes are formed. It is in them that we need to pour cosmetic water or other cleaning agent (for example, glass cleaner or distilled water mixed with dishwashing detergent). Next, using electrical tape (or any other adhesive tape), you need to seal all the holes. Please note that you should not fill the entire headlight with liquid. It is enough to fill about a quarter of the total volume.
This procedure applies to all cars; for example, this way you can clean the inside of a Mazda 3 headlight without disassembling it. After the holes are sealed, you need to thoroughly shake the headlight. After this operation, the liquid usually turns yellow.
The next step is to open the holes and drain the dirty water. Next, fill in the liquid again and seal the holes for the lamps. Thoroughly shake the headlight housing in the same way as in the previous case. If the liquid remains cloudy, it means there is a lot of dirt inside the headlight. To remove all deposits, you must repeat this operation again.
How many times should I drain and refill the fluid? There is no exact answer to this question - it all depends on how dirty the headlight is. Experts say that cleaning should be repeated until new water remains clean after shaking. If so, the headlight is completely clean. This should be done with the optics of any car, be it a Mercedes or Kalina. How to clean the inside of a headlight without disassembling it? At the next stage, we need to completely remove the existing liquid. It does not evaporate so easily, especially if work is carried out at sub-zero temperatures. Naturally, there is no point in waiting several days. Therefore, to speed up the process we will use a hairdryer.