Schoolchildren and students, office workers - everyone who is associated with paper media uses proofreaders today. The first samples of these products appeared in the fifties of the last century. The Japanese and Americans are still fighting for the palm of this invention.
Over the past half century, the barcode has changed significantly. Several types of stationery “paint” have appeared, each of which has both advantages and disadvantages. Today, correctors are divided into dry and liquid. The first includes the most modern development - correction tape, the second - a pencil and a liquid stroke.
Expert opinion
It-Technology, Electrical power and electronics specialist
Ask questions to the “Specialist for modernization of energy generation systems”
Review of Brauberg tape corrector | Helps hide typos. Since the correction pen assumes one single design option, the existing types of these office supplies differ only in the following. Ask, I'm in touch!
Correction roller tape
This is the latest development in the world of correctors. It is a dry composition, which is enclosed in a convenient and ergonomic roller. Correction tape will correct the desired section of text in a matter of seconds: the tape applied to the paper (provided that the corrector is of high quality and is used correctly) will be invisible, not only by sight, but also by touch.
This type has its drawbacks: it will not help in correcting small point errors, its width is standard (4-6 mm), so when correcting small font with small line spacing, you can easily go beyond the edges of the lines.
Correction roller tape
This type has its drawbacks: it will not help in correcting small point errors, its width is standard (4-6 mm), so when correcting small font with small line spacing, you can easily go beyond the edges of the lines.
The Attache correction tape allows you to write immediately after correcting the text. A removable cap protects the working unit from drying out. Has an increased length (20 m). Tape width - 5 mm.
The Attache tape corrector is a compact device that can easily be placed in a pencil case or pocket. It is equally effective on any type of paper. After photocopying it is completely invisible. The device has a removable block, which can be easily replaced with a new one after using the coloring composition.
What kind of lighting do you prefer?
Built-in Chandelier
Expert opinion
It-Technology, Electrical power and electronics specialist
Ask questions to the “Specialist for modernization of energy generation systems”
How to fix putty tape if it breaks. The correction tape consists of two rollers with a tape stretched between them and a gear transmission, which is responsible for tensioning the tape. Ask, I'm in touch!
Repair of rubber products
To repair ruptures in rubber pumps used for watering streets, plants, etc., the following composition is recommended: finely chopped rubber is dissolved in turpentine, chloroform, gasoline or kerosene; Rubber in these liquids does not completely dissolve, but softens to such an extent that it acquires the consistency of a dough-like mass.
You will find other recipes for adhesives for repairing rubber products in this article.
Then the punctured and torn edges of the pump are slightly heated and rubber softened in one of the mentioned liquids is applied, after which the edges are compressed.
If after the first sealing the seal is not completely sealed, the rubber is allowed to dry and the operation is repeated.
After careful work, the damaged parts are completely repaired, so that the pump is once again suitable for continuous use.
Repair of rubber cushions, balls, etc.
The mentioned rubber products with a more or less thick shell are corrected in the following way.
First, their surface must be thoroughly cleaned of dust and dirt, then take rosin and dissolve it in 90% alcohol until a thick mass is obtained.
Carefully coat the cracks with the resulting mixture and allow the putty to harden properly. This method can be used to repair old rubber pads, knee pads, balls, etc. rubber products.
Repair of rubber raincoats
To repair rubber raincoats and other thin rubber shells, take a piece of thin sheet rubber, the size corresponding to the area to be repaired, and spread it on one side, as well as the adjacent area on the surface of the object, with turpentine.
The lubricated surfaces are placed on top of each other and placed under a press for a day.
The repaired areas then turn out to be just as impervious to water as they were before when undamaged.
It should be noted that it is most convenient to cut fresh sheet rubber with a sharp knife moistened with water.
Repair of rubber tubes
Small holes are moistened at the edges with gasoline and then filled with a piece of rubber softened in gasoline, which is then smoothed with a hot iron.
After repair, the tube can serve for a long time, and the repair site itself can, with some skill, be made completely invisible to the eye.
To prevent drying out and cracking, rubber tubing should always be kept at room temperature.
Repair of galoshes
Galoshes are thoroughly washed, dried and cleaned with a fine file. Then cut out a patch of the appropriate size, lubricate it with glue for rubber products, press it to the desired place (if necessary, tie it with twine) and allow it to dry for two hours, after which the cleaned area or the entire galosh is covered with rubber varnish.
Repair of rubber hoses
A rubber sleeve that is cracked on the outside is cleaned of dirt with warm water using a brush and thoroughly dried. It is then placed on a board and rubber repair adhesive is applied to the cracks until all the cracks are filled with it.
Attention!
Condoms cannot be repaired!
Each new layer is applied after the previous one has dried.
When the last layer begins to dry, the sleeve is wrapped in this place with canvas braid moistened with the above-mentioned glue.
If the hose has cracks on its inner surface, then the described method is unsuitable, since a thickening forms in the repaired area, around which dirt collects and a “plug” can form. In this case, cut out the damaged piece and splice both ends, inserting them into a short piece of rubber hose of larger diameter, tightly enclosing the repaired hose.
Rubber shoe repair
The rubber patch that you want to stick on rubber shoes and the damaged area are rubbed with sandpaper so that the surface of both becomes rough; then they lubricate both surfaces with glue for repairing rubber products, after which they are left alone for half an hour and then squeezed tightly.
To make the repair stronger, the patch should be cold vulcanized.
To do this, coat it after the above operation with hydrogen sulfide, to which a little sulfur chloride has been added, and then quickly press on the damaged area.
Gluing soles to boots
The following putties are suitable for gluing rubber soles to leather shoes:
- Cut 10 parts of rubber into small pieces, place them in a tin placed in a water bath and heated to 30°C, and add 140 parts of carbon sulphide. When the rubber has dissolved, add a mixture prepared as follows: fuse 10 parts of rubber with 10 parts of crushed rosin and then add 35 parts of turpentine. This putty should be stored in a hermetically sealed bottle.
- By fusing equal parts of ordinary resin and gutta-percha, a putty is obtained, which is applied hot and which adheres well to leather, rubber and various other materials.
- Dissolve 10 parts of gutta-percha in 100 parts of gasoline. This solution is poured into a bottle containing 100 parts of drying oil, and everything is shaken vigorously.
How to fix a concealer with your own hands - useful tips
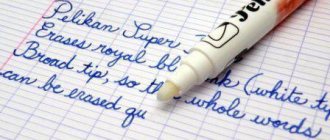
Despite the fact that I graduated from educational institutions a long time ago, sometimes I still have to use office supplies. It is for work that I use the Corrector - tape from Erich Krause.
The appearance of the corrector is a handle with a partially rubberized body, making it comfortable to hold in your hand. The corrector does not fall out even from sweaty and wet hands. Part of the body is made of transparent plastic, through which you can see how the mechanism of the corrector works.
Where to buy - at a stationery store.
The correction tape is made of the same substance as the putty pen, with the only difference being that here everything is immediately pressed into an even tape 4.2 mm wide.
Using the corrector seems to be as easy as shelling pears - take it in your hand, bring the tip with the tape to the text you want to cover, press on the paper and roll the corrector over the text. But not everything is as simple as with a pen corrector.
1. If you roll the tape, tilting it slightly, the line will turn out not straight, but inclined . And the text will only be partially colored. You will have to roll the corrector over and over until all the text is covered. As a result, it will be noticeable on paper how many times the corrector was used, and how carelessly they tried to correct the mistake.
2. No matter how hard I try, it’s impossible to paint a word in one try. For example, I covered up the word “Irecommend” after the 4th roll.
3. If you press too hard on the tip, the tape will break and the rolling joints will be visible. Sometimes it just ruins the finishing work. It’s easier to cross out a word with a line, and it will look better than a word covered with torn tape.
4. Torn edges often appear at the beginning of rolling . They have to be glued to the paper by pressing on them with your fingers. This and all other problems would definitely have passed me by when working with a regular pen putty.
Expert opinion
It-Technology, Electrical power and electronics specialist
Ask questions to the “Specialist for modernization of energy generation systems”
Corrector Erich Krause Correction Tape 4.2mm*8m - “A handy or a bad format? I'm leaning towards the second option, and I won't buy this corrector again! » | reviews To do this, you need to apply the solvent to a cotton pad, wipe the stain and leave for twenty minutes, then moisten the cotton wool with the product again and wipe the area contaminated with the barcode corrector. To completely remove the stain, you will have to change several pads. Ask, I'm in touch!
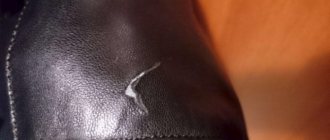
How to seal a leather jacket at home if it is torn or cracked
You can repair an item if it is torn using universal glue (for example, “Moment”) or liquid leather. Before starting work, it is necessary to tear off the section of the lining opposite which the damage is located. It is advisable to flog along the seam. The skin around the break is degreased with a solvent. Traces of the solvent itself are washed off with water and wait until the surface dries.
To repair a leather jacket at home, in most cases a patch is used. Jackets are often sold complete with a piece of leather, which is intended for installing patches. If the product was sold without a patch, use dublerin or artificial leather. After installing the patch, the lining must be sewn up.
In addition to adhesives, a brush, spatula and gloves are used. A brush is needed for applying glue to large areas, a spatula for small ones (it can be made from any hard material: cardboard, a piece of plastic, etc.). Gardening or rubber gloves will help protect your hands from adhesives and dyes.
Where to go if you have a jacket and a sofa?
Leather jackets are repaired in specialized workshops. There are professionals working there who select the best option for eliminating damage to the product.
Contact any clothing restoration shop.
In the case of a sofa, you need to contact a company that specializes in furniture restoration, reupholstery and assembly. Usually the process does not take much time, and specialists can work at the client’s home.
Each item requires careful care and attention, especially when it comes to leather versions of the product. A leatherette jacket should only be stored on hangers, and it should be cared for by dry cleaning. It is better to cover a sofa made of this material with a special cover that protects the product from damage. Take good care of your things and they will last you a long time.
How to seal tears
If there is no skin, minor damage can be repaired using a fabric patch. It is advisable to choose fabric of the same shade as the leather product. But if this is not possible, the material is repainted. Preference should be given to synthetic dense fabrics.
A piece of material is folded in half and the middle is soaked with glue. The resulting flap should exceed the diameter of the tear. Glue is applied to the edges of the patch and applied to the tear from the wrong side. After this, the repaired area remains under pressure for 12-16 hours.
Basic methods of repair at home
The skin is sutured, sealed, and a patch is applied. Also, damage is hidden with a coloring spray.
What and how to seal a hole
Minor damage can be sealed with special glue. It is applied to the front and back sides for strength. This is the easiest and fastest way to repair a jacket.
Moment
Superglue is not suitable for repairing leather items as it contains cyanoacrylate. The substance hardens when it dries, and the canvas loses its elasticity. It is better to use the regular Moment 1 Classic. The moisture-resistant and heat-resistant product does not affect the plasticity of the product. The glue is produced in tubes of 30 milliliters. A small volume is enough to repair a jacket.
To glue a part with Moment, you need to press it firmly, and then put a press on top. Unlike superglue, when using Moment, it does not matter how many minutes you hold the part for gluing. The oppression will help keep it straight and without wrinkles.
Double-sided tape
How to repair a minor abrasion or tear:
- prepare a patch;
- secure the edges of the tear on the outside with transparent tape;
- place the product face down on the table;
- cut a piece of double-sided tape with a diameter 1-1.5 centimeters larger than the patch;
- stick a patch on one side of the tape so that there are free centimeters at the edges;
- Apply the other side of the tape to the wrong side of the tear.
Using double-sided tape, you can seal the cut with any piece of fabric. The renovated space will remain flexible. If the tear is noticeable from the outside, it should be touched up.
We remove the hole using a decorative seam
In order not to bother with glue and selecting patches, you can sew up a torn jacket. There are two ways to tidy up your product:
- sew a straight, even cut with thread along the front side;
- Place a thin strip of leather over the torn edges, and also sheathe the top.
A regular “cross” is suitable for decoration. A more complex but dense goat stitch looks bright if you embroider it with threads of two colors. A decorative trim strip can be used to beautifully cover torn leather near pockets.
How to mend a gap
A large hole with a completely torn out piece of leather is covered with a patch from the outside and from the inside, under the lining. Repair method:
- tear off the lining along the factory seam;
- glue the backing on the inside and wait until it dries;
- cut out a piece of leather or substitute that follows the contours of the hole;
- insert into the hole on the front side so that the edges of the patch coincide with the edges of the hole;
- Fill the gaps between the insert and the edges of the gap with glue;
- When the outer patch is dry, sew on the lining.
If the outer workpiece is different in color, it can be painted with cream or spray dye.
The gap, closed with a piece of leather of the same color as the jacket, must be lubricated with a softening cream so that the product does not become brittle from the hardened glue.
How to seal a cut
When cutting, one backing is enough. Repair method:
- open the cut from the inside out;
- bring the edges together and seal the outside with tape;
- stick a patch on the inside;
- hold it under a load;
- After the substrate has dried, peel off the tape;
- Use a toothpick to apply glue between the edges of the cut.
Once dry, the damage will be almost invisible. You can completely hide the cut using a coloring spray.
What to do if part of the material is torn off
How to repair a torn corner tear:
- put the torn piece back in place and seal it with tape;
- turn the jacket inside out;
- tear off the lining on the torn part of the product;
- degrease the gap from the face and back;
- stick a patch on the back side of the tear;
- peel off the tape and sew on the lining.
How to seal a cut on a leather jacket
The patch should have an oblong shape. As in previous cases, the flap is glued from the inside out. If a cut appears on your jacket, you need to take immediate action to prevent it from getting even bigger. But since it is not always possible to use special material for repairs, it is permissible:
- Cover the damage with adhesive tape. Repair tape should not be used. It comes off quickly. Using an adhesive plaster is a temporary measure. The jacket needs to be repaired as soon as possible. It is worth sealing the skin both from the inside and from the front side.
- Sew it up with thread. This measure is considered an extreme measure: after stitching, there remains a seam on the jacket that is difficult to miss. It is necessary to use threads that match the color of the jacket. Only a thick needle is suitable for stitching.
Basic Tips
When repairing leatherette, you need to follow a few simple rules. This way you will definitely be able to avoid negative consequences. After all, mistakes during repairs can only worsen the situation.
- Before gluing the patch, degrease the surface. Regular alcohol will do. This will provide a more reliable grip.
- Apply liquid artificial leather in two stages. Let the first layer dry. Then apply the second one.
- Recreate the surface relief. You can use a regular napkin for this. Otherwise, you will not be able to glue the product together unnoticed.
After wearing for a long time, scratches and abrasions appear on a leather jacket. Thin leather breaks if caught on a sleeve in transport. You can repair your favorite biker jacket at home if the damage is minor.
The main difficulty is to choose a patch that matches the color. To make a beautiful repair on a leather jacket, you need to figure out how to use glue, tape, and liquid leather.
You can also use applique, fabric or decorate the item with a decorative stitch.
Repairing the collar
If there are loose areas of skin, they need to be cut off. Repairing the collar is complicated by the large amount of dirt that accumulates on this part of the jacket.
To clean dirt, you should wipe the collar with gasoline (preferably aviation gasoline). To completely remove dirt, the procedure is repeated at least 2 times.
Then the collar is cleaned of gasoline residues with a sponge and soap solution.
Since it is inconvenient to place a patch on the collar, paint is applied to the damaged areas. It is advisable to do this with a sponge. To ensure that the paint sticks, it is recommended to apply varnish on top. If you don’t have a special one, you can use a transparent manicure.
Is it possible to sew it up?
They resort to using a sewing machine if the jacket is torn along the seam or if there is a fairly large hole with a torn out piece of material.
First of all, you will need to rip the gasket, and then process the edges of the hole so that they become even. A flap should be cut out of ordinary fabric, which will be 2-3 millimeters larger than the damage on the jacket.
This piece needs to be applied from the inside. In the same way, you will need to cut out the leather material and lay it on the front side of the item.
Next, you need to arm yourself with a strong needle, which is designed for stitching leather products. When using a regular needle, there is a possibility of damaging your jacket or sewing machine.
Then you should make a neat seam that will combine the leather and regular material. However, this method is not considered a panacea, since the patch is clearly visible.
So that the result is not too noticeable, they put a few more patches all over the jacket.
Repair using liquid leather
You can seal a leather jacket at home with liquid leather. It is a polymer compound based on water and alcohol.
Rubber resin in the leather makes the treated surface elastic, which prevents the material from detaching. The skin can withstand temperatures up to 55ºC. For work, choose the product of the desired shade.
If the required color is not commercially available, products of other shades are mixed to obtain it.
If for some reason the patch needs to be removed (for example, it turns out to be the wrong shade), a solution containing alcohol is used, which must be used in the first 10-15 minutes after installing the patch.
Despite the fact that liquid leather dries out in half an hour, you can use the jacket no earlier than 8-10 hours after it has been repaired. It is advisable not to wear the item for 1-2 days.
What kind of glue can I use?
Not all types of glue will work. Do not use superglue or PVA. The first option will create a too rigid connection, which is not suitable for elastic skin. PVA will last until the first rain. This glue dissolves with water.
In order to seal a cut on dermantine, it is better to use adhesives that are not afraid of water and retain elasticity after drying. Among the most popular options:
- classic "Moment". I most often use this glue to repair leatherette at home. It is reliable, not afraid of temperature changes and moisture;
- glue for shoe repair. It can be used to repair artificial and natural leather. You can consider SAR 30E glue. It is moisture resistant, elastic and provides high strength joints. It can be used to glue leatherette to metal, rubber and other materials;
- adhesive based on polyurethane resin. For example, you can purchase Desmokol. Various dermantine items are repaired with this glue. It is highly moisture resistant and creates strong elastic joints;
- spray glue. One of the best options for repairing their leather products. It is easy to apply, guarantees a strong bond and dries very quickly. You can seal an item with an aerosol in a couple of minutes. Consider 888 Ultra glue as one option. The domestic aerosol “Multi-Spray” is also suitable.
Using these compounds you can easily seal artificial leather. But there are more complex cases, for example, when a hole appears on the surface. In this case, ordinary adhesive is not enough.
Correction tape: description. Where is tape corrector used and how to use it?
Oil based putty.
Never use petroleum based putty around double glazed windows. Vegetable oils aggressively attack the thiokol compounds of polymers, and over time they will cause frames to crack.
This is already the second film since the beginning of the year, and we haven’t even studied for a month. We purchased this tape at the Spar hypermarket at the auction price of 59 rubles, instead of 100 rubles.
On the back you can find information about the product and manufacturer contacts.
There are a great many languages there, and they haven’t forgotten about the Russian-speaking buyer. Well, we didn’t count the information, we all know how to use it, it’s not our first tape, and it won’t be the last :)
By the way, this particular correction tape is compact in size and fits easily in your hand. It covers up mistakes well :) And most importantly, unlike liquid putty, you don’t need to wait for it to dry, the tape comes into contact with the notebook paper, already dry and suitable for writing.
Of course, the use of correction tape, as well as correction fluid, is noticeable in the notebook, but it is still better than corrections and crossing outs. I recommend the Tipp-Ex correction tape for purchase, I give it a high score, the downside is that it runs out quickly, maybe it’s only with us?! I thank all readers of my review for your attention! Happy shopping and easy studying.
By the way, I ordered NARVA 48629 RPB for 472 rubles to replace my collective farm xenon (without long-range) from existential. (not as an advertisement, I just haven’t really found it cheaper anywhere).
Group: Chrysler Club Member Messages: 2,121 Registration: 5/28/2005 From: Moscow User No.: 40
By the way, I ordered NARVA 48629 RPB for 472 rubles to replace my collective farm xenon (without long-range) from existential. (not as an advertisement, I just haven’t really found it cheaper anywhere).
The corrector motor can be removed without disassembling the headlight, it turns and snaps off, then you pull it towards you, it is stuck into the reflector on a round hinge, and is pulled out using force. The main thing is not to overdo it so as to break the reflector itself.
Expert opinion
It-Technology, Electrical power and electronics specialist
Ask questions to the “Specialist for modernization of energy generation systems”
Repair of a measuring tape: the device inside. How to repair and assemble a construction tape measure? To do this, you need to apply the solvent to a cotton pad, wipe the stain and leave for twenty minutes, then moisten the cotton wool with the product again and wipe the area contaminated with the touch-corrector. To completely remove the stain, you will have to change several pads. Ask, I'm in touch!