We tell you everything you need to know about cleaning makeup sponges.
takes 2 minutes to read
Text: Veronika Gnezdilova Updated October 16, 2018
Sponges, like brushes, are a very important thing in the process of applying the foundation of your makeup. We have already talked about how to choose a makeup sponge in this material.
After each use, it is recommended to wash the sponge with soap, and this should be done immediately after applying the product. The more sensitive your skin is, the better you need to take care of the sponge. We have already talked about makeup mistakes when using a pong here.
- Advice! Wash as often as necessary until the sponges are completely clean.
It's good if you have a quartz lamp at home. Several times a week, the sponge should be placed under it for a couple of minutes. If you don’t have such a lamp at home, then the sponge can be disinfected in the sun by placing it there for thirty minutes.
These simple tricks will help you protect your skin from bacteria. They do not take much time and increase the shelf life of makeup sponges. And the makeup itself will lie smoother on your skin.
- Advice! Try using a fan for faster drying.
To clean sponges, you should choose special products or the most common soap. Clean and well-maintained makeup products will help keep your skin safe. To find out how to clean follow our instructions below:
How to wash foundation sponge at home
Makeup helps girls and women look attractive and well-groomed by applying brushes, sponges, beauty blenders and other tools. They are simple and easy to use, but particles of powder and other cosmetics accumulate on their surface, so for many fashionistas the pressing question is how to wash a foundation sponge.
The article contains useful tips and recommendations that will help you quickly and effectively wash a sponge at home.
What is it for?
Initially, beauty blender was created to distribute tone and corrector, but makeup artists quickly found a dozen more ways to use it. So,
Why do you need a cosmetic beauty blender:
- facial toning using foundation or bb cream;
- eliminating bags and dark circles under the eyes with concealer;
- contouring;
- powdering;
- creating the effect of “kissed lips”.
These are the most popular ways to use the “magic” sponge. In fact, by understanding the mechanics of action, you can find many new areas of application for it.
General recommendations
A beauty blender is a unique invention in the beauty industry, which is actively used for applying foundation, powder and blush. For its production, good dense foam rubber with antibacterial impregnation is used.
Modern sponges are available in drop, egg and other forms . Appearance does not affect the performance properties of the accessory, but only plays a marketing role.
Regardless of the type of sponge, they distribute the product well over the skin without leaving streaks or streaks. Due to their dense structure, they do not absorb cosmetics. This allows you to use cosmetics more sparingly, while creating excellent natural makeup.
Sponges require careful care, which can be provided at home. It is recommended to clean cosmetic accessories after each use or at least once a week if used infrequently.
When a contaminated sponge is stored for a long time, pathogenic bacteria actively multiply. As a result of using such a sponge, rashes, pimples and irritation appear on the face. This negatively affects the condition of the skin and the quality of makeup.
Even with regular and proper care, foam sponges lose their properties over time and are not able to properly distribute foundation over the skin. Replace the sponge with a new one every 2-4 months, depending on how often you use it.
Product Description
Natural product manufactured in the USA
A “cosmetic egg” or sponge is made in the form of a drop. The country of origin of the original is the USA. The material used is hypoallergenic and does not cause allergies when used.
It is important that the sponge does not contain latex. Using the product you can:
- Apply base.
- Use it as a corrector.
- Apply as blush.
- Create creamy shadows.
This is not a complete list of features of the product in question.
It is important not to confuse original products, which are expensive, with other sponges made in the form of a drop or an “egg”. Unfortunately, they do not have the effect of the original.
How to clean foundation sponge at home
You can clean a cosmetic sponge yourself at home, using available and available products. To properly clean the instrument and avoid dermatological diseases, strictly follow the recommendations presented.
To clean the sponges, you can use special products for the care of cosmetic accessories. They are commercially available, easy to use and absolutely safe for instruments. At the same time, they cope with the task of cleaning and disinfection very effectively.
You can also clean the sponge using hydrophilic oil : apply it to the instrument and spread it over the entire surface with gentle movements. Wash the accessory in warm water with some detergent added, then rinse well and dry.
Cleaning the sponge with liquid soap
Liquid soap will help to wash the sponge:
- Soak the beauty blender in clean water and squeeze it out – it should become slightly damp.
- Squeeze a small amount of liquid soap, baby shampoo or dishwashing gel onto the sponge.
- Apply the detergent evenly with your fingers over the entire surface and rub lightly to create a lather.
- Rinse the sponge under warm water and squeeze well.
- Repeat the procedure until the liquid flowing from the accessory becomes completely clean.
- After complete cleaning, wring out the sponge well and wrap it in a clean, dry towel to remove any remaining moisture. Leave the accessory to dry in a ventilated place overnight.
Do not store a wet sponge in a cosmetic bag, desk drawer or box. A humid environment and porous structure promote the growth of bacteria and mold, which renders the accessory unusable.
How to clean a beauty blender with a soap bar
Regular bar soap will help clean the sponge. Cleaning algorithm:
- Wet the beauty blender and squeeze it well to remove any remaining water.
- Wet the soap (choose an unscented one) and rub it between your palms.
- Saturate the sponge with soap suds and rub it with light movements.
- Rinse the accessory under clean water, and then repeat the procedure until it is completely clean.
- Dry the sponge with a dry towel and leave it to dry overnight in the fresh air.
This is interesting: Flowers for mom, ideas for children's crafts
A unique way to clean in the microwave
You can return the accessory to its former purity and freshness using an innovative technique. Despite the originality, this method is quite simple and effective, as well as safe for the instrument. It can be used to remove traces of foundation, concealer and other cosmetics.
Cleaning procedure:
- Fill a cup or bowl with hot water.
- Add a few drops of baby shampoo or dish soap to the liquid.
- Place a beauty blender into the resulting solution.
- Microwave the container for 1 minute.
- Rinse the accessory with warm water and dry well in the fresh air.
Steps
Method 1 of 3:
Quick Cleanse
1
Clean the sponge using this method only as needed. It is recommended to resort to deep cleansing if the sponge remains dirty after the usual cleansing described above. You'll most likely need to clean your sponge this way if you wear makeup multiple times a day or haven't washed your sponge for more than a week. You will know if you need deep cleaning by the appearance of the sponge. If the water remains cloudy during rinsing, or if the sponge has noticeable stains after it dries, try deep cleaning.
2
Wet the sponge. Alternatively, you can leave the sponge in a bowl of warm water for 5-10 minutes. There is no need to add soap to the water or monitor the color of the water. Hold the sponge under warm running water for 30-60 seconds or until the sponge absorbs water throughout and increases in size.
3
Treat the dirtiest areas with soap. At this stage, you should also use only gentle detergents. A special Beauty Blender soap is ideal, but you can also use Marseille soap, liquid baby shampoo, or organic shampoos for sensitive skin. Rub liquid or solid soap into the brightest spots on the sponge.
4
Rub the sponge onto your palm. Rub the sponge onto your hand over the areas where you applied the soap, using gentle circular motions. Continue doing this for about 30 seconds. X Source of information
The sponge should be rubbed harder than normal cleaning. Remember that this sponge is quite delicate and can be torn or deformed if you rub too hard. During this cleaning, cosmetics that remain deep inside the sponge will come out. There will be traces of foundation on your palm.
5
Rinse the sponge by continuing to rub it against your hand. It may take 2-3 minutes to remove any remaining soap.
It is important to rinse off all the soap, so take your time. Rinse the sponge under warm running water while continuously moving it over your hand in a circular motion.
Rinse until the water runs clear.
6
Check how well the sponge has cleaned. Apply a little more soap to the sponge and rub it on your hand. If the soap suds are white and not gray or beige, this will mean that the sponge is completely clean. Rinse the sponge under water until you get rid of soap bubbles. The water should be clean and transparent.
7
Dry the sponge. The sponge will likely still be damp after this, so place it in a dry place and let it dry naturally. Use the sponge only after it is completely dry. Gently squeeze the water out of the sponge with your hand and then wrap it in a clean, dry paper towel.
- With regular cleaning, you will be able to remove traces of makeup from the surface of the sponge, as well as partially from the inside. This will also get rid of bacteria on the surface of the sponge. The longer the sponge remains dirty, the more bacteria will form there.
- Clean the sponge every week or every two weeks. If you use the sponge daily, it will be enough to simply clean it once a week. Even if you only use the sponge a couple of times a week, you should still clean it at least once every two weeks.
Rules for storing foundation sponges
In order to preserve the sponge and its properties for a long time, provide it with the correct storage conditions:
- keep the accessory separately from cosmetics and other tools;
- store the sponge in a well-ventilated, cool and bright place;
- When traveling, keep the accessory in a special mesh bag.
A sponge is an indispensable tool for creating high-quality makeup. In order for the accessory to last a long time and effectively cope with its task, take care of its cleaning and ensure optimal storage conditions.
Video
The following videos will help you understand the nuances of cleaning, storing and using a beauty blender:
Young mother, wife and part-time freelancer. Being a lawyer by training, I am accustomed to collecting and providing the most complete and reliable information. Constantly improves in the professional field and strives for personal growth and development.
Found a mistake? Select the text with the mouse and click:
The dishwasher cleans more than just plates and cups. You can load it with plastic toys, glass lamp shades and even dirty vegetables, such as potatoes, but only without using detergents.
Stretch ceilings made of PVC film can withstand from 70 to 120 liters of water per 1 m2 of their area (depending on the size of the ceiling, the degree of its tension and the quality of the film). So you don’t have to worry about leaks from neighbors above.
If your favorite things show the first signs of gestation in the form of untidy pellets, you can get rid of them using a special machine - a shaver. It quickly and effectively shaves off clumps of fabric fibers and returns things to their proper appearance.
The easiest way to remove scale and carbon deposits from the soleplate of the iron is with table salt. Pour a thick layer of salt onto the paper, heat the iron to maximum and run the iron over the salt bed several times, applying light pressure.
Before removing various stains from clothing, you need to find out how safe the selected solvent is for the fabric itself. It is applied in a small amount to an inconspicuous area of the item from the inside out for 5-10 minutes. If the material retains its structure and color, you can move on to stains.
Fresh lemon is not only suitable for tea: clean dirt from the surface of an acrylic bath by rubbing with half a cut citrus, or quickly wash the microwave by placing a container of water and lemon slices in it for 8-10 minutes at maximum power. The softened dirt can simply be wiped off with a sponge.
There are special traps to combat moths. The sticky layer with which they are covered contains female pheromones that attract males. By sticking to the trap, they are eliminated from the reproduction process, which leads to a decrease in the moth population.
Threads made of gold and silver, which were used to embroider clothes in the old days, are called gimp. To obtain them, the metal wire was pulled for a long time with pliers to the required fineness. This is where the expression “to drag out the rigmarole” came from - “to do long, monotonous work” or “to delay the completion of a task.”
The habit of using an automatic washing machine “sparingly” can lead to the appearance of an unpleasant odor in it. Washing at temperatures below 60℃ and short rinses allow fungi and bacteria from dirty clothes to remain on internal surfaces and actively multiply.
Flaws
Despite most of the advantages, there are several disadvantages to using a beauty blender:
- The cost of the original beautyblender device can reach more than $20, which is not affordable for everyone.
- The shelf life of the instrument, subject to storage and care rules, is no more than 6 months.
- The instrument requires high-quality care, otherwise its service life will be significantly reduced.
- When applying creamy products, their consumption may increase significantly.
- Using a sponge, only liquid products are applied, preferably of the same shade and texture. Mixing them can give ambiguous results.
It is worth noting that the defining functionality of using a beauty blender is only in wet form. The more it is saturated with water, the more economical the product is used. It is water, filling it from the inside, that prevents excessive absorption of the cosmetic product.
Don't miss the most popular article in the section: Fashionable haircut for short hair. Photo, front and back views.
How to wash a sponge correctly, what is needed for this?
Of course, you can wash the sponge with soap, soak it in a powder solution, or use household chemicals. Microwave disinfection is also a popular option. But, as practice shows, such methods partially remove contaminants. And after using aggressive household chemicals, the material may become deformed, and in the worst case, an allergy may develop on the skin.
This is interesting: How to properly sharpen knives with a knife sharpener
There is a simpler and more effective way to get rid of dirt. In this case, you don’t need to buy anything. Every housewife will find in her arsenal everything she needs for the procedure.
Here's how to wash your makeup sponge:
- olive oil;
- dishwashing detergent.
How to wash properly:
- In a small container you need to pour 2 tbsp. l. olive oil (you can also use coconut, almond, etc.) and dip a dry or slightly damp sponge into it. Oils are great for removing makeup. To make the sponge clean, you need to carefully massage it in your hand until the remnants of the foundation disappear.
- Next, all that remains is to remove the fat from the sponge. Regular dish detergent will help with this. You should moisten the sponge generously and massage thoroughly. If you feel that there is still fat left, you can repeat the procedure.
Then you need to wait for the sponge to dry, after which it will be ready for use again.
History of appearance
More recently, there was no trace of this wonderful sponge, but now it can be found on the counter of any cosmetic store and in the toilet drawer of almost every girl. How did this happen? Previously, make-up artists and make-up artists used a tight brush or used their fingertips. These methods did not give the desired effect, and in some cases were unhygienic. Makeup gurus Rea Ann Silva Veronica Lorenz took the issue of developing a new tool seriously. After analyzing the experience of many years of work, they were able to make a real revolution in the industry.
Many tests and experiments were not in vain, and soon the first beautyblender sponge drop was released. He amazed everyone with his versatility and efficiency. The novelty quickly became part of the cosmetic bags of many fashionistas. Special credit for the spread of the “sponge” belongs to the Kardashian family. First they introduced the fashion for contouring. Then, demonstrating in one of the videos the technique of applying cosmetics, they “lit up” the beauty blender for the first time. And since everything that the star family considers good instantly becomes a trend, it has become a must-have. By the way, at that time, the beauty blender for a long time held first place in sales on the Amazon website, and one famous fashion magazine awarded it the title of the best makeup tool for three years in a row. Now it is produced in a variety of variations: the color, shape, and material change. Almost every cosmetic brand has a legendary sponge in its line.
What is a beauty blender and how to wash it?
A beauty blender is one of the types of sponges. It is designed for applying liquid cosmetics. The original product is shaped like an egg, so it can easily be used to work on hard-to-reach areas such as the area around the nostrils, eyes, and corners of the lips. Also, with this tool you can easily control the density of application of cosmetics.
There is a special product on sale for washing the beauty blender from foundation, powder, cushion - a cleanser from the company Beautyblender. It is not common in cosmetic stores, so it is not easy to find. Its cost is high (about 1300 rubles in Russia and more than 530 UAH in Ukraine). Although this is a professional product, judging by the reviews, the quality of cleansing leaves much to be desired. Therefore, you can save a lot of money and use the washing method described above - using oil and detergent.
What models are there?
Having figured out how to care for a beauty blender, let's talk a little about the models. Classic – teardrop-shaped, pink. But now you can find other varieties on sale, which differ somewhat in properties and appearance:
- Original. Designed for applying foundation and creamy blush. It has a classic shape and traditional pink color. Most often it is used at home.
- Royalty, Red Carpet. The Royalty and Red Carpet models are similar in purpose to the Original, they have the same functions, but they look different - their color is red.
- Pro. Do you like black? Then the Pro model is especially for you. It is denser than Original in texture, so the layer will be denser. Professional makeup artists use this device more often than modest amateurs.
- Mini. A beauty blender labeled Mini is four times smaller than its counterparts. It has a delicate structure, more porous than other models. It is most convenient for treating the corners of the eyes and brow ridges.
- Pure. The white Pure beauty blender is the softest of all. It is suitable for very smooth skin, but if you need to disguise very noticeable unevenness, this model is not suitable.
How often should you wash?
If used regularly, it is recommended to wash a regular sponge or beauty blender at least once a week. For rare use, once every 2 weeks is sufficient. In general, it is recommended to monitor the condition of the material and wash it if necessary. If the sponge is no longer able to apply cosmetics evenly due to contamination, then it is not necessary to wait 1–2 weeks.
So, the fastest and most effective method to get rid of all dirt on the sponge is to treat it with olive oil and dishwashing detergent. The procedure takes only 2-3 minutes and completely removes all stains without deforming the material. As a result, the sponge looks like new.
General information
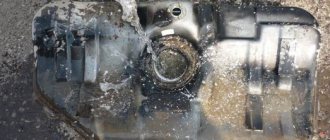
Regular wiping with a sponge, even with a disinfectant, is not enough to properly care for the blender. Nozzles are attached to its bowl, under which the remains of the crushed mixture are clogged, and pieces of minced meat are wound onto the rotor. If all this is not removed in a timely manner, the engine will fail quite quickly due to excessive load. In addition, any crushed mixture in a blender will acquire an unpleasant aroma of musty or rotten food. It’s unlikely that anyone will want to cook anything with it.
How to clean a blender and what difficulties may arise? For example, the manufacturer strictly prohibits immersing such equipment in water, and the base itself, where the filter and the adapter shaft to the bowl are located, may not be removable. If water gets inside, the engine will begin to corrode (although more often it is the printed circuit boards on which the toggle switches for controlling the operating modes of the electric motor are located that suffer from this).
At the same time, if you do not wash and clean the blender in a timely manner or perform this procedure poorly, then pretty soon:
- knives become dull;
- the bowl will become covered with plaque and scratches due to dry food residues;
- the engine will not produce the stated number of revolutions.
Accordingly, this technique will no longer be able to properly grind food. And such breakdowns caused by improper care are not covered under warranty repair.
Three reasons to clean your beauty sponge and not be lazy
There are three reasons to clean your makeup sponge regularly:
- purely aesthetic. Imagine, the sponge sits there for a day or two, on the third you need it, and then the foundation has already dried out. And this sponge needs to be soaked again, and then used to treat the entire face, neck and décolleté. Not pleasant;
- for reasons of hygiene. Clogged pores of a sponge (sponge) are a microenvironment for the proliferation of bacteria, and they are the cause of all skin diseases;
- to save cosmetics. The cleaner the sponge, the less foundation you will use. Firstly, you can see how much product was applied, and secondly, the makeup will apply as it should the first time, without streaks, and you won’t have to touch it up.
Proven ways to remove cosmetics from a sponge
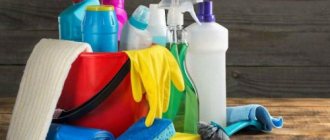
You can wash the sponge with almost anything:
- special detergents;
- lotion for oily skin;
- hydrophilic oil;
- toilet soap (bar or liquid);
- shampoo or shower gel;
- dishwashing liquid.
All these products work, the only difference is the quality. The best result is not only the return of the original color of the sponge. It is very desirable that after cleaning, its texture is preserved, and the pores of the sponge are clean from detergent residues. It is clear that you cannot appreciate this by eye. Here it is better to trust experienced people and simply not do something that will obviously harm your sponges.
Special sponge cleaning products
Manufacturers of beauty blenders, along with the sponges themselves, produce special cosmetics for cleaning them:
How else can you clean a sponge at home?
The following are suitable proven means for cleaning sponges from any cosmetics:
This is interesting: What does the red thread on the hand mean?
Lotion for oily skin
It is advisable that the composition does not contain alcohol. To clean the sponge, you can buy a large package and add it to water baths. The method is effective, but expensive. Lotion is cheaper than special cleaning products, but more expensive than soap, for example.
Hydrophilic oil
This cleanser contains vegetable oil and the emulsifier polysorbate. It is usually used to remove makeup and cleanse. If desired, you can also use it to clean the sponge by adding it to a bath of warm water. Price: from 238 rub.
Shampoo
Any shampoo, as well as shower gel or liquid soap, will do. The good thing about this method is that the sponge is clean afterwards, as if you had just bought it. The only negative is a lot of foam.
The most common washing technique is:
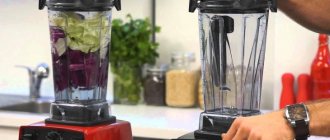
- Pour warm water into a cup.
- Add some detergent there.
- Lower the sponge for 1-2 minutes.
- Then gently knead the sponge without removing it from the water. The movements should be soft: open your fingers, then squeeze them again. There is no need to rub the sponge with both hands, as when washing - it’s easy to spoil, the foam will become loose.
- After washing, the sponge should be rinsed in a bath of clean water.
There is another way:
- Place a sponge in a cup with soapy water.
- Place it in the microwave for 1 minute.
- Rinse the sponge.
Bar soap
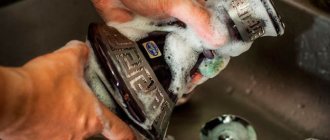
How to wash with soap:
- The sponge should be moistened in a bath or under a tap and gently squeezed.
- Then moisten the soap and rub it between your palms so that as much soap foam is formed as possible.
- Take a sponge and apply foam on it.
- Rub in your palms to soak the sponge.
- Rinse the sponge under the tap.
Dishwashing liquid
The washing technique is as follows:
- Take a spray bottle.
- Pour water into it and add a drop of cleaning product.
- Then soak the sponge in warm, clean water.
- “Shoot” a wet sponge from a spray bottle so that all the pores are filled with soap solution.
This solution washes out all contaminants very well. But this method has a couple of disadvantages. The first is that after washing there is a lot of foam, and you have to keep the sponge under running water for a long time. The second is that dishwashing detergent has a fairly aggressive chemical composition. After washing, it is not completely washed out of the sponge and comes into contact with the skin every time you use the sponge.
Dissolve any detergent in warm, but not hot water and under no circumstances in boiling water, otherwise the foam rubber will quickly become loose and the sponge will become unusable.
Step-by-step instruction
We all know that any household appliance requires cleaning and washing. And also, in order for the device to serve you as long as possible, it must be properly cared for and stored. But before you put it back in place, you need to wash it thoroughly and dry all the parts. Equipment should be washed immediately after use. Do not delay cleaning the device if there is a saline solution inside it.
- Before washing the blender, it should be disconnected from the power supply, thus de-energizing it, and completely disassembled into individual parts. First of all, you need to unscrew the “mill” from the block part of the electric motor (motor), which is easily removed when turned counterclockwise. Next comes the analysis of the remaining individual parts. That is, the cup, knife, rubber gasket and sealing wheel are removed separately.
Be careful when disassembling equipment! After all, the knives are very sharp, and if you make an awkward movement, you can easily get cut and thereby injure yourself.
- The next step is to clean the motor block. You cannot wash it, but only wipe it with a clean, damp special cloth. Some housewives use soap and sponge. Using a napkin, rag or the same Beauty sponge, rinse all parts under running warm water
- If your house has a dishwasher, you can use it. But only removable parts can be washed in the car and at a temperature not exceeding 60 degrees
Do not use descaling concentrates, otherwise it will cause parts to malfunction. You should only use soap or regular detergent from the Beauty series.
- In nature, there are many foods, vegetables and fruits that tend to color objects and things. A blender such as Brown is very susceptible to coloration from rich and brightly colored foods. The ingrained color is quite difficult to wash off, but either regular laundry soap or vegetable oil will help.
Rub the oil into the cup and lid and leave for 20 minutes, then wash off under running warm water and soap. Soap is an excellent assistant when washing any household appliances and more.
It is important to know that all parts are assembled together, and the blender is removed only after complete drying, otherwise wet parts may corrode. Consequently, the blender will stop functioning
Before you start washing the blender yourself at home, you should read the instructions that came with the device. It also tells you how to properly wash the blender lid and bowl.
It is very important to first read the instructions, because each device has its own, depending on the specific model and type of operation
How to wash the blender lid and cup in 15 seconds?
There is a very effective way that will help you wash a blender in 15 seconds at home. To do this, pour 50 ml of liquid soap into a dirty cup and pour warm water up to the top line indicated on the cup. Next, close everything with the lid and turn on the “Start” button. Run the blender for 15 seconds. This time is enough to perfectly clean the device.
Afterwards, pour out the dirty water and rinse the lid and cup under running warm, clean water. After running water, the parts should be wiped with a clean, dry cloth and left to dry completely on the table for 30 minutes, then it can be removed. The method is very effective and, most importantly, fast.
How to dry a sponge correctly
Immediately after washing, the sponge should be blotted with a towel or napkin so that it does not drip. You cannot squeeze or twist it. It is advisable not to dry it on a radiator - it is easy to burn there (strangely enough, this happened to girls). Ideally, if you have a beautyblender box left over, you can place the wet sponge on it and when it dries, it will fall inside on its own. If you don’t have a box, it’s good to take a Kinder egg instead of a case. It is also indispensable as a case for storing the sponge - when it dries, you just need to cover it with the other half.
Sponges should be dried and stored in a ventilated area with low humidity. In the bathroom you can, but only if you are not in the habit of keeping the door closed. At high humidity, a wet sponge takes a long time to dry and becomes a breeding ground for bacteria.
Reviews
From personal experience I can say that the worst way to cleanse yourself is with bar soap. More precisely, the process itself, rubbing the sponge on it. The sponge quickly begins to tear due to pressure and friction.
Lydia Koroleva
https://irecommend.ru/content/samyi-luchshii-sponzh-dlya-makiyazha-legendarnyi-real-techniques-laifkhak-kak-bystro-otmyt-s
It is recommended to dry in a dry, cool, ventilated place, hanging by a string. I didn’t have such a place for the sponge, so I dry it in the bathroom, although I try to remember to hang it with a string.
Anya
https://yandex.ru/turbo?text=https%3A%2F%2Fkosmetista.ru%2Fblog%2Fuhodovaya-kosmetika%2F42552.html&d=1