/Order/
All of the most effective and fastest ways to clean the inside of a microwave are based on one principle - creating a steam bath and a trap for cleaning agent fumes. The trap effect will be created by the stove itself, but our task is to make an effective cleaning solution from products that, fortunately, you probably already have in your kitchen cabinet.
A quick way to clean a microwave
In most cases, the vinegar “bath” method helps to clean the microwave from old greasy deposits and stubborn stains:
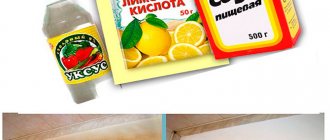
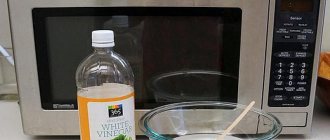
- Mix 1.5-2 cups of water and 2 tablespoons of vinegar (9%) in a bowl and put it in the microwave.
- Start the microwave oven at maximum power for 10 minutes, then leave it to “steam” for another 5-10 minutes.
- Wipe the oven with a damp cloth to remove dirt and vinegar odors.
Yes, the smell of vinegar will be felt during cleaning, but it will quickly disappear both from the room and from the microwave chamber. And, of course, during the “bath” it is advisable to open the window.
If the dirt has become wet after the “bath”, but still remains, you can turn on the oven for another 10 minutes or wipe its chamber with a sponge soaked in the same vinegar solution and sprinkled with soda.
Old greasy deposits after a vinegar “steam room” can be washed off with olive oil.
Now let’s talk about other ways in which you can replace or supplement the cleaning method described above.
General rules
To clean the inside of a microwave oven with baking soda, prepare the necessary solution, a sponge or cotton cloth, and unplug the appliance. Before starting the cleaning process, there are some rules to remember:
- Do not use metal brushes, knives or scrapers as they may damage the surface of the microwave.
- A minimal amount of water should be used as liquid may get into the holes on the inside walls of the microwave.
- The process of deep and thorough cleaning should be performed at least 1-2 times a month.
- It is advisable to use the simplest steam method (hot water and soda) every evening to avoid a large layer of fatty deposits.
- Do not use abrasive cleaning products together with soda, otherwise the wave-reflecting coating will be damaged. When processing with soda, you need to make sure that it is well dissolved in the composition.
- If there is a grill in the microwave, there is no need to wash it. You need to carefully wipe around it with a napkin.
The oven will remain clean and fresh if you follow these rules.
Method 3. Cleaning the microwave with soda (for medium dirt)
If you don’t have citric acid on hand, and you don’t grow a lemon tree at home, and generally prefer to use citrus fruits for their intended purpose, then baking soda will help you, as it will settle on the walls of the chamber in the form of condensation and dissolve dried splashes and dirt.
What you need: water (400-500 ml), a container for water and 1 tablespoon of soda.
Recipe: our task is to make a solution that will settle on the walls of the chamber in the form of condensation and dissolve dried splashes and dirt. To do this, fill the dish with water, pour soda into it, put it in the chamber to heat at maximum power for 2-5 minutes, and then leave the oven alone for another 5 minutes. Then all that remains is to wipe the camera clean, in difficult places, wetting a sponge or rag in the same soda solution.
Useful tips
It is easier to clean the outside of the stove than the inside, since stains do not “stick” here. But the outer walls may change color and turn yellow over time. You can return them to their original whiteness using chlorine bleach or hydrogen peroxide.
To do this, you will need old towels or sheets, which are soaked in the solution and wrapped around the body of the unit. To prevent the product from evaporating and drying out, cover the top of the microwave with film and leave it like that overnight. In the morning, all you have to do is empty it and wipe it clean with a damp cloth.
Before cleaning the inside of your microwave, it’s a good idea to read the following guidelines.
- Do not wash the inner walls with water or a sponge that is too wet, so that moisture does not get behind the grille.
- Do not use melamine sponges, which crumble too much - small particles falling behind the grate can cause a fire.
You need to clean the oven with a regular dish sponge, wrung out until slightly damp. Source kitchenremont.ru
- It is also not recommended to use metal brushes and sponges, abrasives and products not intended for microwave use.
- The enamel walls of the chamber can be damaged by frequent use of acidic cleaners or high concentrations, so it is better to choose more gentle methods for them.
Method 4. Cleaning with vinegar (for severe stains)
Vinegar will help clean even the most neglected microwave oven effectively and quickly, but you will have to endure the smell during the cleaning process. And one more thing - if the chamber of your microwave oven is covered with enamel, then we do not recommend using this method too often.
What you need: water (400-500 ml), a container for water and 2 tablespoons of vinegar (9%) or 1 teaspoon of 70% essence.
Recipe: First of all, open the window slightly so that the smell of acid can disappear. Next, pour water into a plate, pour the bite into it, put the solution in the chamber and turn on the microwave for 2-5 minutes, depending on the degree of contamination. Now we give the vinegar evaporation a little more time to dissolve the dirt on the walls of the chamber and begin to wash the inside of the microwave oven with a sponge or soft brush. When you're done, rinse your equipment clean of the product itself.
Advantages and disadvantages
The main advantage of citric acid as a microwave oven cleaner is its availability and low cost .
If necessary, a bag of citric acid can be purchased at any store, and it will cost mere pennies.
Among the disadvantages, some limitations in use are noted . The thing is that an aggressive acidic environment has an extremely negative effect on enamel-coated microwave surfaces.
Prolonged contact with acid can cause cracks and swelling of the enamel coating.
Method 5. Cleaning the microwave using a sponge and Fairy (for light and medium dirt)
You probably thought that we would be talking about ordinary mechanical cleaning? Not at all, although you can’t do without it, but now we offer a slightly different method that is suitable for washing a slightly dirty microwave.
What you will need: any sponge (except metal, of course), water for soaking it, as well as any dishwashing liquid like Fairy, Dosi, etc.
Recipe: squeeze out a detergent the size of a 1-ruble coin onto a sponge generously soaked in water, then foam it well, squeezing and unclenching the sponge. Next, put it in the chamber and start the microwave at minimum power for 30 seconds, making sure that the sponge does not start to melt. Now open the door and wash off the grease and splashes softened by the steam of the product with the same sponge. In the following video you can clearly see the process and result of cleaning using the described method.
See also the material: How to clean an automatic washing machine from dirt and scale in 5 steps.
Comparison with lemon cleansing
The effectiveness of lemon as a cleaning agent for microwave ovens is explained by the fact that when heated, the citrus produces vapors that contain organic acids . They are the ones who break down old fat and food stuck to the walls of a household appliance.
Comparing cleaning a microwave with lemon and citric acid, it is noted that in the case of citrus fruits, after treatment, a fresh aroma remains on the surfaces of the household appliance, neutralizing unpleasant odors and preventing the development of bacteria.
It is also worth noting the safety of using lemon . This natural product, even if it gets into food from the walls of the microwave, is absolutely harmless to human health, which cannot be said about other products of non-natural origin.
This article will tell you how to clean a microwave with lemon.
Method 6. Cleaning the microwave with a glass cleaner (without a “bath”)
Here’s another good and technology-safe method of cleaning using household chemicals, albeit without creating a “bath” effect.
What you need: a sponge, water, and any glass cleaning liquid.
Recipe: First, unplug your oven. Next, mix a cleaning solution of glass cleaner and water in a 2:1 ratio. The solution should be enough to clean the oven both outside and inside. Next, generously soak a sponge in the cleaning solution and wipe the inside of the microwave, including the ring and plate. Dried stains should be soaked in glass cleaner for 5 minutes. Next, thoroughly wipe the entire chamber with a clean cloth soaked in water so that there is no dirt, no windshield wiper residue, or its smell left on the walls.
Chemicals
How to use chemical compounds. Manufacturers produce special cleaners for microwave ovens. When purchasing them, be sure to read the instructions. Follow the rules for using chemicals in your home:
- apply in an even layer;
- leave the applied composition for the time indicated on the box: for several hours, for the whole night;
- then rinse and wipe the surfaces;
- Be sure to wear rubber gloves.
Popular brands
Preparations that have proven themselves:
- TOP HOUSE is a super effective cleaner. Especially for household appliances.
- "Mr. Cleaner" - cleans ovens and microwaves.
- Wpro, Electrolux, Sun Clean and other professional “care cosmetics” for grills, ovens and other household appliances.
You can also use regular compositions for cleaning ovens and even “Fairy”. It is applied, foamed, left for half an hour and washed off.
Method 7. How to clean a microwave with orange peels
The method is excellent for removing light and medium stains. The advantages are obvious: a pleasant citrus smell that will spread throughout the apartment, and there is no need to thoroughly rinse off the remnants of the “product”, as is the case with chemicals.
What you need: 1 orange, water, bowl and sponge.
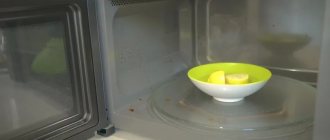
Recipe: Peel the orange, place the peel in a small bowl, fill it with water, put it in the microwave and run it for 5 minutes. During this time, the water should boil, and condensation will form on the walls. Next, you need to wait another 10-15 minutes and only then start washing the oven. Drops of fat will come off quite easily.
Proper care of your microwave oven
If you want the microwave to last a long time, and the cleaning process not to turn into a military battle with grease, follow these rules for caring for the camera:
- cover the food being placed in the oven with a special lid to protect the surfaces from splashes (you will have to buy it additionally),
- wipe the camera daily with at least a damp sponge,
- if severe contamination occurs, deal with it immediately, without waiting for the drops to turn into frozen dirty spots.
You may be interested in: How to clean an automatic machine with soda from scale, mold and dirt - preventive measures
Video: cleaning with soda - advice from a housewife
Rules of caution
In order for cleaning to be quick and effective and to have no “side effects,” certain recommendations should be followed. Adhere to the following rules:
- When taking out a container with lemon after heating it in the microwave, use oven mitts - the container gets very hot, there is a risk of getting burned,
- the container with lemon and water should be open,
- Do not allow the lemon juice to boil completely during the heating cycle,
- if the chamber is enameled, after cleaning it is necessary to rinse off the remaining lemon with clean water to prevent damage to the surface structure,
- do not use pure lemon juice without adding water - it may be too concentrated and cause pain in the eyes, damage to the surface of the camera,
- Do not use this cleaning method if you suffer from an allergy to citrus fruits.
Please note that this method may not be suitable for microwaves with an automatic venting function. This option is provided in expensive and high-tech models; it prevents the formation of condensation in the device chamber. However, if the steam evaporates immediately, it will not have a softening effect on dirt stains. In this case, use a slice of fresh lemon to wipe the inside of the camera.
