“Don’t you have the same one, but with mother-of-pearl buttons?
- Unfortunately no.- No? Will seek"
(film “The Diamond Arm”)
The clothes or interior items we buy do not always fully satisfy our desires. It seems like something is missing. I would like to change it here or there.
Now you can make something bright and unique yourself. And the easiest way is to decorate with rhinestones. These little decorative pieces are pros at transforming things.
How to properly glue rhinestones to fabric at home? Let's look at this in more detail.
How to glue rhinestones to fabric?
Many of you like patterns on fabric made from small stones - rhinestones.
By following our advice, you can make an original drawing at home. Glue can be bought in stores specializing in the sale of fabrics and accessories. Before you begin, prepare the following tools and materials:
- rhinestones;
- glue or hot glue gun;
- mat;
- small tongs;
- durable paper napkins.
Step-by-step instruction:
- Place the design on the fabric, using a simple pencil, mark where to glue the rhinestones.
- Place a mat under the fabric to prevent it from sticking to the table.
- If the stones are large, apply glue to them; if small, apply glue directly to the fabric.
- Use small tweezers to attach the stones.
- Periodically wipe the tweezers and any remaining glue on the rhinestones with a napkin.
Working with glue
To work with small parts you will need tweezers. This will make it more convenient to create drawings from small elements. You also need a backing for the fabric so that it does not stick to the surface on which it lies. The product to be decorated must be clean. The reverse side of the crystals is degreased before work, for example, by rubbing with cotton wool soaked in alcohol.
How to glue rhinestones:
- A piece of unnecessary material is placed under the fabric, which, if necessary, will absorb excess glue. We recommend using foil or wax paper.
- The product stretches on a hard surface.
- The glue is applied pointwise to the places where the rhinestones will be located. The drawing can be marked with a marker or transferred using tracing paper. It is advisable to make droplets exactly according to the size of the crystals. Drops that are too small are also not suitable for large elements: the substance will not be enough for reliable fastening.
- Since the glue dries quickly, the beads must be attached immediately after applying it.
- The rhinestone is carefully placed on a drop of glue and pressed with tweezers. You can replace it with a toothpick or other thin object. It is not recommended to glue decorations with your fingers: this will cover most of the fabric, and it is easy to make a mistake with the placement of the element. And your finger will get dirty with glue. If the work is being done for the first time, it is better to practice on an unnecessary piece of fabric.
- The glue should now dry. It is not advisable to touch the product for at least two to three hours.
- Excess glue is removed with a piece of paper until it dries.
There is another way to glue rhinestones: apply an adhesive compound to the back of the crystal. But this method requires more skill, and errors are more difficult to correct. For beginners, the first method is recommended.
Advice! To wash the product before decorating, you do not need to use conditioner. It is absorbed into the fibers of the fabric and impairs adhesion to the glue.
Another interesting way to place a pattern of adhesive rhinestones when it contains a large number of small elements:
- A pattern of crystals, sequins, beads, etc. is laid out on a transparent adhesive film or tape, and their front side should be at the bottom.
- Now glue is carefully applied to each element in the required amount.
- All that remains is to turn the film over and attach it to the product.
- You need to wait for the glue to dry and then remove the adhesive film. All elements will remain on the fabric.
How to glue thermal rhinestones
If a complex pattern or rhinestone applique is created, first a diagram is drawn on the material, indicating the attachment points. The markings are placed carefully so that after gluing they are not visible.
Iron gluing
The rhinestone is placed on the fabric with the adhesive side down in accordance with the selected pattern or design
It is important that the dress, top or any other clothing is ironed. A sheet of paper is placed on top of the design, through which the rhinestones are ironed with an iron for 1-2 minutes. If the fabric is too thin, paper is also placed on the wrong side. Rhinestones are best glued to fabric using an iron operating in the “Silk” or “Wool” mode.
The choice of temperature depends on the material. When ironing, apply light pressure to the fabric with the iron. Afterwards the paper is removed from the fabric. You can use the item only after the glue has completely cooled.
There is another method of gluing with an iron. The heater is fixed on a stand for ironing sleeves, with the heating surface facing up. While the device is cold, rhinestones are laid out on its sole with the adhesive side up. A gluing pattern is applied on paper. Transparent fabric is placed over the design. The iron heats up to a temperature at which the glue on the rhinestones begins to boil. Each crystal is picked up with a needle and quickly transferred to the fabric with the adhesive side down.
Using the applicator
Not all materials can be covered with thermal rhinestones with an iron. To ensure that rhinestones stay on velvet, leather or suede for a long time, they are attached with an applicator. This is a soldering iron with nozzles of different sizes, using which you can glue large and small parts. The algorithm for using the applicator is as follows:
- The nozzle is selected according to the size of the rhinestone, so that it is completely heated.
- The nozzle is installed, the applicator is plugged in and heated up.
- The material is placed on a flat horizontal plane. The rhinestones are laid out according to a pre-designed pattern.
- Each crystal is warmed up and pressed against the material with a soldering iron for 5-20 s. The larger the crystal, the longer it takes to glue.
There are vacuum applicators that have a pump to draw out and hold the rhinestones.
Jacket with brake clasp
A beautiful oversized sweater with a complex intertwined pattern is a great option for home, work and walking.
YOU WILL NEED
Yarn (100% wool; 100 m/ 50 g) – 650 (700) 750 g blue; knitting needles No. 5,5 and 6; circular knitting needles No. 5.5; 3 brake fasteners.
PATTERNS AND DIAGRAMS
RUBBER
The number of loops is a multiple of 4 + 2 chrome. Each row begins and ends with chrome. loop. Front rows: * 1 front, 2 purl, 1 front, from * repeat. Purl rows: knit loops according to the pattern.
"BRAID" ON 24 LOOPS
Knit according to the given pattern. Only the front rows are given on it; in the purl rows, knit the loops according to the pattern or as indicated. For the shelves and back, knit: from the 1st to the 32nd r. 2 times, from the 33rd to the 68th r. 1 time, then repeat the 69th and 70th rows. After 68 r. there should be 18 stitches on the knitting needles. For sleeves, repeat from the 1st to the 32nd row.
KNITTING DENSITY
13 p. x 21 r. = 10 x 10 cm, knitted with front and back stitch; 20 p. x 21 r. = 10 x 10 cm, knitted “Oblique” on 24 loops in rows from the 1st to 62nd pattern; 15 p. x 21 r. =10 x 10 cm, knitted “Oblique”, starting from the 69th r. diagrams (= on 18 loops).
PATTERN
PERFORMING THE WORK BACK
On knitting needles No. 6, cast on 98 (104) 110 loops and knit 10 cm with an elastic band, while in the last purl. row add 1 p. = on knitting needles 99 (105) 111 p. Continue work, distributing patterns as follows: edge, 10 (13) 16 p. front stitch, 2 p. purl stitch, 2 p. front satin stitch, 2 p . purl stitch, 24 sts of the Braid pattern, 17 sts of the purl stitch, 24 sts of the Braid pattern, 2 stitches of the purl stitch, 2 stitches of the front satin stitch, 2 stitches of the purl stitch, 10 (13) 16 stitches . front surface, edge. After 43 cm = 90 r. (41 cm = 86 r.) 39 cm = 82 r. from the elastic band, close 1 x 3 stitches on both sides, then in every 2nd row. another 1 x 2 p. and 5 x 1 p. = on the knitting needles 67 (73) 79 p., including decreases inside the patterns - in the “braid” sections. After 22 cm = 46 r. (24 cm = 50 rub.) 26 cm = 54 rub. from the beginning of the armhole, close on both sides for shoulder bevels 1 x 5 (6) 7 p., then in the next 2 p. 1 more time, 5 (6) 7 p. Simultaneously with the beginning of the shoulder bevels, close the middle 33 p. for the neck and finish both sides separately. To round the neck, close along the inner edge in the next 2 r. 1 time 2 p. After 3 cm = 6 p. from the beginning of the shoulder bevels, close the remaining 5 (6) 7 stitches of the shoulder, respectively.
LEFT SHELF
On needles No. 6, cast on 47 (50) 53 sts and knit 10 cm with an elastic band. Continue the work, distributing the patterns in the following sequence: edging, 10 (13) 16 stitches in the front stitch, 2 stitches in the purl stitch, 2 stitches in the front stitch, 2 stitches in the purl stitch, 24 stitches in the Braid pattern, 5 stitches purl stitch, edging. I will make an armhole along the right edge as described for the back = on knitting needles 31 (34) 37 p., including decreases inside the pattern - on the section of the Braid pattern. After 18 cm = 38 r. (20 cm = 42 r.) 22 cm = 46 r. from the beginning of the armhole, close for the neckline along the left edge 1 x 6 p., then in every 2nd r. another 1 x 3 p., 2 x 2 p. and 3 x 1 p. At the same time, make a shoulder bevel along the right edge, as described for the back.
SLEEVES
On knitting needles No. 5.5, cast on 38 (42) 46 stitches for each sleeve and knit 13 cm with an elastic band, while in the last purl row evenly add 8 sts = on knitting needles 46 (50) 54 sts. Continue working with knitting needles No. 6, distributing the patterns in the following sequence: edging, 4 (6) 8 stitches in the front stitch, 2 stitches in the purl stitch, 2 stitches in the front stitch, 2 stitches in the purl stitch, 24 stitches in the Braid pattern, 2 stitches in the purl stitch , 2 stitches in stockinette stitch, 2 stitches in purl stitch, 4 (6) 8 stitches in stockinette stitch, edging. For bevels, add 5 x on both sides in every 8th r. and 2 x in every 6th r. (2 x in every 8th r. and 6 x in every 6th r.) 8 x in every 6th r. and 1 x in the next 4th p. 1 p. each, on the added loops knit with stockinette stitch = on knitting needles 60 (66) 72 p. Through 26.5 cm = 56 r. close from the elastic on both sides to roll 1 x 3 sts, then in every 2nd p. 2 x 2 p. each, 9 x 1 p. each, 2 x 2 p. each and 1 x 3 p. (3 x 2 p. each, 7 x 1 p. each, 3 x 2 p. each and 1 x 3 p.) 4 x 2 p., 5 x 1 p., 4 x 2 p. and 1 x 3 p. After 14.5 cm = 30 r. from the beginning of the formation of the okat, close off the remaining 14 (16) 18 sts in one row.
ASSEMBLY
Make shoulder seams. For the fastener strips, cast on 104 sts on circular knitting needles along the sides of the shelves and knit with an elastic band, while starting and ending with 2 knits. loops. After 5 cm, close the loops. For the binding, cast on 88 stitches on circular needles along the edge of the neckline, including the short sides of the fastener strips, and knit with an elastic band, while starting and ending with 2 knits. loops. After 5 cm, close the loops. Sew on the brake fasteners, as in the photo. Sew on the sleeves. Sew side seams and sleeve seams.
Gluing methods
How to glue rhinestones on clothes? Depending on the type of rhinestones you use for decoration, the gluing process itself depends.
Basic Considerations
Before considering each option, let’s outline a number of general operating principles:
- The fabric must be clean and ironed.
- It is best to degrease the places where the rhinestones will be attached.
- Rhinestones must be applied to stretched clothing. A hoop is especially useful in this matter, with the help of which the fabric is perfectly fixed and stretched in the required place.
- Determine the location of the decor.
- Mark the design pattern on the clothing. This can be done with a pencil or chalk.
- The work process requires you to be extremely careful and attentive.
So, let's move on to ways to glue rhinestones on clothes.
Decor made of adhesive rhinestones
This type of stone already has an adhesive layer, which greatly simplifies the work. To decorate clothes with thermal rhinestones, you need to arm yourself with an iron, which can glue them to the fabric. Due to the simplicity and convenience of the process, this type of crystal is very popular.
Let's look at how to glue rhinestones onto clothes with an iron, in order:
- Place a sheet of paper or foil under the area of clothing to which you will glue the rhinestones: this will prevent the glue from getting further.
- Set the temperature setting on the iron - the average setting will be enough.
- Place the desired pattern or design on the bottom side of the stones on the clothing, and then cover with a light cloth.
- Apply the iron to it, press and hold for about 2-3 minutes. During this time, the adhesive base will melt and the crystals will stick to the clothing, but large elements will require a little more heat treatment.
Your beauty is ready!
To make the process even easier, manufacturers produce entire applications made from thermal rhinestones. They can be bought in a store, and the ornament can be very diverse in shape, size and type.
How to glue rhinestones onto clothes with an iron in the form of an applique? It's simple:
- We apply the selected decoration to the clothes.
- Place a piece of fabric on top of the applique.
- Heat with an iron for at least 30 seconds.
- We wait until the rhinestones and clothes cool down.
- Remove the film from the application.
Or by the following method: start ironing from the inside out and continue for about five minutes, then turn the clothes inside out and heat for another 30 seconds.
Gluing thermal rhinestones with an applicator
If your clothes are made of leather, velvet or suede, then you cannot use an iron to process thermal rhinestones. To do this, use a special device that resembles a soldering iron. It's called an applicator and it comes with several special attachments for rhinestones of different sizes.
The operating principle of the device is spot heating. How to glue rhinestones on clothes using an applicator?
- Install a nozzle on the device that matches the size of the stones.
- Place the rhinestones according to the pattern of the ornament.
- Apply the applicator to each crystal and hold until the glue sets on the material.
Attach rhinestones with glue
For this method you need special glue for rhinestones. It is not difficult to purchase it - it is sold in various fabric stores. The glue may be whitish in color or completely transparent. Most often, the tube is equipped with a convenient spout for precise application of the substance.
How to glue rhinestones to clothes using glue? The sequence is as follows:
Apply neat drops of glue to the drawing diagram.
A crystal is placed on each drop. It is most convenient to grab crystals with tweezers, and miniature parts with a toothpick
But using a fingertip is not the best option, since most likely it will not be possible to place the crystals strictly in their places. Using the pad of your finger, carefully press down each stone so that the glue should come out slightly. After you have laid out the entire design with rhinestones, leave the clothes so that all the elements dry - preferably for a day.
Gluing with adhesive tape
Another quick and very convenient method is how to glue rhinestones on clothes.
You need to do this:
The pattern is applied to the film, and the crystals are laid along its contour directly on the sticky side of the film.
We cover the back part of the laid out stones with glue and apply it to the clothes. After drying, carefully remove the film, leaving your shiny design on the fabric.
Tips for a needlewoman
In the old days they told me to learn to embroider on matting, and then on scoured cloth. A similar recommendation is addressed to novice decorators with rhinestones: by practicing on not the best items in your wardrobe, you can understand the principle of working with decoration and find out which company supplies the best material.
Be sure to take into account the presence of other accessories on clothing : zippers and buttons may interfere with the uniform treatment of the surface with rhinestones by the iron.
Advice! Places with small surfaces that are difficult to reach with an iron can be decorated with a soldering iron, gluing each part separately. Don't know how or are afraid to work with a soldering iron? You can use a candle and tweezers: after heating each rhinestone on the fire, quickly and carefully glue it. The method is also good for fabrics that do not like high temperatures.
Having mastered pasting clothes with thermal rhinestones, you can try decorating shoes - for example, masking scuff marks on your favorite but slightly worn boots. For this:
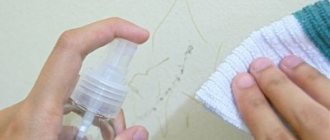
- A drawing is applied with a gel pen;
- Before gluing the decor, the trace of the handle is carefully wiped off with a cotton swab and alcohol or acetone. Acetone spread over the surface of the skin is fraught with indelible stains !
- Using a soldering iron or a candle, each element of the pattern is glued.
Will the skin suffer from such manipulations? No - a fairly coarse material can survive heating of about 180 degrees. Only the varnished surface raises doubts.
DIY beads from scrap materials
How to make a belt with your own hands from fabric?
How to glue thermal rhinestones onto fabric with an iron?
To fix thermal rhinestones on clothes, you will need:
- a set of thermal rhinestones themselves;
- iron;
- test piece of fabric;
- paper.
To achieve the most satisfactory result, the following conditions must be met:
- The clothing on which the rhinestones will be glued must be clean. It is recommended to pre-wash it and go over the fabric with a roller to get rid of excess lint. This will ensure better adhesion of the glue.
- If you plan to make an applique or a complex design that requires preliminary marking, you need to make sure that the marked lines are not visible after gluing the rhinestones.
Now about how to carry out the process itself.
Place the rhinestones in the desired manner on the fabric with the adhesive base facing down. Make sure that wrinkles and creases do not form - after gluing the rhinestones, you will no longer be able to smooth out the wrinkled fabric. Cover the rhinestones with paper and iron them. If the fabric is thin, also place paper inside
It is important to do this before laying out the rhinestones so as not to knock them off the markings and prevent the fabric from sticking together. Iron in the “silk” or “wool” mode - if the fabric is not very thin - without steam
It is recommended to apply a little pressure on the iron so that the rhinestones stick better. Carefully remove the paper and let the glue cool.
Gluing rhinestones using a candle
This method is suitable if the material cannot be ironed. Here are detailed instructions on how to glue thermal rhinestones using a candle:
- Straighten the fabric and lay out the rhinestones as needed.
- Light a candle. Be careful not to get any wax on the fabric.
- Using tweezers, take one rhinestone and, holding it high above the candle flame, heat the adhesive coating.
- Place the flat surface of the rhinestone on the fabric and press with the back of the tweezers. Do not rush to remove the tweezers immediately: press on the rhinestone for 30 seconds, this will help it stick better.
This method is suitable for decorating with rhinestones not only fabric products, but also various accessories, shoes, outerwear, interior items and various other crafts.
Features of gluing
Gluing is the easiest and most reliable way to attach jewelry to fabric. If you follow all the steps correctly, the rhinestones will look perfect on things.
- Use only special glue. The required ones are sold in fabric and accessories stores. It can also be purchased at automotive or hardware stores, but this kind of glue - industrial (epoxy) - may leave marks or not set at all.
- Glue for rhinestones is applied in equal small drops in those places where the design should be. Crystals should be taken with tweezers or miniature tongs, or, as a last resort, pry them out with a toothpick. Under no circumstances should you apply them with your fingers: the pad will cover a large area of the fabric, and the pieces of glass may move from the right place. In addition, your finger can stain the fabric with glue, which then cannot be washed off.
- Accuracy. You can lubricate the rhinestone itself with glue, but this task requires dexterity and very great care, since peeling off will lead to disastrous consequences - not only will the crystal be difficult to remove, but an ugly trace of glue will also remain in its place. It is advisable to first practice on a separate piece of fabric to get used to the process, and also watch thematic videos.
Self-adhesive options
They are initially sold with an adhesive composition on the surface, so there is no question of what glue to use to glue the rhinestones with. The gluing process is noticeably simplified: you put rhinestones on the fabric, cover with gauze and iron. Under the influence of heat, the composition dissolves and glues the crystals to the fabric.
Soldering iron applicator. This unit is also sold in specialized stores. It is relatively small and very easy to use. A soldering iron is necessary for heating individual rhinestones with an adhesive base. It performs the same functions as an iron, but is used with each crystal separately. Using a soldering iron applicator, you don’t have to worry about the rhinestones moving or turning over under the gauze.
Thus, choosing glue for glass jewelry will not be a big problem: you can buy it in any store, and even more so in a specialized one. If you need to manually glue rhinestones, you can purchase a soldering iron applicator, which will greatly simplify the task, or small tweezers or tweezers.
The simplest way is to use self-adhesive, or hot-melt, rhinestones - they are produced immediately with an adhesive base, which just needs to be heated to adhere to the fabric.
Remember that when gluing rhinestones, the most important thing is accuracy and attentiveness, so that you do not have to re-glue the stones and not leave glue marks. Then the thing will look neat and beautiful.
Caring for updated things
Products with rhinestones certainly require careful care and delicate handling during washing and ironing:
- Do not soak things;
- Hand wash only at low temperatures;
- Washing with liquid detergents for delicate fabrics, without using conditioner;
- When ironing, avoid direct contact of the hot surface of the iron with decorated areas; iron through gauze or thin cotton.
By gluing rhinestones to fabric, you not only update your favorite piece of clothing, but also enjoy the process.
Adhesive rhinestones VIVA12
Hot-melt rhinestones VIVA12
Adhesive rhinestones MAXIMA
General information
Glue for rhinestones
The most reliable way to glue rhinestones is to use specialized glue. This glue ensures reliable adhesion of the rhinestones to the fabric.
Fabric glue - produced in special sealed containers with a pointed top, which allows you to carefully distribute the required amount of glue onto the fabric
Another important advantage is that after complete drying, no traces remain on the fabric; the glue becomes completely transparent.
“Moment Crystal” adhesive with a transparent structure, easy to apply, dries quickly enough, leaves no marks
Important: the glue quickly sets on the fabric, and it is no longer possible to change the position of the rhinestone. In addition, the glue has a specific and unpleasant odor; long-term use can have a negative impact on health.
Fevicryl Fabric Glue bottle has a very convenient applicator spout, making it very easy to apply the right amount of glue. The glue does not stretch, it is white, but after drying it becomes transparent. After applying the rhinestone to the fabric, you have a couple of seconds to adjust its location, since the glue sets quite quickly. The glue dries completely within 24 hours; if you need to speed up this process, we recommend using a hairdryer.
Important: the product can be washed after seven days and only in cold water. "E6000 CRAFT" specialized adhesive for textiles, made in the USA
Odorless, viscous, so threads may form between the drops. But excess glue is very easy to remove from the fabric. Glue is often used to decorate products with Swarovski fabrics.
"E6000 CRAFT" is a specialized textile adhesive made in the USA. Odorless, viscous, so threads may form between the drops. But excess glue is very easy to remove from the fabric. Glue is often used to decorate products with Swarovski fabrics.
The main advantage: the special waterproof formula of the glue allows the product to be used in sea and fresh water, as well as machine washable.
Danscouture water-based rhinestone adhesive, made in the USA. Non-toxic, transparent emulsion, does not cause fabric deformation. Often used to decorate the costumes of gymnasts, figure skaters and dancers with rhinestones.
Important: not suitable for leather products. Types of rhinestones
Types of rhinestones
According to the method of attachment to the material, they are distinguished: adhesive and sewn.
Adhesive. The glue is either on the thermal rhinestone or it needs to be applied to the fabric. Apply cold or hot.
Sew-on. They have a special hole for sewing to fabric.
Hot-melt adhesive, fixed to fabric due to exposure to high temperatures. In order to stick rhinestones, you will need to place them on the fabric and heat them using an iron or a special soldering iron.
Cold fix rhinestones are fixed to the fabric using special glue.
Decoration with Swarovski crystals
Popular around the world, Swarovski crystals are a symbol of quality, impeccable style and cutting-edge design. Rhinestones are often used to decorate interior items, items of clothing or shoes, mobile phone cases, and various other accessories. For working on hard surfaces, it is better to use stones with a flat bottom.
Before decorating, it is necessary to thoroughly degrease the surface on which the crystals will be applied. They will be securely secured with a two-component epoxy adhesive, for example, CG-50-35. After applying the mixture to a grease-free, dry surface, quickly place and fix the crystals by lightly pressing on them.
When using Swarovski crystals with a hot-melt adhesive base, they should be placed on the material and ironed from the back.
Preparatory stage
Three factors play an important role in gluing rhinestones - good mood, inspiration and patience. But you also need to prepare thoroughly:
Idea. Think carefully about your future drawing or make a sketch on paper. A life-size sketch can be attached to the surface and adjusted to size.
Life size sketch
Life size sketch
- Choose rhinestones that suit the size, color and style.
- Fabric preparation. Lay out and gently smooth the base fabric. An important point - if the fabric is thin, it is better to place a sheet of paper between the layers of clothing in advance. Otherwise, the adhesive may penetrate too deeply and stick to the clothes.
- Draw onto the fabric with a pencil, tailor's chalk, or a special disappearing marker the outline of the pattern according to which you are going to glue the rhinestones.
- Arrange the rhinestones according to this pattern for visual perception.
You are ready? Let's start work.
Which rhinestones are more convenient and practical
Rhinestones are often used in sewing industries. You can also attach these stones to your clothes yourself. This way you can save money and get satisfaction from creativity. Based on the type of fastening to fabric, rhinestones are divided into two types:
- hot fix;
- cold fixation.
Each of these types of crystals has its own advantages and disadvantages. Cold fix rhinestones are attached to the fabric using special glue. They have a flat, smooth back surface. Glue is applied to it, and then the rhinestones are placed on the fabric. After several hours, the rhinestones adhere securely to the fabric. Cold-fix rhinestones are cheaper than hot-fix rhinestones. They can be used with different types of materials, especially thin and mesh ones.
There is already glue on the back of the thermal rhinestone. When heated, the substrate of such a crystal melts, and after cooling it is securely fixed to the material. This saves time if you need to attach a large number of rhinestones to clothing. Also, you will not have problems with applying glue: excess glue will not come out from under the crystals.
Gluing with adhesive tape
This method is used if you need to transfer a large pattern, which would be difficult and time-consuming to attach one stone at a time. The process occurs in several steps:
- The rhinestones are laid out on adhesive tape with the adhesive side up;
- The film is transferred to clothing and then ironed;
- The film is removed.
You might be interested in Sewing a bolero for a dress with and without patterns
Scotch film helps transfer a large picture
This method saves effort and time, but it has a significant disadvantage: the stones are fixed in a large group, some may not grab and come off.
Types of rhinestones
According to the type of material, rhinestones are:
- Acrylic. Lightweight, inexpensive plastic decor. They shine poorly and quickly become cloudy after washing and wearing for a long time.
- Metal. Resistant to wear, no shiny shine.
- Glass. The better the quality of the material, the brighter and more brilliant the rhinestones. They don't fade for a long time. They contain lead oxide, so their price is quite high.
Depending on the method of attachment to fabric, rhinestones are:
Cold fix rhinestones. The user himself applies the adhesive mixture to decor or clothing.
For high-quality fixation, it is important to choose the right glue and work with it carefully. Hot fix adhesive. These are self-adhesive or hot-melt rhinestones
They need to be applied to the clothing in the desired place and heated, then the adhesive layer will soften, and after hardening it will fix the decoration in the chosen position. Thermal rhinestones are heated with an iron or thermal applicator. In hot-melt rhinestones, the product is applied to the bottom by the manufacturer. Sew-on. They have holes for sewing to the material. The process of fixing to the material is more labor-intensive, but there is always the possibility of altering them to another place. Such crystals are used on thin and fleecy materials, where fastening with glue will not be strong.
How to quickly glue rhinestones to fabric
Gluing stones to fabric is easy. In general, everything happens in several steps:
- You need to apply a little glue to the fabric and wait a few seconds for the substance to absorb a little. There should be enough glue to capture the entire rhinestone - it should protrude slightly beyond the surface of the stone, “grasp” it.
Important! The thicker the fabric, the more glue you will need.
It is better to carefully pick up the crystal with tweezers, a thin plastic stick with wax at the end, or tongs, or a toothpick. The stone must be placed in the center of the drop and press slightly on it. If you wish, you can apply glue to the crystal itself, but this is more difficult and requires some skill. It is important to remember that the glue sets quickly: if you place the pebble incorrectly, when you wipe it off, a mark will remain on the surface.. There are several ways to apply decoration to clothes When working with stretchy clothes ( made of knitwear, nylon or lycra) before applying the glue, part of the clothing needs to be slightly stretched and held
Thin material, for example organza, generally does not hold stones well; you should also not decorate natural and artificial leather
There are several ways to apply decoration to clothing. When working with stretch clothing (knit, nylon or lycra), part of the clothing needs to be stretched and held a little before applying glue. Thin material, for example, organza, generally does not hold stones well, and you should not decorate natural or artificial leather.
You might be interested in this: Creating patterns and sewing children's dresses for girls of different ages
Using the applicator
There are fabrics that cannot stand the touch of an iron. For example, velvet. This is where a convenient soldering iron applicator with various attachments will come to the rescue. The attachments vary depending on the size of the rhinestone and allow you to heat the jewelry precisely and evenly.
The device itself is small and easy to use. The applicator will be indispensable for gluing individual hot-melt adhesive rhinestones. The device must be held still to accurately place the crystal on the fabric and ensure excellent results.
There are vacuum models of applicators that are equipped with a special pump; it draws in and holds the rhinestones.
How to choose rhinestones: their features and varieties
When applying stickers yourself, the choice of decorations depends on experience. Iron-on adhesives and rhinestones with glue applied are easy to use, but they do not last long. Glass and crystal can be reused, but they are more difficult to work with.
Designers advise using the same shapes and maintaining moderation in decor in everyday life. For an evening out, you can use rhinestones more freely and combine them with accessories.
Adhesive
Some manufacturers apply glue to the bottom of the parts. These products are easy to stick on your nails; no additional products are required. It is enough to remove the decorations from the film and lay out the desired pattern with them. LILYCUTE is a manufacturer of cheap acrylic jewelry. Their shape imitates precious stones. Rhinestones with glue are produced from high-quality glass in Hong Kong. Among the old brands, Aroshirva stands out, and among the new ones, Best.
Thermal rhinestones
Printed nail rhinestone designs are very easy to apply on your nails. In warm water, the thermal film peels off and is removed. Thermal adhesives with rhinestones are heated with a soldering iron applicator and carefully distributed over the nail plate. It turns out to be a kind of application. Dries in about 3 minutes. The Russian company Milv offers a wide range of 3D slider designs.
Other options
Depending on the materials, parts can be made of acrylic, plastic, ceramic, glass or crystal. According to the form they are distinguished:
- charms that can take the form of various figures, including animals;
- pearls, broths, transparent and multi-colored;
- hemispheres;
- pixies - small multi-colored crystals that look like neat shards of broken glass;
- conical with an unusual cone-shaped top and bottom, specially created for extended nails;
- classic, imitating precious stones.
Swarovski crystals
The cost of products from this brand is high. It depends on the materials used - high-quality glass or rock crystal. The cut of each set is the same, only the shape is round. Special processing allows you to achieve a unique shine. Visually they resemble diamonds.
How to decorate clothes with pebbles
Let's find out what types of shiny pebbles for clothing exist today. The technology for attaching each type of rhinestone is different. Let's try to understand each of them.
Types of rhinestones intended for decorating clothes:
- cold fix rhinestones (adhesive);
- thermal rhinestones;
- sew-on rhinestones;
- Swarovski jewelry.
Stages of attaching cold fix rhinestones:
- Before you begin attaching jewelry, you must wash your clothes thoroughly or degrease them using alcohol.
- Think about the pattern in advance. It can be laid out on paper or a piece of fabric. This stage should not be skipped under any circumstances.
- In order to apply a design to clothing, you need to use special crayons. Such marks can be freely removed from the surface of clothing after work. In addition, you can use transparent tracing paper, which will help you apply the pattern.
- Now you can start applying glue to the base of the picture.
- Then attach the pebbles one by one to the applied adhesive droplets.
Attaching thermal rhinestones
Thermal rhinestones differ from cold-fix stones in that they are initially coated with a special adhesive that is activated by heat. Thermal rhinestones are glued to the fabric using an iron.
Fastening steps:
- Before attaching thermal rhinestones to clothing, you need to put some kind of lining under it (another fabric or a thick magazine). This must be done in order to prevent hot melt glue from getting onto another part of the clothing.
- Set the iron temperature to an appropriate temperature for the fabric you are using.
- Place the thermal rhinestones with the adhesive side facing the fabric. You can practice laying out the pattern on a piece of paper or piece of rag in advance.
- Cover the jewelry with a damp thin cloth or gauze and apply an iron. There is no need to press the household appliance tightly against the fabric, otherwise the hot-melt glue may come out beyond the pebbles. Hold the iron without moving it to the sides for two to three minutes.
- Once the decorations are glued on, let the fabric cool flat for 30 minutes.
How to glue decorations to a hat
You can glue acrylic decorations using special glue. Then you may have a question about which glue is better to choose. It should be colorless and not spoil the appearance of the product, and it should not contain acetone, and it should only be purchased in special textile stores. Of course, you can buy universal glue (epoxy resin) in regular stores, but it can leave marks on the product.
If you decide to use ready-made designs and patterns made from thermal rhinestones to decorate your headdress, then you need to use an iron to glue them or a soldering iron for rhinestones.
Pebbles are attached to dresses, trousers and jeans in the same way as to a hat. You can also use sew-on decorations that have holes on the back side. They are fastened with ordinary threads.
If you want to decorate a ball gown or stage costume with sparkles, you can use the following materials to attach them:
- PVA glue;
- Polish for hair;
- nail polish;
- textile glue.
As you can see, the technology for gluing shiny pebbles is not that complicated. Now you know how to glue rhinestones on nails and clothes, so you can cope with this task at home. The main thing is to have patience, do the work carefully and be very careful. Don't be afraid to experiment, follow the latest fashion trends and create your own exclusive items. Good luck and creative success, friends!
What glue is best for gluing cold-fix rhinestones?
If the rhinestones do not have an adhesive layer, then they need to be glued with glue
When working with this type of jewelry, it is important to choose the right glue. The choice of adhesive depends on the type of material to which the rhinestones need to be glued
It is necessary to fix the crystal on the material without damaging it. Most often, rhinestones are attached with a special glue that is designed for working with fabrics.
Popular brands of special glue
Among the special adhesives intended for fixing rhinestones, there are several brands that are popular with most needlewomen. These include:
- "Fevicryl Fabric Glue". This glue is made in India. Its composition is based on epoxy paste. When applied, the white mass does not stretch, and after drying it becomes transparent.
- "Danscouture". Water-based glue designed specifically for decorating fabric with rhinestones. Can be used when working with all types of fabrics, as it does not destroy or deform the material.
- Textile glue "E6000 CRAFT". This brand is made in the USA. During use, threads may appear between drops of glue, but they can be easily removed from the fabric without leaving marks. When the composition dries, a strong and elastic connection is formed.
- Glue "CG 500-35". An epoxy composition intended for decorating products with Swarovski rhinestones. Often used in jewelry making. Suitable for working with wooden, metal, rubber, glass surfaces, but not used for decorating fabrics.
How to choose glue that is not specifically designed for gluing rhinestones?
In the absence of special glue, you can use universal
It is important to take into account the type of material and the resistance of the glue to moisture if the product requires periodic washing. The connection formed should not affect the elasticity of the material
It is also important that the glue does not leave marks.
Typically, waterproof compounds are used to fix rhinestones. In addition, “Liquid Thread” glue has proven itself well when combining materials and decorating clothes.
Can I use a glue gun?
A special glue gun is used in everyday life. With its help, you can get rid of cracks in window openings, repair shoes, and plumbing fixtures. However, the gun is suitable not only for joining plastic, wooden, and ceramic parts. It successfully copes with gluing rhinestones to clothing and accessories made of various materials.
Glue gun
The operating principle of the gun is based on heating and melting an adhesive rod. Solid adhesive, inserted into the corresponding hole, melts under the influence of the built-in heating element. 10 minutes after switching on, the hot composition is supplied in liquid form from the barrel of a gun to a certain area of the product.
Glue selection
Special glue can be purchased at a hardware department or store or with craft supplies. There are adhesives for attaching rhinestones to fabric and soft surfaces. They are sold in convenient tubes with a narrow nozzle for precise application. The substance often has a whitish tint, but this is not a problem: when dry, the glue becomes transparent.
A good example of such products is the German composition Schmuckstein Kleber. The color of the material resembles milk diluted in water. But this does not mean that the fabric will be dyed. After gluing, no traces of the substance remain. Rhinestones and sequins attach equally well to it. Similar compositions for working with fabric and rhinestones are Danscouture, Guttermann Textillekleber HT2.
If the rhinestones are attached to a hard surface, you can try attaching them to two-component epoxy glue, which is sold in hardware stores. It is better not to apply such glue to fabric: it will most likely leave unsightly stains on clothes.
Stationery glue does not have a sufficient degree of adhesion to stick a decorative crystal to clothing, so it is better to avoid using it. What definitely cannot be used are adhesives like “Super Moment”. These products contain caustic substances that corrode fabric and beads.