After using soap for a long time, residue remains. Most people rush to throw them away. The desire to get rid of them occurs because people do not know where they can be useful. You can easily get a new product from old soap remnants if you are interested in creating updated soap. You can achieve the desired effect in making soap only if you take into account certain points. The article will help you understand the creation of new soap from soap remnants.
Preparing for soap making
When starting to make soap at home, you must first prepare everything you need. Prepare all the necessary tools in advance and place them in one place. Cooking usually takes place in the kitchen. Place food and utensils in closed cabinets or the refrigerator. Use only one that will not be used for cooking in the future.
If there are small children in the house, to avoid unpleasant situations, organize the process so that they do not interfere with you in the kitchen. The same applies to animals, as hair can get into the soap components.
Preparation of the workplace
Before starting work, prepare your work area. If you work at home, then remove all unnecessary items into cabinets and clean the work area.
Minimize the presence of children and animals near the workplace.
Tools, containers and accessories
To make new soap from old soap you will need:
- Soap remnants are preferably in large quantities.
- Molds. You can buy professional ones. If you can’t buy them, silicone molds for baking, sand molds for outdoor games, and any small food containers are suitable.
- Base oils. For example, almond, olive, sea buckthorn.
- Essential oils for a special aroma and healing effect.
- Plastic jars of different sizes for melting soap base.
- An alcohol solution in a spray bottle to spray the base and remove air bubbles.
- Dyes, preferably food grade.
- A metal grater, preferably in the shape of a cone.
Homemade Soap Ingredients
Homemade soap making is a creative and exciting process. Before you start preparing a unique product, prepare the necessary ingredients:
- soap base;
- dyes, flavors;
- base oil;
- additives.
Important! To avoid an allergic reaction, choose high-quality materials from trusted manufacturers.
Soap base
It is better for beginning soap makers to take a regular children's soap composition without dyes, fragrances and fragrances, or purchase a professional base. It can be white, transparent or colored in packages from 250 ml to 1 liter.
A high-quality base is homogeneous, viscous, without foreign impurities and strong odors
When purchasing soap base, pay attention to the consistency of the product.
Shelf life does not exceed 2 years.
Dyes
When boiling soap at home, use natural coloring agents:
- saffron, curry, mustard powder, turmeric give a bright yellow color;
- beet juice, cherry juice - all shades of red from pale pink to rich red;
- ground red pepper, paprika – bright red;
- chamomile decoction – creamy, pale yellow;
- dill, nettle, spinach, parsley, any herbs - green;
- sea buckthorn, carrot juice – orange;
- ground activated carbon, poppy seed – gray;
- coffee, cocoa - brown or chocolate.
The disadvantage of natural dyes is their unstable color, which fades over time. Store this soap in tight packaging.
Professional liquid or dry pigments have more lasting results. They give a deep, rich color, do not fade, and help create briquettes with patterns or bright stains.
Important! Before adding to the base, the dry substance must be ground with glycerin or oil.
To add beautiful shine and shimmer to the soap base, add mother of pearl - a dye based on mineral components.
Base oil
A base vegetable oil infuses homemade soaps with skin-loving nutrients. The therapeutic effect is achieved by the presence of microelements, vitamins, fatty acids:
- for oily or combination skin, use eucalyptus, sage or grape seed oil;
- for dry, castor, palm or almond are suitable;
- for normal – coconut, almond, cocoa or apricot kernels.
Important! Add no more than ½ tsp per 100 ml of soap base. oils An overdose can cause allergies, redness, severe itching and burning of the skin.
Supplements
To give the soap exfoliating properties during its production, natural ingredients are added to the base:
- ground coffee;
- coconut flakes;
- cereals;
- dried flowers, medicinal fragrant herbs;
- ground nuts, fruit pits.
Honey, cinnamon, cream, glycerin are added to soap to soften and create a pleasant aroma.
Additional components can be made independently using a coffee grinder (blender), or purchased at a specialized store.
Soap making tools
To make a homemade product, prepare:
- a heat-resistant glass or plastic container that can be used in the microwave, or pans of different diameters for heating the mass in a water bath;
- beaker;
- silicone molds for hardening soap;
- wooden or glass sticks, spoons, spatulas for mixing the mass;
- alcohol in a spray bottle to wet the molds and remove bubbles;
- thermometer.
In order to make soap from soap remnants, you may also need a knife or grater for chopping.
Advice! If you don’t have special containers on hand, use silicone molds for home baking.
Making soap in the microwave
- We prepare the molds in advance, grease them with oil to make it easier to remove the soap.
- We cut the remnants into small pieces. You can grate it on a coarse grater. Transfer to a microwave-safe container. Let it melt for 15–20 seconds. Repeat several times until the remnants are completely dissolved. Make sure that the mixture does not boil.
- After dissolving, pour into a container. If desired, you can add aromatic fragrances, essential oils, and coloring pigments.
- Sprinkle the form with the solution with alcohol and lightly tap along the edges. To remove excess air bubbles.
- Place the molds in a cool place or refrigerator for 2 days. After this, carefully remove the soap.
What to pay attention to
If you have never melted soap in the microwave before, read this section carefully.
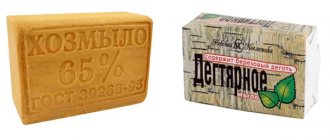
1. There should be no pieces of laundry soap in your mix because it smells. When heated, the “aroma” intensifies, and the microwave “preserves” it well. The same goes for other “scented” foundations.
2. It is very important to maintain the desired melting temperature. This can be done using a liquid thermometer. Make sure that no bubbles form on the surface of the mass, indicating boiling. Overheated soap quickly dries out and loses its ability to foam.
3. Add all additives (discussed below) at the last stage of melting (to avoid odor). Let us remind you: you prepare soap in the microwave from soap remnants, that is, individual pieces, each of which has its own color and smell. If the use of additives is not planned, all components should combine well with each other in these parameters.
Soap in a water bath
It is better to melt multi-colored soaps separately. If you mix them, the result may be unexpected.
- In a water bath, the soap remnants are melted gradually. If you cut it with a knife, the manufacturing process will be extended. It is better to use a grater to grind soap remnants.
- Use two heatproof containers of different sizes so that one fits easily inside the other. Pour some water into the lower container and put it on fire.
- After the water boils, place a second container with soap shavings on the pan and begin to melt. Do not forget to stir constantly and make sure that the composition does not boil.
- Then pour into molds and send to dry.
Melting technology
The simplest technology is used to melt soap.
- First, the material is properly prepared (as a rule, it is simply crushed as much as possible), after which it is heated. Thus, it quickly becomes liquid and homogeneous.
- The smaller the chips in the end, the faster the whole process will go. It is very important not to overheat the soap mass and, even more so, not to bring it to a boil, otherwise it will be spoiled and cannot be used in the future. Therefore, during the process of melting soap, it is better not to leave the stove, but to carefully monitor the mass and stir it constantly.
- Open fire and boiling water are not suitable for melting. Water should not get on the material. This may also damage it and make it unusable in the future. Often a water bath is used to melt the soap. A minimum amount of water needs to be poured into the lower container. Even with active boiling, its drops should not reach the soap mass.
- You will need to choose methods that involve gentle heating at low temperatures. It is also important that there is no direct contact with water. The best ways to melt the material in this case are a water bath or a microwave oven. In the latter, heating occurs evenly, and, in addition, the power of the device is easily regulated.
- After preparation, soap pieces are sent to a container suitable for heating. The latter must be carefully selected. For example, you can take an old small saucepan that is no longer used for cooking. In the future, it is not recommended to cook or heat anything edible in it. But this option is only suitable for the stove.
- If you plan to melt the material in the microwave, you will need to choose special dishes designed for microwave use. In the future, it can be used to prepare cosmetics, warm masks for hair and face, and mixtures for wraps. But also not for heating food.
- Containers made of not every material are suitable for the process under discussion. Its most important characteristic is heat resistance. In addition, the material should not absorb soap components. For example, glass, metal or ceramic dishes are perfect.
- No matter how high-quality the chosen container turns out to be, it will no longer be possible to completely wash it of the smallest soap particles. That is why, after the first melting, it will become unsuitable for any food products.
Liquid soap
The recipe for making liquid soap is simple. We grate the soap on a fine grater. Transfer to a container. It should be approximately 2/3 filled with shavings. Pour boiling water or herbal decoction. If desired, you can add other components later. In this case, leave some space in the container. Shake vigorously from time to time. It is necessary to achieve complete dissolution of the remnants and the formation of a thick composition.
After this, you can add a few drops of essential oil or a little liquid honey and pour it into a bottle with a dispenser.
If the mixture is too liquid, add a teaspoon of sugar and mix thoroughly.
Preparing soap residue for melting
We follow the process:
- To grind, use a grater or blender.
- If the soap residue is too dry, then you should use olive oil (30 milliliters per 500 grams).
- An additional way to soften the soap is to add a tablespoon of herbal tincture or milk. It is important that the added ingredient is completely absorbed into the structure of the soap base. To do this, leave the finished composition for 2-3 hours.
Having completed the work on the above points, you can begin the process of melting soap.
One piece of remnants
Grate the remaining soap. Transfer to a container and add a little hot water. The liquid should be flush with the chips. A smaller amount will not dissolve all the shavings. Excess will prevent the soap from hardening.
The composition needs to be stirred from time to time. After complete dissolution, you can add a few drops of food coloring or essential oil.
Pour into mold and refrigerate for 2 days.
How to properly melt soap on the stove (master class)
This option for melting leftover soap will require some skill on your part, regardless of whether you are working with a gas or electric stove.
Below are step-by-step tips:
- Grate the soap on a fine or medium grater;
- Transfer the dry mass to a saucepan and hold it above the fire at a distance of 3–5 cm;
- Stir occasionally and do not allow the soap mass to burn;
- As soon as the soap becomes liquid-thick, begin adding the remaining pre-prepared ingredients;
- Pour the resulting mixture into molds and leave to harden.
Soap-scrub
To prepare toilet soap with a scrubbing effect, oatmeal, ground lemon or orange zest, ground coffee or cinnamon are added to the soap base.
Pour a little water into the soap shavings and wait for complete dissolution. The base should have a consistency similar to plasticine.
Scrubbing components are added to the resulting mass, shaped and placed in a dark place to dry.
You decided not to throw away your soap. Where to begin?
We begin to collect the remaining soap. Find a way to store them. This could be a small box in the bathroom or kitchen. A mesh bag, like for onions, or a regular plastic bag. From 5-6 pieces you can already figure out what to do. Therefore, it is better to save up more.
Quick liquid soap
Take an empty bottle with a dispenser and crumble or cut soap into it (except for household soap, if you have one). Fill with warm water, close the lid, and shake. And you have a whole bottle of hand rinse
.
Convenient soapy rag for the kitchen
If you know how to handle a needle and fabric, then I suggest sewing a soap rag for various surfaces. An old towel or an unnecessary T-shirt will do for this. Sew a square of fabric and leave only a small gap to place the remnants there. If sewing is not your thing, use an old sock or cut off the bottom of unnecessary tights. In any case, no matter which option you choose, you will have an excellent self-soaping cloth for cleaning up your home.
Universal washing liquid
Make a soap composition for rinsing windows, cracks, window sills, plastic furniture or surfaces during general cleaning. The points are the same as for creating liquid soap in a bottle, the other will be the volume of water needed. The solution should be less thick. Take a basin or bucket for this.
Soap and water solution for cleaning the house
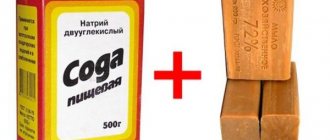
If you add a little soda to the soap solution, you will get a universal cleaning product. Good for doors, wooden furniture, window openings. To clean linoleum, tiles in the kitchen and bathroom, take the same solution and combine it with a few drops of ammonia.
Original soap air freshener for linen and clothes
Place the fragrant soaps in mesh bags and place them in your closet with bedding and clothes. The musty smell will go away, and things will always smell delicious and fresh.
Soap made from colorful pieces
Some of the remnants need to be cut into small pieces, remaining into larger ones. Then we mix them and sprinkle them with alcohol so that they stick together.
Transfer to form. Fill with melted transparent soap base. Leave to dry. Then remove from the mold.
If the mold is not silicone and the finished soap is difficult to remove from it, lower the container into hot water for a few seconds.
Washcloth
Soaps can also be used at home. Now there are washcloths with pockets on sale. You can put soap in them. This type of washcloth doesn’t even need to be soaped – you just need to wet it.
You can make such a device yourself. If you are comfortable with sewing, cut out a rectangle from an old terry towel and sew a bag out of it, inside which you place the soap.
If you don’t have the opportunity or desire to sew, you can do it differently. Take a terry sock (perhaps you have an unpaired one lying around somewhere), place soap remnants in it and tie it in a knot.
Bath foam from soap remnants
We grate the soap and fill it with hot water. For 100 grams of chips, 1 liter of liquid. Stir occasionally. Complete dissolution must be achieved.
To obtain air bubbles you need to add glycerin. Approximately 60 grams. You can add a teaspoon of liquid honey or drop a little of your favorite perfume.
Stir and pour into a container with a screw-on lid.
Do not make a lot of foaming hygiene product at once. The finished composition is not stored for a long time. Shake well before use.
Tips for Beginners
The following tips will help you melt soap quickly, easily and correctly:
- It is not recommended to mix multi-colored soaps; it is better to place each shade in a separate bowl (otherwise it is difficult to predict the final result);
- if the material melts as a base for liquid soap, it will need to be mixed with a decoction of herbs and other additives (for example, liquid honey), and only then poured into a container with a dispenser;
- All options for melting soap pieces are suitable for soap making; by the way, the same method can be used to melt a special store-bought base (the mass with various additives is then poured into beautiful shaped shapes);
- for eyebrows, it is best to melt soap in the microwave - 10-12 seconds will be enough for the shavings, after which you can pour it into a palette and wait for it to dry (after which it will be used instead of styling gel);
- for shaving, simply melt the soap shavings in any convenient way, mix it with chamomile herbal decoction (to minimize the possibility of irritation) and let the mixture cool to a temperature comfortable for the skin.
To melt your own soap at home, you don’t need any special equipment or accessories. Suitable dishes that are not used for food and a device for heating the mass - stoves, microwaves, ovens - are sufficient.
Subtleties of the process
- It is recommended to use the same dishes and molds each time. The smell of soap is absorbed into the micropores of materials and can cause discomfort.
- To spray the soap base and remove excess air from it, use alcohol, not vodka.
- You can add almost anything to your homemade soap base. Abrasive substances are not suitable: ground coffee, poppy seeds, and so on. Because they can injure the skin.
- Fresh fruits and juices should not be added either. They quickly deteriorate and significantly reduce the shelf life of soap. If you do prepare it, use it as soon as possible.
Tailor's chalk
This is a method of using soaps known to all needlewomen. Everyone who sews faces the problem of how to draw a line on fabric from time to time. Tailor's chalk is not always on hand; the mark of the pen may be visible on the front side; On dark fabric, pens and pencils are not always visible. In this situation, a small piece of old soap will help you out. Sharpen it and draw a line. It can be easily removed later.
This method has one drawback - the soap leaves a white mark, so it is visible only on dark fabrics. For light ones, you will have to resort to another remedy.
Healthy Supplements
Essential oils not only add aroma, but also have a healing effect. A few drops are enough.
- Aloe gel will help moisturize and smooth the skin. Add to the base. The volume can reach up to 50%.
- Lemon juice tightens and tones the skin. Add to the mold after pouring. A sufficient amount is 2-5 drops. Depending on the size of the future soap bar.
- Honey increases the volume of foam, nourishes and moisturizes the skin. You can add from 2 to 4 teaspoons per 1 kilogram of soap base.
- Grape seed extract. Accelerates the thickening of soap, a good antioxidant.
Pasting on glass
Soaps can be used not only for their intended purpose - to wash something with them, because they can not only clean, but also glue. However, unlike regular glue, soap does not leave behind any residue. This will come in handy if you need to stick something on a window.
For the New Year, children, like many decades ago, love to decorate windows with paper snowflakes. Wet the soap, run it over the unfolded snowflake, apply it to the glass and press lightly with a cloth, removing excess water. The snowflake will delight you all holidays, and after them it will easily be washed off with warm water.
On a window that for some reason you do not want to cover with curtains, you can glue small pieces of tulle. This is done in much the same way as with snowflakes. A closed window will still let in light, but will also protect you from the prying eyes of your neighbors. When the need for “shelter” disappears, the tulle can be easily removed without leaving a mark on the window.
Possible mistakes in soap making
The package of remnants is ready, the recipe has been found. The process was carried out without deviating from the indicated points, but the result was not satisfactory. What is the reason? As a rule, they “oversalted” the components. The main disadvantages are:
- Remember to have a sense of proportion. Do not overdo it by stuffing soap with different ingredients. All you have to do is pour out the essential oils, add an extra 4-5 drops of dye, and it’s all down the drain and can be thrown into the trash. Not only the soap will be painted, but also the skin.
- To make the soap smell good, do not bring the base to a boil. Too much flavoring spoils the smell. For example, vanilla powder and cinnamon ultimately do not give the expected effect.
- A solution of brilliant green gives a shade of bright emerald color. Over time it fades.
- Red wine added to soap base can give the product a gray color.
- A series of meltings, overheating or boiling of the base, changes the pH of the soap and, as a result, a bad smell. It is necessary to monitor the temperature of the base during melting.
- It is not recommended to use chemical dyes when making soap; it is better to use food dyes.
- After adding salt, do not add water, otherwise the soap will curdle.
Microwave Soap Recipe
For a good result, it is necessary to maintain the proportions of the base material and water. The optimal amount is 200 g of soap bars and 50 ml of boiling water. If there is a desire to increase the portion, then the ingredients are added in equal proportions. Pieces of laundry soap need to be selected, it can spoil the overall “picture”.
To melt the mass evenly, you need to grind the soap remnants using a grater, put the shavings in a container suitable for the microwave and fill with boiling water. Place the mixture in the oven for 30 seconds at maximum power. After the time has passed, mix the mixture and put it back. We carry out this manipulation until a homogeneous liquid mixture is obtained.
The soap base should not be brought to a boil, because the quality of the original product deteriorates. As useful supplements you can use:
- Essential oils.
- Ground coffee.
- Chopped herbs.
- Natural dyes.
Safety regulations
When using essential oils, you need to remember that excess oil can be harmful to health. The dosage is different for each type, but no more than 7–10 drops per 100 grams of base. Possible allergic reactions must also be taken into account.
Avoid getting essential oils on your skin, as this may cause chemical burns. In case of contact, immediately wipe the area with sunflower or olive oil. And rinse with plenty of running water.
Use only food coloring. Follow the dosage. Excess pigments can stain the skin.
For soap making you need to use separate dishes.
Cautions and tips for beginners
- The room in which you are going to make soap, most often a kitchen, should have windows and be well ventilated. Mixing aromas and different elements during the process can cause allergic reactions.
- Do not use tin or aluminum pans. They can easily react with soap, which will most likely ruin your dishes and have to throw them away.
- Use a wooden spatula or sushi stick to mix ingredients. Silicone and plastic can leave an unpleasant odor.
- Restrict small children's access to the kitchen until you have poured everything into the molds. They may accidentally unwrap hot soap dishes, resulting in burns and unplanned cleanup.
Benefits of homemade soap
- The main advantage of handmade soap is saving the family budget.
- The final composition of the hygiene product depends on your desires and preferences.
- Availability of useful components. By adding essential oils or herbal infusions, you can make the soap vitamin-rich and rich in substances beneficial to the skin.
- Making soap can become a hobby.
Making soap from soap remnants offers endless scope for creativity. The main thing is to approach the matter with soul, put in a little effort, flavor it with imagination, and then the result will sparkle with colors and sparkle with aromatic foam.
Window insulation
Not everyone has modern double-glazed windows, but everyone wants warmth in winter. One way to insulate is to seal the joints of the window frames. The easiest way is to use special tape for covering windows. It sticks in minutes, but in the spring it comes off along with the paint, adding extra costs and extra work to you. A less fast, but more gentle way to insulate windows is to cover them with plain paper. And here remnants will help you again.
Place the prepared strip on the windowsill. Dip a bar of soap into the water and wait until it gets a little wet. Run a wet soap over the strip and glue it to the frame. Press with a rag for better adhesion. In the spring, you can easily remove unnecessary paper - you just need to slightly moisten it.
