Proper and timely care of your Janome sewing machine will ensure uninterrupted operation and a long period of operation without equipment breakdowns.
You can care for your Janome sewing machine yourself or at a service center. At home, periodic cleaning and lubrication of moving parts and equipment components is sufficient. These simple steps ensure:
- Reducing the load on moving parts.
- Increases the wear resistance of parts.
- Protection from dust and dirt during the sewing process.
- Save metal parts from rust.
Tools and accessories
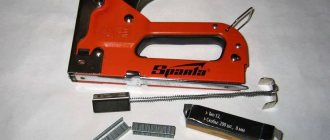
To clean and lubricate the sewing machine components you will need:
- Fabric – lint-free cotton flap.
- Brush with hard bristles. Usually included with the machine; if you don’t have it, you can use a regular toothbrush or a hard art brush.
- A syringe or a special oiler for lubricating elements in hard-to-reach places.
- Oilcloth to protect the table surface.
- Paper towel or napkin.
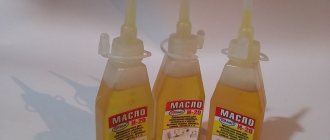
- Oil for sewing machines.
- Screwdriver.
Properties of oils
The price of oil for sewing machines also depends on the properties and degree of purification. Of course, the cleaner and more transparent the oil, the better it is: it does not stick parts together and does not leave stains on the fabric. In addition to purity, lubricating oil may have the following properties:
- Viscosity. This is a value indicating how strong the oil film will be on the lubricated parts. The optimal viscosity index for sewing equipment is 18-20. As a rule, for high-speed machines, oil is taken with a higher viscosity.
- Pour point. At low temperatures, the oil loses its mobility. If your cars are constantly in a well-heated room, then this is not a threat to you.
- Anti-oxidative properties - the ability not to deteriorate under external influences, that is, a shorter or longer service life.
- Cleaning properties - the ability to prevent dust from adhering.
- Additive content. Additives are additives that improve the properties of the oil (for example, so that it does not foam).
How to choose oil for lubricating a sewing machine
When completing basic spare parts and tools for sewing equipment, the manufacturer adds a small bottle of oil, which is enough for the warranty period. But what to do if there is no oil or if it has run out?
On sale you can find different types of oils for caring for Janom sewing machines. The cost of oil depends on the type of raw material:
- Mineral is one of the cheapest options. Produced by processing petroleum products.
- Synthetic - is a product derived by chemical synthesis. Ideal for equipment containing plastic elements, as it does not contain mineral solvents and fats.
- Mixed - oil created on the basis of mineral and synthetic.
Step-by-step algorithm for lubricating a Janome sewing machine
Carefully read the section of the instructions included with the equipment for cleaning and lubricating the sewing machine. The diagram usually shows the main components that require periodic lubrication (once every 3-6 months - depending on the intensity of use).
- Preparatory stage: disconnect the equipment from the network, place an oilcloth under the machine, free the machine from threads, completely removing the bobbin from the shuttle device, as well as the upper spool, fill the syringe or oil can with oil.
- According to the instructions, unscrew the necessary screws and remove the plastic case. To avoid confusion during assembly, place the unscrewed parts on a labeled sheet of paper.
- Using a brush, thoroughly clean all mechanisms of the sewing machine from dust and dirt.
- Using a syringe or oil can, lubricate all metal moving parts indicated in the instruction diagram. 1-2 drops of oil is enough. Pay special attention to the attachment points of moving parts.
Machines with vertical shuttle.
Cleaning and lubricating the shuttle.
Vertical swinging shuttles are most in need of cleaning and lubrication. Even in imported sewing machines.
Instructions:
- We take out the bobbin case.
- We move the latches (mostly plastic, black): left - left, right - right.
- Remove the locking ring and take out the crescent shuttle.
The most important thing is to thoroughly clean the grooves of the shuttle body from dust and dirt: the place where the shuttle rotates*
After cleaning, lubricate with oil (preferably transparent), the grooves of the shuttle body - 2-4 drops on the left and right. See photo:
Reassemble in reverse order.
Important: when assembling the vertical shuttle device, the needle bar and needle must be in the upper position. The crescent-moon shuttle pusher and the crescent-moon shuttle should look at each other (until a full circle).
Service at the service center
Despite the fact that Jan can easily handle basic cleaning and lubrication of a sewing machine even for a non-professional, it is recommended to periodically contact the service to diagnose the equipment, replace worn parts, as well as maintenance and adjustment.
The ARS-Master service center carries out all types of maintenance, repair and adjustment of Janome sewing machines with a guarantee for each type of work.
Seamstresses quite often replace hand tools and devices familiar to the older generation with automated sewing machines of various types. Each of them is suitable for a specific type of work and has its own functional features. Previously, no one could even dream about this. Despite such a wide variety, all machines require almost the same care and maintenance measures. These include lubrication of the main working units with special oil. This is necessary not only to extend the service life of the unit, but also for its flawless operation.
What is sewing machine oil
Sewing machine oil is a special composition that helps reduce the friction force of parts in the main running units of the machine. A layer of such a substance protects the moving parts of the device from wear and prolongs their service life.
Sewing device
If you need to find out which lubricant is best to use for a particular machine, where the oil compartment is located in devices with an automatic lubrication system, and other points, you should read the operating instructions for the equipment. It comes complete with all devices.
Important! It is strictly forbidden to use machine or vegetable oil, as it does not provide proper lubrication, collects dust and has a bad effect on the operation of both individual components and the entire mechanism as a whole.
The quality of the oil directly depends on the components from which it is made. Their properties, in turn, are determined by the composition of the primary raw materials. The following types of lubricants are distinguished:
- semi-synthetic. This is a mixture of petroleum and synthetic oils in a certain proportion;
- mineral or petroleum. They are obtained after oil refining. The result is a mixture of high-boiling carbons;
- synthetic oils. They are made through the synthesis of chemical elements, as a result of which the composition is almost completely free of mineral fats and solvents.
How to choose a lubricant oil
Lubricants for sewing machines are quite viscous in structure. When a substance that is too thick is used, there is a risk that internal parts and mechanisms will not be lubricated properly. But they are the ones who bear the main burden. The same can be said about a consistency that is too fluid: it will not have time to penetrate deeply, and the nodes will also be undiluted. It is for these reasons that the composition should be of medium viscosity. Often the indicator is indicated on the label.
Important! Some sewing equipment does not require lubrication, since it is already equipped with an automatic system that can independently perform maintenance after a certain time or based on sensor readings.
As already mentioned, the most suitable oil for a particular sewing machine comes with the device. If for some reason it was not there, then you should choose the best quality lubricant. Its cost starts from 100 rubles. It is sold in ordinary plastic bottles.
A device with an independent lubricant replacement system
Bobbin case device. Cleaning the bobbin compartment
1-Bobbin case. 2-Hook fastening levers. 3-Central rod for fixing the bobbin case latch. 5-Shuttle. 6-Shuttle guide. 7-Protrusion of the shuttle.
The bobbin compartment becomes dirty with fabric frays and thread fragments, which sometimes penetrate the bobbin case and are pressed onto its walls, interfering with the free movement of the bobbin. You should inspect it before installing it back and, if necessary, clean the walls from fringes with a stiff brush. In addition, it is necessary to disassemble the shuttle itself, as shown in the diagram. Be sure to lubricate the shuttle movement grooves with a small amount of oil.
In general, try not to waste too much oil in the shuttle compartment. Oil can get in as the thread moves upward and stain your product, even after a long time. If your machine has a horizontal shuttle, the grooves do not need to be lubricated. The shuttle is made of plastic and does not require lubrication. But the swinging shuttles are completely metal, so a little lubrication will do the trick.
When installing the hook back, position it as shown in the figure so that the hook guide 6 forms a crescent moon on the left side of the sewing machine. Holding the shuttle 5 by the central rod 3, position it so that it forms a crescent on the right side. Protrusion 7 shown in the figure will be at the bottom. Place bobbin plate 4 on top. Return levers 3 to their original position until they click.
Lubricant for industrial sewing equipment
The latest industrial devices have an automatic lubrication system. You just need to look at the oil level from time to time and fill the reservoir if the mark is below normal.
Some older industrial sewing machines, like household sewing machines, are lubricated using a drip or dry lubrication system. In this case, the main rubbing parts and mechanisms must be processed manually and only by qualified specialists.
Typically, industrial units are treated with mineral or synthetic oils. Among synthetic compounds for sewing mechanisms, silicone ones are in particular demand. This type is used only for certain parts of the device, namely:
- blades and knives;
- motor parts and assemblies;
- plastic and graphite elements.
Treatment should be carried out using a coarse brush and spray.
Tools for cleaning and lubricating Janome machine
Features of the lubrication procedure
It is a mistaken belief that when lubricating, you need to apply as much of the compound as possible. This is far from true. Excessive oil may cause further accumulation of dust, pieces of thread and pieces of fabric. The mass, which is formed from lumps of foreign bodies, usually accumulates in one place and leads to the breakdown of a certain mechanism.
Sewing machine lubricant
How often should you lubricate your sewing machine?
There is no universal recommendation on the frequency and method of processing the machine. It all depends on the regularity of its use and the quality of the build. If you use the device several times a week, then it will be enough to change the lubricant a couple of times a year. The processing method is also different everywhere and depends on the structure of the apparatus. The disassembly of devices with a vertical and horizontal shuttle, for example, differs, as does the location of the main components in them.
Sewing tool lubrication
Thus, with high-quality care, as well as compliance with all operating rules, the sewing machine will be able to serve for quite a long time and bring a lot of benefits to its owner.
A sewing machine is the main tool of a needlewoman. You need to choose it very carefully, having decided on the necessary functions. The appearance should be aesthetic, and the functionality should fully make you feel like a professional. But not only the quality of the device itself affects the service life; proper operation of the device is also important. In order for a sewing machine to serve for a long time, it is necessary to properly maintain it: change parts, clean and lubricate, and adjust mechanisms. This article will tell you how to lubricate a sewing machine, why lubricant is needed at all, and what lubricants are used for this.
Machines with a rotating rotary shuttle.
These are old VERITAS cars, modern BERNINA, PFAFF cars (limited number of models), they are installed in some models of cars from Chinese companies. The rotating shuttle is the most durable and high-quality, allowing you to sew at high speed. Therefore, they are installed in almost all models of industrial machines. It is enough to keep this shuttle clean (brush) and drip about 3 drops of oil between its movable and stationary parts.
In all sewing machines, the needle bar block and its adjacent hinges should be cleaned and lubricated. To do this, remove the left cover (where the light bulb is located), clean out the dust and dirt with a brush, and apply oil to the needle bar rod and adjacent hinges.
It is very useful to clean the dust between the teeth of the fabric conveyor (rack). In my practice, there have been cases of motor breakdowns (expensive replacement) due to uncleaning of sewing equipment - the mechanisms jam, then the motor * burns out.
How often should you oil and clean your sewing machine?
It all depends on the amount of load on the machine, hours worked (Total 8 hours of sewing).
- Those who sew a lot - clean and lubricate 2-3 times a week
- For those who don’t sew much, clean and lubricate 1-2 times a month.
Doing all this is quite simple without inviting a specialist to your home. Of course, only a master will do full maintenance (including disassembling the case).
Depending on the amount of sewing, a specialist is invited for full maintenance once a year. Then the sewing equipment will thank you with high-quality and durable work.
A FORUM is opening soon on our website.
with various interesting topics:
- selection of sewing equipment
- discussion of specific models
- technical problems
- and other useful topics
I will be a technical moderator and will be happy to answer all your questions.
One of the important requirements for proper operation of a sewing machine is the timely lubrication of components and mechanisms with special sewing oil, the brand of which is indicated in the operating manual of the sewing machine. Lubrication and cleaning of the sewing machine should be carried out regularly, at least once every six months. Caring for a sewing machine includes not only regular lubrication and cleaning, but also proper storage and use of the sewing machine to sew the fabrics for which it is designed.
Proper operation of sewing machines is the key to many years of operation without breakdowns. Unfortunately, often we simply don’t even read the instructions to the end. We figured out how it works and that’s enough, let’s start sewing. However, based on experience, we can conclude that the main cause of sewing machine breakdowns is non-compliance with the operating rules clearly indicated in the manual. A sewing machine, be it a Chaika sewing machine or the latest model Singer with a computer control, is, first of all, a mechanism that sometimes requires lubrication and maintenance, and most importantly, it is designed for certain loads of components and parts.
Sewing thick and coarse fabrics using household seamstresses is the main reason for the breakdown and failure of many of them. Untimely lubrication or lack thereof at all is the second and improper storage of the sewing machine is the third.
Why do you need lubrication?
A sewing machine is a complex device. When creating a stitch, many mechanisms work simultaneously. If you do not clean and lubricate important components on time, the mechanisms will become clogged and fail. This will entail breaking threads, creaking, knocking and general noise. In the worst case scenario, the machine will not work and you will have to replace it.
How to sew a pencil case
Lubricants are needed for:
- Extending service life and improving overall quality of work;
- Easier needle movement;
- Reducing noise during operation;
- Prevent thread breakage and fabric damage;
- Easy and quick adjustment of mechanisms.
Old manual typewriter
Important! Old machines are lubricated every 90 days, while new ones require inspection every 6 months. If the work intensity is low, you can lubricate moving parts once a year.
With constant use, it will immediately become noticeable when new oil is needed.
Old unit Podolsk
What you need for work
To lubricate the machine correctly, you should prepare everything necessary for this. And you may need:
- Machine oil. You can buy it at any hardware store. Even 100 grams of oil will be enough for your head;
- Medical syringe. It is convenient for them to lubricate those parts of the machine that are difficult to get to without disassembling it;
- Brush. A small brush will do a great job of removing dust, dirt and old oil;
Important! This is exactly the set you need to perform high-quality professional cleaning conscientiously.
Which oil to choose
Oil for such purposes has a special viscosity indicator. If it is too viscous and stringy, then the deep parts will not be lubricated properly, but they bear almost all the load. A composition that is too fluid will also not be useful, since it will not have time to penetrate deeper and will simply drain. This means that the lubricant for the sewing machine should be moderately viscous. Usually this parameter is directly indicated on the box and is recognized upon purchase. When working on a high-quality production machine, lubrication may not be necessary, since such units have an automatic lubrication system.
Regular medium viscosity oil
The best oil will be the one that came with it. If it is not there, you need to choose a better quality lubricant. You can find recommendations for choosing on the website of the manufacturer of this machine. Under no circumstances should you use vegetable oil: this can lead to serious damage and rapid contamination.
Toyota Power Fabriq
How to lengthen children's pants
How to lengthen children's trousers - Detailed instructions in photographs
How fast kids grow! Just yesterday it was a baby, and today it’s a whole big man! And it’s not true that other people’s children grow up quickly; for those parents who take care of their children’s wardrobe, their own grow even faster. And of course, you can buy new clothes every time as soon as the old things become too small for your child, but what if the thing is still very decent and the width of the child fits into it perfectly, but the thing has simply become too short? And is it also a “terribly beloved” thing, without which a child, for example, refuses to go to kindergarten or to the doctor? In the end, it also happens that simply buying a new thing in the near future is not included in the family budget. The situations are different, but there is only one way out - to remake the thing so that the child can still use it for some time. In my situation, this thing turned out to be “terribly beloved, well, mommy, please don’t throw it away!” trousers. Here they actually are BEFORE:
There are several options for lengthening, and for girls there are much more options. I’ll tell you about the method that I used. So. First you need to decide on the color and material. The color of the additional fabric can be the same color so that the alteration is unnoticeable, but with a worn item it is extremely difficult to match the color because the item has already been washed several times, and therefore the fabric has already lost its former brightness. You can take a different path, the path of contrast, this technique is used to “make fashionable” even in completely new things, so I like this technique more. As for fabric, it is better to take one that is as close as possible in density and texture. I have corduroy trousers, and therefore I need corduroy fabric. Not having one at hand, you need to rummage through the closet for unnecessary adult things, and you’ll find something. I found this shirt, the existence of which I had long forgotten. By the way, the shirt also had a couple of excellent pockets, which we also use for business.
So, let's get to work, stage one, rip out the hem of the trousers from the bottom, if the fabric is very worn, like mine, then in order not to bother, you can simply cut off the hem:
Next, rip out about 2 centimeters in the side seams
Then we take our shirt (or just the pieces of fabric that we are going to use) and cut strips of fabric to the length we need.
Then we pin the fabric with pins where we will sew it
Here it is important to correctly attach “face” to “face” so that later you don’t have to rip everything apart and redo it.
Then sew with a straight stitch:
Since corduroy has a habit of fraying, and just to be on the safe side, I additionally process all the seams with an overlock stitch. And we do this on each side (4 in total). Then we sew the trousers along the side seams and process all the seams in the same way:
After this, we make the bottom hem (here you can immediately make more, so that later you can “lower” the trousers another 1-2 cm).
This is the look the trouser leg takes at the end. Do not pay attention to the “crease” from the ripped dart, since after all the work the item must be washed in order to have a “smooth” appearance, then all this will come apart and will not be visible at all. And in order to visually make the junction of the two fabrics less clear on the front side, I stitched it with another line - a zigzag.
Then we do the same with the second leg, and at the end we add decorative elements so that the contrasting hem does not look like a completely foreign body on the pants. In my case these will be pockets. And this is what we have at the end:
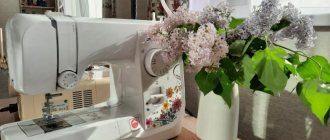
My son was happy, his reaction was: “Oh, how beautiful they are.” “And I saved about 2,500 rubles for the budget. because these new trousers from Gymboree cost about that much in our store. I would like to express my special gratitude to my sewing machine for helping me remake the children’s pants!
How to lengthen a child's pants
Ways to lengthen classic men's and women's trousers (read more...)
A cuff is cut out of it, which is sewn to the lower edge of the trouser leg.
The cuff will be double, so its height is multiplied by 2 and a seaming allowance of 1.6 cm is added. 5 ways to lengthen trousers, jeans or sweatpants at home The choice of method to lengthen jeans depends on the condition of the product , purpose, age, gender of the owner, taste and preferences. How to lengthen a child’s pants
- Sections (read more...)
The first way to lengthen trousers is to sew on a ruffle.
Measure the circumference of the trouser leg at the bottom and cut out a flounce with an inner circle equal to the length of this trouser leg. It turns out nice and airy. How to lengthen a child's pants The eighth way to lengthen pants is a cuff with buttons.
Make a cuff, but do not sew it into a ring, but decorate the edge with loops and buttons. You can make an application if your knees are very worn out or a stain has formed there. — Subscription by e-mail
The fourth way to lengthen pants is with a cuff. Cuff trimmed with fur - this method is suitable if there is very little fabric left from sewing, and it is not enough to cut out the cuffs along the entire width of the trouser leg. You can insert fur. You can also sew fur along the very edge of the trouser legs. It looks impressive and new. The plush faux fur is easy to wash and then comb with a comb.
The ninth way to lengthen your trousers is to turn down the hem at the bottom.
This method can also be very simple and will lengthen the trouser legs by approximately 2-3 cm. The edge can be decorated as a hem using braid. In this case, there will be only 0.5 cm inside from the main fabric. Or you can simply go over the edge with an overcast stitch. The only problems appear in the form of ironed stripes from the previous hem. You can put thin ribbons on top of them and stitch along the edges. How to lengthen your child's pants
What can you do if your jeans are short (read more...)
After improper washing and drying, despite its density, the denim material changes its structure.
It’s a pity to throw away short and tight trousers, especially if their owner already loves them. Or, the child is rapidly outgrowing the good-quality pants purchased not so long ago, or the initially new item was purchased in the wrong size. In such situations, do not despair - there are many simple ways to lengthen women's jeans, as well as men's or children's. The main thing is to put in a little effort, choose a couple of hours of free time and prepare a set of available tools. How to lengthen jeans with your own hands: women's, men's and children's In order to properly lengthen jeans with your own hands and not spoil the item, you need to take into account the properties of the material and the features of its processing. A small violation will lead to final damage to the item and the inability to restore it later. To get started, you need to prepare all the tools and materials:
Which components need to be lubricated?
It is necessary to determine which operating units of the device need lubrication. This is usually indicated in the instructions for the machine. If it is lost, you can find an electronic version on the Internet on the same official website of the manufacturer. You can do it even simpler: lubricate all the components where there are moving parts. For cleaning and lubricating, you will need a table from which you must remove all valuables in advance so as not to stain them with oil and dirt.
Lubricating the top
Original solution
There are many options to “save” your trousers by making their legs longer. For example, if they are too short and even the fabric produced does not allow them to fit, you can add another material by making cuffs.
To do this, you need to cut out rectangles of fabric that are the same length and much larger in width. In this case, you need to understand that the cuffs should not be single-layer, they should be made double. To do this, instead of one or two parts for one trouser leg, you need to cut out two or four, respectively. After cutting, fold the pieces with the right sides inward, stitch on three sides (one longitudinal and two transverse). Attach the open side directly to the pant leg. Make the cuffs large so that you can roll them up to the height you need. To make them harmoniously match with trousers, sew a decorative insert on the pocket or find a more original place on any part of the trousers, this is now in trend.
Found a violation? Report content
Sequence of disassembling and lubricating the machine
Disassembly of the machine is necessary before lubrication. By looking at it, you can immediately identify elements that can be removed and unscrewed. The general operating procedure is as follows:
- Remove the cover from the needle bar by unscrewing the screw and pulling out the cover;
- Turn the device over and unscrew all the bolts at the bottom;
- Pull back the speed selector knob and remove it;
- Remove the cover from the side without touching the flywheel;
- Unscrew all remaining screws;
- Remove the handle fasteners;
- Lower the presser foot handle down;
- Separate the remains of the plastic housing;
- Remove the shuttle from the holder.
No further disassembly steps need to be taken. All elements can be reached with your hands or a syringe. The further procedure for lubricating the components is as follows:
- Place the machine in a position as if it were going to be used for sewing;
- Fill the syringe with lubricant;
- Slowly turn the flywheel counterclockwise;
- Drop oil onto all existing parts and their joints, which will begin translational and rotational movements;
Digging from above
- Under no circumstances should you touch plastic parts and gears that have already been lubricated with a special compound, this may damage them;
- Lubricate the needle bar parts at friction points;
- Remove excess grease with a napkin or rag;
- Check the progress of the nodes by connecting the power;
- Assemble the machine and give it a couple of hours so that the joints of the parts are saturated with oil;
- Run for a couple of minutes with the presser foot raised.
Digging from above
How to lubricate a Janome sewing machine
Janome are popular machines, so the question is relevant. As with any device, they require constant prevention of breakdowns and lubrication. You need to process at least the main components that set the device in motion.
Before work, it is important to read the cleaning and operating instructions and review all explanatory drawings. You need to remove the cover of the device and pour lubricant into the special holes, and also apply it to the rubbing elements.
Janome Sewist 780D
Brother machine lubrication
No less popular brand of cars. It has its own instructions, but if it is lost, it is important to remind you that a couple of drops of oil are enough for processing. They should only be applied to metal surfaces, avoiding smearing plastic.
Important! The brazer especially needs high-quality wiping of excess oil after processing, as well as idle operation to consume the mechanisms.
Singer
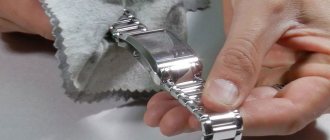
High-quality Singer machines require lubrication much less frequently, but still require maintenance. You need to start cleaning them from the needle plate. To do this, the screws are unscrewed and cleaning is performed. Next, the shuttle is cleaned: the cap is removed, and the latches are moved apart. The shuttle parts are removed and cleaned of dust. The same is done with the rotation device itself.
Astralux
To service Astralux you need:
- Remove the needle plate by turning the handwheel until the needle is in the highest position;
- Clean the lower fabric feeder. To do this, take out the bobbin cap and clean the conveyor with a brush;
- Clean the mechanisms and lubricate them. Remove the bobbin and cap and fold the two holders to the sides. When this is done, the shuttle will come out freely and the device can be lubricated;
- Reinstall the bobbin and cap by rotating the handwheel.
Vertical shuttle machines
They especially need lubrication, even imported ones. The steps are the same: remove the bobbin and move the clamps apart, take out the shuttle parts and wipe them thoroughly. Put everything back. In such machines it is important that the needle bar is in the upper position.
Machines with horizontal shuttle
Most of these machines have a lube-free shuttle, but this is a ploy to sell new equipment when the old one breaks due to improper use. Any moving mechanism needs lubrication.
Electric Brother Artwork with horizontal shuttle
Machines with rotating rotary shuttle
This type of shuttle is the most reliable and lasts the longest. Another advantage is its high sewing speed. This is due to its popularity in industrial machines. For long-lasting operation, you need to clean it and add three drops of oil.
Machines with horizontal shuttle.
In the operating instructions for modern machines with a horizontal shuttle from some companies it is written that the shuttle does not need to be lubricated - it is lubricant-free. The Swedish concern HUSKVARNA is especially guilty of this. Accordingly, sellers of sewing equipment tell customers this: there is no need to lubricate the horizontal hook. A completely wrong position - any rotating and moving mechanism with bushings, hinges, gears - needs to be cleaned and lubricated! Perhaps sewing companies mean that this needs to be done in a service center by a specialist. In our conditions, this mostly does not work. (For example, the equipment is located in another city - far from the service center). It turns out like this: if they said there is no need to lubricate, so much the better - I’ll sew calmly... What happens next is serious damage and expensive repairs (sooner or later, depending on the amount of sewing). Of course, you can invite a specialist for maintenance, but he is not always available in a certain locality. Therefore, it is useful for the owner of the sewing machine to learn how to do all these simple tasks.
How often should you clean and lubricate?
If the sewing machine is new, then at first you need to lubricate it once every six months. When the device ages, lubrication is carried out every three months. This largely depends on the intensity of the work.
Hook lubrication
If a person uses a machine every day for several hours, it is necessary to constantly listen to it. If suddenly there are extraneous noises, knocking, creaking or rustling, this is a reason to disassemble it and clean it thoroughly, additionally applying a new portion of lubricants. This will prevent breakdowns and sudden failure of the sewing unit.
In addition to oil and a napkin, you will need a screwdriver
In conclusion, we can say that a sewing machine, no matter how high-quality it is, needs repair and maintenance. In order not to repair a broken component of an expensive product, you need to follow simple rules and periodically inspect the device, listen to the sound of its operation, and lubricate it in a timely manner.
Sewing
Take the pants right side up and place the strip on the leg so that the fabrics are right sides together (rectangle, wrong side up). Attach the strip along the very edge of the trouser leg with pins, make sure everything is done correctly, then sew it on the machine. In the same way, sew a strip of fabric onto the other leg. Turn out the tape that you just sewed and place it on the wrong side of the trousers. Fold the open side up a few centimeters (one or two is enough) and attach it to the pant leg.
That is, you need to tuck the strip, securing it first with pins and then stitching it on a typewriter. If you wish, you can make not one, but two parallel seams.
They are performed separately or a special double foot is installed. The strips must be closed into a circle, also tucking the sides and connecting them with a vertical (relative to the circumference of the leg) seam.
Why French children behave well: eight ways to raise them
Lost weight: what Sofia Tarasova sacrificed for the sake of “VIA Gra” (new photos)
Rare shot: Viktoria Isakova showed her grown-up daughter from Yuri Moroz (new photo)