Wooden floors begin to creak over time, which is annoying for household members. Hearing unpleasant sounds every day after each step on the floor becomes simply unbearable.
Many people decide to independently carry out work to eliminate squeaks without dismantling wooden floors. The task is not easy, but if you act correctly, it is quite feasible. They start by finding out the causes of the sounds and what kind of wood floor repair work needs to be done to eliminate them.
How to eliminate creaking wooden floors without disassembling
Creak and places that cause it
Creaking is a physical phenomenon caused by friction resulting from movement that is accompanied by sound. The “music” of the floor occurs as a result of deformations in wooden floor structures that occur in different places and for different reasons.
Probable places for friction to occur.
- Discrepancy in the connection of floor boards to each other.
- Loosening of boards.
- Places for installation and fastening of floor joists.
- Fastening skirting boards to the floor.
Creaking usually occurs due to friction between the boards, which occurs due to loosening of their fastenings.
Video description
Repairing an old plank floor on joists:
There is another simple method, which only conditionally involves dismantling the floor structure when the floors creak. The first 4-5 boards with pre-numbered numbers are removed. They are subject (like subsequent floorboards) to inspection and replacement if necessary. Then one is attached one by one and the last one is removed, the procedure is repeated. This way, the entire floor, including joists, will be examined, the necessary adjustments will be made, defects will be corrected, and creaking will be eliminated without complete dismantling.
Reasons why wooden floors creak
There are several likely reasons why wood floors make squeaking noises. When examining the floor surface, pay attention to such points.
- On the condition of the base on which the floor joists are installed. These are lintels with boards fixed across them, forming the floor surface. The joists are made of wood and as they age and from daily loads, the base of the floor underneath them becomes deformed, becomes uneven, the level acquires a slope, which can cause vibrations and creaking sounds.
- When initially leveling the floor, special pads are used that are installed on the joists. They consist of wooden blocks, which age over time, dry out, and the floor boards in these places collapse and begin to wobble, making a creaking sound.
- Correct spacing between joists is of great importance. If the 50 cm parameter is not observed and thin boards are installed on them, the coating will fluctuate.
If the distance between the joists has not been maintained, there is a high probability that the wooden floor laid on top will creak.
Also, a lot depends on the quality of the wood used when choosing boards and joists:
- poorly dried material will dry out when laid on the floor, it will warp at the fastening points, which will disrupt the evenness of the coating;
- The fastening of the boards depends on the density of the wood. If this indicator is low, the connection of boards with lags and nails quickly becomes loose.
The accumulation of moisture on the base of the floor under the joists leads to the proliferation of fungi in the wood and its rotting. The quality of the connection between boards and joists is deteriorating, and the floor is sagging in some places. In this regard, all wooden components of the floor must be treated with an antiseptic for prevention.
If the wood has not been properly dried, the floor will sooner or later sag, which will also cause squeaks.
Small wood-boring beetles are a real disaster for wood. In a short time they can eat through the wood and damage the joists to such an extent that the floor boards will fail.
Important! Biocidal solutions, which are used to impregnate all wooden structures, prevent damage and protect the wood from harmful insects.
When installing the floor, be sure to pay attention to the following points:
- there must be reliable fastening between the logs and boards;
- there must be a technological gap between the floor surface and the walls;
- it is important to ensure reliable fixation of the plinth to the floor;
- It is impossible to allow the floor to be attached to the joists through a board, which was practiced in the old days in order to save money. This is an unsuccessful method, resulting in squeaking on unnailed boards.
Long-term use of the floor leads to its natural aging. All parts of the floor structure are subject to wear and tear. The gap between the boards grows due to weakening of the fastening - it becomes clogged with debris and dirt.
Remember that wooden boards and joists must be securely fastened
Not all of the listed reasons can be eliminated independently without opening the floor. For reliable and long-term service of the floor, it is necessary to initially provide for the installation of joists in a concrete base, a reliable structure with good ventilation with fastening of tongue-and-groove boards.
To eliminate the causes of the squeak, they first begin to find the source of the sound and study the condition and degree of wear of the floor. When a problem area is detected, press firmly on the boards. In case of deflection due to a loose fastening, use a long self-tapping screw to strengthen the fastening of the boards to the joists. If the cause is not eliminated, the floor will continue to creak. To clarify the circumstances, you will have to partially open the floor and examine it from the inside, for the presence of reasons for the creaking according to the above points.
Possible ways to restore the floor
For proper floor repair in order to get rid of squeaks, there are the following recommendations.
- In order to prevent changes in the condition of wooden floor structures during drying, deformation from high humidity, all parts are treated with an antiseptic before installation. Periodic repetition of impregnation is also required during the operation of the floor.
How to treat wooden floor structures with an antiseptic
- Rigid fixation of the logs to the base is ensured with the most complete fastening of the boards using self-tapping screws or nails with a screw notch.
- The use of wooden wedges is a thing of the past. Now a set is used that has two wedges with a corrugated surface made of polymer materials.
- The distance between the lags (laying step) is strictly calculated depending on the loads and the thickness of the boards used, which will protect the floor from deflections.
- To securely fix each board to the joists, two self-tapping screws are used, which will create a reliable fastening in the transverse direction.
Advice! To avoid the labor-intensive complete opening of the floor, to inspect its condition from the inside, it is enough to cut a hole in the form of a hatch to see the degree of damage to the joists and the base.
The boards are attached to the joists using two self-tapping screws
Methods for eliminating squeaking are as follows.
- Strengthening the fixation of wooden boards to the joists with self-tapping screws.
- Increasing the adhesion of wooden structures using pins and wedges.
- As a last resort, use polyurethane foam for fastening and increasing the support area.
- Laying a new sheet of plywood or chipboard over the existing floor, which will distribute the load over a larger surface.
Useful tips
The following recommendations will be helpful in troubleshooting the problem
- to secure the boards, use only anodized, not black, self-tapping screws;
- holes in the floor should be 1-2 mm smaller than the diameter of the fasteners;
- Before screwing in the fasteners, blunt the end of each self-tapping screw to prevent damage to the concrete flooring;
- to avoid severe shrinkage, instead of polyurethane foam, you can use epoxy or polymer glue to fill cracks;
- If there is a slight creaking, the cracks at the joints of the boards can be rubbed with a soft wax candle.
How to determine the location of the squeak?
Wood is a popular floor covering, especially in private homes. The main disadvantage of this type of floor is that it creaks very often. Any owner can fix this on his own, having the simplest set of tools without opening the coating, but it is important to accurately determine the location and cause of the unpleasant sounds. Household members, attention and hearing are involved in the search.
- The owner goes down to the basement, if there is one, and from above someone is walking heavily on all the floorboards. The creaking area will be clearly audible from below.
- They walk along each floorboard, listening to the source of the creaking, paying attention to the movement of the boards under their feet. Examine the boards for cracks and large gaps. If the sagging of the boards is clearly visible, you can check them with a level.
- Remove the plinth and examine the condition of the beam and base in the gap between the wall and the joists.
When the floor is thoroughly examined and problem areas are marked, repairs begin. Many methods for solving problems have been developed, the main thing is to follow the work technology.
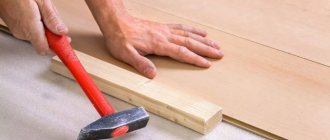
Wedging
This method is used if the boards are walking. If the flooring was laid with damp wood, wedging helps resolve the issue.
Gaps between floorboards can be repaired at no additional cost. There is no need to disassemble anything.
Wedging technique:
- First, you should sand the boards on the sides of the gap with sandpaper. To make the process go faster, take coarse grain.
- Then you will need to plan the wedge. The lath should match the width and length of the gap formed between the boards. One edge becomes sharper.
- Then try on the wedge, if it fits, move on to the next step.
- Lubricate the strip prepared for wedging with glue (do not take the cheapest one, otherwise after a while this question will arise in front of you again, take good glue).
- Insert it into the gap, take a wooden mallet and carefully tap it into the gap. The batten should fit snugly between the boards and not fall out.
- After the glue has dried, it is necessary to process the wedge with a plane and then sand it. You need to plan the slats flush with the floor.
Thanks to the wedge, the gap formed between the floorboards disappears. The entire load is evenly distributed and the boards stop “walking”. Eventually the squeak disappears.
Methods for eliminating floor squeaks without removing the coating
Wooden floors age and begin to creak, but it is not always possible to make major repairs and completely open the floor. In some cases, proven methods for eliminating squeaking are used without such drastic interventions.
Eliminating the creaking of a wooden floor without disassembling is quite possible - there are many ways to do this
Sagging floorboards
To solve this problem, rigid fastening of the boards to the joists is not enough. Take long self-tapping screws with large threads. If the nails in the floor are firmly driven in, do not stick out, and are not bent, then they cannot be pulled out. Prepared screws are screwed in next to them, the length of which is selected according to the thickness of the log along with the board, about 2 cm shorter. For an accurate measurement, remove one board from the floor.
To accurately determine the number of screws needed and where to screw them in, it is enough to remove the plinth from the transverse wall. In the gap between the wall and the floor, all laid joists are clearly visible without the need to disassemble the entire covering. To make it easier to screw in long screws, small holes in the boards are prepared in advance. This ensures a stronger adhesion of the covering to the joists by screwing in self-tapping screws with their heads recessed deep into the board to prevent clinging to them when walking.
Important! If the creaking has disappeared and the floor has acquired some unevenness, cover the surface with sheets of plywood. It is screwed to the floor with self-tapping screws in increments of 15-20 cm, the heads of which are also recessed.
If the floorboards begin to sag, they are additionally fixed using long self-tapping screws
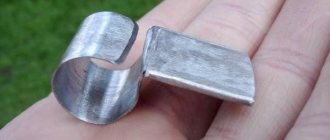
Reinforcement with wedges
Gaps formed between the boards and they began to rub against each other, making sounds? This can be eliminated by securing the floorboards using spacer wedges. They are driven into the resulting gaps. For work you will need a mallet and a hammer.
To make wedges, take thin slats of wood up to 15 cm long. They are first coated with wood glue and PVA to securely fasten them so that they do not get squeezed out by the floorboards when walking. The spacers are hammered in at a distance of 20 cm from each other. To prevent the wedges from protruding above the floor surface, they are cut off with a plane, and the remaining cracks are filled with a mixture of glue and fine sawdust. After drying, the areas where the cracks are sealed are sanded and covered with a water-repellent solution.
You can use wedges made from thin slats that drive into the gaps
Sealing cracks with a tourniquet
Sealing cracks can be done quickly and efficiently using a tourniquet. To do this, you can use a material made from flax, hemp, or a synthetic composition, which is pre-lubricated with glue. Using any sharp object, the tourniquet is inserted with force into the gap along its entire length so that the material does not stick out above the surface. When the glue dries, the gap is securely plugged, it is puttied and covered with paints and varnishes to match the main floor.
You can seal the cracks with a tourniquet
Sealing cracks with graphite and sawdust
If the gaps are small, and the creaking comes from the friction of the boards against each other, then it will be quite enough to fill the gaps with graphite or talc powder. Small gaps into which it is impossible to drive wedges are sealed with a prepared mixture of wood glue and fine sawdust. They are applied tightly into the gap using a spatula.
Small cracks can be repaired using graphite powder or a mixture made from sawdust and glue.
Sealing cracks with foam
To seal cracks, you can use polyurethane foam, which, when filling the space, reliably grabs and fixes the boards, and the floor acquires additional rigidity. But foam is used locally when it is necessary to eliminate the creaking of several boards. The disadvantage of foam is that it will compress under load, and over time the squeaking will return.
Gaps in the floor can be sealed with foam
Reducing the distance between joists
If boards of small thickness are initially laid on the floor or the distance between the joists is incorrectly calculated, then the floor covering sag over time and the floorboards begin to creak. This reason can be eliminated without opening the floor, using self-tapping screws with threads along the entire length.
Their size is chosen so that they reach from the beginning of the coating to the base of the concrete floor.
A hole is drilled near the joist, without touching it, and self-tapping screws or self-tapping screws are screwed into it all the way to the base, which will serve as additional support for the covering. The heads of the screws are broken off so that they do not stick out above the floor, and the sharp tip of the screws is removed so as not to damage the concrete.
If the joists were laid too sparsely, you won’t have to disassemble the floor: just screw in the screws near the joists all the way to the base
Ancient method
The ancient method of eliminating squeaks is time-tested and gives noticeable results for several years, provided that the floors remain level. To do this, take long strips of dense thick fabric, reminiscent of an overcoat. Pieces with a width of about 30 cm are laid out on the floor at a distance of 40 cm between them. Fiberboard sheets are placed on top and connected to the floor using self-tapping screws.
Important! This is a fairly simple and inexpensive method.
Elimination of board deflection with polyurethane foam
When a couple of boards sag, you can also use polyurethane foam as a temporary measure to eliminate squeaking. At the bend point between the board and the joists, a hole is made into which the tube from the cylinder is inserted. Before pumping the foam, the boards are secured with a block so that when it expands, it does not squeeze out the boards. After the foam dries, the filled space between the floorboard and the joists is sealed and the deflection is eliminated. The securing beam is removed and the holes in the floorboard are filled.
If some boards are bent, this problem can also be eliminated using polyurethane foam.
Loosening the tie
If the creaking occurs due to a weakening of the screed between the board and the joists, then they are strengthened using self-tapping screws. To accurately determine the location of the logs, remove the plinth from both sides. In the gap formed between the boards and the wall, the places where the logs are located are clearly visible.
Take two metal rods and drive them into the base of the floor to mark the center of the joists on both sides of each wall. A cord is pulled between the rods to indicate the timber along its entire length. To select the length of the screw, measure the total thickness of the board and joist and reduce it by 2 cm. Screw at least 3 screws into each board, strictly in the center of the joist, marked with a stretched cord. The screw caps are sunk so that they do not stick out above the floor surface. If there are protruding nails on the board, remove them. All holes are filled with putty to match the color of the floor.
To strengthen the tie between the boards and joists, screw in additional screws
Cementing subsidence of boards
Using cementation, subsidence of boards, which is caused by voids between the floor covering and the concrete base, is eliminated. To do this, in the place where the creaking occurs, make a small hole in the board with a drill, and using a syringe, gradually pour in cement mortar, making time intervals for the mass to harden. Fill until cement appears outside the hole. After the cement hardens, the floorboard straightens and the floor stops creaking for a while.
If the boards have sagged, you can fix this problem with a cement mortar, which is injected into the hole in the board using a syringe.
Additional anchoring
If using different methods still fails to eliminate the squeak, then a method of additionally securing the floorboards to the concrete base is used. To do this, fix the boards with metal anchors. These are special fasteners designed to secure the entire wooden structure to the load-bearing base. The height of the anchor is measured from the floor surface to the concrete floor with an increase for immersion in concrete.
To install them, a powerful drill is used to drill through holes a meter apart from each other through boards and joists all the way to the concrete. The anchor shell is inserted into it, and a metal pin is screwed into it. The wooden surface receives additional fastening and support.
Important! All holes in the floor are puttied, sanded, and painted to match the color of the floor.
Boards, if they creak, can be additionally secured with metal anchors
Installation of dowels
If simple edged non-groove boards are not connected to each other without a special joint using a tongue-and-groove system, they will dry out or diverge over time depending on humidity. To eliminate this drawback, install dowels. This is a cylindrical wooden product that is coated on all sides with wood glue or PVA. The dowel with glue is driven into specially prepared holes using a mallet or a special hammer for woodworking. Two adjacent boards are drilled at once in two directions towards each other, at an angle of 45 degrees, forming a symbolic cross. The ends of the unfinished dowel are cut flush with the floor surface, sanded, puttied and tinted to match the color of the floor. After such repairs, the boards will be fastened for a long time and will not come apart.
If the boards begin to diverge and creak over time, you can use dowels
Plywood covering
When the wooden floor is smooth, but very cracked and creaks in many places, a simple but expensive method of laying sheets of plywood with a thickness of at least 12 mm or chipboard on top of it helps. The load on the floor will be evenly distributed over the entire surface, which will eliminate the creaking emanating from some boards. The sheets are laid at an angle to the direction of the boards and glued with wood glue. When laying, take into account that the joint of the sheet does not fall on a problem area that produces a squeak - otherwise it will intensify. After installation, the floor is decorated.
It may be possible to eliminate the squeak by simply laying a thick layer of plywood or chipboard on top
Pouring foam and other materials
How to eliminate the creaking of a wooden floor in an apartment or your own house without opening it?
In this case, you can use one of the simple methods. To eliminate squeaking, graphite powder should be poured into the cracks between the boards. Instead, you can also use talcum powder.
Some owners solve the problem more radically. They fill the space between the boards with polyurethane foam. It expands, filling the cracks. In this case, the floor becomes more rigid.
The creaking stops temporarily. This is a rather expensive method, which is now considered ineffective. Over time, the polyurethane foam is pressed through and destroyed. The creaking will appear again. It is better to use liquid polyurethane.
It is harder than polyurethane foam. However, to use this method you will need to purchase special equipment. This is an expensive but more effective way. Today, owners of houses and apartments prefer to eliminate creaking using other approaches.
Reinforcement with additional bars
What to do if none of the methods helped? It may be impossible to do without at least partial opening of the upper surface of the floor. In this case, you can repair the sheathing, as well as strengthen it with additional bars, which are simply inserted between the joists. This will create additional support.
Important! If the boards are too thin, the distance between the lags is too large, then they will sag under the weight of the weight when walking. When repairing the sheathing, it is strengthened by inserting additional bars.
When calculating the distance between the logs, the thickness of the board is taken into account.
| Board thickness (mm) | Distance between joists (cm) |
| 20 | 30 |
| 24 | 40 |
| 30 | 50 |
| 35 | 60 |
| 40 | 70 |
To further preserve the reinforced sheathing and prevent the appearance of squeaks, all parts are treated with waterproof solutions, and fabric linings such as geotextiles are laid between the parts and on top of the timber.
Sometimes it is necessary to partially open the upper surface of the floor and reinforce the subfloor with additional bars
Prevention of breakdowns
To prevent creaking, you need to follow a few simple rules:
Place a backing made of foamed polyethylene, rubber or other non-woven material on top of the joists.- Observe the recommended distance between support bars. Check that all boards are level using a bubble level.
- Leave gaps between the outer floorboard and the wall.
- Use only dried wood for floor installation (moisture content of beams and boards is no more than 12%). In dry rooms, maple and conifers are used, and in wet rooms, larch, alder and ash are used.
- Provide natural ventilation and maintain low humidity in the room.
- Treat floors annually with antiseptic and water-repellent compounds.
To prevent premature wear, the gap between the support beams is selected in accordance with the size of the boards.
Floorboards with a thickness of 20-30 mm can be laid on joists in increments of 300-500 mm, and 45-50 mm in increments of 800-1000 mm. In areas where you plan to install heavy furniture, you can reduce this distance by 50-100 mm.
Spot repair of parquet
Parquet board is an elite option for wooden flooring. Like all wood floors, parquet can squeak when rubbed. In general, it consists of wooden elements assembled into one common flooring. Elimination of damage that causes sounds when walking is carried out pointwise, locally. Parquet repairs take place in several stages.
- They carefully inspect each board, identifying and noting defective and creaking parts.
- Prepare the necessary tools and materials: drill, volumetric syringe, cement or polyurethane glue.
- Find the middle of the plank with a creak, drill a hole with a drill with a thin drill bit.
Parquet boards can also creak over time.
- Dilute the cement mortar to a liquid state.
- Draw up a solution of cement or polyurethane glue with a syringe.
- Insert the syringe into the prepared hole and slowly inject the composition, allowing air to escape.
- Portions are introduced gradually, allowing the composition to gain a foothold and harden.
- Check the work for no squeaks.
- If the repair of one tile is positive, they begin to eliminate the squeak on the rest.
- The last stage is to seal the hole with mastic and sand the parquet.
To get rid of the squeak that parquet makes, you need to fill the space under the plank with cement from a syringe
Application of metal anchors
If the base of your wood flooring is a concrete slab, then squeaking can be eliminated by using metal anchors. They can only be attached manually. First you need to make a small hole, then install the metal shell, and then tighten the anchor pin by hand.
This method is highly effective because it really eliminates floor squeaks. But at the same time it is very costly in financial terms. To repair a floor, you may need up to 200 metal anchors, each of which costs about 10-15 rubles. Therefore, the total amount may not be small at all, and such work requires quite a lot of time.
Eliminating squeaky laminate flooring
Laminate is becoming the most popular floor covering. It has many advantages: it is inexpensive, if you follow the technology, it is not difficult to install the coating correctly, it looks beautiful, and there are practically no difficulties with caring for it.
But it can also begin to creak during operation. There are several reasons.
- Incorrectly selected substrate. The synthetic gasket ages over time and becomes compacted in areas most exposed to pressure. The plates bend in these places and make a squeaking sound when walking. Cork backing is the most expensive, but stable material - it cannot be deformed.
- Inexpensive laminated boards usually have locks of poor design. Eliminate squeaking using silicone-based lubricants. When lubricating the locks of the creaking laminate plates, apply the lubricant carefully to the seam and wait 15 minutes until it flows inside the lock. Excess grease is removed with a microfiber cloth, without leaving stains on the laminated surface.
Laminate flooring can squeak if it has poor-quality locks - then silicone-based lubricants are used
- Creaking occurs when laminate laying technology is not followed, when the gap around the perimeter between the coating and the wall is less than 5 cm. The plates rest against the wall, creating friction, which gives rise to sounds. To remove, part of the coating near the wall is cut off using a grinder.
- Laminate flooring begins to creak due to an uneven subfloor, incorrectly selected underlayment, and unaccounted for class of laminate flooring at the time of purchase. This can only be corrected after dismantling the entire coating.
Products by topic
- Choose …
View
PVC backing for laminate
520 ₽ – 1131 ₽
- Not available
More details
View
Cork underlay for laminate flooring
Check the price
- Choose …
View
Penoflex reflective insulation
763 ₽ – 1013 ₽
- Choose …
View
Birch plywood FSF
707 ₽ – 10929 ₽
- Add to cart
View
Primer “Homafloor 001 2K EP”
11900 ₽
- Choose …
View
Primer “Homakoll 05C Prof”
1660 ₽ – 3186 ₽
- Choose …
View
Solvent turpentine
140 ₽ – 1400 ₽
- Choose …
View
Thermal felt
3313 ₽ – 8100 ₽
- Choose …
View
Aluminium foil
725 ₽ – 1450 ₽
- Choose …
View
Assembly adhesive
200 ₽ – 275 ₽
- Add to cart
View
Acrylic adhesive – two-component
13500 ₽
Creaking of boards damaged by fungus
Humidity under the floor covering and poor ventilation lead to the formation and proliferation of fungus, which, damaging the wooden floor sheathing, leads to its deformation and can cause the boards to creak. The coating can be affected by several types of fungus:
- the cellar mushroom forms large yellow myceliums covered with white spots. Over time they turn black;
- house sponge appears as a white fluffy mass, turning into gray mold. It has the ability to grow quickly under the floor;
- white house fungus in the form of mycelium, forming a cotton mass, is concentrated in one place in the form of a white pillow.
How to treat floors against fungus
These fungi not only affect the floor covering, but are also harmful to humans.
If you don't start fighting, the joists and boards will corrode, lose their strength, and the floor may rot and collapse. The most correct thing is to dismantle the affected structures and replace them with new ones. But with minor damage, mold and fungal plaque are scraped off to a clean place. The entire structure is treated with a solution of iron or copper sulfate, which is diluted in a proportion of 50 grams per liter of water. Lubricating the floor structure with a mixture of clay and vitriol gives a good effect. To prevent damage by fungal growths, wood is salted and impregnated with oil according to the Chinese method.
Important! There are many effective antifungal agents on the market for treating wood products.
If the fungus has affected a large amount of wooden flooring, it is better to get rid of it completely and re-lay it
Laying plywood
When choosing a method to help eliminate the squeaking of wooden flooring, you should consider another possible option. If the base is level, you can put sheets of plywood on it. This method is less effective.
The squeaking may return over time. However, the problem will be solved for some time. For several years, the creaking will not bother the owners of the house.
To do this you will need sheets of plywood 12 mm thick.
You can take thinner material if it is laid in 2 layers. The second option is preferable. In this case, the floor will be stronger.
The sheets are glued to the base using a special compound. They need to be laid at an angle to the direction of the parquet pattern. If a second layer is to be created, it is mounted on the first one so that the joints fall in the middle of the bottom sheet.