Types of glue
How to glue a mosaic? There are a number of options; you need to choose based on the parameters of the surfaces to be bonded and operating conditions. The tiles are laid on compositions containing various polymers, mineral components, resins (for example, epoxy).
Choosing adhesive for mosaic tiles is easy. Often renovators use the same materials as when gluing tiles. It is necessary to take into account the type of base on which the mosaic is supposed to be laid. Otherwise, the effect will be unsatisfactory and you will need to redo the work.
Below are tips to help you choose an adhesive that will securely hold the mosaic in place:
- The glass mosaic is translucent. Therefore, it is wise to purchase white or transparent mixtures (they will not stand out). Gray is not recommended because it will show through the glass tiles.
- To save time, it is recommended to use quick-drying adhesives. They are available for purchase at construction department stores.
- For uneven surfaces, leveling highly elastic adhesives are purchased.
Cement glue
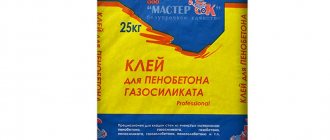
The most economical option. Such adhesives are sold in packages of 25-30 kg. and have a lower cost compared to analogues. The color of the mixture will optionally be gray or white.
Before gluing the mosaic, you must properly (in the required proportions) dilute the powder from the packaging in water. The shares are indicated in the instructions on the bag. Preference should be given to clean water, otherwise the solution is guaranteed to darken.
Dispersion composition
A convenient option, since it does not require mixing with specific proportions - it is supplied in cans immediately in finished form. However, you have to pay for convenience; such formulations are sold more expensive than soluble powders.
Dispersion compositions require 30-50 minutes to completely harden; a long wait is not required. Leftovers are stored for a long time if you press them tightly with a lid.
Two-component adhesive
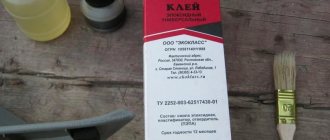
These adhesives contain epoxy resin and a hardener. Interacting, they form a mass of high strength, which subsequently is practically impossible to tear off.
Two-component adhesives are indispensable assistants in cases where it is necessary to lay material on a smooth surface. Professionals use them for cladding swimming pools, bathhouses and laundries. The reason is increased water resistance.
Cement
This is the most common composition on which any tile can be glued. It is available in dry form, and before use it is diluted with water or latex according to the instructions. Latex is used when it is necessary to increase elasticity. Rigid cement adhesive has a low price, and if there is no need for additional properties, its use would be quite appropriate.
Some cement compositions may initially have a high degree of deformability. Such adhesives are used when there are constant changes in temperature, vibration or high humidity at the location of the surface to be coated. Its use is appropriate when applied to a heated floor or on the outside of a building (taking into account weather conditions).
The color will depend on the cement used in the composition - there is white and gray mosaic glue. If the substance is not noticeable after application, you can choose a regular dark-colored composition.
Adhesive manufacturers
What kind of glue should I use to glue the mosaic when the store shelves are full of goods? The most worthy and high-quality options from the largest world-famous manufacturers are listed below.
Ceresit cm 115
White adhesive designed for working with glass mosaics and marble tiles. Additionally purchased for reliable fixation of glass and stone. The substance is environmentally safe, has no pungent odor, and is easy to use. Belongs to the middle price category.
Bergauf mosaik
Bergauf's adhesive composition is packaged in 5 kg packs. The basis is specialized white cement. In addition to it, the composition also includes: polymers, all kinds of mineral fillers, fractionated sand.
A distinctive feature of the glue is increased frost resistance, so the priority for using Bergaif Mosaic glue is for cladding swimming pools, balconies, some ceramic bases and other areas located outside a warm room.
Axton
The purpose of the adhesive mixture is to interact indoors with glass mosaics (in lobbies, living rooms, bathrooms, restrooms). The product copes with gluing stone mosaics. Due to its increased moisture resistance, it is permissible to use “Axton” for finishing pool surfaces.
Litokol K 55
The glue is supplied to stores in the form of a dry white mixture used for exterior and interior decoration. The glue is equally effective for all types of mosaics. In this regard, it has a fairly high cost relative to its competitors.
The composition is plastic and is characterized by high adhesion. Helps the tiles not to slip even on an inclined surface when gluing, which makes life easier for the worker.
Mapei
Mapei produces an adhesive that, like the previous product, is based on white cement. Copes even with complex (for example, large relief) types of mosaics.
Equally effective with products made of stone and glass. The product is sold in 10 kg buckets. and bags of 25 kg. The second option is the cost per kg. a little cheaper.
Assortment of adhesives
Let's figure out what kind of glue is needed for the mosaic covering. You can find many suitable products on sale, and you can take whatever you want from them.
Such adhesive may consist of specific mineral impurities, polymers and epoxy or other resin.
By and large, for mosaic tiles it is allowed to use those products that are intended for simple tiles and ceramics. But it is important to take into account the material of the surface where the pasting will actually be done.
For example, when finishing plaster or drywall, simple tile adhesive mixtures are used. Special mixtures are used for cladding wood or plastic surfaces.
Here are the rest of our recommendations:
- Due to the fact that glass mosaic is visible, it is advisable to buy colorless or white glue for it. In gray color it will be conspicuous and spoil the appearance of the product.
- To save time, it is recommended to stick the mosaic on a product that dries quickly. It can be easily purchased at any building materials store.
- For gluing natural or decorative stone, glue based on epoxy resins is used, since it improves its moisture resistance.
- If there are unevenness on the wall, it is better to give preference to elastic compounds, thanks to which such errors can be eliminated.
Laying a mosaic finish using liquid nails is considered a big mistake, since it is difficult for such a product to be evenly distributed over a wide base. It is only suitable for spot application.
And this, in turn, can lead to the fact that in the future small squares of the mosaic may peel off and simply fall out.
Technology for gluing mosaics in the bathroom
Now you need to figure out how to properly glue the mosaic, namely, how to glue the mosaic in the bathroom. For simplicity, detailed step-by-step instructions are provided to the reader. By using it, no noticeable problems should arise when performing the work.
Surface cleaning
The first thing you should focus on is cleaning the surface from all kinds of contaminants (dust, remnants of old plaster). To begin with, you can use a vacuum cleaner, then use a broom to sweep away everything that has not been sucked up.
Preparing the base
First, you should level the wall as much as possible. Any, even the smallest, unevenness will stand out in the future. Plus, individual chips will peel off over time and will need to be re-glued. Now to the specifics, you need:
- fill voids with leveling mixture;
- sand the surface with sandpaper;
- seal holes from previous nails and screws;
- allow the wall to dry completely;
- If there is dust, remove it;
- prime twice;
- apply tinting (in case of subsequent use of transparent tiles).
Wall marking
Correctly executed wall markings play a big role, because during the installation of tiles, individual small elements can move relative to each other, which is absolutely unacceptable.
It makes sense to first create a sketch, and then repeat it on the walls. It is recommended to start marking from the outer corners (from the mirror). If the chips are placed on the floor, then it is better to carry out the initial dry layout.
Mosaic laying
Laying temperature range is from +5 to +35 degrees Celsius. Gluing should begin from the second row. If there is a composite drawing, you must first substitute it, assessing the size and correctness, and only then glue it.
Tile adhesive sets quite quickly. The first film is formed already at the 25 minute mark. It is for this reason that large volumes should not be diluted at once. It is better to do this in several passes to avoid damage to the finished adhesive compositions.
Gluing the mosaic
Having prepared the adhesive composition in advance, you need to apply it to the wall with an even spatula. The optimal layer thickness is 3-4 millimeters. Then a notched trowel is used to create a uniform ribbed relief. Now you can lay the mosaic, pressing each element evenly. The coupling will be fast due to the low weight of the chips.
Grouting joints
Experts recommend giving preference to two-component mixtures for grouting. You just need to choose the ones suitable for specific materials. This information is always available on the packaging.
It is good if the grout contains elements that prevent the formation of mold and fungi. Such properties are simply necessary in places of high humidity. The grout is applied with a rubber spatula, the excess is removed with a damp sponge.
Tools and materials
To work with mosaics, you should measure the walls or floor, purchase the required amount of base material - small ceramic, plastic or other types of tiles. You also need to buy tile adhesive. There are various types of adhesive base on sale on which the mosaic will adhere perfectly. Here is a list of other materials and tools required for installation:
- grout for mosaic tile joints;
- crosses for forming joints;
- spatula with teeth;
- rubber spatula;
- gloves;
- sponge;
- bucket;
- construction mixer (if the glue is dry).
In the case where a self-adhesive mosaic is purchased, no adhesive is needed. Typically, this material is recommended to be glued to the wall in the kitchen, but in the bathroom, with constant contact with water, it does not last long.
Mosaic on mesh or paper
Separately gluing each element takes a lot of time. To save it, a block system was invented. Its essence is the creation of individual large elements by placing small ones on a special grid or paper.
It turns out, with little effort, to evenly cover large areas at once, and quickly. The advantages of such a mosaic do not end there; glue can be selected for almost any type, since it is not the small elements themselves that will come into contact, but their base in the form of a mesh or paper.
Seam rubbing stage
To grout seams, it is best to take adhesive compositions of two components that are intended for a specific type of cladding, and it is especially good when they contain antiseptic additives.
This stage should be started 24 hours after laying the mosaic blocks.
To do this, prepare a grout solution and apply it lengthwise and crosswise with a rubber spatula. After final drying, the residues should be carefully removed with a foam sponge and polished with a flannel cloth.
Bonding surfaces
On tiles
If you do not want to remove the old tile layer, it is permissible to attach the mosaic to it. For such purposes, it is recommended to use silicone products. An affordable alternative is sealant for gluing aquariums. In addition to these options, epoxy adhesive made in a two-component format is also suitable for work.
On a tree
If there is a wooden base, an acrylic dispersion composition is most often used. You just need to remember to walk over the wood with a primer several times before applying. This is done to minimize the absorbency of the material.
On drywall
One of the simplest options for laying mosaics. The layer will hold firmly for many years if you first coat all sheet joints. This action will significantly strengthen the overall reliability of the structure. Then, after priming, you can safely glue the chips with cement glue.
Features of gluing certain types of mosaics
Glass and mirror mosaic, installation features
To ensure reliable adhesion, you must first degrease the working surface. The glue for glass mosaics and the glue for mirror mosaics is the same. It is important that it has a transparent base (polymer and epoxy adhesives are suitable).
Natural stone products
The main stones for making chips are jasper, marble and onyx. The reason is a respectable, expensive look, especially after additional polishing. For installation on a bathroom wall, it is recommended to purchase such a mosaic on a grid.
For fixation, it is wise to use epoxy tile adhesive, which provides the material with increased moisture resistance. It will be easy and quick to put on it.
Plastic mosaic
This interior finishing option is one of the cheapest and most accessible. Such mosaic slabs are made from PVC, the distinctive features of which are increased resistance to water and temperature changes.
Plus, plastic mosaics are famous for their increased durability compared to more expensive claddings. It is even permissible to use liquid nails to fasten plastic mosaics. But, if possible, it is better to use standard adhesive options.
Step-by-step instruction
In order for the mosaic to serve for a long time, installation is carried out sequentially in the following order:
- The glue is first applied to the surface in an even layer of 3–5 mm. Then the mass is leveled with a notched trowel to create grooves. The larger the elements, the greater the height of the teeth.
- The mixture can be applied not only to the base, but also to the mosaic itself. In this case, the glue thickness is 2–3 mm.
If you do not have experience in installing it yourself, spread the glue over an area of 3-4 plates, no more. To take your time and prevent the top layer from drying out.
- After applying the glue, the mosaic is applied to the surface and tapped with a rubber hammer to release excess air.
- To ensure that the tile lies flat, the top is rolled with a plastic roller.
- After half an hour, excess glue is removed from the surface of the mosaic with a brush with stiff bristles or a match.
- Paper sheets are pre-moistened with water and peeled off from the front side.
- After the glue has completely dried, the joint space is grouted using special materials. The grout is distributed evenly between the chips with a rubber spatula.
- The color of the grout is chosen depending on the shade of the decorative coating.
- Excess grout is removed with a wet sponge and wiped with a lint-free soft cloth.
Interesting video on the topic:
Features of laying mosaic tiles on rounded surfaces and corners
In general, the process of gluing mosaics onto rounded surfaces is identical to the actions performed when working with a flat surface. However, there is still one nuance - the smoother the curve, the better the tile fits. Therefore, all efforts should be directed towards creating uniformity, so that there are no angularities on the fold.
To place a mosaic on a corner, you need to cut the elements along the seam. The second option is to saw the material using one of the suitable tools.
