Hand stitches are the basis of sewing. Even with modern technology, sometimes you can’t do without them. Today we will tell you how to make an invisible seam (also called a hidden seam). With its help, you can quietly sew up a hole, hem trousers, sew the edges of a product and perform a number of other operations.
Main features of the technology
When considering this technique, it should be noted that its main task is to ensure an invisible connection of two flaps of tissue. Most characterize the approach to creating an inconspicuous seam as simple and not requiring special preparation.
The main requirement is to ensure maximum accuracy. At the same time, from the front side, a thing processed in this way should look as if all actions were carried out using the latest technical capabilities.
Hand stitches: basic rules
Techniques for weaving wicker products, preparation, processing of rods
How to sew hand stitches with your own hands? There are several basic rules that you should adhere to when sewing by hand.
- Be sure to work on a level and flat surface.
- The hand sewing needle must match both the fabric and the threads.
- For more comfortable and faster work, use a thimble. It is placed on the middle finger of the hand with which you are holding the needle.
- As you work, control the tension of the thread: it should not be pulled too tight.
Getting Started: Node
We'll show you how to tie a knot at the end of a thread quickly and easily.
Hold the thread with your left hand. Loop the thread around the tip of the index finger of your right hand, and place it on the end of the thread. Place your thumb on the crossed threads and, pulling the long thread, move your thumb to the end of your index finger so that the threads twist around each other. Then drop the loop. Pinch the ring between your thumb and index (or middle) fingers. Pull the long end with your left hand and gently tighten the knot.
How to secure the thread at the end of the seam?
You can secure the thread in two ways: with a knot or tack. To create a knot, make a small stitch on the wrong side, on top of the last stitch. Slowly tighten the thread until a small loop remains.
Pass the needle through the loop and continue tightening until a second loop appears. Pass the corner into the second loop and pull the thread tightly, forming a knot. To make the tack, simply make a few small stitches using a backstitch. These stitches are placed one on top of the other and hold the layers of fabric together well.
Back stitch
This stitch is one of the strongest hand stitches available. It is used for seams in hard-to-reach places and for securing stitches at the end and beginning. Bring the needle to the top side. Make a small stitch back (2-3 mm) and bring the needle up again, retreating the same 2-3 mm along the seam line.
Continue bringing the needle into the end of the last stitch and out one stitch ahead.
On the wrong side the stitches will be twice as long as on the front side.
Back stitch with skips
This option is also used to secure the transition edge of the facing and hem.
Perform a regular backstitch, but pull the needle back half the stitch length. The needle still comes out the length of a whole stitch.
Loop stitch
Used for the manufacture of hand-processed parts: hanging thread loops and holes, thread loops, hook fasteners, belt loops. Also suitable for decorating felt or fleece parts. Sew the seam from left to right, positioning the fabric so that its cut is at the bottom.
Secure the stitch to the edge of the fabric with a loop or any other method convenient for you.
For each stitch, point the needle toward you. Stick the needle into the right side of the fabric and bring it over the thread at a distance of about 5-6mm from the edge and the same distance to the right. Do not pull the thread too tight.
Stitch “Goat” (“Herringbone”)
Use this stitch to join two layers of fabric with a slight degree of movement, for example to join a lining to a garment or to hem knitwear.
Sew the seam from left to right. Make a small horizontal stitch in the top layer, slightly away from the edge. Then, just beyond the edge of the top layer, sew another stitch on the bottom layer, diagonally to the right of the first stitch. Sew stitches without tightening the thread.
French setting
Use this bartack to attach the hem of the loose lining to the hem of the garment.
Sew 2-3 stitches, about 2.5-3cm long, between the garment and the lining.
On top of the long stitches, sew stitches in a buttonhole stitch, placing them as close to each other as possible. Completely cover the long stitches with loops.
Dotted seam
This version of the “back needle” seam is used to finish sewing in zippers on fabrics such as velvet, corduroy or satin, in case the machine stitching looks unsightly.
Bring the needle up through all layers of fabric. Perform a back stitch, picking up 1-2 threads of fabric. Bring the needle to the surface, retreating 5-6 mm forward.
Basting stitch
This stitch is a basic hand stitch used for cinching fabric, tucks, darning and non-stress seams.
Sew forward a few stitches, bringing the needle evenly in and out of the fabric before pulling the thread through.
The number of stitches depends on the thickness of the material. The length of the stitch and the distance between them depends on the location of the seam and can range from 3 mm to 3 cm.
Specifics of the invisible seam
When studying this approach, it is necessary to note that, despite its existence, it remains practically invisible. Achieving a similar effect is possible as you acquire the necessary practice.
At the initial stages, it is important to use fabrics that have a pronounced texture in which the weaving threads are visible.
The most common options include linen and cotton varieties.
There are two main ways to create blind seams:
- The classic type is formed on the wrong side and is indispensable when a high-quality hem is needed for the product. It is important to organize the sewing process so that there is no possibility of viewing stitches from the outside. At the same time, there should be differences in length between them, and when working on the outer fabric, a pair of threads is captured by the needle.
- The formation of a seam on the visible side is permissible when connecting two parts, the edges of which are folded, and the thread is passed through the formed fold. With the right combination of thread and fabric, the seam becomes almost invisible. The stitches, regardless of their location, must be equal in length.
The trouser tape should protrude 0.1-0.2
I would like to draw your attention to one more nuance. To prevent the trousers from fraying in the fold of the hem, the trouser tape should protrude from the edge of the hem by 0.1-0.2. It's about the same as in this photo.
To make this operation easier, mark with chalk a line to which you will apply the edge of the tape when stitching. It is not necessary to stitch along the tape at 0.1-0.2. Only a professional seamstress can have such precision. You can stitch at 0.4-0.5, and then use an iron to “lay out” the hem exactly at 0.1-0.2.
Areas of application for blind seams
A seam of this type is used when performing many types of work. To ensure the full use of such seams, it is extremely important to initially form an idea of where exactly this or that variety is used.
The most popular types of hidden seams are:
- Front joining seam - suitable for repairing clothing, for example, eliminating seam waste, small tears and cuts.
- The front connector is indispensable for making toys, for example, sewing on individual parts;
- Hemming purl is used when there is a need to hem the bottom of a skirt or trousers;
- The front one is necessary for hemming the lining and sewing on sleeves, and occasionally, flaps for pockets or collars;
- Purl is used mainly when creating certain items in a decorative style (the most popular options include patchwork and quilling techniques).
Preparation and first recommendations
Any repair and tailoring of clothes begins with fitting - only the thing that fits your figure looks perfect and improves your appearance.
Video tips for beginners on hemming pants
A few tips to properly hem men's trousers:
- Having put on trousers, choose shoes that match them;
- use the belt;
- classic models should reach the middle of the heel;
- narrowed models can be located a couple of centimeters higher;
- Fold the legs and pin them, or sew a few stitches with white thread.
Now take off your pants and lay them on the table. Draw the first line along the fold line - this is the future level of the length of the trousers. Now put about 3-4 cm down for the hem. A large length will spoil the appearance and is used exclusively for children's models.
Features of creating an invisible seam manually
In addition to the optimal skills to ensure the creation of a hidden seam, it is extremely important to pay attention to the correct selection of sewing accessories. For example, it is important to choose high-quality threads and needles.
It is also worth knowing some subtleties, the main ones being:
- High-quality work is only possible with;
- When selecting a thread for sewing work, it is necessary to take into account its maximum proximity in color to the product;
- The optimal needle should be thin and sharp;
- The sections of the hemmed parts are folded inward; if the need arises, they must be ironed;
- The thread with which the parts are connected can pass strictly perpendicular to the fold;
The seam is completed by securing the thread by threading it into the loop made and then tightening it.
Invisible external seam, clothing repair MK video in detail
How to sew clothes from the front side
- An invisible external seam, made with a thread and a needle on the front side, will save you in an unexpected situation.
- Video tutorial: How to quietly sew a hole on the outside of a garment along the seam
If you have a seam torn and it is impossible to quickly sew it up from the inside out, because... there is no access, for example, the lining is in the way.
Photo 1
It is very easy to sew up a torn area. In addition, no lines need to be drawn. The seam line on the fabric will be visible by itself, it has already been created by machine stitching, iron and time (photo 1)
Photo 2 Photo 3
Using a needle, carefully “open” the seam further (photo 2, photo 3). This will release the threads of the remaining seam. Tie them together with 2 knots, thereby securing the remaining seam. Remove the threads from the fabric inside out. Do the same with the opposite side of the opened seam.
Take a thread that matches the color. Thread it through a needle. Make a knot at one end of the thread and leave the other end of the thread hanging freely. For the photo, I deliberately took a thread of a contrasting color to show that the seam would be invisible.
- Photo 4
- Make a puncture with a thread and a needle on the left half of the seam from the wrong side strictly along the seam line, slightly above the ripped place, pull the thread with the needle to the front side of the fabric to be sewn (photo 4).
- Photo 5
Photo 6
On the right side of the product, strictly opposite the thread exit from the left half of the seam, make a puncture with a needle and thread on the wrong side and immediately on the front side, also strictly along the seam line. Stitch length is about 1 mm. Pull the thread to the front side (photo 5, photo 6). Tighten the thread so that the halves of the rupture of the product are connected.
What threads should you use?
Based on the quality of the selected thread, we can further talk about whether it will be possible to create an optimal seam or not.
The main requirements that exist in such a case include:
- Maximum color match to the item of clothing with which all necessary actions will be carried out;
- The thread must be straight, and in no case should it be twisted; otherwise, there is a possibility of loops forming, which will significantly reduce the speed of work and have a negative impact on the final result;
- The optimal choice is threads made from synthetic fibers that have a high level of strength; also, this variety is not capable of providing additional styling;
- One of the most acceptable options is transparent monofilament, but in order to work with it efficiently, it is extremely important to have the appropriate experience.
Material and tools
Expert opinion
Mikhailov Ivan Maksimovich
Furniture maker. Work experience 3 years.
Having only trousers, it is pointless to start hemming - you need to prepare a complete set of tools and auxiliary material, depending on the chosen method:
- white threads and pins for primary fixation;
- plain threads for classic models, or material of a different color for jeans;
- needles;
- sewing machine, if we choose mechanical hemming;
- trouser braid;
- chalk or soap;
- adhesive tape (web) when choosing the appropriate method.
Choosing a needle for a blind seam
In addition to threads, to create a high-quality blind seam by hand, it is also necessary to use needles, which should be relatively short, sharp and with a narrowed eye.
The need for a small ear is due to the fact that in such a case additional marks will not remain on the fabric.
- Under no circumstances should you use dull needles or accessories covered with rust, as they can only ruin the item.
- It is extremely important that before performing all the necessary actions, maximum attention is paid to preparing the workplace: The surface must be level and well lit.
- Many people note that the use of sunlight can tire the eyes very quickly, but if such a possibility exists, in no case should it be completely excluded.
The best option is to combine both artificial and natural light to ensure full-fledged activity.
In order not to spoil the item, you can initially try to carry out all the necessary actions on individual flaps and only after that proceed to a full repair.
How to sew a hole in knitwear: 7 different ways to repair different holes
Blind stitch by hand.
photos, patterns for hemming the edges of trousers, patches, jackets, toys, How to quietly sew up a torn seam on a T-shirt, mend a frayed sock, collect runaway loops and sew up a hole in a sweater and other life hacks for repairing knitted items - in our selection.
How to sew up a hole in a sock with an invisible seam: master class
A hole in the toe or heel is one of the most common sock “damages.” It happens that you don’t have threads of a suitable color at hand - for example, at the dacha or while traveling. This life hack is about how to sew knitwear with a seam in which the thread on the front side is not visible, so you can use any color. In addition, there is no need for special devices, as with darning
Please note: this method is not suitable for very visible places. It's more of a life hack for quickly fixing something that's torn. You will need:
You will need:
Sequence of work:
1. Thread a needle and make a small knot. Do not turn the product inside out. Pass the needle through the hole to the inside of the knitwear and leave the knot there.
2. Start sewing up the hole, grabbing one or the other edge in turn. Proceed as shown in the diagram.
3. After finishing the seam, pull the thread. Pull until the thread goes into the seam, becoming invisible from the front side, but does not pull the seam. You can always pull the seam sideways to straighten the thread a little. Bring the needle inside out and secure the thread.
More clearly - in the video:
Life hack: how to quietly sew up a hole in a T-shirt
How to sew a broken stitch with a hidden seam: master class
In this case, the hidden seam from the previous life hack is also used. Read a detailed master class on how to make this seam here.
The method is suitable for repairing burst or torn machine stitching where it is not entirely convenient to sew up a hole from the inside out. For example, you can sew up a hole in the lining, on the inside pocket, and so on. By the way, the same seam can be used to repair a torn hem on trousers or a skirt.
You will need:
Sequence of work:
Carry out the seam as shown in the photo or in the diagram from the life hack above. At the end, carefully secure the thread.
More clearly - in the video:
https://youtube.com/watch?v=9Zmufc8Yz-0
How to make a blind seam by hand
How to sew a small hole on knitted items: master class
We have already written about how to quietly sew up a small hole in thin knitwear (master class with video here). The same master class is about how to repair thicker knitwear, for example, a knitted sweater, pullover, or cardigan. In the same way, you can sew up a thick knitted sock or any knitted item.
You will need:
- thin threads to match the color of the item;
Sequence of work:
1. Turn the item inside out. Thread the needle. Start casting small stitches across the direction of the threads in the knitwear. Move up and down, threading the thread all the way to the end of the hole.
2. Now use the same stitches perpendicularly, along the direction of the knitwear threads. With each movement of the needle, intertwine it with the laid stitches, and grab a little of the material of the item being repaired.
3. As a result, the work should look from the inside out, as in the photo below. Secure the thread with a few small, neat stitches and cut the thread. Ready.
Read further:
What threads are needed for sewing machines and what are not? How to choose the right thread for a sewing machine?
How to make hems on a guy’s trousers: correctly fold the trousers by hand, make cuffs on classic men’s trousers
How to sew up a hole in jeans - between the legs, on the knee. methods and tips
How to fix a hole in a down jacket: sew it up carefully, seal it discreetly, useful tips
Restoration and restoration of a leather jacket: how to repair, refresh, or repair a hole in a jacket at home
How to remove puffs on trousers: practical tips
How to thread a children's sewing machine: sequence of actions
What are threads made of? structure and properties of sewing thread. types of thread compositions.
Belt loops on trousers, what they are, description of what they are for
How to process (sew) a codpiece in men's and women's trousers: distinctive features, processing stages
What to do if there is a hole in the sole of your shoe? ways to repair a hole in the sole and heel of a shoe.
How to remove creases on trousers? preliminary stages. smoothing process without a trace. processing smoothed arrows
Machine knitting: scarf pattern - baktus (scarf scarf) on a knitting machine
Photo of a blind seam made by hand
How to remove puffs
The appearance of a small snag or puff cannot be left unnoticed. If they are not removed in a timely manner, arrows and other damage may occur on the trousers. By using available materials, protruding threads and snags can be quickly eliminated.
Gently stretch the small hook
First of all, you can try the standard method. Gently pull the product in different directions.
Important!
Do not overdo it, as this may cause more serious damage.
If the tightening is not too tight, this process can help reinsert the thread and return the product to an attractive appearance.
Using a sewing needle
The most popular is to remove puffs using a regular sewing needle.
- The product must be carefully straightened. For reliability, you can place it on a hard and level surface. A table would be an excellent option.
- In the tightening area, insert the needle so that the eye remains on the outside.
- We hook the protruding thread into the eyelet and pull it to the wrong side.
A couple of minutes, and the surface of the trousers is smooth again and without visible damage.
Features of working with different materials
When working with knitted items made from wool or knitwear, it is better to use a crochet hook instead of a needle. It differs from a regular crochet hook in that it has a lock. You can buy one in a specialized store.
Chiffon
When repairing damage to chiffon trousers, it is recommended to use a fine needle to prevent further defects from occurring. After completing the work, the product must be steamed with an iron turned on at a mode suitable for the fabric.
Atlas
Satin material has a rather capricious structure. If defects appear on a satin product, it is better to contact a specialized studio. You can try to remove the puff using a steam iron. To do this, it will be enough to treat the fabric several times with a hot sole on the wrong side.
- When using the needle method, it is not recommended to trim the tail of the protruding thread. This may cause arrows or holes to appear, which will ultimately ruin the attractive appearance of the product.
- In general, it is better to avoid using scissors in the process of removing snags. Cutting the protruding thread will make the situation worse.
- After carrying out the elimination process, it is recommended to slightly steam the product with an iron with a mode suitable for the fabric. This will smooth out the fabric and finally eliminate the area of deformation.
- For a more reliable fixation when removing a tightening on a knitted product, you can carefully hem the loop using a needle and thread that matches the color scheme.
- If there are puffs from washing, it is better to refrain until the defects are eliminated. During the washing process, the protruding thread may finally unravel. This will lead to the appearance of holes or arrows on the trousers.
- Using a special delicate washing mode will avoid the appearance of unpleasant loops.
- Claw marks are almost impossible to remove at home. In this situation, it is better to contact a specialized studio.
Reference:
The above methods and tips can be used for any item of clothing.
What to do?
Don't let the lack of an overlocker bother you. You can sew the overlock stitch by hand. It's not as difficult as it might seem at first glance. Of course, you will have to spend much more time, but the result may look very decent in appearance.
What is an overcast stitch? We use it for finishing fabrics during the sewing process. At the same time, they can be used to fasten individual panels. Thanks to this, you can get a very neat tissue cut. There are several ways to make an overcast seam by hand. And in our article we will try to touch on some of the subtleties of this work.
The photo below demonstrates quite clearly what a hand-made overcast seam looks like in a product.
Hole on hand knitwear
A suitable repair method for knitted items is darning. How discreetly you can hide the loose loops depends on the size of the damage. Thus, a short hook with a torn or pulled out thread can easily be patched with a knitted seam, simply by gathering the loops together with a suitable thread.
If the thread breaks and the fabric unravels, the best option is to restore the torn thread in the top row (by tying the ends) or replace it with a new one, then arm yourself with knitting needles or a crochet hook and pick up the thread, re-knitting the section. Secure with a “crawfish step” or a simple overlock stitch.
- Aluminum profiles for curtains
- Press for buttons and eyelets
- Single-row tire cornice
- Photos of cafe and restaurant design with curtains
- Photo of an interior with curtains on a ceiling cornice
- How to make an internal seam with thread: instructions
- What is a curtain
How to remove a large tear if all or several threads are torn:
- Use a needle-forward stitch around the tear. This way the fabric will not stretch during darning, and the thread can be pulled out afterwards.
- Then, between the outer loops of each row of holes, stretch thin transverse threads as a base.
- Perform the darning itself by wrapping loops around each warp thread from the top to the very bottom of the break. Next row, “braid” the hole with the same girths, but from the bottom up.
Hemming trousers
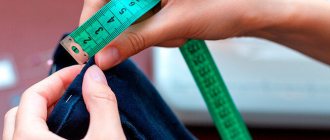
At first glance, it is very simple to hem trousers. But, in fact, this work has several nuances. In order to hem them correctly and the result is neat folds, you need to familiarize yourself with the work procedure.
Hemming trousers:
- The first step is to carefully determine the desired length of the trousers. Tuck the edges of the trousers directly onto the wearer. Leave a small margin, about a few centimeters, in case they need to be lengthened in the future;
- then fold the trousers along the entire length and pin them with pins - this will allow you to cut the trouser legs evenly. Stitch the hem tape and finish the edge with an overlocker;
- hide the ends of the threads with a hook;
- Next, a blind seam is made. To do this, you need to turn the trousers inside out and pin the fold, stepping back 1 centimeter from the cut;
- insert a needle with thread and a knot into the overlock stitch, grabbing a couple of threads of the fabric of the product and bring the needle back to the hem;
- It’s worth sticking to the smallest step possible.
What to do in more complex cases?
Unfortunately, the jacket does not always tear strictly along the seams. In this case, returning it to its proper appearance is much more difficult. If you sew up a hole in the usual way, even very carefully, the seam will still be noticeable.
You will need non-woven fabric with an adhesive thermal backing. It is sold in haberdashery stores in the form of ribbons and scraps. The size of the tape (or shred) should be slightly larger than the hole. If threads come out at the cut site, carefully cut them off so that there is no fringe. Then, under the wrong side, place the interlining with the adhesive side to the fabric and press it well so that there are no wrinkles or blisters. Carefully connect the torn edges without overlap. Cover the hole with gauze on top and iron thoroughly.
Decorating a cut
Jackets may be cut by a blade or other sharp object. You can hide the hole with a piece of reflective tape. Take the cobweb. Place under the awning and glue with an iron. Before working with the iron, look at the label to see what temperature the material of this product can withstand.
Ideas for decorating a cut:
- Sew on a row of buttons, maybe of different colors, but of the same diameter.
- Glue decorative tape or iron-on sticker.
- Install rivets or buttons.
- Attach plastic fittings.
- Lay a neat seam using matching threads, connecting the sections.
- Sew on a small zipper.
A padded jacket will look like new if you cover the cut area with non-woven tape.
This material is thinner than gossamer, so it can turn into an excellent “finishing” material.
Place it under the top layer of the jacket, and on top through gauze, touch the iron with steam. The non-woven linen will melt under the iron, reliably filling the cut areas.
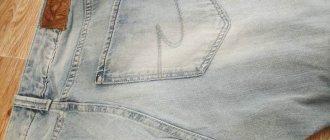
How to make a patch between your legs
You can solve the problem of jeans frayed between your legs with patches. This method requires having any denim material on hand. It is better to use the same material that remains after shortening the jeans or a spare piece that comes with the pants.
A pocket torn at the seam can be repaired discreetly
How to sew a patch on jeans between the legs? In general, the following actions are performed:
- Searching for suitable fabric by color, shade and texture, if there is no original one;
- Laying out your pants so that the hole is clearly visible;
- Cutting off the required piece of fabric and stitching it on a machine;
- Turn the jeans inside out and apply the patch facing inside out;
- Sew a patch along the contour;
- Turn the pants inside out and sew them right side together.
A beautiful applique can save a thing
Important! To repair jeans in intimate areas, you can also use ready-made applications and patches. They do not require edge processing and have various shapes and contain drawings
Some models already contain drawings
How to sew by hand: tips for beginners. What seam should I use?
The most durable is the saddle. When connecting parts of the product with a saddle stitch, the threads do not intertwine inside the leather and do not return each to its own side.
The top thread is on the bottom and the bottom thread is on the top. The threads meet again inside the material at the next stitch and return to their sides. If one of the threads breaks, the seam will not fall apart because each stitch is supported by two threads.
What is the advantage of hand sewing over machine stitching?
When machine stitching, the top and bottom threads are intertwined within the material and each thread returns to its own side. Machine stitching, compared to hand stitching, is not as durable and strong. If the thread on one side breaks, the thread on the other side will remain unsupported and “fall out”, forming a hole in the seam.
Flowers
The most popular leather flower is the rose. Thin raw materials 0.5 - 1.2 mm thick are suitable for its production. Petals are cut out of the material, onto each of which (several layers) PVA glue diluted with water is applied with a brush.
Photo 1. From leather you can make such original decorations in the form of flowers; multi-layered petals give volume to the figure.
As soon as the petals are saturated with the skin, it is necessary to form folds and bulges on them: the material is folded like an accordion and kept in a compressed state for 5 - 7 minutes, then the petals are straightened. They are dried and collected into a bud using glue. You can use a toothpick, stick, or wire as a base around which the petals will wrap.
Decorations
Among the leather jewelry, the most popular are chokers (on the neck), earrings, and bracelets. They are made of thin material, predominantly black or brown. Black leather looks great with silver metal details.
All kinds of belts
To make a belt, it is recommended to use a special hole punch to make holes. You will also need a buckle and additional fittings if the craftsman wants to decorate the item (for example, rivets).
The finished product is treated with walnut oil and beeswax to improve the appearance of the leather and make the belt waterproof.
Important! The edges of the object must be smoothed and polished. This can be done with your own hands or on a polishing machine.
Small handbags
You will need soft leather, a pattern, a set of tools, accessories (buttons, snakes, rivets, magnets, carabiners for bags and backpacks).
After all stitching work, it is recommended to rub the surface of the product with wax and punch the seams with a hammer.
The reverse side of the leather is treated with CMC wallpaper glue or starch to prevent lint.