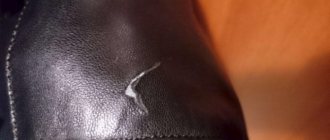
How to quietly sew a jacket at the seam
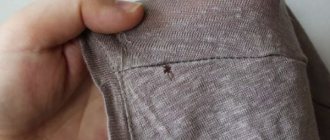
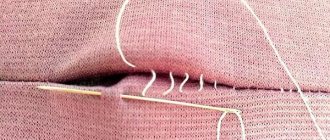
Often the jacket tears when touched by a sharp corner or object, but most often it comes apart at the seam. The seam repair operation is the simplest. You can stitch it by machine or by hand. If the item is without a lining, then simply turn it inside out, pin the tear area, sweep it so that the parts do not move, and stitch it on a typewriter.
Repairing a down jacket
If the jacket is torn at the seam, there is no need to invent anything.
Such a hole can be sewn up with thread. First, it is recommended to visit a haberdashery store that sells suitable threads. It should be noted that such a gap can be eliminated even without a sewing machine. To make sewing more convenient, the jacket must be placed on the table, first turned inside out. It is important to sew so that the new line is a continuation of the old one. In this case, the seam should be as smooth as possible.
It is most difficult to sew up seams if the jacket has a lining. To make your task easier, you should make a small cut on the inside, which will also need to be stitched up.
If you carefully repair the damaged area, not a trace will be visible.
If a torn hole appears, you can not only sew everything up or apply a patch. Various types of applications are popular now. You can use this. Thus, you can not only get rid of the hole, but also update your down jacket.
Before mending a tear, you should visit the appropriate store to select a decal or pattern. A similar method can be used if the sleeve or main part of the jacket is torn.
Appliques and stickers can help out in many cases, but this method has a drawback. You can sew on a pattern or stick on a beautiful picture only where it is appropriate, namely:
- On the sleeves;
- On the chest;
- On the pockets.
In other cases, the stickers will look stupid, which means it’s best to consider another way to fix the holes. If embroidery was chosen, it should be done on a separate fabric, which will subsequently be sewn to the torn area of the jacket.
Braid or tape
You can disguise the hole next to the seam using tape. Many people are interested in the question of how to fix a hole in a jacket so that it is invisible and also beautiful. It's simple, you should use all your imagination. It doesn’t matter what length or color the braid is. Don't be afraid to experiment.
Another way to disguise a hole is with reflective tape. The advantage of this method is that it will not only hide the defect, but will also make the jacket visible at night. You need to cut a piece of tape and carefully stick it over the gap.
There are several ways to sew up or make a hole in your jacket invisible. Most methods are universal for all types of jackets. However, a certain method is better suited for each type. There are three ways to fix a hole:
- pull it off;
- seal;
- glue.
Repairing a down jacket varies depending on its type. Down jackets for men, women and children are repaired differently. Children's jackets are quite easy to repair, because a bright patch will look very organic on a children's down jacket. There is a huge variety of patches on the market.
Quite often the patch looks lonely on a jacket. In this case, you can stick a few more patches on undamaged areas. Thanks to this, the stripes on the down jacket will look organic.
A variety of patches are great for repairing women’s jackets, but men’s models are not so tolerant of such unplanned “modernization.” A bright colorful patch will look ridiculous on a strict men's down jacket. In order not to make a mistake when choosing a patch for a men's jacket, you need to give preference to items made in a strict, restrained style. Patches made of leather are well suited for men's jackets.
Despite the fact that winter jackets are in most cases made of reinforced materials, they can suffer from various types of damage, from snags to burns. Down jacket repair is carried out using several main methods:
- patches;
- thermal stickers;
- reflective tape;
- decorating the break point using a zipper or fittings.
The main difficulty when sealing a hole in a down jacket is the inconvenience. If the item is not repaired correctly, the filler may begin to come out. If the task seems difficult, it is recommended to take the jacket to the studio. Patch Thermal adhesive Reflective tape Zipper
Stitching up a burnt hole
A blazer can be burned by simply touching a hot object. How to arrange it? Choose a material that matches the color. Cut the patch into a diamond, square or circle shape. The patch should be slightly larger than the hole. Prepare glue for the material.
Step by step repair:
- Degrease the gluing area and the patch itself with acetone or solvent.
- Using a brush or cotton swab, apply glue to the treated surface.
- Apply the patch, closing the hole, press with a heavy object, for example, an unplugged iron.
- Hold the press for 2-3 hours so that the glue penetrates the fibers of the fabric.
The burnt hole is best hidden under a thermal sticker.
Choose a suitable sticker. Glue it with an iron through damp gauze. But not all jackets can be decorated with decor. An adult man can seal his jacket in another way: take 2 patches with an adhesive base. Squeeze one of them into the hole, place another on top, press with an iron through the gauze.
Masking a hole
If you do not want to mend the damage to your jacket, you can repair the tear using the following means:
- Decorative patch. There is a wide range of such elements that are used not only for clothing repair, but also for decoration. Patches can be made of fabric, rubber, leather; the latter option is well suited for jackets made of the same or denim fabric and looks organic on them. To secure a piece of material, it must be applied to the tear site and sewn with a hidden seam.
- Reflective tape. This option is suitable for sportswear or children's clothing. The only drawback of this method is its impracticality, since even if there is a small hole in the coating, you will have to sew on a long reflective tape and carry out the same procedure on the other side of the product.
- Fabric thermal sticker. A quick and reliable way to discreetly get rid of a small hole in your clothes. Such stickers are presented in the form of small fabric patches that are attached to any product under the influence of temperature. They should be placed at the site of damage, a layer of fabric should be placed on top and the area should be carefully ironed.
Another option to disguise a hole is to attach a zipper, rivet or button. This method will help not only with covering the hole, but also with decorating a previously unremarkable item.
Zippers, buttons and rivets are not always suitable, since they will look harmonious only on certain areas of the product, such as the front part at chest level, pockets and sides.
Decorative patch
Reflective tape
Fabric iron-on adhesive
Decorating a cut
Jackets may be cut by a blade or other sharp object. You can hide the hole with a piece of reflective tape. Take the cobweb. Place under the awning and glue with an iron. Before working with the iron, look at the label to see what temperature the material of this product can withstand.
With this fashionable element you will kill two birds with one stone - you will disguise the hole and make your clothes visible in the dark, which means you will be safe on the roads.
Ideas for decorating a cut:
- Sew on a row of buttons, maybe of different colors, but of the same diameter.
- Glue decorative tape or iron-on sticker.
- Install rivets or buttons.
- Attach plastic fittings.
- Lay a neat seam using matching threads, connecting the sections.
- Sew on a small zipper.
A padded jacket will look like new if you cover the cut area with non-woven tape.
This material is thinner than gossamer, so it can turn into an excellent “finishing” material.
Place it under the top layer of the jacket, and on top through gauze, touch the iron with steam. The non-woven linen will melt under the iron, reliably filling the cut areas.
What kind of glue will help?
When choosing glue for repairing a jacket, you must be guided by several principles. The composition should be:
- waterproof;
- elastic;
- colorless;
- resistant to light and temperature changes;
- do not change the structure of the fabric;
- have a thick consistency;
- do not spread;
- Don't freeze instantly so you have time to make changes.
Among the wide variety of adhesive compositions, you can choose an option suitable for a specific fabric and the nature of the tear.
Polyurethane
This type of glue reliably connects surfaces because it is made on a synthetic basis. It is produced in hard and elastic form. The second option is suitable for repairing jackets, down jackets and other fabric products. It has high adhesion and excellent resistance to temperature changes.
Polyurethane glue performs equally well at temperatures from -50 ⁰С to +120 ⁰С.
Rubber
The adhesive composition, which is based on rubber, is highly elastic and can be used to work with leather, fabric, rubber, glass, and wood. Latex rubber adhesive contains casein, which gives it additional elasticity and water resistance. Seams can be glued with styrene rubber-based glue. The composition, which includes natural rubber, is used to glue leather and fabrics together. It has high elasticity.
Polyvinyl acetate
This type of glue is well known to users as PVA. It can be used for fixation “temporarily” and “permanently”. Usually this glue is washed off after washing, since it does not tolerate moisture. But currently they produce polyvinyl acetate glue with high moisture-resistant characteristics. If desired, you can even find two-component adhesive compositions on sale that can withstand direct contact with water. They are best suited for repairing down jackets and down jackets.
Neoprene
Neoprene adhesive makes it easy to make on-site repairs. It dries in less than a minute and forms a strong bond that is flexible and durable. An adhesive composition based on neoprene can easily withstand elevated temperatures and is recommended for gluing elements made of leather, fabric, and rubber. The glue is transparent, waterproof, and can be used to repair jackets and down jackets.
Hot melt adhesive
Safe and non-toxic hot melt adhesive can be used to glue fabrics together. It is applied using a glue gun, which allows the composition to be distributed evenly over the surface. Hot-melt adhesive takes the form of rods that are melted in a gun, or powder for preparing the adhesive composition. The advantage of hot-melt adhesive is its speed of action.
Adhesive aerosol
The difference between aerosol glue and other types is that it can be applied using a spray can. The sprayer allows you to create an even layer of glue and fix materials in places that are difficult to reach for other types of glue. The connection it creates is elastic, the can is sealed, and the consumption is economical. You can apply several layers of adhesive. Complete drying occurs after 20 minutes.
See also
How to use foil glue correctly and a review of the best brands
Polyvinyl chloride
This type of glue is produced in the form of an aerosol. It is sprayed in an even layer on one surface, the second is applied on top and pressed with a press for two hours. Complete drying occurs after 6 hours. The adhesion of polyvinyl chloride glue is high and can be used for different fabric textures.
How to repair a jacket using applique
In this case, an applique with an adhesive base or a sticker will help. In stores you can find applique of different sizes. If with an adhesive base, then glue it with an iron. And if it’s just a design or embroidery on fabric, then you’ll have to sew it on.
How to sew an applique correctly:
- First, prepare the jacket: cut off excess threads and padding, baste the applique.
- Machine sew.
- If you don’t have a machine, then work it over the edge with threads of a suitable color. If the applique has a pattern of different colors, then the threads must be matched to match each section of the applique. Only then will it be beautiful and neat.
If the sleeve is torn, the patch must be sewn or glued on both sleeves. On the sleeve you need to make a patch much larger than the hole so that the hole does not appear again.
Invisible seam No. 4 – for knitwear and knitted items
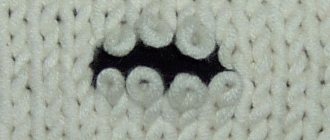
No one is safe from a hole in their sweater. Many people know that such holes tend to spread quickly. To prevent this from happening, you should repair the product correctly. Knitwear and knitted items have their own invisible seam.
We recommend: Turning a disposable razor into a reusable one - 3 ways to sharpen the blade
Let's pay attention to the diagram:
Progress:
- First you need to find the threads that have broken and bring them to the wrong side.
- Next, we arm ourselves with thread to match the color of the product. We insert it into the needle.
- We tie the end of the thread to the end of the broken thread.
- We bring the needle to the front side. We pass through the 2 upper loops, then through the 2 lower ones (see diagram).
- Continue darning until all the loops are secured.
- Let's go to the wrong side. We tie the thread to the second torn end.
- Ready!
If the knitting is small, you can use a magnifying glass.
A clear example of how to properly sew up a hole on knitted items and knitwear:
How to cover a hole with reflective tape
To fix the luminous strip on clothing, you should use a self-adhesive piece. Just iron it with an iron and it will close the hole. But such clothing repair cannot be considered reliable. After several washes, the tape may come off.
The most reliable way is to sew on a machine or by hand. First baste the section, then carefully sew across the edge, making even stitches.
Preparing to sew
The work of making a blind seam puts a lot of strain on the eyes, requires concentration and takes a lot of time. In addition, you need to constantly hold the product in a certain position for accurate stitching.
Therefore, it is necessary to prepare a comfortable, well-lit workplace. The most practical thing is a table with a lamp. Working at a desk will help preserve your vision and posture. But sitting on a chair for a long time is uncomfortable. Therefore, you can set up a workplace on an armchair or sofa, placing a floor lamp nearby.
The place for hand sewing should be organized so that the necessary tools are at hand: threads, pins, needles, scissors.
The light is installed in such a way that the rays are directed from above on the left side and completely illuminate the work space. Sunlight quickly tires the eyes. However, it should not be completely ruled out. The best option is a comfortable combination of artificial and natural lighting.
In addition to thread and needle for sewing, you may need:
- Iron (for smoothing seams).
- Ruler and chalk (to mark the seam line).
- Tailor's pins.
- Magnifier.
- Scissors.
What to do if the raincoat fabric is torn?
Recently, raincoat fabric is increasingly used for sewing outerwear. It has many advantages:
- It doesn’t get wet, we won’t wait, or under the snow. Droplets of moisture simply roll off the clothes.
- After washing, things dry very quickly.
- Protects from wind, but at the same time allows air to pass through well. It is impossible to sweat in such clothes.
- This is one of the most durable materials.
- Things made from this fabric are very light and beautiful.
- Does not fade in the sun, does not deform when washed.
Items made from raincoat fabric tear very rarely. Only the armpit along the seam may tear. How to repair? You also need to rip the lining, align the seam, and sew a stitch on the machine.
Removing stubborn stains
In addition to various defects, down jackets and other types of jackets often have stubborn stains that are difficult to remove with ordinary means at hand. In this case, time-tested tips will come to the rescue:
- Using regular laundry soap, you can remove fresh greasy stains. The greatest effect is achieved if you thoroughly soap the problem area and leave it overnight. After this, all that remains is to wash the jacket in the usual way.
- If your outerwear is made of light-colored fabric, then you can use ammonia. Contaminated areas are wiped with a small cloth. You need to be careful, since applying ammonia to a clean fabric may simply discolor it.
- Regular table salt has proven itself to be effective in the fight against greasy stains. The secret of this procedure is that the contaminated areas need to be rubbed with salt until they completely disappear.
- You can often see specific stains with a greasy sheen appear on the collar, pockets and cuffs. Baking soda and vinegar will help deal with them. A small amount of the product should be applied to a cotton pad and wiped over problem areas.
- Old, stubborn stains can be removed well with dishwashing detergent. In this case, the soap composition should be dropped onto the stain itself and rubbed well until foam forms. In this state, outerwear should be left for 4 hours and then rinsed under running water.
- The most common and effective is bread crumb, which copes well with various types of stains. Treat the contaminated areas with a piece of bread and leave the jacket for 5 hours. After this time, the product should be washed by hand with the addition of powder or other detergent.
