Any washing machine can fail, especially if it has been in service for more than one year. After the warranty period expires, most amateur craftsmen try to fix the problems themselves. Often, in order to carry out repairs, you have to look for the cause of the breakdown, and for this you have to get to the internal parts.
How to disassemble a Samsung washing machine with your own hands, what is needed for this and what is the sequence of actions - you will find the answers to these questions in the article.
Preparation
Disassembling a washing machine is not difficult if the owner of the device has minimal skills in electrical engineering and plumbing. In Samsung brand models, such as, for example, S821, WF-S861, S803J, WF6458N7W, it is easy to access the main mechanisms.
To disassemble and subsequently repair the washing machine, you need to choose a bright and spacious place where nothing will interfere with the work.
Whatever machine you are going to repair, first it is important to prepare a workplace and tools that will be useful during the disassembly process. Of course, you can get started with a few screwdrivers and wrenches. But if the machine requires a detailed inspection and subsequent repairs, it is better to prepare everything you need at once. So, you may need:
- hammer;
- wire cutters;
- screwdrivers (slotted and figured);
- open-end wrenches;
- heads (socket wrenches);
- pliers;
- hacksaw;
- pliers;
- mites;
- soldering iron
It is important to prepare auxiliary materials in advance - liquid for softening nut fasteners WD-40, silicone sealant and lubricant for hinge elements. It is convenient to have a clean rag on hand to wipe your hands or any remaining liquid from the machine. Experienced craftsmen advise beginners to photograph each stage of disassembling the unit to make it easier to reassemble the device after completion of the repair, therefore, you need to prepare a camera.
The preparation stage may not seem so important, but the result largely depends on the quality of its implementation.
Preparatory stage
Disassembling a washing unit is not as difficult as it seems at first glance, but first you should properly prepare for the upcoming repair. To do this you need:
- determine the location for the work;
- prepare tools and related materials;
- prepare the washing machine for disassembly.
The room for repairs should be spacious and well-lit; you will need a free section of the floor with an area of 2 x 2 m. It is recommended to cover its surface with newspapers or rags in advance so as not to get dirty during the repair process.
Next, you should stock up on the necessary equipment. To disassemble and repair the washing machine you will need:
- screwdriver (with a set of bits) or a set of Phillips screwdrivers;
- impact wrench;
- flat screwdriver;
- wrench and hex key (8 mm);
- pliers;
- pliers;
- multimeter;
- hammer;
- a set of colored markers;
- WD-40 lubricant;
- silicone sealant;
- CV joint lubrication;
- clean rag.
If you have to cut the tank, you will additionally need: a hacksaw with fine teeth, a drill, a long drill, a gun with sealant, self-tapping screws or bolts.
Disassembling a washing machine is easy when you have a full set of tools at hand
Remember that after repair and replacement of parts, the unit will need to be reassembled, so immediately record all stages of dismantling, using photos or videos, or at least write down the sequence of your actions. Then the installation process will go quickly and without complications.
If your washing machine has not yet expired, it is better to contact a service center for help in troubleshooting. If you replace parts yourself, you may subsequently be denied free warranty repairs.
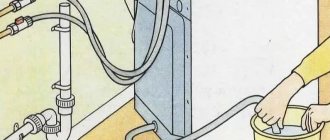
All that remains is to prepare the washing machine itself for further disassembly. Follow these steps:
- de-energize the unit;
- disconnect the inlet and drain hoses from the water supply and sewerage systems, respectively;
- remove the drain filter and drain the remaining water (the filter can be cleaned at the same time);
- move the washing machine to the work site.
Please note that to disassemble and subsequently repair a Samsung washing machine (for example, models such as s821, wf-s861, s803j and wf6458n7w) you will need several hours. In addition, if it becomes necessary to remove the tank from the unit, outside help will not hurt.
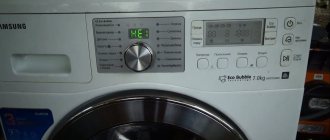
Samsung washing machine diagram
Before you start disassembling the washing machine, it is advisable to get an idea of its structure. The unit diagram will show the location of the functional parts and will help when making repairs.
If you suspect that the problems are caused by poor electronics, it will be useful to have the electrical diagram of the unit on hand.
For an ordinary user, a schematic representation of a machine’s structure may seem complex and incomprehensible, but if anyone wants to understand the circuit, anyone can understand it.
Final Thoughts
Disassembling Samsung washing machines is a labor-intensive process that requires a responsible approach. The principle of disassembly is practically no different from different manufacturers, since the units themselves are designed approximately the same. Some differences in the procedure are typical only for Samsung washing machines with a vertical loading type. The main thing is to accurately remember the location of each of the parts while installation is underway. Then it will be easier to reassemble in the reverse order, following the manufacturer’s requirements. It is important to assess your own strengths in advance so that disassembly later does not turn out to be overwhelming.
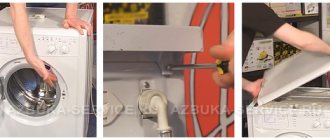
How to disassemble the unit yourself: step-by-step instructions
To properly disassemble a Samsung washing machine, we recommend following the following sequence of actions. You need to start the process by removing the top cover , for which you need to take a screwdriver and unscrew the two screws located at the back of the machine. Then carefully slide the cover forward a little and remove it from the body. If you need to inspect the motor pulley and belt drive, simply pull the counterweight towards you.
The next step is to remove the detergent tray . Open the container, press the locking tab and pull the compartment towards you as you would when removing it for cleaning. It is a little more difficult to remove the cuff - the rubber drum seal. Helping yourself with a screwdriver, carefully disconnect the fixing ring and remove it from the cuff. Perform the procedure slowly so as not to accidentally damage the rubber. Next, wrap the rubber part inside the drum.
Removing the bottom panel , under which there is a drain hose and filter, is easy. In Samsung machines, the part is fixed with latches, so you just need to disconnect it from the body. As a result, the drain pump becomes accessible. To get it, you will need to remove the clamps using pliers and unscrew several screws with a curly screwdriver.
Next, go to the dashboard , under which the electronic control unit is located. To remove the part, you need to unscrew the screws located in the niche of the detergent dispenser and on the opposite side of the panel. Then unfasten the latches and separate the control unit from the machine body. The part can be left hanging on the wires or placed on the top of the unit, but it is better to disconnect it from the wires and put it aside.
After the above manipulations, begin dismantling the facade surface. How to remove the front panel of a Samsung washing machine? To do this, simply unscrew the fasteners and lightly separate the panel from the body.
When removing the front panel, do not forget to first disconnect the sunroof lock from the wires connected to it.
To remove the back panel , unscrew the 4 bolts from the back and move the part to the side. Now you need to disconnect all the hoses that are attached to the unit tank: filler and drain, as well as the tubes leading to the pressure switch and the detergent compartment. Use a screwdriver to first remove the clamps.
Next you should deal with the tubular electric heater (TEH): dismantle it or simply disconnect it from the wires. Typically the heating element is located at the bottom of the tank under the drum. If you need to replace the heating element, unscrew the nuts and completely remove it from the socket. At this stage also disconnect the wires from the motor . There are quite a lot of contacts, so you need to photograph or write down the sequence of connections so as not to confuse anything during assembly.
You also need to remove the counterweights , which are located on top and bottom of the tank. Unscrew the bolts with a suitable size wrench and set the weights aside.
Dismantling and installing bearings in a Samsung car
Before replacing the bearing on the washing machine, you need to remove it. Proceed as follows:
- In the tank bushing you will find 2 bearings of different sizes.
- To get a large one, you need to knock it out from the outside towards the tank using a pin.
- The smaller one is knocked out from inside the tank.
- Take a pin, place it against the edge of the bearing and lightly tap it with a hammer. Place the pin against the second edge and lightly tap again - go around the entire circumference of the bearing until it pops out.
Attention! When knocking out a part, never hit in the same place. There must be at least 3 points for hitting. Otherwise, the bearing will come out crooked or may get stuck in the bushing, and you will have unnecessary problems.
By the way, you can remove the bearings at any auto repair shop - mechanics have special pullers. Therefore, if possible, you can contact specialists. They usually do this kind of work for a nominal fee.
Don't forget about the seals:
- remove the used elements;
- take a clean cloth and wipe the inside of the bushing;
- lubricate the new oil seals with the grease that comes with the bearings;
- install the seals.
After this you can seat the bearings. Do it this way:
- install the part into the bushing and use your fingers to seat it there;
- Place a wooden block on the second bearing;
- hit the part several times until it sits.
Video
We invite you to watch a video on how to disassemble a Samsung washing machine at home.
She graduated from the Institute of Tourism of the Federal Pedagogical University with a degree in Management, loves to travel and communicate with people. She is interested in psychology, enjoys dancing, and studies English. During the five years of maternity leave, I thoroughly mastered housekeeping, not forgetting about my own development. He skillfully uses words and can support a conversation on any topic thanks to his interest in different areas of life.
Found a mistake? Select it and click the buttons:
For washing small items on the road or in a hotel, it is convenient to use a regular plastic bag. Socks or tights are kneaded inside a tied bag along with water and a small amount of detergent. This method allows you to pre-soak things and wash them without damaging the fabric or wasting a lot of powder and water.
There is a washing machine “for bachelors”. Linen washed in such a unit does not need to be ironed at all! The thing is that the device does not have a drum: some things can be placed inside the container directly on hangers (for example, jackets and shirts), and smaller things (for example, underwear and socks) can be placed on special shelves.
Washing machines have something to do with the origin of the expression “money laundering.” In the 1930s, American gangsters used a network of laundries as a cover for their illegal activities. By passing off the proceeds of crime as proceeds from cleaning clothes, they turned “dirty” money into “clean” money.
Astronauts, while in Earth orbit, solve the problem of dirty things using an original method. Clothes are dropped from the spacecraft and burn up in the upper atmosphere.
History knows the fact that a kitten fell into the drum of a washing machine and, after going through a full wash cycle on the “Wool” program, got out of the unit unharmed. The only trouble for the pet was an allergy to washing powder.
There are a variety of balls that are used in the washing machine. Antistatic ones will prevent the fabric from sticking to the body after washing, balls with special loops will “comb” the lint and prevent the appearance of pills, and silicone ones with pimples will prevent fluff from matting when washing outerwear.
In the 19th century, washing ladies' toilets took a lot of time. The dresses were first ripped open, and then each part was washed and dried separately so that the fabric did not become deformed. After washing, the clothes were sewn again.
The expression “soap opera” (“soap”) did not arise by chance. The very first series and shows that had a female audience were broadcast on television at a time when housewives did cleaning, ironing and laundry. In addition, to attract female viewers to the screens, commercials for detergents: soaps and powders were often played on air.
Washing machines equipped with the “No Iron” or “Easy Iron” functions can wash clothes with little to no wrinkling. This effect is achieved through a special approach to spinning - it is performed at low speeds, with long pauses, and a small amount of water is retained in the tank.
Any washing machine breaks down over time. Units from the South Korean manufacturer Samsung are no exception. Replacing some parts requires almost complete disassembly of the device. In this article we will talk about how to disassemble a Samsung washing machine with your own hands.