- January 3, 2021
- Tools and equipment
- Ivan Gresko
Judging by the reviews of washing machine owners, these devices often fail. The cause of the breakdown is often the malfunction of a part such as the tachogenerator. Therefore, the question of how to check the tachometer on a washing machine is quite relevant. If necessary, replace this part. Information on how to check the tachometer on a washing machine is contained in this article.
Getting to know the device
Before you are interested in how to check the tachometer on a washing machine, you need to get an idea of what this part is. A tachometer, or tachogenerator, is a small measuring device located at the rear of the engine shaft. Tachogenerators have a magnetic rotor and a coil, through which an alternating voltage of varying amplitude is generated, which depends on the speed at which the shaft rotates. In general, the tachogenerator is a sensor that provides feedback between the control electronics and the engine, due to which the engine rotates at a stable speed under any load.
The question of how to check the tachometer in a washing machine arises if you need to check the performance of the engine. Washing machines use a synchronous AC tachometer. Thus, if the rotor rotates faster, this will affect the amplitude of the signal. Read more about the signs of breakdown and how to check the tachometer below.
Operating principle
Failure of the electric motor is associated with a current overload in the circuit. This unfavorable phenomenon can be warned by the Hall sensor in the washing machine. Hall sensors are compact and accurate. Sometimes such devices are called rotor rotation control sensors. The sequence of their operation is as follows.
If current flows through a conductor and a magnetic field, the induced magnetic flux can move through the conductor perpendicular to the flow of current, causing charged particles to drift toward the edges of the rectangular strip. These charged particles aggregate at the edges of the surface. The magnetic flux imparts a force to the conductor, causing the voltage (plus sign) to drift toward one edge while the electrons (minus sign) move to the opposite edge. The force acting on the flow of current is called the Lorentz force.
While a magnetic force is applied to a conductor, the carriers are located on opposite sides, creating a voltage drop across the conductor. This voltage drop is the Hall voltage. It is proportional to the current flowing through it, the strength of the magnetic field and the type of conductor material.
If any of these three variables changes, the voltage drop across the conductor will also change. Therefore, the device must have a controlled voltage applied to the current path. If the current is controlled and the conductor material is given, the only thing left to change is the magnetic intensity. The greatest effect will be achieved when it changes at an angle of 90° to the direction of the current.
About the device malfunction
Judging by the reviews of the owners, at the beginning of the program the engine can reach high speeds. This may be caused by a broken winding on the coil or poor fastening. Also, a sharp change in speed indicates that the engine brushes are worn out. It is possible that as a result of vibration, the wiring contacts began to move away. Voltage can be supplied from the control unit to the motor winding, which is why the signal from the tachometer is not received. It happens that the signal stops coming due to the heating of the engine and coil of the device and resumes after they cool down. Due to the instability of the signal, the motor begins to operate in sharp jerks, and may not spin at all. According to experts, in this mode, the engine in a washing machine must provide at least 800 rpm. If the tachometer fails, the number of revolutions is not regulated. Such signs indicate that a chip or crack has formed on the magnetic rotor.
How to understand that the tachometer is broken
It is quite easy to detect a malfunction of a washing machine, since most of its functions are impaired. But a breakdown of the tachogenerator can be distinguished from others using a number of the following signs:
- Sudden sharp changes in the speed of the rotating shaft,
- Too high rotation speed during washing, which is several times higher than usual,
- A very low number of drum revolutions during spinning or their absence (the drum does not rotate),
- After the washing machine has finished working, the items remain poorly wrung out or completely wet.
Where should I start? First way
First, get a multimeter with an electronic needle or display. Before starting the procedure, disconnect the washing machine from the power supply, water supply and sewerage system. To check the tachogenerator, you do not have to remove it from the engine, but the engine itself will have to be removed from the washing machine. How to check the tachometer on a washing machine with a multimeter? To do this, do the following. First, remove the belt from the shaft. Next, start unscrewing the bolts that secure the motor to the machine. Once the bolts are removed, you can take the engine out. Do not forget to also disconnect all tachogenerator wires from the connector.
Where is the tachogenerator located?
As already mentioned, this device is quite easy to find. The tachometer is located on the washing machine motor, or rather, on its rotating shaft. To get to it, you will need to disassemble the washer, but not completely, but only the back part. To do this, you will need to remove the panel, which is usually located at the back, using a screwdriver.
Next you need to find an electric motor. It is located next to the rotation wheel and is connected to the latter using a drive belt. Then on the rotation shaft you can see a small iron ring - the tachogenerator of the washing machine. But if you need to replace the tachometer, you will also need to remove the engine. Well, without the appropriate qualifications, it will be quite difficult to figure it out on your own.
If you are not very familiar with the operation of this type of electrical appliance, it is not recommended to repair the tachogenerator or other parts of the washing machine.
Not only can the problem only be aggravated without a certain knowledge of electronics, but also if the parts of the washing machine are handled incorrectly, after such a “repair” a complete replacement of the unit may be required. Therefore, it is best in this situation to turn to the help of qualified craftsmen.
Second way
If you decide to use this method, then the electronic device must be in AC voltage mode. After connecting the probes, start rotating the rotor. In this case, you will see voltage generation, which can vary between 0.5-2 Volts. If so, then there is nothing wrong with your tachogenerator. According to experts, the alternating voltage of the engine in real mode at maximum speed is from 60 to 70 Volts.
Is the sensor working?
If you manage to get the engine with the sensor yourself, then you should first take a photo of the wiring device so that you can then connect the engine back with your own hands. Next, you must strictly follow our instructions.
- We go around the machine from the rear wall.
- Unscrew all the bolts securing the motor.
- We loosen the engine to the sides, and then sharply pull it towards ourselves.
Be careful, the engine is very heavy, so don't drop it so you don't have to repair it again.
- First of all, you need to inspect the sensor, wires and reliability of fastenings. It often happens that due to sudden jumps in speed, contacts come loose and clamps become loose. In this case, you can simply tighten the terminals harder and restore the usual balance.
- If there is no visible damage, then you cannot do without a test, which can be carried out in two ways.
The first option is to measure Ohms. To do this, you need to set up the multimeter, loosen the wiring and apply the probes to the contacts. If the readings are in the region of 60-70 Ohms, then the sensor is working.
The second method is to measure the current generated by the sensor. You need to switch the tester to voltage mode, connect the probes to the contacts, and either yourself or ask your household to accelerate the motor by hand. If a figure appears around 0.2 Volts, then the tachometer is normal.
How to check the tachometer on a Samsung and Indesit washing machine
Owners of such units can be recommended to measure the coil resistance using a table of values. The indicator may depend on the type of engine and tachometer. For example, the tachogenerator in Samsung has a coil resistance of within 40 Ohms. Those who do not know how to check the tachometer on an Indesit washing machine should take into account the internal diameter of the coil. Depending on the thickness, internal and external diameters, the resistance value can vary from 65 to 95 ohms.
Signs of a tachometer malfunction
If the sensor is faulty, the control units do not receive engine speed data or receive them in an incorrect form. A breakdown of the tachogenerator of a washing machine entails incorrect operation of the entire device as a whole.
If this part breaks, the machine starts:
- Rotate the drum in the washing mode at the wrong speed. Excessive speeds entail an imbalance of the tank, strong vibration and displacement of the entire product along the base on which it is installed.
- Shock absorbers and bearings are subjected to heavy loads. If the machine has a function for recognizing imbalance, the device stops the programs and displays a fault code on its display;
- When a signal is sent to the electric motor, it begins to quickly gain momentum. At the same time, the machine experiences a beating of the tank inside the body. In belt-driven machines, the belt wears out until it breaks;
- In washing machines equipped with modern inverter engines, an increasing squeak appears, but the drum may not even begin to move.
About replacing the tachogenerator
It may be that your tachometer is faulty. In this case, it needs to be replaced. Before doing this, you need to remove the broken device. First disconnect the connectors. It will be enough to just pull them out. You may not be able to do this, so unscrew them using a slotted screwdriver. After completing these steps, remove the metal or plastic cover of the device, which is bolted to the tachometer. You need to unscrew them, after which you can remove the tachogenerator.
Repair of Hall Sensor SMA LG (6501KW2001A)
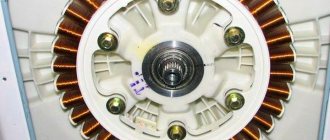
Manufacturers of washing machines strive for constant improvement and creation of competitive advantages, the Korean company LG is no exception, and many craftsmen have already encountered their drum drive motors, which differ from the classic design in the absence of a drive belt and additional “wear elements” (commutator brushes, armature bearings and lamellas)
On the one hand, direct drive washing machines are more reliable, but on the other hand, they also received additional elements unique to their class of electric motors
Article on the topic: How to disassemble an lg wd washing machine
The number of rotation speeds is controlled by a microcontroller, which “sees” this information using
In the last article I wrote about the hall sensor in Whirlpool washing machines, but there are design differences from LG
The PCB has Part Number EBR375603! Let's get acquainted with the Sensor pins, according to the pinout on the printed circuit board: 1 pin - Sb 2 pin - Sa 3 pin - NC 4 pin - GND 5 pin - VCC
Resistance between the contacts of the working sensor: Between pins 5(VCC) and 1(Sb), 5(VCC) and 2(Sa) is equal to - 10 kOhm (10.32 kOhm is a very good indicator, but in practice it can be 9.32 kOhm , are considered to be the performance indicators of the sensor - tested experimentally). If you do not have readings between the terminals, then it is often enough to replace the SMD Resistors: - Between terminals 5 (VCC) and 1 (Sb) these are resistors - R03S 681 (1206) = 680 Ohm and R04S 681 (1206) = 680 Ohm - Between pins 5(VCC) and 2(Sa) are resistors - R01S 681 (1206)=680 Ohm and R02S 681 (1206)=680 Ohm
But even if you have a resistance of 10 kOhm, you shouldn’t rejoice in advance, the sensor may still not be working due to the Hall Sensor - W12C! If this is pin 1(Sb) – IC02S and 2(Sa) – IC01S! When there were no “donors”, I found a working analogue of the Hall sensor: bipolar - Hall Sensor SS41 (4.5-24v), which had to be modified with an SMD resistor - 103 (1206) = 10 kOhm as shown in Figure 2 and Figure 3!
Article on the topic: Which washing machine can be installed under the sink
Consider the fact
– if you install the resistor not at the same level with the TO-92 Hall Sensor housing and leave excess solder, the board will not fit into the plastic housing, and if you try to connect it with force, the resistor will come off or damage the Hall Sensor! When replacing Hall Sensor SS41, take into account the height of the mounted part, it is 12.1 mm! (Fig. 4) SMD parts included in the LG Hall sensor: IC01S - W12C (analogue of Hall Sensor SS41) IC02S - W12C (analogue of Hall Sensor SS41) R01S SMD marking - 681 (housing 1206) = 680 Ohm R02S SMD marking - 681 (housing 1206 )=680 Ohm R03S SMD marking - 681 (case 1206)=680 Ohm R04S SMD marking - 681 (case 1206)=680 Ohm C01D (C3)- 100 nF case 0805 C02S (C2)-10 nF 50V case 0805 C01S (C1 )-10 nF 50V housing 0805
It is also possible to install resistors R1 and R2 marked SMD - 331 (case 1206) = 330 Ohm (Fig. 7). The sensors differ from each other in the location of the elements, this can be seen in Fig. 5, Fig. 6, Fig. 7!
We draw conclusions: I removed all the SMD elements from the board and replaced them with new ones! The sensor was assembled and tested for SMA, the entire washing cycle was successful! After that, I filled the board with transparent sealant Ceresit CS 24 and a business card, aligned the contours - it turned out no worse than the factory.
Article on the topic: The washing machine has trays where you can put things
Removing and installing the sensor
If a malfunction of the tachometer is detected, the only way out is to replace the part with a new one. The first step is to dismantle the old Hall sensor; to do this, use a slotted screwdriver to disconnect a special latch. It is important to act carefully so as not to damage the fasteners and contacts. After loosening the fastening, the tachometer is carefully removed from the groove.
When removing the Hall sensor, do not damage the latch on the stator, otherwise this will greatly increase the cost of repairs.
It is better to go to the store with the old sensor removed, this will help you avoid making a mistake in choosing the part. When ordering an item in an online store, be very careful and take into account the product labeling. Also check the purchased tachometer with a multimeter to ensure that the new part is in good working order. Often, retail outlets sell defective components, so precautions will not be superfluous.
Then you can begin installing the Hall sensor. Insert the element so that its recesses completely coincide with the guides on the stator. Carefully press the tachometer until you hear a characteristic clicking sound. Then all components of the LG direct drive washing machine are installed in the reverse order. Having finished assembling the washing machine, connect it to the water supply and sewerage system, and plug it into the electrical network. Check the equipment for functionality.
Source


