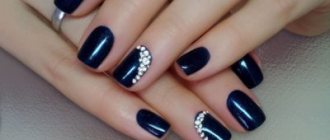
Well-groomed nails and a beautiful manicure have become as important elements of the image as a haircut and well-chosen clothes. Every year, nail design gurus come up with new ways to stand out from the crowd. However, shiny rhinestones and stones consistently occupy top positions in manicure trends, along with classic French and graphic design.
Using rhinestones has become much more convenient and practical with the advent of gel polish. This manicure remains presentable for a long time and, with the correct selection of glue, the decorations are securely attached to the surface. In this article we will look in detail at how to glue rhinestones onto gel polish so that they do not fall off. What adhesive to choose and how to then remove these same rhinestones without damaging the nail plate.
Choice of rhinestones
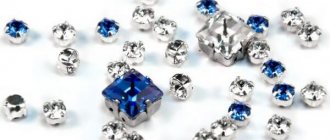
The modern market offers rhinestones for every taste: all kinds of sizes, colors and shapes. Often, the choice of one or another stone is a matter of taste, but keep in mind a few points:
- Higher quality stones are made of glass or crystal; they are more durable, less susceptible to chipping, and look more expensive.
- Plastic rhinestones are cheaper, but also lower in quality. On the other hand, if you need such decoration for one evening, why pay more?
- Smaller stones are easier to attach and hold better.
- Don't go for the cheapest materials. Even good glue cannot compensate for the low quality of the stone.
- If the rhinestone is not frayed or chipped, it can be safely used a second time. So for lovers of shiny manicure, it makes sense to immediately opt for high-quality pebbles.
Rhinestones made from Swarovski crystals are especially popular.
You can also glue beads (caviar manicure) and bouillons (small balls similar to beads) onto your nails.
Common Mistakes
Mistakes that beginners often make when working with rhinestones:
- Wrong choice of material. If a representative of the fair sex plans to wear rhinestones for a long time, then her choice should fall on products made of glass, or, in extreme cases, metal. Plastic stones will quickly lose their original appearance.
- Lack of patience. If you apply a fixative to the varnish that has not dried, the life of the manicure will be short.
- Too much quantity and color. Too many large stones on one nail look cumbersome, and stones of all colors on the same nail look strange.
- Applying too large stones to short nails. This manicure looks disproportionate.
Glue selection
A reliable way to fix rhinestones on your nails is to put them on glue. But which glue to choose? Is it possible to take advantage of the ubiquitous moment or is it still worth purchasing a special composition?
On the one hand, nothing will happen to your nails from using household glue. But, on the other hand, not all rhinestones can survive this. There is a high risk of dissolving the shiny film in the base, then the stones will lose their attractive shine. The first at risk will be plastic samples.
Moreover, non-specialized compositions do not guarantee reliable adhesion of the stones to the varnish, so you can lose all the beauty on the way to work or somewhere else.
Characteristics of specialized glue:
- Effectively glue rhinestones and other decorative elements.
- Convenient small bottles, equipped with a special brush.
- Transparent composition of medium viscosity.
- Affordable price.
- Multifunctional: in addition to decoration, this glue can seal a nail crack, as well as glue extended nails or tips.
- Some manufacturers claim that the composition additionally strengthens the nail and protects against UV rays.
By the way, special glue is often sold along with rhinestones.
Note: an alternative to glue can be placing rhinestones on gel polish.
How to stick rhinestones on nails?
You can only glue rhinestones onto prepared nails, so first we remove all dirt, remove the cuticle, it is also advisable to polish the surface of the nail with a soft file/buff. The better the nail plate is prepared, the better the polish and decorative elements will adhere to it.
Stages of applying gel polish:
- Preparation of nail plate.
- Degreasing.
- Application of primer.
- Applying a base layer of gel (drying in a lamp).
- Applying color (2 layers, each layer of gel is dried in a lamp).
- Decoration.
- Fixing (drying in a lamp).
- Removing the sticky layer.
The rhinestones themselves can be attached in two ways: with gel polish or with special glue. Below we will discuss these methods in detail.
For gel polish (shellac)
This method is very popular with both nail technicians and those who like to do their own manicures. It provides good adhesion, and decorative elements do not cling to clothing.
Important! If you decide to use this method, you need to come up with the design and layout in advance. Because in the process you won’t have time for this.
- Next, we prepare the nail for applying gel polish : clean it, remove the cuticle, make a shape, polish the nail plate.
- The next step is to apply the base and two layers of gel polish (each layer is dried in a special lamp).
- First, we apply a topcoat (top coat) to the nails on which the design is not intended. Dry it in a lamp.
- Next, apply the top coat to the nail where the rhinestones will be, but do not dry it. Using tweezers (a thin brush, a toothpick or an orange stick), carefully make the layout. At the same time, you need to press on the stones so that they sink a little in the varnish. Then we dry them in a lamp.
- You can correct the position of the rhinestone using the same stick, brush or toothpick. As long as the composition has not hardened, this will not be difficult.
Important! You don’t need to design all your nails at once. We applied the top coat to one nail, decorated it, dried it in a lamp, and moved on to the other nail.
- After all the rhinestones are attached, take the brush and brush the top over your decorated nails again. Try not to get the material on the pebbles; carefully coat all the spaces between them.
- Finally dry it in a lamp (at least 2 minutes).
- We remove the sticky layer with a special liquid (some tops do not have a sticky layer, then nothing else needs to be done).
With special glue
The second effective method of attaching rhinestones to nails is special glue:
- First, you still need to do a manicure, cover your nails with a base and two layers of gel polish (each applied layer is dried in a lamp).
- Next you will need glue and a sharpened orange stick (you can use a toothpick).
- The glue can be applied either to the nail (use a stick to place the glue dot in the desired place) or to the rhinestone itself. Try it, see which method is more convenient for you personally.
- We wait until the glue dries. Check the drying time in the glue instructions (often on the tube itself).
- We carefully apply the topcoat, covering all joints, but not getting it on the stones. Dry it in a lamp.
Important! It is better to choose a top coat without a sticky layer. Less chance of damaging the structure.
Preparation
- First you need to remove the dead skin particles around the nails - the cuticle. To do this correctly, make a bath from a decoction of medicinal herbs (brew 40 grams of any plant in 1 liter of boiling water, let it brew, strain). Lower your fingers and wait 20 minutes. After the period has expired, stretch the skin so that the edge of the cuticle is clearly visible. Remove dead particles with nail clippers, moving from both sides.
- Sterilize your hands with antiseptic or hydrogen peroxide (can be replaced with Chlorhexidine). Remove the old varnish layer and give the plate the same length and shape. Rhinestones look very beautiful on oval and square nails with soft corners. When processing the free edge, keep the file perpendicular to the plate, otherwise the nails will begin to peel. For these purposes, it is better to use a thin glass file of low abrasiveness.
- For better adhesion of the rhinestones to the surface of the plate, polish your nails with a buff. Firstly, you will make it easier to apply the varnish, and secondly, you will get rid of unsightly “waves”. In addition, any coating lasts longer if the nail plate is pre-polished. Cover the surface with healing varnish-strengthener in 1 layer, let it dry.
How to remove rhinestones from nails?
If the rhinestones are glued well, they should not fall off during wear. To remove decorations you can:
- Use gel polish remover. The base will get wet and you can simply pick off the rhinestones with an orange stick or a manicure pusher.
- Decorations placed on glue can be removed with a special compound.
- Mechanical action is often sufficient. The pebble can be picked off with a manicure pusher or old tweezers. Don't worry about your nail, there are still a few layers of varnish between it and the rhinestones.
Iron-on stickers with rhinestones
You can make your life easier by using iron-on adhesives (appliqués) with rhinestones. In fact, these are ready-made designs made of rhinestones, laid out on a special thermal film. It is transferred to the nail using a heat press or a special thermal applicator for rhinestones.
To glue thermal rhinestones you need:
- Prepare your nail (it should be clean and smooth).
- Apply the sticker to the nail, heat it up and iron it with a heat press or soldering iron applicator.
- Wait 3 minutes until the glue cools down.
This method saves time, plus the stones last longer. However, it requires additional equipment.
Interesting ideas
Rhinestones are placed differently on the nail. There are options that have become classics.
Shirt
Pebbles located in the center of the nail plate imitate the look of a shirt.
French
It is a strip of stones located along the outer edge of the nail.
Double French
Instead of one strip, another one is made.
Pyramid
There are 5 stones at the base of the nail. This is done in such a way that the finished result looks like a pyramid.
Geometry
The design involves the intersection of lines located at different angles. In turn, they are not painted with varnish, but are laid out with rhinestones.
Wave
It is done along the middle vertical of the nail plate. Using pebbles, a wave pattern is imitated.
Luxury
The entire nail is covered with pebbles.
French
Imitation of French. Rhinestones are used instead of varnish.
Strip
A strip of rhinestones is made anywhere on the nail.
Useful tips
Finally, we have collected useful tips and life hacks for you that will help you create a beautiful and high-quality manicure with rhinestones:
- Be responsible when choosing materials. Quality stones will look better, last longer and can be reused a second time. Choose a good gel polish so that it does not crack or bubble after drying.
- When gluing rhinestones, it is better to use topcoats without a sticky layer, and the topcoat should not be too liquid.
- Manicurists prefer to apply the nails using an orange stick dipped in water.
- Try not to get the top coat on the surface of the rhinestones. This causes them to lose their attractive shine.
- Small pebbles hold better.
- It's better not to get carried away with large rhinestones. A large number of large decorations can make a manicure not only uncomfortable, but also vulgar.
There are a great many options for displaying rhinestones. With their help, you can do a French manicure, a moon manicure, lay out a graphic design, add rhinestones to an artistic painting (for example, put a rhinestone in the center of a flower), cover the entire surface with rhinestones, etc. Try, experiment, but follow moderation.
Master classes
Girls looking for something original can get a lunar manicure. Experienced masters also advise trying a manicure with imitation precious stones. Both options are interesting, and every girl should definitely do them.
Lunar manicure
Always looks appropriate, regardless of the event. Depending on the colors chosen, it can be delicate or bright. It's easy to do. First, the entire nail is covered with a single-color varnish.
The area near the base of the nail is filled with rhinestones. They can be matched to the varnish or have any other color. Pebbles made of different materials and sizes are suitable for this purpose.
