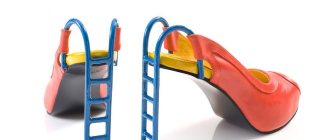
For most women in the country, buying a new pair of shoes because the paint on the sole is damaged is a waste of money. You can go through many more seasons in good and favorite shoes if you know how to paint the heels of your boots at home. The methods are suitable for both elite and inexpensive couples: some of them are also used by professionals.
DIY heel painting.
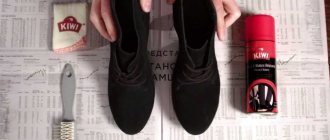
Paint for heels
In hardware stores you can find a large assortment of coloring pigments and creams. But heel paint varies in properties, cost and quality. It is usually sold in bottles and with a ready-made brush. The average price is about two hundred rubles. To accurately select the color, take the damaged shoes with you to the store.
Special paint for heels can be of three types: powder, spray or water-based. You can also see the following types of dyes on the shelves:
- “Liquid leather” is a special composition for repairing leather products.
- Special automotive paint in cans for repairing things made of plastic and metal (varies in a variety of color shades, can be glossy or matte).
- Acrylic spray paint.
- Nail polish (without drying element).
- Dark, waterproof markers for touching up small chips and scuffs.
Note
If you want a quick fix and don't want to deal with leather, retailers sell special wraps for heels. I can't vouch for this material, but it comes in different types. You can also glue the leather sections together and simply spray paint the heels. Honestly, I doubt many people will notice the black heel if it's pretty close to the same sheen it was originally and your paint job is good.
How to paint heels
Before you start painting, you need to take care of the area of the boot that you do not plan to use. The paint should not get on the untouched surface. Often the shade of a hairpin can differ greatly from other elements.
To protect the shoe material, use construction tape. It will easily take the required shape, outline the border, and the tape that extends beyond the frame can be cut with scissors. It is necessary to paste over at the very beginning, before restoration.
You can also use simple tape. But there is a chance that the adhesive attached to the surface will be difficult to remove after painting. In some cases, a stream of air is used, which can "seal" the adhesive onto the "skin" of the shoe. Be careful.
Do-it-yourself major restoration
Major restoration with your own hands is quite possible and real. If for any reason your shoes become unusable, for example, this could be the result of being bitten by a pet, then do not rush to throw them in the trash. No matter how dire the situation is, you can find a way to improve it.
To begin the repair, open the insole completely, open the visible screws and disconnect the heels. After this, open the heels and strip off the old covering. If there are traces of teeth or claws on your shoes, carefully cover all damage with epoxy paint. Sand the surface thoroughly and then apply a thin layer of glue to later glue the leather to this place for covering. To complete the procedure, reattach the heel and install new heels. If you need the shoes as soon as possible, you can use a hairdryer to dry the glue.
What to do if your heels are made of plastic
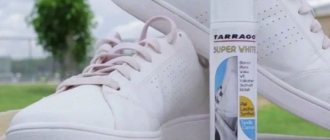
Have you noticed that your favorite ankle boots have lost their attractive appearance? Are your plastic heels worn out and looking scary? There is a solution! If the main part of the shoe remains intact, then the heel can be painted with a special paint to match the color of the boots.
To hide the white protruding plastic, you must first degrease the surface with a solvent (eau de toilette or alcohol). Then you need to apply acrylic shoe paint with a small brush. It can be purchased at any hardware store. Another repair option is to paint it with nail polish.
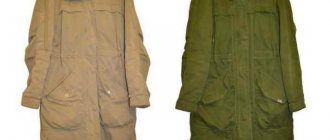
How to repair cracked leather on shoes - repair methods and available tools
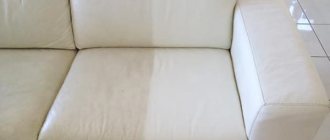
Leather shoes require careful cleaning and drying, otherwise they will become deformed. To maintain the appearance of your shoes, clean them after each wear. If the leather on your shoes is cracked, has lost its shine and has scratches, do not rush to get rid of it. There are many ways that will return it to its marketable appearance and allow it to be used for many more years.
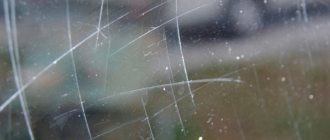
How to repair cracked leather
If you do not pay proper attention to shoe care, cracks will appear on its surface.
To prevent shoes from deforming during storage, the toe is usually stuffed with paper, and thick cardboard is placed in the boot.
After each wear, wipe your shoes with a damp cloth and mask cracks with a special cream.
Fish oil can make shoes more water resistant. Light-colored boots and boots are treated with a soft brush, pre-moistened in warm water. Afterwards, the shoes are washed and dried naturally. As a preventive measure, it is worth wiping some steam with castor oil. The remaining oil is removed with cotton wool and rubbed with a velvet sponge.
You can get rid of cracks in any shoes using shoe care products. Water-repellent agents prevent the formation of cracks. The product is covered with a thin layer of cream to remove moisture. After this, the shoes are polished. A traditional means for treating leather products, shoe polish, protects it from external irritants.
Repairing boots at home
If the sole of your shoes has become unusable, then proceed to repair it. The most effective means include special glue for shoe restoration. To work, you will also need a knife, alcohol, clean cloth, newspaper, and a bag.
Lay out newspaper as a work surface. Treat the sole with a cloth soaked in an alcohol solution. If possible, scrape off the old glue with sandpaper.
Apply glue on all sides so that it is evenly distributed over all irregularities. Apply pressure to the torn areas. To remove glue, use alcohol-based products.
Wrap the shoes in a bag and weigh them down with a heavy weight, for example, a book. Check that the tear area is carefully pressed. Leave the glue to dry for two days.
How to seal burst boots with liquid leather
Often, when walking, we catch our foot on a stone or other obstacle, and our shoes tear. However, if you have liquid skin on hand, then there is no need to worry.
The principle of working with it is as follows:
1. Dry the boots well, and then remove pieces of leather and threads. To do this, use a sharp knife.
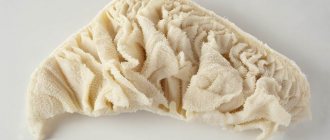
Repair of paper covered heels
The cost of materials for making high-quality shoes increases from year to year. Some manufacturers often skimp on product elements. If you find that your heels are made of paper, don't be upset.
If the back of an expensive shoe has lost its appearance, worn out and marks have appeared, then it is possible to save it. For the operation to restore your favorite shoes, you need to purchase the necessary materials at hand: a simple nail file, a hard lint-free cloth, solvent, hair dryer and paint.
Then go through the following steps:
- Gently heat the heel area with a blow dryer and remove the paper.
- Carefully treat the surface with a cloth previously soaked in alcohol or other solvent.
- Cover the required surface with acrylic paint in 2-3 layers.
- Leave in a dry place until the paint has completely hardened for a couple of hours.
A few tricks to reduce your shoe size
One of the easiest ways is to take a pair to a workshop, where they will do this task perfectly. But shoemakers most often do not take on sneakers, boots and shoes made of leatherette or woven materials. You also need to take into account that this can cost a pretty penny. If you have time and desire, you can reduce the size using additional materials.
- Insoles are one of the simple ways to reduce not only the size, but also the volume of shoes. When one insoles are not enough, you can use two. The material from which the insoles are made is chosen depending on the time of year. For a winter pair of shoes, fur, felt or wool insoles are suitable. For demi-season boots, foam or synthetic insoles are usually used. If the insoles are intended for sports shoes, then they will reduce the size of the sneakers and have a shock-absorbing effect.
- Silicone inlays - can be purchased at almost any shoe store. Initially, they are intended to prevent slipping and rubbing of calluses. But they are also capable of narrowing the shoes a little. But to make high-heeled shoes smaller, it is better not to use them.
- Double-sided tape - you can stick it on the inside of the sole of the shoes, but you need to put them on bare feet, otherwise the tape will not stick. This method is mainly used by models during shows. Walking in such shoes for a long time is uncomfortable.
- Cotton wool, paper or fabric - placed in socks, it will help make shoes a size smaller. Our mothers and grandmothers also used this method, because back then they often bought shoes for children to grow into, or they got them from older brothers or sisters. But you need to keep in mind that this method is only suitable for closed-toed shoes.
Shock-absorbing orthopedic insoles are considered a good size reducer for closed shoes.
Decoration
When restoring your favorite shoes, you can use decoration that will help revive the heels. In some cases, it is appropriate to apply rhinestones of various sizes. This will create a stylish accent to complement your evening outfit.
You need to glue the rhinestones carefully, after the second painting, pressing the crystals tightly against the sticky surface. If you choose small rhinestones, fix them with one layer of colorless varnish. Repeat application of rhinestones in several stages if necessary.
Heels with elegant guipure braid will look elegant. To do this, cut the appropriate material to size, adjust it in the desired position after applying the second layer of colored pigment. Leave to dry for an hour. Beautiful heels with an attractive element are ready!
Shoe uppers: sewing and patching
Quite often you can encounter shoe ruptures. Even the most expensive shoes have this problem when a crack forms at the junction of the material and the sole. This causes severe discomfort, especially in rainy or snowy weather. Such defects can be easily repaired.
For example: a shoe has a hole along the sole line. To solve this problem we need a small piece of leather, that is, haberdashery. First, you need to warm up the problem area over a gas burner, then you need to carefully detach the sole from the material itself. Thus, we will get to the place of the gap, which needs to be turned inside out. We spread shoe glue on the inner surface and a piece of the patch, which we then slip inside. The next step is to connect the external break of the product to the patch. We leave everything in its place, and seal the sole with the covering with Demoxil. After 30 minutes, the defective area must be heated again, and then sharply connect the sole to the material and leave the shoes to dry.
This type of repair is suitable for absolutely any shoe material, be it leather, suede or canvas. The main thing is to choose the right patch.
How to fix a broken shoe sole?
A burst sole will require necessary and immediate measures, because if you continue with such a defect for some time, the situation can become much worse. This type of damage can be easily repaired yourself without going to a workshop. Glue, sandpaper, rubber and a press are the necessary materials to repair a pair of boots. Moreover, this small list can be easily found at home, or purchased at the nearest store.
Repairing hard and soft soles
Gluing the soles of shoes, sneakers or boots at home is not at all difficult if you use the most proven and reliable methods:
- We retreat 5 centimeters from the crack to the heel, drawing a parallel line. Then a few centimeters away from the toe, in order to rub the sole with sandpaper. It is worth noting that shoes with treads must be cleaned to zero. Apply any fast-acting glue onto the crack treated with gasoline or acetone. The insoles must be removed from the shoes in order to sew up the soles with strong threads. Lubricate the seam with glue, and when it dries, glue the outsole material to the surface, the same size as the rubber.
- We do the same with sandpaper and gasoline. We take a sharp knife and cut the edges of the sole to a depth of 1 mm, but at the same time retreat 5 mm towards the toe and heel. We take a ruler and measure the depth of the crack, after which we add one and a half centimeters to the result obtained.
We will need rubber from a bicycle or car inner tube. We cut out a rectangle and treat it on each side with strong shoe glue, after wiping it with acetone. The size of this insert must correspond to the size of the burst area. We bend the shoe so that the defect opens up more, then fill it with glue and let it dry. Under no circumstances should the edges of the crack be allowed to join. After this procedure, we glue a rubber strip and put the shoes under the press so that everything is properly held together.
- We degrease the defective area (regular nail polish remover is also suitable for this), and then rub its edges with sandpaper. We use a car or bicycle inner tube as a base, cutting out an insert with the appropriate length and width of the defect, also adding one and a half centimeters in reserve. Fill the damaged area and the rubber piece with glue and create a crack, after which we leave the shoes under pressure for a day.
These methods are mainly used to repair hard soles on winter boots and, as you may have already noticed, ordinary glue is unlikely to be sufficient. After all, if you just seal the crack, you will not only not correct the defect for a long time, you will most likely ruin the sole completely, which is why you will have to buy a new one. Replacing it is much more expensive, and you are unlikely to be able to do it yourself.
- When repairing soft soles, such as those found on sneakers and summer footwear, the situation is even simpler. The technology is the same - before the process, you should clean your shoes and wash them with a product that contains alcohol (for degreasing).
If a large hole has formed in your sole, you need to fill it with sickle. Use a solution of epoxy glue to fill the crack or hole with an even, thin layer (no more than 3mm). The solution will dry for several hours, but you should leave the shoes like this for a day, sticking masking tape on top of the sole to avoid deformation.
When the sole of a sneaker breaks in half, you should not try to seal it yourself, as this is unlikely to give the desired result. This requires a major overhaul, which only a master can do, because sports shoes are unlikely to withstand amateur efforts in such matters for long.
Finishing
The skin was still a little damp when the husband moved on to the next stage of work. It didn't get wet, but as a result he had dye on his hands that washes off.
Start by cutting your large strip into two equal pieces. Apply glue liberally to the center of the heel.
Then apply the skin starting from the back. Pull, but do not tear, the wrap until it wraps around the sides and back of the heel itself.
Add glue if you need it. It can be easily cleaned with sandpaper if you suddenly see excess protruding in some places.
The drying process lasts about an hour.
Trim the leather around the heel, leaving about five millimeters as an allowance.
Make final cuts. On the sides of the heel (where it meets the flat inside) you can place a knife so that you get a clean cut.
The finishing touch to this project is to apply mink oil, which will add a nice shine not only to the heel, but to the entire shoe.