Published: 06/20/2014 Category: Tools and accessories, Repair, Plumbing work Views: 118197
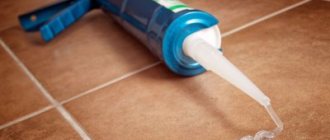
How and with what to remove old sealant and apply new one
Even if you are not renovating your bathroom, pay attention to the condition of the silicone sealant joint on the side of the sink or bathtub. Even modern sanitary silicone sealants specifically designed for use in the bathroom or kitchen can, over time, be affected by fungus and mold, and simply darken and change their previously attractive appearance.
If you decide to renew a previously applied sealant, but do not know how to properly remove the old layer of sealant and apply a new one, then this article is just for you. There is nothing complicated in replacing old sealant, and we will show you step by step how to do it correctly and easier.
In rooms with high humidity, such as a bathroom or kitchen, mold or mildew may appear on the seams between ceramic tiles, so it is best to use grout with fungicidal additives for grouting.
Mold on the side of the bathtub | Mold on the side of the shower tray |
Particularly at risk are the sides of a bathtub, sink, shower stall or shower tray where water flows down the wall or any other place where the water does not evaporate quickly enough, creating ideal conditions for mold growth. Mold in this area, as a rule, looks like small, dark (to black) spots. At first glance, such darkening can be mistaken for ordinary dirt, but this is not so.
Chemical method
Another method involves cleaning the tiles from hardened silicone sealant using a chemical method.
Solvents such as acetone or white spirit are used for this. This approach allows you to deal with dried material without much effort. Wet a cotton swab or ear stick with the solution. Gently apply acetone to the areas where the sealant needs to be removed. After some time, the silicone will soften, turn into pulp and can be easily and effortlessly scraped off or wiped off with a rag.
White spirit will easily remove silicone sealant
However, before you try to wipe off the silicone sealant from the tiles with a solvent, keep in mind that if you go beyond the seam, you can ruin the tile itself, the countertop, the bathtub, and the baseboard. The liquid can damage plastic and rubber surfaces and eat away enamel and paint. Objects in contact with it may become blistered, crumble, or acquire a matte coating, and you risk breaking the seal of the seam if you go beyond the joint and remove the excess.
Before choosing one or another method of cleaning silicone sealant from tiles, weigh all the pros and cons taking into account your specific situation. But it is better, of course, to prevent contamination even at the stage of applying the sealant. Cover the tiles with masking tape and you will get a perfectly even seam with a spotlessly clean cladding surface.
This is interesting: Silicone black sealant - black adhesive-sealant, waterproof composition, packaged in 85 and 315 ml, high-temperature option for seams, Abro and Sikasil SG-20
Suitable means
Silicone does not only need to be removed during application.
It is removed if:
- when the old sealant has already become unusable and has lost its complete sealing;
- during work it turned out that due to violation of the rules, complete sealing did not occur;
- mold and mildew have appeared;
- if the surface was accidentally smeared.
The sealant penetrates very deeply into the material, which makes it very difficult to remove it from the surface, especially when it has already been in contact with it for a long period.
There are different ways to remove silicone. For some surfaces it is better to choose a mechanical method. This method should not be used to clean glass surfaces, tiles, acrylic or enamel bathtubs, otherwise they can easily be damaged. The mechanical method is suitable for cleaning surfaces that are not visible, since there is a possibility of damaging the surface during cleaning and scratches may remain.
In order to remove the old layer of sealant, you should take a knife and use it to pick up the seam. After the top layer of silicone is cut off, use the sharp end of a knife to remove any remaining silicone and clean the surface to be treated. You can use sandpaper or pumice for cleaning.
The surface should be cleaned carefully so as not to scratch or damage it.
Silicone is removed using special means. You can purchase sealant in the form of a paste, cream, aerosol or solution. Let's look at some of them.
Lugato Silicon Entferner is a special paste that can be used to easily remove dirt from many types of surfaces. The paste cleans well sealants on glass, plastic, tiles, and removes dirt from acrylic surfaces and enamel. Suitable for metal surfaces, concrete, stone, plaster, removes glue from wooden surfaces well.
Sili-kill removes dirt from brick surfaces and concrete, ceramics, metal, glass. When using, cut off the top layer of sealant, and apply this product to the surface for half an hour. Afterwards you should wash it with soapy water.
Penta-840 is a remover for cleaning sealant from surfaces made of metal, concrete, glass, and stone. This product can be used to treat cast iron bathtubs and tiles. This product is tested on a small area. To do this, apply it to a part of the surface for a few minutes and inspect whether everything is in order. After checking, remover should be applied to the sealant. After half an hour, the silicone swells and is removed with a sponge.
Dow Corning OS-2 is used to clean silicone from glass, metal, plastic, and ceramics. The top layer of sealant is removed. This product is applied for 10 minutes. Using a damp cloth or sponge, remove the residue.
You can clean silicone from the product and any surface using chemical means. Such products help get rid of silicone quickly and easily. You can use white spirit for such purposes. It helps remove adhesive from tiles, ceramics, cast iron, and glass.
White spirit should not be used on painted surfaces. When using this product, apply it to cotton wool or gauze and clean the contaminated area. After a few minutes, when the silicone becomes soft, it is removed with the tip of a knife or blade.
You can remove dirt with acetone. Before use, apply it to a small area. If the surface remains unchanged, you can apply acetone to the entire seam. Acetone is more aggressive than white spirit and has a strong odor. The liquid is applied to the seam and wait 15-20 minutes until it softens and loses its shape. Residues should be removed with a cloth.
Do not use plastic cleaner, otherwise the acetone may dissolve the plastic surface. It is used for products made of tiles, glass, and cast iron.
After treatment, an oil stain remains on the surface, which can also be removed with acetone or white spirit, using table vinegar. It has a sharp, specific odor, so you should work with it wearing a respiratory mask and ventilate the room well.
You can also use other solvents such as kerosene and gasoline. Sometimes these products can cope with stains no worse than expensive store-bought products.
How to clean silicone sealant with chemicals
The solvent is selected taking into account the composition of the sealant.
Neutral silicone adhesives do not have a strong odor and are easily dissolved with gasoline, acetone or other organic solvents.
Household chemicals
A quick way to clean virtually any substrate. Do not use household chemicals to clean rubber and plastics.
Vinegar
Acidic sealants have a characteristic vinegar smell.
Their traces are easily removed with vinegar essence (70%). If necessary, the area is treated with vinegar several times.
Work with the essence is carried out with gloves on, with the windows open or forced ventilation turned on.
Alcohol
Alcohol-based sealant can be dissolved with industrial alcohol or ethanol. The compositions act in the same way, first softening the glue and then dissolving it.
To clean surfaces, a clean rag is dipped in alcohol, which is then used to wipe the dried mixture.
Petrol
Gasoline dissolves sanitary sealant and mixtures with a neutral base well. A small rag is soaked in the purified fuel and the dirt is thoroughly wiped off. If necessary, the processing is repeated. The dissolved layer is removed with a spatula, and small traces with a stationery eraser.
White spirit, acetone
White spirit or other solvents like acetone can easily remove traces of fast-hardening sealants. Neutral sealants, the main components of which are amines and alcohols, are washed off. They can easily clean any surface without damaging it.
Dip a cotton swab into the solvent and wipe the area. After the product has dried, cleaning is repeated if necessary. When the sealant softens to a mushy mass, it can be easily removed with a kitchen sponge.
Professional solvents
- Tytan (Selena, Poland). Phosphoric acid based sealant solvent, odorless. Can easily dissolve dried silicone. The cleaner operates for 12 hours. It effectively cleans textured substrates, so it is often used to clean tiles with a three-dimensional pattern. The product leaves greasy traces.
- XADO Mottec Antisilicone (Ukraine). All-purpose alcohol-based car cleaner. Used to degrease and clean substrates from traces of tape and sealant. Can be used on ceramic and acrylic materials. Does not require rinsing, no traces remain after treatment.
- Soudal (Belgium). Hydrocarbon based silicone remover. Available in gel form. Easy to apply, has a moderately pungent odor. Begins to act after 10 minutes. Can only be applied to dry substrates. Before using on ceramic, acrylic, plastic and stone substrates, it is better to test the product on an inconspicuous area. After processing it leaves traces of fat.
- (Greece). Car wash, which is available in aerosol form. Cleans any base. Based on organic solvents. Can dissolve various sealants. Stubborn stains may require re-treatment.
- Dow Corning (Dow Sil, USA). Silicone based solvent. Starts the depolymerization process of the sealant. Safe for any surfaces, including painted ones. Does not change the color of the dye, does not leave stains. Available in aerosol or liquid form. The latter is suitable for removing old traces of silicone.
- Penta-840. Cleans waterproofing from tiles, metal and acrylic substrates. A washcloth is used for application. After washing, the surface is covered with oilcloth for several minutes. The softened silicone is removed with a sponge.
How to remove a fresh one?
Silicone sealant hardens within 20 minutes. If you manage to remove it during this time, then you don’t have to resort to using strong agents.
Removal instructions:
- pry off the silicone sealant with a wooden spatula and clean it off the surface;
- remove the mixture that has clogged up in the cracks with a screwdriver;
- if the sealant begins to harden, it is treated with vinegar, and the softened stains are wiped off with a paper napkin.
A hairdryer can easily remove small fresh stains. It is turned on at low power and a warm stream of air is directed at the sealant. After a minute it will soften and can be easily peeled off the surface.
Useful tips
You should not use unfamiliar methods; keep in mind a few recommendations:
- Immediately after contamination, wipe the area with a lint cloth.
- Use gloves when working.
- To prevent the silicone sealant from sticking to the epidermis of the hands, they are first soaked in dish balm and dried.
- After work, hands are washed with soapy water.
- After cleansing, the skin requires moisturizing (castor oil, baby cream).
- If the contamination is thick, then before removal it is well saturated with products and then washed.
Sources
- https://GidPoKraske.ru/spetsialnye-materialy/dopolnitelnye-sredstva/chem-ochistit-silikonovyj-germetik.html
- https://wlooks.ru/uborka/chem-otmyt-silikonovyj-germetik/
- https://oboiman.ru/inside/cem-udalit-silikonovyj-germetik-s-kafela-cem-otteret-s-plitki-kak-snat-s-poverhnosti-kak-ubrat-ili-smyt-sostav-kak- bystro-ocistit-poverhnost.html
- https://stroi-store.ru/kak-ochistit-germetik-ot-vanny-i-plitki/
- https://KraskaGuru.ru/germetiki/stroitelnye/sposoby-udaleniya.html
- https://SamoDelino.ru/kak-skleit/chem-rastvorit-silikonovyj-germetik.html
- https://OPlitke.com/uluchshenie/chem-otmyt-silikonovyj-germetik
- https://www.ivd.ru/stroitelstvo-i-remont/otdelocnye-materialy/chem-otmyt-silikonovyj-germetik-samye-effektivnye-sposoby-38911
- https://po-chistim.ru/chem-otmyt-silikonovyj-germetik-v-domashnih-usloviyah/
- https://kraska.guru/klej/udalenie/chem-rastvorit-silikonovyj-germetik.html
- https://VseProKley.ru/germetik/kak-otmyt-s-ruk
Cleaning methods
Only fresh, not yet hardened silicone is removed quickly and without consequences. Therefore, if during the application process the product gets outside the work area (on tiles, bathtubs, sinks, floors or clothes), it should be quickly wiped off with a sponge or rag.
Fungus on silicone is the most common reason why it needs to be removed.
If you plan to reapply the sealant, the working surface must be cleaned of the old layer especially carefully. There is practically no adhesion between the molecules of fresh and polymerized silicone. Therefore, if the old layer is removed poorly, poor sealing is likely.
To clean the surface of dried sealant, use a combination of mechanical and chemical means. In any case, it is impossible to do without physical effort, so the work begins with the mechanical method. At the same time, they try to gradually remove as thick a layer of silicone as possible, since chemistry can only dissolve a relatively small layer.
Mechanical method
To work you will need the following tools:
- a sharp stationery or construction knife (you can purchase a special knife for cutting silicone seams);
- blade;
- small spatula;
- tweezers;
- flat screwdriver;
- special plastic or wooden scrapers for removing sealant;
- pumice.
Stages of work:
- Previously, thin layers of silicone are cut off with a knife or blade. To do this, longitudinal and transverse cuts are made between the surfaces and the adjacent layer of sealant. If the silicone has not hardened too much, you can try to remove it in one motion. To do this, the longitudinal cuts are made solid and as long as possible.
- The cut edges are grabbed with tweezers or fingers and strips and pieces of old silicone are separated.
- Use a spatula or special scrapers (wooden are preferred for acrylic surfaces) to remove the residue.
Cleaning off silicone residues with a glass scraper. - If silicone gets into cracks or cracks somewhere, pry it up and pull it out with tweezers, small pliers or tongs.
- The thin layer of remaining sealant is very difficult to remove, but you can try using fine sandpaper, the hard side of a dish sponge, or a pumice stone.
- To remove sealant from tiles, you can rub it with a paper eraser or pumice stone. An eraser is especially helpful when you need to clean embossed tiles without damaging them.
- Removing bathtubs and shower trays requires at least one assistant. Dismantling begins with trimming the outer layer of silicone around the entire perimeter. Then they pry up the bathtub or tray with a screwdriver and try to loosen it. If the product gives in, it is lifted and transferred to the prepared place. Otherwise, the seal continues to be cut with a knife or blade until the bath can be disconnected.
We invite you to familiarize yourself with Master flash for a chimney: characteristics, correct choice and do-it-yourself installation
Chemical methods
Since it is almost impossible to completely remove old sealant in the bathroom using the previous method, mechanical cleaning is often supplemented with chemical treatment.
Cleaning shower stalls
Separately, it is worth mentioning about cleaning shower stalls from sealant. Owners of shower stalls may encounter difficulties when carrying out such cleaning. Particularly noticeable after removing the sealant are the places where the cabin tray meets the walls of this structure. Often these places darken, and sometimes the sealant even comes off. Then the water from the stall tray begins to flow directly onto the bathroom floor.
To remove old sealant in the booth, you can use different methods - cleaning with a sharp knife, pumice stone, scissors or screwdrivers. First, the sealant must be removed by picking up the edge with some sharp object, such as a screwdriver. Then the sealant is completely peeled off by pulling the free edge. After this, you need to remove the walls of the booth from the pallet, then clean off the remaining silicone sealant using a knife or other sharp object.
You can use pumice to clean off any remaining sealant. Pumice must be worked carefully so as not to damage the surface of the cabin. If after this there are pieces of sealant left on the surface of the cabin, they are cleaned using a screwdriver. Only after thoroughly cleaning the surface of the shower stall should it be wiped with a clean and dry cloth.
To clean the surface of the shower stall from the sealant layer, it is quite acceptable to use chemicals. Today, silicone can be easily removed using specialized products. Such compositions can be purchased at a car dealership or in the paint and varnish department. Fresh traces of sealant can be easily removed with vinegar or white spirit.
Everyone who has a simple shower stall at home sooner or later faces the problem of removing plumbing silicone and replacing it. It was my turn, because... The silicone layer between the tray and the walls of the shower had long since become a dirty dark color, and in some places it had completely peeled off, forming cracks through which water could easily fall onto the floor.
It would seem that it would be easier to remove the old silicone and fill the cracks with new one? And that's all! That’s roughly what I thought, but after fiddling around for about five minutes, trying to tear the silicone sealant off the acrylic shower tray, I realized that it couldn’t go any further, otherwise I’d be fussing all day.
As always, the best friend and assistant of all progressive humanity - the Internet - came to the rescue. It was enough to simply type the phrase in a search engine - How to remove silicone? And follow the first link to go to one of the construction forums, where this topic has found quite a wide discussion.
As always, the advice was very different, from removing silicone by friction, to using some modern chemicals that dissolve silicone without a residue. Some advised removing the silicone with a razor, and others with a sharp knife.
In the end, after studying all the tips, I decided to use a regular screwdriver and a piece of pumice, fortunately there was one in the shower stall. The result exceeded all my expectations, and the job of removing the silicone was completed in less than an hour, including a couple of “smoking breaks.”
So, for those who have decided to replace the silicone seal in the shower stall, but do not know where to start, I give a brief recommendation based on my own experience.
The first thing to start with is to try to pick up the silicone layer anywhere with the same knife or screwdriver and try to tear it off manually. In some places I managed this quite easily.
The next step will be to remove the walls of the shower stall from the pallet. If this cannot be done immediately, then again carefully cut the silicone with a knife, inserting the knife into the gap between the walls and the tray. After this, the shower stall can be easily removed, and some strips of silicone may also come off along with it.
At the end of the work, all that remains is to remove any remaining silicone remaining on the surface of the pallet. On the walls of the shower stall themselves, at least, I had practically no silicone left. When removing silicone residues, you will need pumice. Using friction, which was mentioned on the construction forum, pumice quite easily removed the remaining silicone from the surface of the pallet, without causing any visible harm to its acrylic surface. In those places where there were small lumps that the pumice did not remove, I carefully cleaned them with a screwdriver, again without harming the acrylic.
A dry rag completed the surface preparation of the tray and the bottom edges of the booth walls for resealing. Now I’m sitting, waiting for the silicone to harden so that I can take a shower again. Can someone tell me how long? Since, unfortunately, there is no similar information on my container with silicone sealant.
How to remove silicone from bathtubs and tiles
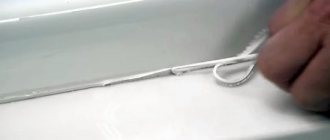
It is not always easy to remove silicone or other sealant between the tiles and the bathtub. You will need a sharp knife, as the material will not come off without cutting. Cut through the seam, then pick it up from the bottom. Then tear off the base, but the marks will be visible in any case. The following tools will help you remove them:
- salt;
- vinegar;
- abrasive;
- pumice;
- solvent.
If you were unable to carefully glue the sealant and dirt appeared, you can remove the silicone sealant from the bathtub with vinegar. If the glue hardens, apply vinegar and leave overnight
You need to be very careful when cleaning hardened silicone sealant from an acrylic bath, as the coating can easily be damaged. Apply a small amount of white spirit to the dirt, and after a quarter of an hour, carefully remove it using a wooden scraper. Wipe off any remaining residue with a dry cloth, then rinse the acrylic bathtub, sink or toilet.
Abrasives should not be used on acrylic bathtubs.
It is much easier to remove silicone sealant from bathroom or shower tiles. It practically does not scratch, its surface is even and smooth. First, remove protruding areas of contamination with a knife, then use kerosene or gasoline to remove traces of silicone sealant on the tile. The product must be rubbed in with a cloth until the layer that has hardened softens.
Let's look at how to remove old silicone construction sealant from ceramic tiles in other ways. If there is no reaction with previous products, white spirit should be used. In difficult cases, use the solvent “Penta-840” or “Silicon-Entferner”. Before applying it, you need to test the reaction on an inconspicuous area. Sometimes the coating acquires dull spots and loses its gloss.
Features of tile processing:
- Expensive tiles with a “capricious” surface should be processed using a wooden scraper;
- In hard-to-reach areas, it will be effective to replace the knife with a razor;
- Solvents should be left on the contaminated area for 2-3 hours, then begin cleaning. The silicone should acquire a jelly-like state;
- Any remaining stains should be treated with salt.
https://youtube.com/watch?v=gMccJUdsyf8
How to replace sealant
First of all, it is important to choose an original product from a trusted manufacturer. Bathroom compositions must contain a biocide (antimicrobial component)
It is advisable to purchase sanitary silicone sealant in specialized stores: as a rule, storage conditions are observed there and there is less chance of buying a fake.
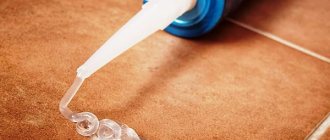
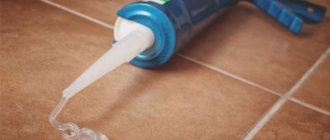
Technology for applying a new layer of sealant:
- The working surface is degreased with any available means and dried thoroughly.
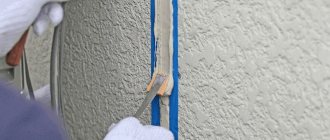
- To prevent unwanted contact of sealant with surrounding areas, the area around the work area can be covered with masking tape.
- The tube with sealant is prepared for use according to the instructions.
- Carefully apply the composition.
- Form a seam around the entire perimeter of the application, removing any remaining sealant. To obtain an even, uniform seam without defects, it is better to use not your finger, but a spatula, a ruler or an old payment card.
- Before use, wait until the sealant has completely dried (12 to 24 hours).
In practice, even high-quality formulations with antifungal additives can be affected by mold. This is possible in a number of cases:
- violation of sealant application technology;
- purchasing a counterfeit;
- favorable conditions for the development of fungus (high humidity, poor ventilation).
If every time a fresh sealant quickly becomes covered with mold, you should eliminate the listed reasons one by one (purchase the product from another store or from another manufacturer, check the humidity in the bathroom).
How to seal?
In order for the DIY sealing process to be carried out correctly, you should use special equipment, which most often comes with sealant. We are talking about a so-called gun, into which a capsule with sealant is inserted, and the force is transmitted from the trigger through a special design to the piston. This allows the sealed mass to be applied in an even layer without breaks along the entire joint length. But before doing this, you need to degrease the surface, completely and very thoroughly clean it of dirt and dust particles to ensure a reliable connection of the silicone to the edges of the degreased surface. It would not be superfluous to apply an antifungal composition to prevent any formation of fungus or mold at all.
The speed of hardening is influenced by the following factors:
- thickness of applied sealant;
- temperature;
- moisture level in the room where work is being carried out.
Considering the last two factors, you should not use the bathroom for some time so as not to increase the humidity and temperature in it before carrying out work. Once the required area has been sealed, experts do not recommend using the shower for a while. As stated, silicone-based caulk is the ideal solution for protecting joints during shower stall installation. It is easier to handle than acrylic sealant, and its properties will be better. And the affordable price indicates that it is better to choose this type of sealant.
If we move directly to the sealing process, then shower cabins should be siliconized either during assembly (each connection) or after installation (all joints that have formed). It is necessary to carefully apply the sealant to areas that are already sealed with cords or rubberized gaskets. It is necessary to process the joints in such a way that the places where the parts are attached to the structure with screws or bolts are on the outside of the sealant strip.
Sealing should be carried out according to the manufacturer’s instruction plan, which clearly and step-by-step describes the entire process. And at each stage, silicone must be applied to all joints and joints.
Processing of seams should be carried out as carefully and very carefully as possible. The substance should not come into contact with the internal parts of the shower box, bathtub or tray. A small amount of sealant will be enough for any corner. If you are not confident that you can carefully apply silicone, then some places, and especially those located next to the seal line, can be covered with masking tape. This will protect them from accidental contact with sealant.
When all work is completely completed, the tape can be easily removed. If suddenly you accidentally stain some unprotected place, then the fresh composition can be removed with a piece of cloth. Once the sealant dries, it will be nearly impossible to remove without damaging the surface.
When all the joints inside the shower stall are treated with silicone or other sealant, and the structure is fully assembled and secured with all fasteners, it is necessary to conduct a general inspection of the shower stall from the outside. You should inspect it very carefully for the presence of excess sealant on the outside.
If such excess is found, you should carefully wipe it off with a rag or piece of cloth.
Next, you need to give the sealant time to dry. As a rule, its drying time is indicated on the tube. When it is completely dry, then you need to check the structure for leaks. To do this, simply turn off the drain and collect water in a pan or on the floor to a certain level, and then drain it. While drawing water, you will be able to understand whether the shower stall is leaking in the most important places. If such a leak is discovered, then in order to eliminate it, you will need to replace all the sealant already applied with a new one. It will be pointless to use sealant specifically in places of leakage, since it will not form a single tenacious mass. This solution is temporary. But sooner or later a leak will appear in this place again.
How to remove with improvised means?
It is possible to remove silicone sealant using simple improvised means that can be found in the household. In order for them to have a decent effect, the acrylic must be prepared, and the maximum possible amount of the product must be removed mechanically.
Vinegar essence
70% vinegar essence can be used as a solvent. Soak a rag in the solution and vigorously rub the stained area of acrylic. You can leave it on the stain for better effect. After the sealant has softened, it is completely wiped off.
Salt
You can use table salt to remove any remaining sealant from the bathtub. You will also need a sponge or rag.
Application:
- The sponge must first be moistened.
- Sprinkle it with salt.
- Wipe off the waterproofing compound from the surface.
Alcohol
Using alcohol undiluted is also quite effective. With this method, a rag soaked in alcohol will be used.
It is placed on the soiled area and left to act for an hour and a half. After the paste becomes plastic, it is rubbed off with a wooden scraper or rag.
White Spirit
This product is one of the popular solvents. To apply the drug, moisten a rag and apply it to the stained surface. In this case, it is necessary to ensure that the rag does not dry out. When the sealant becomes softer, it can be cleaned off without effort.
Petrol
Refined gasoline can be used as a silicone solvent. When applying the product to the silicone sealant, it will begin to soften, which will improve the process of wiping the product off the acrylic.
The effect of its use is lower than that of special means.
Removing sealant
Renewing the sealing layer on the bathroom can be due to a number of factors: moisture, scale, mold in bathrooms, cracking, discoloration. To refresh the aesthetics of the room or prepare for a new sealing, you will have to remove the old layer of material. Use a simple life hack that will help you remove unusable sealant:
Soften the connections. The easiest way is to use a chemical solution that you can easily find on sale. The solution penetrates the joint and destroys it, after which it will be much easier to remove the silicone. Important point: research the composition of the solution so that it is suitable for use on your surface. Otherwise, aggressive components may damage the surface. Sealant removal solutions are not necessarily universal, but are suitable for specific surfaces. If you are working on a delicate surface, this method is not suitable for you. Cut off the frozen silicone. Use a sharpened kitchen knife, utility knife, or razor blade. When removing multiple layers of sealed seam, pliers are your best bet. There are also special tools for carefully removing sealant
Do everything with extreme caution so that no marks are left on the bathroom. Surface cleaning. Once the sealant is removed, treat the area to remove any limescale or stains (yellow stains are often left behind)
For most surfaces, a cloth soaked in bleach or detergent will work. This way, you can get rid of residual mortar and mold. Delicate surfaces need to be cleaned with safer compounds. For example, denatured alcohol. It is not capable of damaging different types of surfaces. The manufacturer's instructions should indicate which solutions will quickly help you get rid of silicone sealant. Allow the surface to dry naturally before applying new sealant.
Types of sealants for shower cabins
Today you can find a variety of products on sale, and each of them has both advantages and disadvantages. To make it easier for you to navigate the variety of sealants, we have prepared a brief description of each type.
Acrylic
This is one of the most common and accessible means today. It can be found in almost any hardware or hardware store, and the price is affordable for a wide range of consumers.
If we talk about the advantages of this sealant, then it is worth highlighting:
- ease of application,
- possibility of coating with varnish or paint (this is done from the point of view of aesthetics and design),
- absence of unpleasant and pungent odor,
- average operating temperature range (from –25 to +80 degrees Celsius).
Acrylic sealants also have disadvantages. They have little elasticity and therefore should not be used on seams that are constantly subject to movement. When purchasing, you need to make sure that the composition is water resistant. This property must be noted on the packaging.
Silicone
Another very popular sealant, which has several undeniable advantages over acrylic products:
- ideal for rooms with high humidity levels,
- reliably seals all cracks, even the smallest ones,
- has high moisture resistance,
- easily tolerates a wider range of temperatures (from –50 to +200 degrees).
When working with silicone sealant, be sure to use a special gun. The product can be applied with your hands, but this creates a greasy film on the skin that is very difficult to wash off. This composition hardens quite quickly, and therefore, when delayed, it begins to cling to the skin and move away from the surface of the wall or elements of the cabin.
Using a gun, you can “drive” the sealant into the mounting joints and cracks, and it fills all the available space. It is not recommended to use silicone compounds to seal polyacrylic and polycarbonate, since when it expands it can increase microcracks, which will open the way for moisture.
Polyurethane sealants
These compositions have a number of features, in particular:
- increased adhesion,
- good elasticity,
- strength.
The downside is the high cost, which is why such sealants are used mostly by professional craftsmen and on those sites where enhanced sealing of seams and joints is required. Before applying this product, it is necessary to thoroughly prime the surface, which slows down the pace of work.
Sealants based on MS polymer
These products appeared on sale not so long ago, but due to their good performance and their technical characteristics, they have become very popular among craftsmen.
The high demand for these sealants is due to:
- possibility of painting after complete hardening,
- good indicator of elasticity,
- very fast hardening even at low temperatures,
- excellent adhesion without the need for preliminary priming of the surface,
- resistant not only to fresh water, but also to salt water.
The high price of sealants based on MS polymers makes them inaccessible to most consumers. Over time, these compounds may turn yellow.
What is silicone sealant
The dense mass of sealant has a high elongation at break, which is about 400%. It is not easy to remove silicone, since the dried material can be stretched four times without breaking its integrity.
The multicomponent silicone composition is capable of operating at temperatures from 50 to 180 °C. It is used for waterproofing seams, gluing surfaces, and sealing joints.
The viscous mass includes the following components:
- The main filler is silicone rubber.
- To impart strength and thixotropy (the ability of the mixture to thicken and not form smudges), an amplifier is added.
- Adhesive primer - allows for reliable adhesion between objects.
- A vulcanizer turns a simple paste into plastic rubber.
Some manufacturers, to expand the properties of the sealant and its scope of application, supplement the composition with the following ingredients:
- Color pigment - a dye added to silicone sealant can give the insulation the required color.
- To prevent the appearance of fungus and mold, fungicides are added to the sealant.
- To increase the adhesion of materials, mechanical fillers (quartz dust or sand) are added.
As we can see, manufacturers are trying to make sure that silicone adheres well to the surface. Therefore, to remove sealant from tiles you will need some knowledge, tools or special solvents.
But, first, it is important to mention that preventing surface contamination is always easier than cleaning it later
How to avoid getting silicone sealant on unintended areas
The first step is to remove the composition immediately when it gets on the surface. The rate of hardening directly depends on the thickness of the coating. A thin layer of silicone dries in the shortest possible time, so to avoid this defect, before applying it, you need to protect everything as follows:
- Initially, it is necessary to paste all surfaces that should not be exposed to the sealant using masking tape or tape. Thanks to this, it will be possible to fully protect the material from getting in during work and also easily remove it after completion.
- Mirrors and all elements made of glass must be covered with paper or cloth.
- For your own protection, you need to wear rubber gloves, a hat, and thick clothing that covers your legs and has long sleeves.
Compliance with these recommendations allows you to avoid getting the composition on an unintended surface, as well as eliminate other problems that may arise during its use.
Which one is better to choose?
If your choice is not determined by any specific features, then you should use proven and affordable sealants. Silicone compounds are great for this. They are cheap, durable and practical.
When purchasing a product, pay attention to its instructions and labeling. Make sure that the sealant has antiseptic properties, which will help you not to worry about the development of microorganisms on its surface
Water resistance is also a priority.
It is not recommended to purchase products that contain more than 10% of all kinds of additives, as this can impair adhesion and negatively affect the properties of the sealant.
Tips and tricks
Today, the store has a large selection of products for successfully removing sealant, but you can use the traditional ones: vinegar, gasoline, white spirit, etc. Before choosing any of them, you should test how effective it is on a small surface. If the result is positive, you can safely opt for it.
If you need to remove dried sealant from a countertop, craftsmen advise finding out what products, besides silicone, are included in the sealant. If the composition contains petroleum products, then you can remove the sealant from the countertop using purified gasoline. The solvent is applied with a soft cloth for a period of 5 to 30 minutes, then the contamination is removed using a wooden spatula or spatula.
In this way, you can clean non-dried sealant from the countertop. If the glue has already dried, you should immediately cut off the top layer, then apply solvent. After treatment, the surface is treated with detergent.
When cleaning acrylic surfaces, do not use sharp objects or hard brushes.
To remove sealant from ceramic surfaces, glass or mirrors, you can use a hair dryer. It should be heated to a temperature of 350 degrees and directed at the surface to be treated. The sealant will begin to heat up and flow; use a sponge to remove any remaining contamination.
If your hand gets dirty while working, you can remove the dirt with polyethylene. Silicone adheres well to plastic film. Washing your hands with water and drying with plastic wrap can quickly and easily remove silicone from your skin.
Dirt on the fabric can be removed with an iron. A solvent is applied to the surface, paper is placed on top and a heated iron is passed over it.
You can remove silicone from a fabric surface in an unconventional way using cold. Place clothes in the bag and place it in the freezer for three or more hours. After such freezing, the silicone can be easily removed from the fabric surface. You can also remove sealant from clothes using hydrogen peroxide.
To avoid spending a lot of time removing stains and dirt, it is better to try to prevent their occurrence.
Builders recommend during work:
- use gloves, wear an apron or other suitable clothing;
- as soon as the sealant is smeared on the surface, it should be wiped with a cloth soaked in vinegar until the silicone dries;
- To make repair work easier, you can use masking tape. It is glued to the surface for sealing seams; after work, the masking tape should be removed before the silicone dries;
- builders advise not to throw away the sealant label to make it easier to select the right solvent in the store.
Silicone sealant is quite difficult to remove from many surfaces. When working with this material, you should prepare work clothes and wear rubber gloves. Using masking tape while working with sealant will make the work much easier and eliminate the need to remove glue from the surface.
To learn how to remove sealant from surfaces, see the following video.
How to clean?
When treating joints and seams in the bathroom with sealant, you should understand that after some time the old layer of silicone may become unusable. Mold appears at the joints and seams, and it is no longer possible to remove it, so you should remove the old layer of sealant and fill the seams with new grout. To remove the old layer from the tile, you should take a knife and cut off the top layer of silicone. You can use a screwdriver to clean the gaps between the tiles. After the seams have been cleaned mechanically, it is recommended to clean the cracks with a vacuum cleaner. A solvent is applied to the treated surface; after it softens, the silicone will become easier to clean with a wooden or plastic spatula. It takes two to twelve hours to soften the silicone. More precisely, it should be indicated on the packaging.
You can remove frozen silicone with gasoline or kerosene. The product is applied to the surface and rubbed a little, then you should wait until the adhesive composition becomes soft. To remove silicone, you can try Penta 840. Before using it, you should first treat a small part of the tile with it. If you do not test the preparation in a small area, cracks may appear on the tiles, since tiles are not always resistant to the preparation
When it comes to removing caulk from the side of your bathtub, it is important to consider the material it is made from. Acrylic bathtubs require special treatment
You only need to remove dirt from an acrylic bath using special factory-made solvents. To clean trays and shower stalls, it is not recommended to use sandpaper, steel wool, or brushes.
Also, do not use organic solvents.
All work to remove contamination must be carried out carefully so as not to damage the surface being treated. If the bathtub is steel or cast iron, you can clean it using abrasive materials and chemicals
When trying to wipe off silicone from joints in the bathroom, it is important not to overdo it so as not to scratch the surface.
If you need to remove silicone sealant from glass surfaces, choose white spirit or gasoline. This can be done very quickly and easily at home. The cloth should be soaked in a solvent and applied to the glass; after a few minutes, the remaining silicone can be easily removed. When working with sealant, it is not uncommon for silicone to get on clothing or remain on your hands. While the glue has not yet hardened, stretch the fabric and, picking it up with a spatula, remove the silicone. If the glue has managed to soak into the fabric, you should take vinegar, technical and medical alcohol to remove it. The selected liquid is poured onto the stain, the area with the stain is scrubbed with a toothbrush, and the glue will begin to roll out, forming lumps. After treatment, you need to wash your clothes by hand or in a washing machine.
If silicone gets on your skin, you can try to wash it off using regular salt. Pour a little salt into a jar of warm water, hold your hand in this solution for a while and then try to wipe off the dirt with a pumice stone. It is not always possible to get rid of the glue immediately, so this procedure is carried out several times during the day. You can try lathering your hands well with laundry soap, then rubbing them with a pumice stone. This sanitary product can be used to remove sealant from very small areas on your hands. You can get rid of sealant using vegetable oil. It is heated and applied to the skin, then lathered with laundry soap and washed well. If all these methods do not help, you can use chemicals.
Folk remedies
You can also clean the bathtub and other surfaces from old sealant using household items. They are not as effective as industrial solvents and specialized products, but they are still capable of bringing the polymer to a softened state. After this, it is easily removed mechanically.
For processing we use:
- Salt. It is poured inside a tampon made of gauze folded in several layers. Then it is slightly moistened and areas with a hardened polymer layer are wiped.
- Baking soda. You need to proceed in the same way as when treating the surface with table salt.
- Vinegar essence. Wet a rag or rags, which are then applied to the remaining thin layer of sealant. After 1 – 2 hours, you can try to scrub it off the bath. If this does not work right away, you need to wet the entire area with vinegar again.
- Alcohol can also soften hardened polymers. You need to treat the surface with sealant according to the same procedure: moisten the cloth in alcohol, cover the area to be cleaned with it, and after a while scrub it with mechanical tools.
- Dichlorvos. An old insect control product can also be used to treat hardened polymers. But this should only be done with good ventilation and work in a protective mask.
Available folk remedies require time to act on the hardened sealant. But you can speed up this process if you preheat the walls of the bathtub in the areas to be cleaned.
What means can be used to dissolve the sealant?
Hydrochloric acid works best on hardened sealant on plastic. However, there is a risk of damage to the surface, so experts advise using special solutions. They should be designed to eliminate silicone without risking damage to the plastic. Glass.
Interesting materials:
How to call London from Russia on a mobile phone? How to call Microsoft Russia? How to call Russia from Belarus MTS? How to call Russia? How to call Sberbank of Russia from Kazakhstan? How are laws passed in Russia? How are laws passed in the constituent entities of the Russian Federation? How is precipitation distributed over the territory of Russia? What is graduation like in Russia? How to calculate the population density of Russia?
Types of sealants
Proper sealing of shower stall seams requires the use of a quality sealant. It is quite difficult to choose one, since there is a huge variety of similar compositions on sale. First, you need to study the instructions, understand the manufacturer’s instructions, consult with the seller, and only then buy the product.
The further sanitary condition of the room and the serviceability of the plumbing fixtures depend on the quality of the sealant and the method of its application. Effective protection of high-risk areas is provided by compositions made on the basis of:
- silicone;
- acrylic polymers;
- polyurethanes.
The above preparations are paste-like masses, which, after application, completely fill the crevice space and reliably glue the contacting surfaces.
There are several types of construction sealants, each of them is designed for use in specific conditions. Source i.ytimg.com
Silicone
Silicone sealing mixtures come in two types:
- acidic – upon contact with metal they oxidize;
- neutral - highly inert.
To equip metal booths, it is advisable to use inert compounds that have the following advantages:
- excellent elasticity;
- moisture resistance;
- strength;
- resistance to high temperatures;
- resistance to ultraviolet radiation and aggressive substances.
Minuses:
- require careful preparation of the base;
- poorly connect polycarbonate, polyethylene, polyvinyl chloride elements.
To prevent mold from appearing on the silicone seam, it is recommended to use products with antibacterial additives or thoroughly treat the surfaces with an antiseptic.
Silicone sealant does not have a strong chemical odor and is not at all difficult to apply. Source: hammer.white
Polyurethane
They are best suited for sealing the cabin from the outside; they are also used for sealing gaps between the pallet and the wall.
Pros:
- good flexibility;
- water resistance;
- excellent adhesive properties in relation to concrete, glass, metal substrates;
- after drying it can be painted.
Minuses:
- do not adhere well to plastic;
- cannot be used at high temperatures;
- require applying a primer to the surface to be treated;
- have an aggressive effect on mucous membranes and skin, so you should work with them wearing protective equipment.
In terms of performance characteristics, polyurethane mixtures are slightly inferior to silicone ones.
After drying, polyurethane sealant can be painted and varnishedSource cdn.vseinstrumenti.ru
Acrylic
Acrylic
The main advantage of acrylic-based sealants is their low cost.
Pros:
- environmental friendliness;
- chemical neutrality;
- high adhesion to metal, glass, concrete, plastic, wooden substrates;
- quick drying;
- wide operating temperature range (-20 -80 °C);
- resistance to vibrations and mechanical stress;
- After drying, it can be treated with dye or varnish.
Minuses:
- poor elasticity;
- are destroyed even under low load;
- suitable for processing only fixed structural elements;
- cannot be used for sealing pallets;
- susceptible to mold;
- after application they require treatment with an antiseptic.
You can coat the shower stall with acrylic mixture only in those places where moisture does not seep in. Source germ.ru
How to scrub with special compounds?
Special products can be used to remove silicone from the surface of an acrylic bathtub. When choosing the right one, it is necessary to clarify whether it can be used on acrylic surfaces.
Silicon-Entferner Lugato
Lugato produces a special product for removing silicone sealants. It can be used on various types of surfaces, including acrylic.
To get a good result, you must perform the following steps:
- Remove the bulk layer of sealant, leaving a thickness of no more than 0.2 cm.
- Open the tube (child safety system - press the lid and turn it).
- Pierce the protective foil on the tube with a needle.
- Apply the product to the surface with remaining sealant in a thick layer - up to 0.5 cm.
- Leave to act for at least an hour and no more than 5 hours.
- Remove any remaining product with a non-sharp object. For example, a wooden scraper.
- Wipe the bathtub with a rag soaked in purified gasoline.
- Wipe with a dry cloth.
- If necessary, the treatment should be repeated.
The drug is available in an 80 ml tube. Price per package – from 1,000 rubles.
Dow corning os-2
The silicone remover is produced by an American company. The drug is produced in various forms:
- paste;
- spray;
- liquid.
All molds are safe for plastics and can be used on acrylic. Dow corning is applied to the sealant for 20 minutes. During this time, it softens the sealing agent and makes it easy to remove. Price – from 500 rubles.
Methods for cleaning different surfaces
To determine how to remove silicone sealant, you need to try and combine different methods. Specific recommendations depend on the type of coating being treated.
Removing unusable sealant Source prorab.help
Bath
When choosing how to clean the sealant on the bathtub, you can follow the following tips:
- The layer of hardened mixture must be carefully pryed off with a sharp blade.
- Use your hands to try to completely remove the material.
- The surface should be wiped with a damp cloth soaked in salt of minimal grain size.
- If there are traces of the sealing agent left on the bathtub, they can be washed off with vinegar or solvent.
If the silicone-containing substance has not yet hardened, there is no need to perform these manipulations. The mixture that has contaminated the surface of the bath can be easily removed with a solvent.
Removing silicone-containing products from the bathtub Source kak-otteret.ru
Tiles on the wall
To understand how to wash silicone, you need to read the following instructions:
- It is recommended to remove large pieces of silicone using a thin object.
- A washcloth is soaked in a solvent and the dirty tiles are treated. There must be a lot of liquid so that it can be “absorbed” into the hardened mixture.
- After 10 minutes, remaining silicone can be removed with a hard cloth soaked in solvent.
- At the final stage, it is recommended to wash the tiles using a soap solution.