If in past years sneakers were shoes exclusively for sports, now they are worn everywhere.
Active use of the pair leads to rapid wear, the first sign of which is creases.
Read the article on how to remove creases from sneakers made of leather, leatherette and nubuck, as well as how to prevent these defects from appearing.
General recommendations
When planning to restore sneakers, you need to take into account that different models differ in the materials used to make sports shoes. Depending on the material, the nuances of further repairs depend. The main task of the work is to update shoes and maintain proper appearance. Without going to a workshop, you can easily glue or extend the sole, whiten the visible part of the products, and eliminate small cracks.
The toe of a sneaker is most susceptible to wear and external influences, which is why tears most often form on it. The toe section is constantly in need of repair due to increased load, so the restoration of this element should be approached with great responsibility.
Even if worn and handled carefully, sneakers will wear out faster than other shoes, especially when used for sports. Prolongation of operation is facilitated by timely repairs and compliance with preventive care measures. This reduces costs compared to purchasing a new pair of sports shoes.
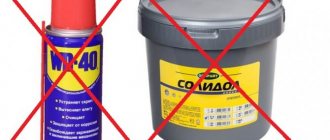
Shoe glue: brands for various materials
Wondering which adhesive is best for shoes made of a certain material? Let's take a look at the rating of high-quality special compounds for reliable bonding.
- KENDA FARBEN is a good shoe glue from an Italian manufacturer. It is considered universal and is excellent for gluing synthetic and natural leather. Copes with rubber, textile, wood, plastic, shotgun and metal products. It is often used by craftsmen when repairing boots, because the materials adhere quickly, and the seam is durable and moisture-resistant.
- UHU “SCHUH & LEDER” - this glue is actively used by shoemakers for gluing hard and soft materials. The seam has been characterized by increased elasticity for a long time. Resistantly withstands the negative effects of moisture, alkali and acid. It does not dry out for a long time and can withstand high and low temperatures. If the sole bursts, then using Uhu glue you can glue the separated parts together using the contact method. Use solvent reactivation or heat activation.
- Use professional EVA glue if you don’t know how to seal a hole in your shoes. It reliably connects corner and side cuts, porous surfaces of breaks. In addition, they can be used to glue the insole. This is a reliable waterproof product that does not flow under the influence of ultraviolet radiation and does not leave adhesive marks. Suitable for all types of materials except PVC.
- You can glue the polyurethane sole with Nairit Shoemaker. It is actively used in their work not only by shoemakers, but also by ordinary people. It has high strength and water resistance. Does not contain hazardous substances, therefore completely harmless to humans.
- Russian-made Contact glue has been popular for more than 10 years. This product is suitable for repairing leather, rubber, ceramic and porcelain products. With its help, it is possible to fill all the cracks and gaps. If we glue even heavily damaged parts, the seams will be almost invisible.
- The Henkel company suggests using Moment Marathon for repairing boots. This is a universal adhesive that is highly effective. Economical in consumption and convenient to use. It has fast adhesion and will only take a few hours to completely harden.
DIY tread repair
The most vulnerable are the protectors located on the heels of shoes. To restore them, you will need a hard piece of rubber, which can be taken from the sole of unnecessary shoes. Among the tools and additional devices that will be useful for work are: shoe glue, a sharp knife, and coarse sandpaper. The tread repair process is as follows:
- A patch is cut out of a piece of hard rubber and fitted in place of the damaged or worn out tread.
- Using a knife and sandpaper, make a wedge-shaped patch.
- The surfaces that will be glued are treated with sandpaper to roughen them, and then wiped with a solvent and allowed to dry.
- The adhesive composition is applied in two layers to the patch and the future location of the protector. The drying time of the first layer should be about 20 minutes, the second - 4-6 hours.
- After the glue has dried, the surfaces are heated over the stove until a smell appears, applied to each other, squeezed tightly and held until cool and fixed.
Sneakers with retreads can be worn immediately after the repair is completed. If possible, it is recommended to wait a day before use to provide additional reliability.
See also
How to properly glue a foam plastic ceiling plinth with your own hands
Restoring leatherette after reagents
During the winter months, roads are sprinkled with chemically active mixtures - special reagents. They minimize the risk of injury, but have a negative impact on the condition of the shoes. During this period, try to devote as much time as possible to her care.
For work you will need: ammonia (ammonia alcohol), vinegar, water, brush and cream. Follow these steps to repair leatherette products:
1. Take care of shoe maintenance. Household departments sell special products to protect against moisture and chemical components. Spray your shoes with a spray, dry naturally, and repeat the procedure. This will protect your pair of shoes from hazardous substances.
This is interesting: What to do if your sneakers are narrow and rub, how to wear them in
2. Apply cream with mink oil to the leatherette to protect it from getting wet.
3. Boots will have to be treated constantly. After each use, clean the pair with a brush dipped in ammonia solution. Dilute a tablespoon of ammonia in a liter of water, wet the brush and apply to the boots. Dry them. Carefully lubricate the skin with cream.
How to repair heels
To repair heels on sneakers, you need to get rid of the old tread, tearing it off the sole, cutting it in places where it is impossible to separate the element manually. To simplify the task, you can treat problem areas with a solvent.
After removing the tread, the contour of the sole is transferred to thick paper or cardboard and the erased edges are completed. Having drawn the outline, the pattern is cut out of paper and used to create a new blank. You can make the sole from a rubber mat, which is sold in hardware stores. It is impractical to partially restore the sole, so if the heel of the sneakers is damaged, the base is completely changed.
When gluing the sole to the main part of a sports shoe, you need to thoroughly clean the surface. Otherwise, the gluing procedure does not differ from the standard one.
How to repair the top
The features of repairing the upper part of the sneakers directly depend on the material used. If shoes are made of suede, natural or artificial leather, then the material wears out over time and cracks at break points. To restore the appearance, patches made of thin and elastic material can be glued or sewn onto cracked and cracked areas. Before applying patches, the old material is torn off.
The use of patches on the upper part of the sneakers ruins the original appearance of the shoes, so it is better to prevent cracks from occurring. To maintain shoes in good condition, natural leather should be periodically lubricated with cream, and suede should be cleaned with a dry, stiff brush, trying to lift the pile. To clean the upper part of your sneakers from dirt, you should use a damp cloth rather than washing your shoes under running water.
Removing yellowness using improvised means
If the sole has turned yellow, it is not necessary to resort to any compounds. It is enough to arm yourself with a light eraser or melamine sponge.
Cleaning shoes with an eraser is safe, but takes time. In addition, you will need to make an effort to erase the yellowness from the entire sole. It is advisable to use an eraser to remove stains or black stripes from small areas. When working, use only the soft side of the washing machine. The hard one leaves traces.
A plastic miracle sponge will do the job much faster. And you won’t have to exert any physical effort when processing yellowed soles. Do not rub with a damp sponge, but wash away dirt. But it will not be able to remove heavily ingrained plaque.
Sole
The quality and condition of the sole affects the comfort when wearing sports shoes. With prolonged use, the sole of the sneakers wears out and becomes deformed. Stepping on stones and unpaved surfaces risks damaging the sole, causing holes to form on it.
How to seal a hole
Any holes in the sole can be repaired in different ways, depending on the base material of the sneakers and the extent of the damage. Most often, epoxy glue is used to eliminate holes, which is relatively affordable and easy to use. Holes on the sole are sealed as follows:
- all edges of the hole are well cleaned and treated with a solvent to degrease;
- when the area next to the defect is completely dry, apply the diluted adhesive composition;
- if the hole in the sole of the sneaker is too large, a fiberglass mesh is placed in it to fill the void;
- when the glue dries, cover the damaged area from the outside with masking tape to level the sole;
- The sneakers are left in a well-ventilated area to dry completely.
See also
What to do if a computer chair creaks and how to fix the problem
How to increase worn out
If the soft sole of the sneakers has worn down slightly, it can be increased to its original thickness. For this purpose, you will need to purchase microporous rubber. A blank is cut out of the material in the shape of the worn-out element, the surface is cleaned with sandpaper and glued to the shoes.
It is better to use a special kind of shoe glue as glue to ensure reliable adhesion.
Replacement
A sole with a lot of damage is easier to replace with a new one. This will significantly reduce the time spent on repairing each damaged area. The replacement sole, as well as for extension, is cut out of microporous rubber. The sneaker is applied to the cardboard and the outline is outlined, and then it is transferred to the prepared material and the blank is cut out.
The advantage of using microporous rubber to create a new sole is the ability to cut parts into different shapes and sizes. The material can be used to make the sole of the desired type at minimal cost. In addition, microporous rubber has the following performance characteristics:
- light weight, strength and elasticity;
- resistance to rapid erasure;
- anti-slip;
- immunity to various atmospheric phenomena;
- no need for additional processing.
High quality microporous rubber is non-toxic, elastic, and does not deteriorate due to temperature changes and exposure to frost. The material can be produced with different contents of synthetic or natural rubber, which affects the strength and service life. The only negative side of the material for restoring sneakers is the sharp specific smell, but it tends to disappear quickly, so the repaired shoes will not create discomfort.
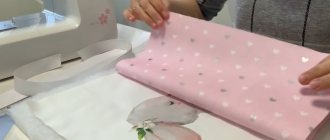
How to sew patches
Depending on the material from which the upper part of the sneaker is made, a corresponding patch is made. The size of the patch should be slightly larger than the damaged area so that the defect is completely hidden and the likelihood of further rupture is minimal. To fix the patch on the top or side, you need to attach the prepared material to the shoe and sew it with strong threads around the entire perimeter.
How to wash white shoes without yellow stains?
If your shoes are not made of genuine leather or suede and were not bought for 100 rubles on the market, most likely they can easily be washed in a machine. In the last article, I described in great detail how to wash sneakers and sneakers correctly.
Take care of your white shoes immediately after a walk.
Now let's talk specifically about preventing yellowness .
- Before washing, it is better to play it safe and walk through shoes that have already been hand-cleaned (from large dirt and debris), with a mixture of two tablespoons of washing powder or gel (preferably bleach) and two tablespoons of vinegar. Take a sponge and run this solution over the entire surface of the shoe.
- To avoid yellow spots and stains after washing in the machine, add a little citric acid - 1/3 teaspoon - to the rinse compartment.
- Use gels instead of powders; they penetrate better into the fibers of the fabric, and then come out just as freely when rinsing. It would be good if they were intended specifically for white things.
⚠️ Detergents should not contain chlorine - it is this that can cause an unpleasant reaction with the material of white sneakers and cause stains.
- Do not turn on the drying mode if your “washer” has one. Improper drying is a common cause of loss of whiteness of your favorite shoes.
- Add an extra rinse. With white shoes it will never be superfluous - you need to eliminate as much as possible the detergents from getting “stuck” in the fibers of the fabric. And rinse by hand in at least 4-5 waters.
If washing does not give the desired effect the first time, we move on to plan B: long and tedious, but with a 99% guarantee))
Combination top repair
On sneakers with a combined upper made of synthetic material with foam padding or natural and artificial suede, the fabric most often damaged is in the toe area, where the shoe comes into contact with the toes. On the outside, this area can be protected by a rubber insert around which there is a mesh, which is typical for running models of sneakers.
See also
Which laminate is better to choose for the kitchen and how to decorate the walls
If there is minor damage to the front of the shoe, a patch can be sewn on. If there are large holes, you need to prop up the seams, adjust the size and shape of a piece of durable nylon fabric and sew it in place.
How to fix a backdrop
Damage to the back of sneakers manifests itself in different ways: the fabric tears, the inner lining comes out, and discomfort appears in the heel.
When repairing shoes at home, you can take the following steps:
- Carefully cut off the torn edges in the area where the lining is located.
- Select a piece of thin leather that is soft to the touch and cut the blank in the shape of a small horseshoe. This shape is required to cover the entire surface of the heel of the sneaker.
- Treat the leather blank with shoe glue, thoroughly covering the entire surface, especially the edges.
- Carefully apply the patch to the heel of the shoe and place any suitable size object inside the sneaker to spread and press the fabric tightly.
- Leave the shoes for several hours for the final fixation of the patch.
How to reduce the number of cracks
A common cause of cracks in sports shoes is improper use. In particular, defects appear on sneakers due to wearing shoes of a larger size, excessive bending of the foot while wearing, prolonged pressure, exposure to high or too low temperatures.
If you follow the rules for using shoes, cracks will appear on them in a minimal amount.
To reduce the number of damages, it is recommended to use special mold holders, blocks and spacers during storage. It will also be useful to stuff the sneakers with crumpled paper to flatten the shells. Another factor that leads to the formation of cracks is soiled shoes. When a large number of dirt particles accumulate, the number of cracks increases and they grow faster. For this reason, the products should be kept clean.
Restore color and shape to brown boots
To restore the color of boots, use a special paint in a bottle. Before processing, prepare the product:
- clean your boots and dry them;
- degrease the surface;
- place the newspaper inside;
- work in rubber gloves;
- Apply paint with a sponge;
- leave the product to dry for 15 hours.
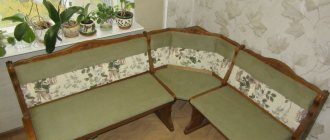
Sometimes boots wear out and become uncomfortable. Those with narrow feet have to tighten their shoes tightly on their feet.
To restore the shape of your boots, use special insoles. You can find them in any shoe store. Silicone inserts are placed under the heel and glued to the shoe.
To return the boots to shape, it is recommended to store them in a box with holes. Be sure to place special pads inside. If the shoes become unusable after wet treatment, put newspaper inside and wait until the boots are completely dry.