Features of glue for decoupage. What do you need to know before choosing?
Before you start choosing a specific manufacturer and brand of glue, it is worth talking about what qualities the glue should have in order for your product to be of the highest quality and free from defects.
Properties that glue should have
- Color preservation. For decoupage, it is important that the glue used does not change color (darken, turn yellow) after drying.
- No pronounced “synthetic” smell. Strong-smelling glue can spoil the product with its odor even after drying, so you should choose glue with a weak odor that will disappear after drying.
- Consistency. For ease of application, you should choose one that is not too thick and not too liquid. The best consistency resembles sour cream - this glue is convenient to apply with a brush in a not too thick layer.
- Bleaching. It doesn’t matter whether the glue is transparent at the time of application or white - the main thing is that after drying it becomes transparent so as not to spoil the appearance of the applied application.
- Drying time. It’s good if the glue dries quickly enough, but only if you have enough time to smooth out all the folds in the image and remove air bubbles from under the applique. Therefore, you should not choose glue that dries in a couple of moments - choose an option with a margin of 20-30 seconds.
We eliminate flaws
If the surface is decorated with small torn fragments, from which it is necessary to obtain a single whole, straighten the edges of the fragments with a brush or fingers. If there is color unevenness somewhere, dilute the paint of the desired shade and paint over the translucent base.
When the surface is no longer very wet, but has not yet dried, you can use thin brushes and acrylic paints to draw in the details, add brightness and clarity.
The next step is to decorate the edges of the product. There are different approaches here. In some places you have to trim the edges evenly, painting the sides, in others you can wrap the napkin on the back side and glue it there. In general, this is also a whole science.
Getting it to the finish line is an equally creative process.
After this, you can leave the product to dry. To speed up the process, you can use a hair dryer, but you need to keep it at a considerable distance, move it all the time and make sure that it dries evenly. If after drying you see that there is a fold on the glued napkin, you can still fix it. Take fine-grained sandpaper and sand it. We act gently so as not to damage the drawing around.
PVA glue
If you need to decoupage a simple surface, but there is no way to buy special glue in the store, you can get by with homemade PVA-based glue. There is nothing difficult to make; you will need a tube of PVA glue, warm water, a container and a mixing stick.
To make your own decoupage glue, you need:
- Measure out PVA and warm water 2 to 1;
- Mix together, stirring thoroughly with a stick.
As you can see, it couldn't be easier. This composition is suitable for thin paper and napkins. For thick sheets and photographs, it is better to purchase specialized glue. Important - you need to mix the glue immediately before decoupaging.
Application of universal and special composition
Among the varieties of decoupage glue you can see universal and special compositions. The first one can work on almost any surface. Special adhesives are focused on the following materials:
Glass. The glue components allow you to decorate porcelain and ceramics. After drying, the item is subjected to heat treatment - firing in the oven for one and a half hours at a temperature of 130°C.
Moreover, it is important to remember the rule: the oven is lit after placing the products, the finished item is removed after complete cooling.
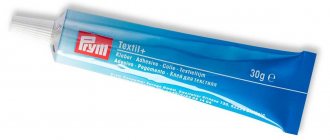
Textile. Any type of fabric will easily accept this type of glue. Once the gluing is complete, the creation is ironed at the appropriate fabric temperature.
- Rice paper for decoupage - step-by-step instructions for use, features and subtleties of use (110 photos)
- Decoupage of bottles - step-by-step instructions and description of the progress of decorating with various materials (110 photos)
- Napkins for decoupage - manufacturing features and tips for use (85 photos)
Wax candles. The composition itself contains wax as a component. It is better to decorate candles of impressive size, so that the glued pattern does not burn along with it.
Sugar and starch glue
Homemade glue recipe that you can make at home. You will need: Starch, sugar, vinegar, stove. Sequencing:
- Measure out a third of a glass of sugar, mix with a glass of water and bring to a boil;
- Add a tablespoon of vinegar to the sugar solution and continue boiling for about 20-30 seconds;
- Remove the mixture from the heat and mix with one-third cup of starch.
That's it, when the glue cools down, it will have a creamy consistency and will become colorless after drying.
Decoupage a vase using paste
To prepare the paste, mix glue and putty, add a little starch for thickness. This paste is used to create relief paintings on plates, paintings, furniture and other objects.
Instructions:
Wash the vase and degrease it with alcohol. Cover it with light acrylic paint. Prime the vase in two layers, drying each one thoroughly.
Cut out the images you like from a napkin, separating the top layer from the bottom. Paste the drawings cut out from the napkin onto the vase. Secure everything with varnish
Using a syringe, squeeze the putty mixture onto the contours of the image. Apply another layer of light acrylic paint. After waiting for the paint to dry, fix everything with varnish.
This technique is often used to decorate bottles. Champagne decorated in this way will complement the table setting and will be an excellent gift for people who love unusual things.
To create a bright bottle, attend master classes and photo ideas for volumetric decoupage, combine various techniques.
Famous manufacturers
If you decide not to use homemade glue, but to purchase a specialized decoupage mixture, then it is worth highlighting among the assortment of glue from such manufacturers as:
- Decola is an acrylic-based adhesive suitable for decoupage of wooden, metal and glass surfaces. Complete drying takes about 10-12 hours, after drying it becomes transparent. The glue is produced in Russia, the price is appropriate - you can buy a package from 130 to 160 rubles;
- La Doratura is a professional adhesive for water-repellent surfaces. Produced in Italy, the price of one package is from 1000 rubles;
- Mod Podge - American hard surface mixture. It is noteworthy in that it can be washed off with water before it dries completely, and after drying this mixture will give a matte look to your decoupage. 1000 rubles per package.
Rating of the best
The choice of glue for securing elements plays a leading role in preparing for the creative process. Each needlewoman empirically chooses the most suitable and convenient glue for herself. But there are indicators and characteristics that distinguish some brands from the rest:
- Mod Podge PLAID - American made. In the last 2–3 years, an analogue has been produced in China. When purchasing, check the manufacturer with the seller. The original glue is universal. It can be used for finishing metal, wood, cardboard, glass, plastered and varnished surfaces. Mod Podge PLAID – suitable for securing napkins, paper, fabric. In addition to adhesion of elements, it can be used as a finishing coating. Within 15–20 minutes, you can remove the composition with soap and water. Final adhesion occurs within two days. Forms a matte finish. Package price 236 g from 1050 rub.
- Decola – . Its cost is relatively low, so it is suitable for craftsmen without experience to get the hang of it. A universal composition, used for working with wood, metal, lacquered, leather, canvas, glass and ceramic substrates. used for adhesion of napkins, paper, fabric. Does not deform cardboard bases. You can choose a glossy or matte effect. The cost of the bottle is 70 g. – from 100 rub.
- Olki is a universal component and can be used as a topcoat. Creates a matte protective layer. Used for securing fabric, paper, napkins to wood, metal, glazed and glass surfaces. Does not change color over time and does not crack. Package price 33 ml. from 45 rub. Olki adhesive varnish for decoupage loses its properties at temperatures below –3⁰С. Please take this into account when transporting.
- Glue for decoupage Ferrario LA DORATURA . Used to coat substrates with hydrophobic properties. The glue is alcohol-based, which increases the drying speed to 35 minutes. Used for finishing surfaces with gold leaf and gold leaf. Does not require additional finishing fastening. The price of a tube is 75 ml. from 570 rub.
- Daily Art glue is suitable for working with the thinnest textures (rice paper, napkins). Easy to apply, forms an even layer without creases or unevenness. The combination of a water and acrylic base allows it to be used to create crafts from glass, metal and plastic blanks. Available in matte and glossy composition. The cost of the bottle is 60 ml. from 150 rub.
How to stick the applique correctly?
In addition to the correct choice of decoupage mixture, it is important to emphasize the techniques for applying the adhesive composition to the surface to be decoupaged. The quality of the image and the appearance of the product as a whole depend on how you apply the glue.
To avoid making mistakes, follow simple rules:
- Pre-apply a layer of primer to ensure an even layer of adhesive;
- Try to apply the glue evenly, in a thin layer;
- Separate the top layer with the pattern from the napkin and soak in warm water;
- Transfer the design to the surface with glue, also cover with a small layer of glue on top;
- Straighten the folds of the image using a brush and remove the air from under the napkin.
Now you know what properties of glue to rely on when choosing a mixture for decoupage, as well as how to make a simple mixture at home. Remember that the appearance of your future product depends on the choice of the most suitable glue for the blend. Pay enough attention to this moment to guarantee high-quality and durable decoupage.
Examples of decoupage
Now I offer you several pictures that demonstrate the result of a fairly simple decoupage. Which even a beginner can do.
For example, a stool, we simply cut out a round motif to fit the size of the seat, glue it, paint the legs in the desired color and fix everything with varnish:
The same thing, motifs are cut out of a geographical map to fit the panels on the front side of the desk, everything is glued and varnished.
The wood cut is primed. A picture and varnish are pasted on top.
A flower pot is first covered with newspaper, on top of which is glued an image of a bird, all the motifs are dense. therefore ideal for first decoupage projects
The lampshade of the table lamp is covered with music notes. It turned out very nice, and the cost was low. Just cut out the necessary pieces from the music book and stick them on the lampshade from the outside.
Pendant in the form of a key, the key is degreased. a floral motif is pasted and the remaining unoccupied picture key is painted blue. Varnish.
The boxes are simply covered with pictures, but it looks great.
All examples are very simple and quite suitable for initial experiments.
How to work with adhesive correctly
Due to the use of certain components in decoupage glue, it cannot be called completely safe. You must adhere to certain rules. Otherwise, there will be no noticeable difference between it and ordinary PVA. The jar is expensive, so consumption needs to be reduced, and this can be done in various ways.
The first thing you should pay attention to is where you buy decoupage glue. It is not worth purchasing secondhand from an unknown manufacturer.
To buy a proven and high-quality product, it is better to go to specialized handicraft stores, construction stores or stationery stores.
There is no need to dilute the glue, but you need to check its consistency before use. A good composition will not flow from the brush very quickly. The tools that will be used to glue the surfaces depend on their shape. For regular sizes, a thin brush is suitable, for others something like a roller, and still others can only be processed with the tip of a thin needle. You need to pay attention to the following nuances when working:
- It is better not to use thick glue - it will set, but will not be effective for a long time;
- drying speed - there are models that dry instantly; in order to fasten parts with other compounds, it will take an hour and a half;
- smoothing - it is necessary to carefully smooth the surface to prevent the formation of wrinkles and bubbles;
- Holding - Some options need to be held firmly to be effective.
See also
How to properly seal a bicycle inner tube at home using a repair kit
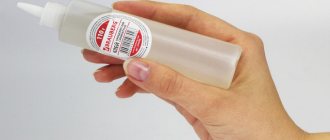
Decoupage glue is equipped with a special cap. Underneath there is a thin hole where you can insert a brush and take the required amount of composition.
Advice from experienced professionals
The popularity of decoupage not only does not decrease, but also increases. New ideas are rapidly filling the Internet, allowing needlewomen to enrich their experience.
Helpful Tips:
- Fragments of the picture should be cut out with a small margin. A few extra millimeters will protect the edges of the picture if the napkin gets very wet.
- It is recommended to remove excess glue to avoid prolonged drying and drips.
- Begin to apply glue from the middle of the picture, gradually increasing the area.
- To make the picture dry faster, hang it on a rope and dry it in this position.
- Even if it seems that the drawing has already dried, it is not recommended to iron the product earlier than 24 hours after finishing work.
- You shouldn’t limit yourself to textiles and furniture. Cutting boards, radiators and even shoes decorated in decoupage style look great.
Decoupage is an excellent solution for those who want to breathe new life into old things. Using simple technology, you can not only restore objects, but also create new and original ones. Creative inspiration and imagination will come to the rescue with this.
Decorating fabric products with table napkins
Sachet bags made using this technique look very beautiful. For their decoupage, ordinary table napkins can be used.
First, you should carefully cut out the design motif chosen for decoration. Having placed it in the place where it will be attached, the master either marks the outline with chalk, a marker (disappearing), dry soap, or pins it with safety pins. Then the base fabric is smeared with glue exactly in the place that was marked. Now you need to wait a few minutes.
After the glue has set slightly, the fragment of the pattern is carefully placed where it will now be permanently located. Then, using a brush from the middle to the corners, the part is covered with a layer of glue. You need to straighten the fragment as you proceed, slightly stretching the napkin. But you need to do this extremely carefully, trying not to tear it.
After the entire surface of the picture becomes smeared, use cotton swabs moistened with clean water to carefully remove excess glue that has protruded onto the base beyond the border of the fragment. You can dry the product on a clean film or in a suspended state using a clothesline and clothespins. The item should be secured at the corners. This process takes at least a day.
After thorough drying, you need to thoroughly iron the product with a hot iron from the wrong side, then from the front. It is better to do this through the fabric so that the glue does not spoil the sole of the iron and the picture does not change its colors.
Wall panel using the technique in question
Decoupage on fabric, the master class of which is presented here, repeats the algorithm for decorating with napkins. The fragments of the painting for the panel themselves should be printed on calligraphy or rice paper.
As a base, you can take ordinary fabric of two colors and sew the pieces together. But there is a way to paint them in the desired colors with acrylic paints. The panel will be especially successful if you make it on burlap or sackcloth. The paint is applied to the fabric in several layers, two or three.
After drying, the place where the panel fragment is glued is smeared with glue. Then the carved motif is attached to it.
After gluing, you can paint the sun’s eyes and draw rays.
Sometimes it is necessary to outline the motif. This is especially true for panels with children's themes.
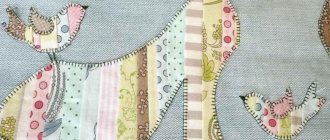
Animal figures are attached in the same way as when working with napkin motifs.
Any glue protruding beyond the fragment should be immediately removed with cotton swabs soaked in water.
Flowers on the panel can be used either printed on paper or voluminous artificial ones. The butterfly can also be voluminous, taken from a hair decoration.
Imitation of embroidery using decoupage technique
This type of wall decor is suitable for those who do not like embroidery, but want to have something reminiscent of embroidery.
As a base, it is best to take canvas that can not be washed. It is enough to iron the fabric well through a wet cloth with a very hot iron. The drawing itself must be printed on an inkjet printer or a photocopy made from paper. The picture is made on rice paper or a thinned printout. Next, the cut out pattern is glued according to the algorithm for working with napkins. Only when painting the picture with a brush should you make driving movements so that the paper is slightly deformed in the voids between the threads of the canvas and the effect of punctures and holes is created. You can also make holes with a needle after drying, then the imitation of embroidery will be more accurate.
Sometimes you can find a color cross stitch pattern. Then you no longer need to pierce holes. The picture will already be very reminiscent of finished embroidery.
After drying, you can coat the decoupage with varnish. A picture inserted into a frame will wonderfully decorate a room.
We transform boring things using decoupage on fabric
The simplest, and at first glance unsightly things can be transformed using the decoupage technique. Today you will learn how to make a beautiful pattern on fabric. The technology for performing such decoupage is quite simple to repeat, and a visual master class with photo and video examples will help you with this. Before moving on to the master class, see what beauty can be created using decoupage on fabric.
Using this technique you can decorate decorative pillows, bags and bags made of fabric and, of course, clothes in an original way.
Having learned how to do decoupage on small surfaces, you can safely move on to furniture and other large surfaces, giving it a special style and charm.
Pillowcase decor
The first master class will show you how to make decoupage on fabric, namely, decorate a pillowcase with a bright pattern of poppies.
For work, prepare:
- a plain pillowcase made of linen or cotton;
- a napkin with a suitable image or fabric with large flowers
- decoupage glue for textiles. When heat treated, it forms a protective film; Decoupage glue can be replaced with PVA glue
- paints;
- contour for textiles;
- flat brush;
- foam sponge;
- polyethylene bag.
Decoupage on fabric begins with preparing a pillowcase, which first needs to be washed and ironed.
Take the prepared napkins and cut out the images you need from them with a small margin along the contours. Next, with your own hands, cast the first color layer on which the design is directly applied. Place the bag inside the fabric and straighten it out. Now, decide on the areas in which you will record the drawings. Take a sponge and cover the pictures with glue in several layers. The fabric and napkin should be thoroughly soaked. Using a brush, smooth the motif from the middle to the edges with gentle movements. For a more secure fixation, reapply glue along the edges of the design.
Leave the decoupage on the fabric to dry for a day, after which, take the outline and trace the images with it.
Thorough fixation of the image is carried out using an iron, with which you must iron the decoupage on the fabric from the wrong side for three to five minutes. Use the “clap” mode for this.
Such decoupage on fabric is washed carefully by hand. The water temperature should not be higher than thirty or forty degrees. Before washing, the product must be turned inside out.
How to decoupage a fabric bag
To decoupage a canvas bag you will need: glue for decoupage on fabric, a napkin with a pattern, a brush, a hairdryer.
First, remove excess layers from the napkin. Then we put a plastic bag inside the bag so that the glue does not saturate the back of the bag. Then we apply glue to the fabric surface. You must apply the glue carefully so that the glue subsequently saturates the entire napkin. When the entire surface is coated with glue, you need to dry it a little with a hairdryer.
Then we need to glue a napkin with a pattern. We do it this way - apply a napkin and coat it with a brush with the same glue on top.
Now dry the decoupage a little with a hairdryer and let the bag dry for 24 hours. and then iron the decoupage from the inside out with an iron on setting. corresponding to the type of fabric. It will be a pleasure to go shopping with such a bag! You can wash a bag with decoupage without strong mechanical influences and, better yet, with soap.
How to decoupage clothes
Now you can give a second life to your old things! A simple blouse forgotten in the closet can sparkle with new colors and give you a lot of positive emotions.
We will need:
- plain sweater (100% cotton);
- napkin with your favorite image;
- special glue for decoupage on fabric;
- paints and outline for fabric;
- brush;
- foam sponge;
- paper;
- stationery knife;
- paper tape;
- Printer;
- iron.
The first and most important rule: decoupage is done on fabric made from natural materials (linen, cotton). Before starting work, if the item is dirty or new, wash and iron it properly.
1. Cut out the required image from the napkin, leaving a minimal outline of the background of the napkin, or not leaving it at all.
2. Place the design in the space provided for it, place a sheet of paper between the layers of the jacket and glue the design using fabric decoupage glue and a foam sponge.
3. Additionally, brush with glue along the edges of the picture. The napkin should be completely wet from the glue.
4. To create an inscription, you can use a ready-made stencil with letters or create it yourself. To do this, you need to type the required text in a text editor on your computer (it is better to choose a large font with a simple geometric outline), print it on a printer, and cut out holes in the shape of the letters with a utility knife.
5. Place the resulting stencil on the jacket and secure with paper tape. Be sure to check if the jacket is lined with paper!
6. Apply fabric paint using a foam sponge or brush.
7. Remove the stencil and add glitter lettering with gold paint.
8. Using a 3D outline for the fabric, decorate the inscription with drops of gold paint.
9. Leave the work to dry for 24 hours. Then remove the sheet from the jacket, turn it inside out and iron the decorative area with an iron in the “cotton” mode for 3-5 minutes (just in case, place a sheet of paper under the ironed area between the layers of the jacket).
The work is done! Feel free to put on a new thing and remember that no one else has such a sweater!
Do not forget! Products decorated using decoupage and painted techniques can only be washed by hand at 30-40 degrees (without pre-soaking and spinning), ironed only on the reverse side.
If anything remains unclear, then watch the detailed master class: How to make decoupage on fabric. Success in creative work!
Source
Photographs are stylish and creative!
You can decorate your home in the style of the sixties by making original decoupage on fabric. A photo of a loved one or your own should be processed in Picasa by selecting the “Other filters and effects” option and clicking the “60s style” button. It is also recommended to make an oval or round frame on the photo with smoothed corners and remove all excess.
The picture is printed on thin paper (for calligraphy or rice) in the same way as is done when preparing an embroidery pattern for decoupage. The work algorithm repeats the process of decorating fabric with motifs from table napkins.
Decor of interior items
Initially, decoupage was used only for interior decoration. Tables, chairs and cabinets were transformed by simply transferring the image onto the surface of the furniture. Delicate pastel drawings were especially relevant, creating an indescribable atmosphere in living rooms and bedrooms.
Today, decoupage techniques are rapidly improving . Special materials for creativity allow you to decorate furniture by imitating other techniques. For example, using decoupage you can create the effect of a cracked surface.
By combining decorated fabric decorative elements with furniture decorated using the decoupage technique, you can create a harmonious composition in any room. To decorate flat surfaces, you will need to choose a comfortable surface, such as a white coffee table.
Other necessary equipment:
- Sandpaper.
- Brushes, pencil, ruler, scissors.
- Acrylic primer.
- Container with water.
- Images printed on thick photo paper.
- Finishing varnish.
Volumetric decoupage postcards
Postcards created using this technique look very original, interesting, and bright compared to simple standard postcards.
Simple instructions on how to make volumetric decoupage on a postcard, what you need to prepare:
- sheet of cardboard;
- pencil, scissors, double-sided tape;
- identical old postcards (at least 2-3 copies) or printouts of templates for 3D postcards.
Bend the cardboard in half. Cut out the necessary elements from old postcards to create an independent composition. Elements must not be in one copy, but at least 2 pieces each.
Using double-sided tape, glue the cut out element onto the cardboard, and stick the same one on top again. This way the detail will look more advantageous and interesting.
Additionally, decorate the card with sparkles, beads, braid, decorative ribbons...
Hot fixing the applique
To make decoupage on fabric with your own hands, you can use polyethylene to glue the picture. This method is especially convenient when the fabric is decorated with fabric, that is, the design is placed on the fabric.
The drawing, not yet cut out in detail, is placed on it, and a newspaper is spread down. The fabric should completely cover the polyethylene so that it does not stick to the iron. Therefore, the design itself is cut out first “with an overlap.”
Then, using a not very hot iron, iron this “sandwich” from the front side of the design so that the polyethylene slightly “grabs” the fabric. After this procedure, you need to cut out the design in detail.
It is very important to do this as carefully as possible, only then will the decoupage on the fabric look beautiful. How to make sure that the drawing is fixed firmly enough? To do this, the picture is placed in a permanent place, after which it is thoroughly ironed with a hot iron. You can do this through a cloth so as not to burn the fabric, especially if the design is made on silk or artificial fabric.