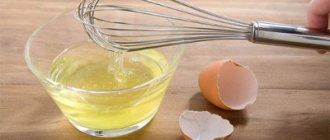
You will learn how to easily separate the yolk from the white of a raw egg.
To do this, we will consider two dozen ways. After all, they are useful not only to professionals.
Even beginners can cope with this task at home.
It is worth noting that such separation is one of the basic culinary skills.
It must be done carefully.
After all, if even a little yolk gets into the whites, then it will no longer be possible to beat the mass into a stable foam.
But don't be afraid!
In this article, this process will be described in detail and step by step.
In addition, I will share secrets that will greatly simplify your task.
Why are the whites separated from the yolk?
The separation of eggs into white and yolk is actively used in cooking. This process is required when creating a test
and culinary
creams
.
The yolk contains fat, which when beaten simply will not allow the mass to increase in volume.
Separation is often practiced when baking biscuits.
Biscuit
The yolk is mixed with sugar and added to the flour, and the white is beaten separately until stiff peaks form and only then added to the dough.
Everything needs to be done carefully and in small portions. This will make the mass more airy.
After baking, the sponge cake turns out very soft and fluffy.
A few tips will help you separate the whites from the yolk efficiently.
It's better to take fresh eggs
Their yolk is denser. Therefore, it practically does not mix with protein. As a result, the separation will be much easier.
Easier to separate cold eggs
At low temperatures, the yolk thickens and does not pierce so quickly. But the problem is that many recipes require eggs at room temperature.
There is only one way out: use cold eggs for separation. And then leave the bowl with the yolk at room temperature for a while.
Beat chilled egg whites better
Moreover, to speed up the process, a pinch of salt is usually added to them.
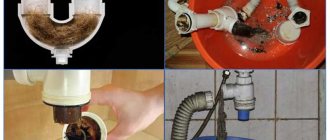
Before starting work, eggs are always washed, even if they are subjected to heat treatment.
The fact is that salmonellosis pathogens
. And ordinary water will easily wash away these microorganisms.
You also need to prepare two plates: one for the white and the second for the yolk.
For beginners, I recommend using an additional plate over which to break eggs.
Even if your hand accidentally shakes and the white and yolk mix, only one egg will spoil.
Useful tips
You need to remove the yolk correctly and carefully, and this will be easier if you take into account the recommendations:
- Eggs must be fresh. Their contents are not so viscous and will be easier to manipulate.
- If you need to separate several yolks, you should stock up on a semi-preparing cup or bowl. Each egg is separated over it, only then the finished protein is poured into the main container. This precaution will be extremely useful in the event of an emergency: a spoiled egg accidentally slipped into the refrigerator, accidental mixing of yolk and white, etc.
- Cooled egg whites separate best, so before starting cooking, the product should be placed in the refrigerator for 15 minutes.
- The product tolerates freezing very well. If there are any whites or yolks left during the cooking process, you can put them in a container or cellophane and hide the contents in the freezer. In order not to overdo it with the shelf life, the date of freezing should be indicated on the container.
Advice! Prepare the dishes in advance where the yolks will be placed.
How to separate the yolk from the white in a raw chicken egg - methods
There are classic separation options that do not require special devices.
These methods are the most common. However, they require certain skills.
But my instructions will help you figure it out quickly.
Hand separation
The easiest option is to separate with your bare hands.
It does not require any additional equipment. And the process itself will take a couple of seconds.
Step-by-step separation
1 step
The egg is carefully broken into the palm and the hands are held over the bowl.
They clench their fingers loosely and begin to pass the protein through them.
The yolk can be transferred from one hand to the other.
Step 2
Step 3
Do not squeeze the palm so as not to accidentally damage the yolk, and carefully transfer it to another bowl.
The main advantage of this method is that the separation can be carried out anywhere and at any time.
But there are also disadvantages!
The main disadvantage is that after the protein your fingers will be sticky
. Then they will have to be washed thoroughly.
Before separation, your palms should be washed well and wiped dry. Because if they are wet, then water will get into the protein, and then it will not beat well.
If you don’t want to wash your hands, you can wear cellophane gloves.
Transfusion from one shell to another
Another popular separation method is to use two halves of the shell.
1 step
The egg is broken with the blunt side of a knife approximately in the center.
The shell halves are opened so that the entire yolk remains in one of them.
Step 2
Step 3
The yolk is carefully transferred to the other half, while simultaneously pouring the white into a substitute bowl.
This manipulation is repeated until all the protein remains in the bowl.
The remaining yolk is transferred to a separate bowl.
Step 4
The main advantage of this method is its simplicity and accessibility.
But there are also disadvantages.
For example, if you hit the shell too hard, you may accidentally damage the yolk. In this case, it will not be possible to carry out high-quality separation.
In addition, the egg halves may not turn out the same. Then pouring the yolk from one shell to another will be problematic.
Although with special skills it is quite possible to do this.
Make a small hole with a needle to allow the whites to drain out.
Some chefs practice a more elaborate method of separating the yolks from the whites. Here you will need a sharp thick needle or a small knife and two bowls.
1 step
A small hole with a diameter of up to 7 mm is made in the upper, pointed part of the egg.
The egg is turned over with the blunt end up. For convenience, it can be placed on a stand.
The liquid white will begin to flow into the bowl, and the thick yolk will remain inside.
Step 2
Step 3
We also make a hole on the blunt side of the egg.
Using a knife, break the shell between the two holes and remove the yolk.
This method does not require much labor on your part. But that's where its advantages end.
Firstly, when the shell is pierced, there is a high risk that parts of it will fall inside the egg. In this case, extracting them from the protein will be problematic.
Secondly, separation takes a very long time. Therefore, this method is not suitable when you need to separate a lot of eggs.
tablespoon
You can also use a regular tablespoon to separate the whites from the yolk.
But this method is usually used by experienced chefs. Because a novice cook may have difficulties.
1 step
The egg is carefully broken into a container so as not to damage the yolk shell.
Using a tablespoon, catch the yolk and transfer it to a separate bowl.
Step 2
The main disadvantage of this method is that if you are careless, you can damage the integrity of the yolk.
Therefore, if you wish, you can grab the yolk with your hands instead of a spoon.
Using parchment paper in a funnel shape
To carry out separation, you can use a regular funnel made of thick paper.
To do this, a sheet of parchment is rolled up into a ball and the bottom part is cut off. The resulting funnel is placed on a glass and an egg is driven inside.
The liquid white will flow into the container, and the yolk will remain in the funnel.
Blowing method
If chicken eggs are small, you can use the blowing method.
But professional chefs do not recommend using this method as it is not hygienic.
However, this method is suitable for home use. Especially if the shell needs to be kept intact for crafts and other purposes.
1 step
Using a long thin nail or needle, make two holes in the shell, one opposite the other.
The egg is placed vertically over a deep bowl and held with one hand.
Step 2
Step 3
The lips are applied to the upper hole and the air is exhaled sharply. The more powerful the flow, the faster the protein will flow out.
If necessary, blow into the shell several times until only the yolk remains.
The speed and efficiency of separation directly depends on the strength of a person’s lungs.
Option No. 2 - shell halves
A well-known and old method for extracting the yolk is to pour the contents from shell to shell. First of all, you need to use a knife to break the egg in the middle. It will be easy enough to separate the shell by hitting the egg on a plate.
You must place a clean dish underneath. Part of the protein (after the shell cracks) will immediately pour into the container. The remaining mass must be poured from shell to shell until all the protein is poured into the bowl. Only the yolk will remain in the middle of the shell.
Advice! Womenburg magazine reminds that salmonella can live on the shells of chicken eggs. Be sure to wash your eggs in warm water and soap before cooking.
How to quickly and easily separate the yolk from the white - life hacks
Novice cooks do not always have the necessary skills for high-quality egg separation.
Therefore, to make the manipulation successful, you can use these culinary life hacks.
Bottle separation
An ordinary plastic bottle is the simplest and most affordable method of separation.
To keep the ingredients clean, you will need a flat plate and a bottle with a minimum volume of 1.5 liters.
1 step
The egg is broken into a flat plate. It must be clean and dry. Otherwise, the water will destroy the protective shell of the yolk, and it will mix with the protein.
Next, take a plastic bottle in your hands and lightly squeeze it on the sides.
Without unclenching your fingers, bring the neck of the bottle to the yolk and slowly release the pressure.
Step 2
Step 3
Under the influence of air, the yolk will fall inside the container.
Then you can squeeze it into another plate.
Step 4
This method is considered one of the simplest and most universal. After all, everything you need can be found at hand.
Plastic glass with a cutout at the bottom
There is another simple way with which you can easily separate an egg into white and yolk.
To do this, take a regular plastic cup.
Next, use a sharp knife to make a small semicircular hole at the bottom.
After this, an egg is broken into a glass. The white will drain through the hole, and the yolk will remain inside.
This manipulation will not take much time.
Through a sieve or slotted spoon
If you are not sure that you can carry out the separation manually, then use a regular sieve or slotted spoon.
It must be washed, thoroughly dried and placed over a deep plate.
The egg is simply poured onto a sieve or slotted spoon and wait a few seconds.
Through a slotted spoon
Sieve separation
The liquid white will seep through the holes into the bowl, but the yolk will remain in place.
If you need to speed up the process, you can shake the sieve or slotted spoon slightly. But do not do it too hard so as not to damage the yolk shell.
Option 3 - scoop
You can remove the yolk by scooping it from the white. First, the eggs are broken into a plate, then the cores are removed:
- Using your hand. This method requires skill and accuracy, but its advantage is that the risk of damaging the film on the yolk is minimal.
- Using a tablespoon. This method is more difficult than the first, since the chance of breaking the yolk with a spoon is high, but experienced housewives should succeed in the procedure.
You can act a little differently: remove proteins. To do this, you need to choose a container that is as similar as possible to the diameter of the yolk, for example, a glass. The egg, broken into a plate, is covered with a dish, and the white is separated with a spoon into another container.
How to separate the white from the yolk in quail eggs
Unfortunately, except for special separators, all of the above methods do not work for quail eggs.
Because in such eggs the yolk is enclosed in a very thin film, which is quite easy to damage.
Separation methods for quail eggs:
1 way
Using a small spoon
The easiest way is to break the eggs into a flat plate and scoop out the yolk with a teaspoon or coffee spoon.
You can also use a special olive spoon. In its center there is a small hole through which the protein will flow out.
If you have the skills, you can crack the egg directly into the spoon.
Through a sieve
A tender quail egg can be cracked directly into a sieve. In fresh eggs, the white is very runny, so it will quickly leak through the holes.
If this does not happen, then you need to lightly roll the product along the grid.
Method 2
3 way
Syringe
If the consistency of the yolk does not play a decisive role, the egg can simply be broken into a plate. And already there you can collect the yolk with a syringe.
Sleight of hand
You can separate the yolk from the white without additional utensils or equipment: just with your hands. There is a risk of droplets getting in, but such methods are the fastest and can be used in any conditions. There are three options: the classic one, the more cunning one, and the one that experienced chefs or housewives use.
Quickly whip egg whites without a mixer or whisk - this is real
Foam from egg whites is used by housewives and confectioners to create cakes, pastries, cookies, muffins and other...
Method one: break the egg on the edge of the plate and pour the entire contents into a container. Try to do this carefully so as not to damage the core - then it will end up in the middle of the puddle and can be easily caught with a strainer or hand. The second method: pierce a hole at one edge and drain the flowing protein through it. Third option: use an advanced method. Stand the egg upright and carefully break the shell in the middle, then break it into two pieces. The heavier contents will end up on one half, and get rid of the surrounding liquid by pouring the white from one shell to the other.
Important! It is best to work with a chilled product: then the components separate from each other much more easily. Place the eggs in the refrigerator for at least half an hour before cooking.
How to properly extract the yolk from an ostrich egg
A distinctive feature of ostrich eggs is not only their size, but also their fairly strong shell.
Therefore, standard separation methods are not suitable for such eggs.
But there is one and only correct way to divide. All professional chefs use it.
The algorithm of actions is as follows:
1 step
A circle with a diameter of 1 cm is drawn in the blunt part of the egg. A hole is made along the marked boundaries using a thick and sharp needle.
Another hole is made on the opposite side.
To expand it to 1 cm, use a drill.
Be sure to break through the light protective film of the egg. Otherwise, the yolk will not flow out later.
After this, it is enough to hold the egg over a deep bowl with the large hole down for 10 minutes.
For convenience, you can place the product on a jar with a neck of suitable diameter.
Step 2
Step 3
When all the whites have drained, carefully break the egg shell with a hatchet over a separate bowl for the yolk. You need to break it between two holes.
Special devices for easy separation
The fastest way to separate whites from yolks and sort substances of similar consistency is to use special devices. Most of them do not require special skills. They have the simplest operating mechanism and, if desired, can be constructed by craftsmen at home.
Special devices for easy separation
The most popular separators of this type are:
- Silicone bulb (you need to pour the contents of the eggshell into a deep bowl. Without stirring, press the body of the device, bring it to the yolk, and then release the impact. According to physical laws, the yolk will be drawn into a special container, from which it can be removed later if necessary) .
- A small-diameter strainer (pour the contents of the egg into the strainer without disturbing the integrity of the yolk, after placing the separator over the bowl. Due to the presence of a metal mesh at the base of the device, the white, having a more liquid consistency, will slip into the dish, and the yolk will remain in the strainer).
The most modern, which has no analogues at present, is an automatic egg separator. Its mechanism is based on high-precision calculations by engineers, which involve separating the yolk from the white by rotating the device body.
The user of the device only needs to pour the contents of the product into a special container, and then press a button, activating the automated process. Upon completion of the rotational cycle, the separator will separate the white from the yolk, placing them in different compartments of the body.
Traditional approaches and their nuances
Despite the fact that many devices are offered today that can speed up and simplify the process of separating eggs into their components, many housewives prefer to use familiar, time-tested approaches. If you do everything correctly, the result will be optimal:
- Break the required number of eggs into a bowl. We put on very thin gloves and catch the yolks with our hands, laying them out separately. If you work with bare hands, there is a risk of tearing the film that holds the egg yolk.
- Break the shell and place the contents of the egg on your hand. We spread our fingers slightly over the bowl, allowing the white to flow freely. Place the yolks separately.
- If the product is very fresh, then carefully break the shell over the bowl so that the crack runs strictly in the center. Move the sphere to a vertical position and remove the top part; the yolk will remain in half the shell. When the white has drained to the maximum, pour the yolk into the other half and repeat until only the yolk remains in the shell.
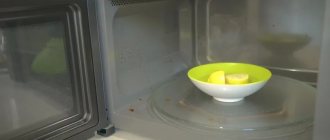
If time allows, and we need to get the white, but the fate of the yolk is not important, we can use the freezing option. Just put the eggs in the required quantity in the freezer and leave for 3-4 hours (you can also overnight). About an hour before the start of cooking, we take out the ingredients, clean them and put them in a bowl. After about an hour, the whites will melt and take on their usual appearance, and the yolks will become elastic and dense, they can be easily removed from the total mass. By the way, such an egg yolk does not require further heat treatment. Usually it is spread on bread and original sandwiches are prepared.
Separate using improvised means
You can quickly separate the components of eggs using various means that both an experienced cook and a person far from cooking are sure to find at home - an ordinary funnel or even an empty plastic bottle . Using any such device is as easy as shelling pears.
Rinse and dry the plastic bottle.
Break the egg and place on a flat plate.
Squeeze the bottle on both sides, releasing the air.
The neck of the vessel should be brought as close as possible to the surface of the yolk and the compression of the bottle should be loosened.
The whole yolk will be easily absorbed into the container.
Now just pour it into the desired container.
Take a factory-made funnel or create one yourself, for example, from whatman paper or printer paper, cutting off the tip of the cone (you should get a hole the size of your little finger). Break the egg and pour the contents into the funnel. Hold it over a plate, where the squirrel will move, leaving its yellow “neighbor” in the shell.
As easy as pie
Take a plastic cup. Heat the knife and make a crescent-shaped cut at the bottom no more than a centimeter wide. Pour in the egg and let the clear substance flow through the hole. You can do the same with a deep plastic spoon.
If you just need the yolk, regardless of its condition, use a syringe without a needle. After carefully breaking the egg, simply draw up the yellow component with a syringe, then all that remains is to empty it.