From time immemorial, fishermen dried fish in order to create a food reserve and prevent their catch from going to waste. Now there are a lot of ways to preserve the catch for a long time in a form suitable for consumption (for example, fresh frozen), and few people depend on the supply of fish for survival. However, dried fish still remains a very popular delicacy: its special taste is adored by almost all adults and even children who cannot stand other dishes made from this product.
Today we will talk about how to prepare this delicacy in the best way, so that on the way to your table it accumulates more excellent taste qualities and does not lose its supply of microelements and nutrients. We will describe in detail each stage of the drying process, from carcass selection to storage of the finished product. We hope that our practical recommendations will help you get a piquant, amazingly tasty and healthy product that is ready for consumption!
Description of the drying process
If we adhere to strict terminology, then drying can be called exclusively a production process, the course of which is prescribed in technological maps. Salted and washed fish are placed in special conditions, maintaining low humidity, providing ventilation and stabilizing the temperature (up to 35°C).
This bait provides a rich catch even with a bad bite!
Read more When drying, the fish slowly gets rid of moisture, the soft tissues separate, microcavities are formed, which are filled with fat and fermentation products. Providing optimal conditions is aimed at obtaining a delicious-tasting delicacy, rich in nutrients and beneficial microelements.
It is almost impossible to create such conditions with an artisanal process, but getting closer to the ideal is quite possible. Properly dried fish at home is in no way inferior to store-bought fish, and sometimes even surpasses it in both nutritional value and taste. It can be called dried without any exaggeration, at the same time conferring the title of a delicacy.
Soaking
This is the next step to remove excess salt. If you skip it, the skin will not dry properly. The easiest way is to soak the carcasses under the tap, removing any remaining mucus. The washed fish is placed in a bowl of cold water: if the carcasses remain on the surface, then the flesh contains a sufficient amount of salt. The duration of washing and soaking should not exceed 1 hour every day of pre-salting. Large fatty fish should not be kept in water for more than 7-10 hours - this will significantly reduce the taste of the finished product. Every 2-3 hours, the carcasses are taken out of the water and kept in the open air for some time.
Fish selection
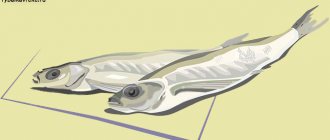
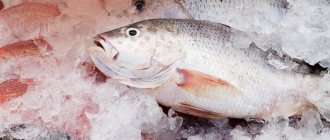
You can dry absolutely any fish. The main indicator of the suitability of raw materials is impeccable freshness. The best way to achieve our goals is a fresh fish that was calmly swimming in a pond a few hours ago. It is acceptable to dry fish that was first frozen and then thawed naturally, at room temperature, without using a microwave or hot water. Its taste will be somewhat worse even with an impeccably organized process, so this option should be resorted to only in extreme cases.
Optimally suitable for our purposes are roach, rudd, bleak, small crucian carp, bream, silver bream, as well as other representatives of the ichthyofauna with a body that is not too round in cross-section. Pike, pike perch and perch turn out to be somewhat dry, but some find a special tsimes in the particularly dense meat of the predator. But it is better to prepare tench, silver carp, carp or grass carp in another way: the round carcass is salted and dried for a long time and often spoils during the process.
The best taste is found in fish caught in autumn and spring, before spawning. She has already put on some fat, and her meat will be especially tender and nutritious.
Preparation of carcasses
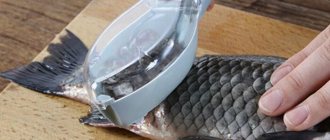
So, we select several individuals (or dozens), preferably more or less identical in size. You need to rinse them thoroughly under running water and make sure that there is no dirt left on the scales or in the gills. However, some anglers skip this step, believing that any stray dirt will go away during the soak before drying. Well, it's a matter of taste!
The question often arises: is it necessary to gut fish before drying? Again, it's a matter of taste. The advantages of gutting include:
- Reducing the time of salting and drying, reducing risks. This is especially important for large fish: sometimes the belly with entrails is not sufficiently salted and dried, which leads to spoilage of the product.
- Guaranteed no bitter aftertaste. During the summer, peaceful representatives of the ichthyofauna switch predominantly to a plant-based diet, and their intestines become clogged with a foul-smelling fraction. If it is not removed, the meat may acquire an unpleasant bitter taste.
- Confidence in the quality of the product. Here we are talking about parasites, which, unfortunately, are often found in roach, silver bream, bream and other peaceful fish. If you rip open the belly and see a tapeworm there (it’s difficult to confuse it with something), it’s better to throw away the carcass. The likelihood of a person becoming infected with the parasite in this way is low, but it is better to be on the safe side.
Most fishermen gut large specimens, sometimes leaving the eggs and swim bladder inside, and salt the small fish in their original form. In summer, it is better to gut all herbivorous representatives of the ichthyofauna, as well as large predators.
We figured this out, but what if you want to dry a very large fish, such as catfish or trophy carp? The only option in this case is to cut the carcass into flat layers or strips of fillet, having first cleared it of scales. The layers are salted and dried using generally accepted technologies, but the process usually proceeds somewhat faster. However, much depends on the size of the layers.
If we don’t know how to fish, then we go to the store
In this case, it is advisable to choose from the display case yourself. And you need to pay attention to the following subtleties:
- Fish color. Yes, if it has been on sale for a long time, then it is a dark gray shade. And when the fish is almost the first freshness, it is light gray. Very noticeable in comparison. And the sellers are trying to put the old one higher.
- The beginnings of mold. Mold may appear on the carcass due to dampness. And it’s not difficult to guess that such fish lie for more than one week.
- Softness. Even if it is dried, it is still fish, and such a product becomes very hard (usually crucian carp or bream) over months. Therefore, we leave the driest one for sale.
- Entrails. More precisely, the part under the ribs. Moisture or sticky mucus is a sign of expired food.
- Black dots. This is a product already marked by insects. The risk of intestinal poisoning is present with them. There were some flies here.
- Smells. Our nose will definitely tell you about expiration dates. We don’t take anything that already smells slightly rotten or rotten. Often similar aromas are due to the ungutted product. And such fish is good for food, although eating most of it (where the ribs are) is dangerous to health.
Pickling
Salting raw materials is a mandatory process before drying. Representatives of the northern peoples somehow dry fresh fish, but this requires both special climatic conditions and a thorough knowledge of the nuances of the process. By the way, in this way they do not obtain a ready-to-eat product, but a semi-finished product, which is subsequently soaked and usually boiled. We do not need to store our catch in this way - we can always use the freezer.
For salting fish, the coarsest cheap coarse salt is used, and you can use both regular and iodized salt. Aesthetic connoisseurs of originality can recommend the use of sea salt (be prepared for the expense), but it is better to refrain from using fine-grained “extras”.
There are three main methods of salting fish, differing in small nuances. We will now talk about them in more detail.
Dry method
Dry salting is the longest option for preparing a semi-finished product (5-10 days), but it preserves the maximum of nutrients, and the dried fish acquires premium taste. The process is based on the outflow of natural juice secreted by fish under the influence of salt. As a result, the carcasses are “dry” (relatively, of course), hence the name of the method.
Dry salting in the classic version looks like this:
- We prepare the carcasses (individuals weighing over half a kilogram must be gutted; you can make an additional longitudinal cut on the back).
- We take coarse salt at the rate of 1.5-2 kg per 10 kg of raw materials.
- We carefully rub the carcasses with salt, sprinkle it on the gills, bellies and cuts on the backs.
- Prepare the container. It is best if it is a wooden box or wicker basket, but if these are not available, you can use either a plastic basket from the supermarket, or any other inert container with holes in the bottom and side walls.
- Take a piece of linen or coarse cotton cloth or burlap and line the bottom of the container with it.
- We lay out the carcasses in dense rows with their bellies up, according to the “head-tail” pattern.
- Cover the fish (not the container!) with a board or dish of appropriate shape and size.
- We install pressure on top (you can fill a three-liter jar with water or find and wash a heavy stone).
- We remove the container to a cool place (on the balcony, in the cellar), install a container under it to drain the brine.
- Periodically drain the resulting brine and check readiness.
If there is a small amount of fish and laying it in one layer, it is not necessary to load it: it is enough to cover the top of the container with cellophane. Sometimes they do without a fabric layer.
Wet salting
This is the simplest method used by the vast majority of fishermen. There is no need to overthink the selection of containers: not everyone has a box or basket in their household, but everyone has an enamel pan or a plastic bucket.
With the wet method, carcasses are salted, so to speak, in their own juice, and medium-sized fish can be dried already 3-4 days from the beginning of the process. Salt consumption is also reduced: only 1 kg is used per 10 kilos of raw materials. If the goal is to obtain a semi-finished product for drying, no additional ingredients (sugar, spices) are required.
The process looks like this:
- We take any inert (non-oxidizing) container: stainless steel, good food-grade plastic or enameled.
- Pour salt on the bottom, put the first layer of fish, sprinkle with salt. We repeat the operations. The largest carcasses are placed at the bottom, and so on to the small ones. Don't forget to salt the gills and bellies.
- Cover the last layer of carcasses with a board or flat dish and apply pressure.
- Place the container in a cool, dark place and leave it alone.
- After a day or two, the surface of the fish will be covered with brine, which serves as an indicator of the correct progress of the process.
After 3-4 days, you can test for readiness: if you forcefully “stretch” the carcass, you will hear a quiet but noticeable crunch of the vertebrae in response. Visual signs are also observed: flattened back, thickened meat.
Bridal Ambassador
In this option, you can start drying small fish in a day or two, which is truly a record figure. The brine salting method is based on the fact that the brine is prepared artificially, and does not wait until the fish gives natural juice under pressure. This is how small fish intended for drying or salted fish are usually prepared as a final dish.
With this option, a concentrated saline solution is prepared by gradually adding salt to the water either during boiling or after it. The degree of saturation of the solution is determined using a raw egg or potato: if they do not sink, then the brine is ready. Please note that you need to check the strength of the brine when it has cooled, otherwise the egg will simply be boiled and the test will be incorrect.
And then everything is simple: place the fish in a container and fill it with cooled brine. In this case, you need to make sure that the fish remains completely immersed in the solution, but it is not necessary to press it under pressure.
A special variation of this salting is the hanging method: the carcasses are hung freely on wire or transverse rods in a vat of brine, without touching each other, as well as the walls and bottom of the container. In this way, salted fish can be dried immediately on the same wires, which is convenient. However, a very large container and a lot of brine are required, therefore, mainly valuable and delicate fish such as eel, trout, salmon, grayling, and sturgeon are salted in this way.
Seasonality
It is best to wither or dry it, of course, in the summer. In spacious rooms without flies or simply in the open air. And they choose for drying what is caught from June to August: crucian carp, pike, and less often perch. How to dry fish yourself?
Individuals of any size are suitable for this task; they try to cut especially large ones into pieces and gut them as cleanly as possible. But the one immediately caught is not suitable for such ancient preservation. In hot weather, you will need a container to soak your catch in brine. And there are several recipes for such a liquid. Let's try to make dried fish, exactly what is convenient in camping (tourist) conditions.
Preparation for drying
We will assume that the semi-finished product is almost ready, has been salted and requires drying. But there is no need to rush: first, the fish must be washed under running water and then soaked, getting rid of excess salt. Carcasses prepared using the brine method are usually not soaked - the amount of salt in them is optimal.
Soaking of carcasses is carried out in clean, cool water, and its time is calculated according to the formula: how many days it was salted, how many hours to soak, plus another hour (it is advisable to change the water hourly). After soaking, the carcasses are really ready for drying.
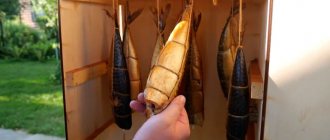
There are many ways to dry fish in natural conditions. The main principle is to protect the product from the sun and have good ventilation. You can dry fish both in the fresh air (in the shade under a canopy) and in a closed but well-ventilated room. It is best to adapt an attic, veranda, shed or other non-residential premises with ventilation for these purposes. In an apartment, it is better to move this process to a balcony or loggia, and in case of high humidity or severe frosts, under the kitchen hood.
Hanging drying methods
In most cases, fish is dried using the hanging method, which has many variations. The main thing that unites them is the free position of the carcasses and accessibility for ventilation from all sides. The gutted bellies of large specimens can be spread out with spacers made of matches or toothpicks.
Fishermen of the past used ropes and wooden rods for hanging drying, while our contemporaries usually prefer structures using wire. The main requirement is that the wire must be strong, not too thick and inert, that is, not oxidize under the influence of salt and moisture. Wire made of stainless steel, copper or brass is ideal, but you can also take any stranded wire with insulation (in the latter case, you will have to think about how you will string the carcasses onto it - insulated wire is usually not rigid).
Let's go through the main structures:
- Stretched wire . At one end of the wire a loop is made for subsequent fixation, the other turns into a kind of needle, which is used to pierce the fish through the eyes. Subsequently, this garland is stretched and fixed in the shade under a canopy, and the carcasses are evenly distributed along the length of the wire with an interval of at least a centimeter. You can dry an unlimited amount of fish on one wire: the main thing is that it does not sag too much under its own weight, otherwise the carcasses will move to the middle and get crowded there, which is undesirable.
- Chalky . Previously, flexible willow rods served as chaps; now their role is played by fairly rigid wire. You need to make a hook at one end, then put on several carcasses, bend the other end into the hook and secure it in the loop. We will get a closed circle of wire that can be hung on any hook or peg. You can put several dozen chalks on a horizontally fixed crossbar - even a country horizontal bar, or a structure for drying clothes.
- Frame dryers . Homemade frame structures are usually created by fishermen who dry fish regularly and in large quantities. The frame (metal, wood), is protected on all sides by a thin, ventilated fabric, mosquito net or gauze. Inside there are fastenings for stretching the wire.
The speed of preparation of the final product is directly dependent on the size of the carcasses and drying conditions.
Drying fish on a plane
Drying fish on the surface (without hanging) is rarely used: the risk of ruining a potential delicacy is too great. But if you have a few small things and really want dried fish, you can try to do without hanging it.
The process looks like this:
- Line a flat surface with foil or polyethylene (otherwise you won’t be able to wash off the stains).
- Place a clean piece of paper on top (not newspaper with paint).
- Thoroughly drain the washed fish in a colander.
- We lay out the carcasses in one layer on paper at some distance from each other.
- At least twice a day we change the paper to dry and turn the semi-finished product over.
Your active participation is important here: if you forget to turn the fish over or leave it on wet paper for a long time, you will ruin the product irrevocably.
Application of household appliances
Our ancestors often dried small fish in Russian ovens, directly on hearths. Of course, it was difficult to call such fish dried - rather, it was used to make a kind of “crackers”, which were eaten directly with bones, scales and giblets.
In a similar way, you can dry small fish in a household oven, preferably an electric one (a gas oven will not provide a sufficient minimum temperature). To do this, just spread the trifle on a baking sheet lined with parchment, turn on the convection mode, set the minimum temperature and open the door slightly. Carcasses need to be turned over periodically. It is better to cut off the heads first, otherwise they will burn.
In principle, fish can be dried in an open electric dryer, but, firstly, it will get very dirty, and secondly, the smell will be ineradicable. Therefore, for these purposes it is better to use closed dryers specifically designed for drying animal products, but they are very expensive.
Using household appliances
Using household appliances can make the drying process easier. If you follow some technological nuances, you can successfully dry small carcasses even without salt. Our grandmothers also dried small items in Russian ovens, not bothering at all with cleaning and sometimes salting. Now an alternative to the oven has become a mediocre oven.
The oven drying process looks something like this:
- Let the fish drain thoroughly, leaving it in a colander or laying it out on a paper towel.
- We lay out the prepared carcasses on a baking sheet in one layer, having first lined it with parchment (otherwise you simply won’t wash the baking sheet).
- Turn on the oven to convection mode and set the temperature to low (about 40-50°C). Leave the door slightly open.
- After a couple of hours, turn the carcasses over, protect the heads with foil (if necessary, if they are clearly burning) and keep them in the oven for a few more hours.
- We remove the baking sheet, thread a wire through the eyes and dry the fish overnight under natural conditions.
It is also good to use electric dryers for these purposes, and preference should be given to models specially designed for drying fish and meat. Closed electric dryers are optimal: they do not smell as fragrant during the process.
Storage of the finished product
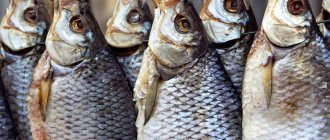
In dry weather and a good breeze, the fish reaches the ready-to-eat stage in 3-5 days, but large specimens can take more than a week to dry. The finished fish exudes a divine fragrance, its meat becomes dense, but not too tough, its scales begin to look slightly oily, but not sticky.
Everyone has their own taste regarding the degree of drying of fish: some prefer to consume it half-raw, others bring it to a semi-stony state, testing the strength of their own teeth. Connoisseurs like to let the product “ripen” in a canvas bag, rag, paper or cardboard box. But it is not recommended to leave the fish like this for a long time: it will dry out to the point of becoming a stone. Therefore, it is better to put it in a glass jar, seal it tightly and place it in the refrigerator or cellar, or take it out to the balcony, in the cool.
If you're thinking about long-term storage, there's nothing better than a household freezer, but don't forget to wrap the food in plastic wrap!
Let's prepare everything on the go
So, we have a bucket or soft bag that does not let water through.
For three kilograms of catch (approximately) you need at least one pack of salt (1 kg) and four liters of clean water
The recipe is:
- Add warm water to the container.
- Then mix a pack of table salt in it. The simplest one is what we need.
- The catch, cleaned of intestines and scales, must be salted from the inside.
- And in this form we place one by one, fish after fish, in the brine.
- Then tightly close the container with a lid or tighten it with a cord.
- All this needs to be cooled. If we cook in an apartment, we put it in the refrigerator. On a hike, at a dacha or on a picnic, you can put it near the shore or dig it in the shade for the night. This way the product will not spoil.
- After 24 hours, you can remove them from the marinade, rinse off excess salt and hang them on hooks or thread.
For your information! The fish will be ventilated for at least a week, so we plan everything correctly so that it does not dry out.
Practical advice
The epilogue of our publication, according to the good old tradition, will be practical advice from experienced fishermen:
- When drying in an apartment, take care of cleanliness. Keep in mind that in the first days the fish will leak a lot, so it is better to hang it on the balcony or above the bathroom during this period. On the third or fourth day, you can hang it in the kitchen near the hood.
- Protect drying fish from insects. The worst enemy of our product is the blowfly, which is especially abundant in the summer. We strongly recommend protecting hung carcasses with gauze, mosquito nets, and tulle. You cannot leave the slightest loophole, otherwise you will have to give the delicacy to the maggots.
- Do not store the finished product in polyethylene: it will lose its taste, acquire an unpleasant odor, become sticky and unappetizing. When storing the product at natural temperatures or in the refrigerator, use paper, cotton cloth, or glass containers. Plastic bags are only appropriate for long-term storage in the freezer.
We hope that amazing fish prepared in accordance with our recommendations will soon appear on your table!
Fishermen wonder why I’m biting and they’re not?
I’m revealing a secret just for you: it’s all about the miracle bait! More details
Dried carp with pepper
To prepare dried carp with pepper, you need to prepare the following components:
- 1 large carp;
- 2 tbsp. l. chili salts;
- 3 tbsp. l. granulated sugar;
- 3 tbsp. l. sweet red pepper;
- 5 dried clove buds;
- 2 tbsp. l. basil salt;
- 1 tbsp. l. coriander;
- 5-6 peas of allspice black pepper.
Step-by-step cooking instructions:
- First you need to rinse the carp in running water, wipe it with a dry towel, transfer it to a cutting board, cut off the first part of the fillet along with the scales and the second part of the fillet, turning the fish over. After filleting the fish, you need to remove the scales.
- Then you need to wash the fillet in cold water, dry it with a paper towel, and then mix the chili salt, basil salt, granulated sugar and sweet red pepper in a separate bowl.
- Next, you need to put cloves, coriander and allspice black peppercorns in a mortar, grind, pour the resulting mixture into another mixture and mix well. After the fillet you need to rub it with a mixture of spices, transfer it to a deep plate and marinate for 2 hours.
- Now you can remove excess salt from the carp, attach it to hooks, hang it on the balcony and leave it for 2 days. Afterwards you need to remove the fish, cut into strips 0.5 cm thick and divide into strips. Then the fish should be moved to a baking sheet, sent to the balcony and left for 3 days. At the same time, you need to stir the chopped fish fillet a little so that it dries evenly and does not stick together.
- After 3 days, you need to pour the dried fish into a plate and serve.
