Why do you need to clean and lubricate your laptop cooler?
Why is it necessary to clean? It's quite simple. Often the cause of such malfunctions is processor overheating. Despite the fact that the design features of laptops require operation with minimal power consumption, in some cases the graphics and central processor get quite hot and begin to require additional cooling.
To accomplish this task, all devices are equipped with a cooling system. It consists of several interconnected tubes that remove excess heat and transfer it to the radiator and fan. It is the fan that needs regular cleaning.
Cooling is carried out using air entering through the air intakes. Then it hits the cooler blades. This process occurs continuously, so over time, dust and dirt accumulate on the internal elements of the cooler. As a result, the fan that usually cools the “brains” becomes dirty, and in some cases stops rotating altogether. The temperature inside the case begins to rise, and when it reaches a critical point, the PC will turn off spontaneously.
Reference. The operation of the cooling system is reminiscent of a vacuum cleaner, because like it, the laptop fan actively sucks in dust and dirt from the environment. As a result, the dust accumulates into felt-like clumps.
To prevent breakdowns and extend service life, it is necessary to regularly remove accumulated dust and dirt, as well as lubricate the cooler. To do this, you need to choose the right lubricant.
Why does the cooler need to be cleaned?
An unpleasant taste and smell of water is not the biggest problem that requires cleaning the cooler. No matter how pure drinking water is, it is not distilled. Therefore, impurities included in the water cause scale to form on the heating elements of the device. Because of this, the heating time of the liquid increases, the taste of the drinks deteriorates, and you begin to notice a yellowish sediment in the cup. Also, scale can cause damage to the device, and repairing a cooler is much more expensive than cleaning it.
But nothing is more valuable than human health and safety.
The fact is that a humid environment is an excellent condition for the growth of bacteria. Therefore, over time, a bacterial film forms on the internal parts of the device, which contaminates drinking water.
How can you lubricate a cooler at home?
If you type this question into the search engine of any browser, it will return a huge number of results. Most of them are not credible, because the answers are not supported by facts, but are based on personal experience. However, experiments with lubricants can lead not only to the breakdown of fans, but also to the malfunction of other elements.
The main component of any cooler is the bearing. The latter comes in two variants: sliding and torsion. Each of them requires a different type of lubricant.
Most modern laptops use sliding bearings, so the appropriate lubricant should be selected. In addition, it must meet certain requirements:
- The viscosity must be suitable for high speed operation. Liquid products do a better job of this.
- The composition should include various dispersive substances, for example, Teflon. They are necessary for faster starting of the bearing.
- Do not have a negative impact on other elements of the cooler.
- The substance must penetrate inside without hindrance.
- One of the main characteristics is the high level of grip. Otherwise, the substance will simply flow out of the cooler.
Reference. These parameters are also suitable for the second bearing option. The main thing is that the chosen product should be more flexible.
The following tools meet all parameters:
- Automotive oil. You need to take “synthetics”.
- Special oil for sewing machines, trimmers, hair clippers and other power tools. Usually it comes with the product.
- Silicone Grease. You need one that is designed for lubricating door locks and gearboxes.
- Specialized lubricant designed for caring for coolers.
How to lubricate a laptop cooler so it doesn't make noise
Once you have chosen and purchased a suitable product, you can proceed to the process of lubricating the fan itself:
1. It is necessary to turn off the power to the PC and remove the battery.
2.How to remove the cooler correctly is indicated in the instructions. Typically, this requires removing the back cover of the laptop.
3.Use a soft brush to remove accumulated dust and dirt from the internal components of the laptop. Pay special attention to the processor and video card. A vacuum cleaner will be an excellent helper.
4.Unscrew several screws that secure the cooler. Don't forget about grooves, cables and other connecting elements. They must be carefully disconnected. After which you can remove the fan.
5.Take a cotton swab or small brush. Use them to carefully process the blades. You can also use a product based on medical alcohol for these purposes.
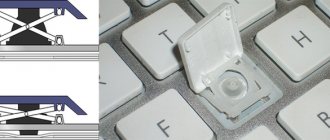
6. There is a sticker on the body of all coolers. You should find it and carefully peel it off. There is a miniature hole underneath it.
7.Using a medical syringe or pipette, draw out the required amount of lubricant and drop it into the hole. To ensure the mixture is evenly distributed, twirl the blades with your fingers.
8.The next step is reassembly and installation of the cooler. It is important to do everything exactly in the reverse order and do not forget to connect the cables and other connectors.
In conclusion, I would like to add that now many laptops are equipped with non-separable coolers. In this case, you will have to drill a hole in the PC case yourself; after lubricating it, you will need to seal it with tape. However, the effectiveness of this method has not been confirmed, so it is unlikely to be rational.
Eliminate laptop fan noise
When using the Acer Aspire 5512 WLMi laptop for a long time, an irritating noise became noticeable. It turned out that the noise was coming from the “main” processor fan of the computer. The noisy behavior of the cooler did not affect the performance of the laptop itself, but it did suggest that it would soon be in trouble.
Eventually the noise became so loud that the decision was made to replace the fan.
Despite the apparent difficulty of removal, the cooler is quite easy to dismantle. True, there are exceptions and some models may require more labor-intensive disassembly.
Removing the fan.
Unscrew the bolts and remove the cover on the bottom of the laptop.
Next, unscrew the miniature bolts that secure the cooler.
Unfasten the three-pin connector.
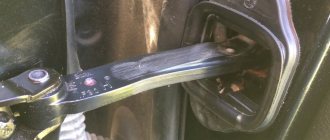
We take out the fan by carefully peeling off the black adhesive tape with which it is glued to the radiator.
Replacing a faulty fan.
Purchasing a similar fan turned out to be problematic. On the radio market we were able to find only used, “used” ones. It seemed impractical to purchase a fan that had already worked, despite the fact that the “native” one regularly generated speed and its motor was in good working order.
Debugg.
To disassemble the fan, you need to unscrew the bolts and remove the metal cover. The working blade with the motor is quite easily removed from the base. The photo shows the cooler disassembled.
After the faulty cooler was disassembled, the reason for the noisy “behavior” was clear. As a result of prolonged use of the laptop, the blade became skewed, causing the blade to touch the top cover when working. The marks on it were visible to the naked eye.
To prevent the blade from touching the top cover, it is necessary to install it slightly recessed in the fixing groove. This must be done so that when the top cover is installed, the blade does not touch the side walls of the base. We check the alignment by vigorously blowing air into the side hole. It is necessary to achieve rotation of the blade. The movement of the blade should be free and silent.
After installing the fan in the laptop, the noise disappeared.
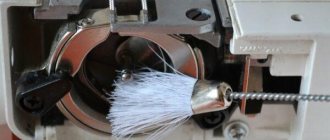
After about 1.5 years, the laptop cooler began to make a lot of noise again. It was decided to re-disassemble and restore its correct operation. As it turned out, over the course of 1.5 years, a decent amount of dust had settled on the blades. Also, the alignment of the blade inside the housing was slightly disturbed, and it again began to touch the metal cover.
It is better to clean the blades with an unnecessary toothbrush - this makes it easier to remove settled dust. Next, you need to center the blade so that when moving it does not touch the top metal cover.
After this cleaning, the laptop began to work noticeably quieter.
This is how, by performing simple operations, you can eliminate the malfunction and save yourself from trips to the service center and the accompanying waste of money.
Source
How to choose a lubricant for a cooler?
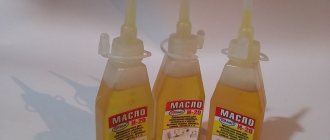
For coolers, it is necessary to use inert organic silicon, that is, silicone grease or a mixture of silicone + Teflon.
The best option is to use silicone lubricant from the manufacturer. It lasts about 4-5 years and then dries out.
Branded lubricant MX-4 in a syringe
Litol-24
If such a lubricant is not available, Litol-24 will do. This is a refractory lubricant that is not afraid of heat.
The third option is solid oil. The principle of action is the same.
Synthetic or semi-synthetic engine oil creates a surface film at any temperature. As a result, there is less noise and almost no wear. Motorists usually have leftovers in cans in the garage. But it is best to use it together with Litol-24.
WD-40 is well suited for lubricating non-separable coolers. The tube attached to the can can be conveniently inserted into the gap between the body and the impeller. Adhere to the following rules:
- Insert the tube as deeply as possible so that the lubricant (at least partially) penetrates the bearings and does not spray all over the gap.
- When inserting through the gap between the impeller and the housing, do not use much force to avoid damaging the parts.
- If after this procedure the problems remain (noise, “wedge”), repeat the process.
WD-40
The use of WD-40 to lubricate fans in computers is being actively discussed on the Internet. Opinions are contradictory. Some sources claim that the product copes with the task perfectly, while others indicate that it is not worth using. Meanwhile, on the official website of the manufacturer of WD-40 there is not a word that the composition can be used to lubricate PC coolers. The product is recommended for removing grease, bitumen stains, adhesive residues and cleaning electrical contacts. It can be used to lubricate parts that do not rotate at high speed. Fans obviously don't belong here. And yet, when treating the cooler bearing with a chemical composition called WD-40, there will be an effect, but not a long-term one. The percentage of oils in it is low, and the main components are chemically very active, which threatens damage to the surfaces of the moving parts of the fan, their jamming and failure of the device.
Graphite grease
Many experts do not recommend using graphite lubricant because:
- graphite is a conductor of electric current and can become a source of even greater problems than the noise of moving elements of the PC cooling system;
- graphite lubricant is used to treat heavy mechanisms moving at low and medium speeds, and coolers are not one of them.
On the other hand, in some specialized compounds sold in computer stores, you can find a very small amount of graphite dust, which improves the sliding of bearing elements.
Suitable medications for maintenance
You need to know what to lubricate your computer cooler with - not all substances are equally useful. It is believed that the most effective and best remedy is ordinary oil. Naturally, there is no need to use vegetable and animal oils. After all, if you use sunflower, olive or butter, the cooler will deteriorate - during operation the shaft heats up significantly. In addition, such a lubricant is not suitable for a computer cooler because these substances actively collect dirt and dust.
The most recommended cooler products are traditional synthetic or semi-synthetic motor oils, which are used for cars, sewing machines and various electrical appliances. What else can you use to lubricate your computer cooler? You can also use special bearing compounds as a lubricant. Silicone materials are also excellent.
It is not recommended to choose compounds that become thick over time as a lubricant for a computer cooler - these are various solid oils, lithols, and graphite lubricants.
WD-40 will also not work - this material, on the contrary, will wash away the remaining oil. This product is intended for processing products that, if they move, do not move very intensively. WD-40 is ideal for processing door hinges, but not for a computer fan - it runs at high speeds, and constantly. Using this product will significantly reduce the resource and service life of the cooler. Don't use it - it will only get worse. But what then? There are a number of other products that can be used for a computer cooler.
Which oil to choose?
Based on the above, the following oils have the best characteristics for lubricating fans:
- quite liquid;
- forming a film on the surface;
- having the effect of filling roughness and gaps.
This is a fairly large group of materials, and they definitely do not include animal and plant compounds in any proportions or variations.
The following products are most suitable for treating computer coolers: Low-viscosity oils. Among them are weapons-grade, transformer, machine, spindle, etc. They are distinguished by excellent penetrating ability and create a very thin film. Recommended for high-speed mechanisms with low dynamic loads.
Medium viscosity oils. This includes engine, transmission, etc. They form a thicker film, penetrate well and fill gaps, stay on the surface longer and can cope with high loads. They have a minus - they load the mechanism.
Separately, it is worth mentioning about high-viscosity lubricants. These include solid oil, lithol, etc. They can be used, but with caution, applying a tiny amount, and only for processing powerful coolers (for example, used in power supplies). Thick lubricating compounds do not penetrate well, but forced pressing into the gaps can help start up an almost “dead” device for some time (before purchasing a new fan). Small and microfans in laptops cannot be lubricated with such compounds. Meanwhile, specialized stores offer a wide range of lubricants for coolers. These synthetic lubricants are completely inert and operate in a wide temperature range (from -20 to +200...300 °C). Ease of use and precise dosing are ensured by a special syringe containing oil. And in most situations, it is better to use a ready-made solution (for example, SPO-1 or SPO-2 ).
Step-by-step instruction
We found out what to lubricate and what not to lubricate, it’s time to start maintenance. For work we will need:
- Phillips screwdriver;
- scalpel or knife with a sharp end;
- awl;
- tweezers;
- sash tool;
- vacuum cleaner;
- cotton buds;
- oil;
- Galosh gasoline or alcohol;
- paper with pen.
Before servicing the cooler, you need to get to it. This is what we will do.
How to remove the cooler
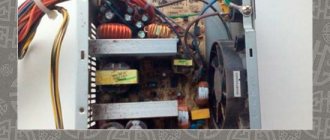
The fan is located in the power supply, so it needs to be removed and disassembled. Turn off the computer, disconnect the network cable located on the back wall of the system unit. It is difficult to confuse it with an interface one.
Now we remove the left side wall of the system unit, if you look at it from the front. To do this, use a Phillips screwdriver to unscrew two screws. In some cases, these screws have a large knurled head. They can be unscrewed with bare hands. In the photo below, the screws have already been turned out, and their seats are marked with circles.
The side wall mounting screws are out
Move the wall back a little and remove it. The power supply is located at the very top (less often at the bottom) of the system unit, closer to the rear wall.
The power supply is marked with an arrow
We take a brush and clean the inside of the system unit, sucking up the dust with a vacuum cleaner so that it does not scatter throughout the house.
We arm ourselves with paper and a pen, disconnect all cables going to peripheral devices - CD drive, hard drive, video card, etc. What and where we pull out, we write down, since in any power supply many cables remain unused, and when installing the power supply in place it is easy to forget what -connect. We write it down precisely for this purpose, and not so as not to confuse anything. Sticking something in the wrong place simply won’t work.
Peripheral power connectors
Now it's the motherboard's turn. There are only two connectors: the main one is the largest and powers the processor. Let's turn them off.
The power supply can be removed. To do this, unscrew the 4 screws securing the power supply to the back wall of the system unit, and hold the unit itself so that it does not fall on the motherboard and destroy the processor along with the video card. We remove the power supply from the system unit.
Places of screws for fastening the power supply and the system unit with the power supply removed
Healthy! If the length of the power cables allows you to remove the power supply from the system unit, then they do not need to be disconnected. There will be less work, and there will be no confusion with the connection.
Place the power supply unit on the table and unscrew the 4 screws securing the cover. Here you will need a very small Phillips screwdriver. In the photo below, the cover securing screws are marked with arrows.
These screws secure the power supply cover.
We remove the cover and find the cooler. It can be located on the back wall of the power supply unit or on the cover itself.
Two fan locations
We unscrew the screws securing the fan, dismantle it, not forgetting to disconnect its power cable from the power supply board.
Again, arm yourself with a brush and a vacuum cleaner, clean the insides of the power supply and the cooler itself from dust. At this point, dismantling the cooler can be considered complete. We put it on the table and carry out maintenance.
What kind of oil can be used to lubricate a computer fan?
In addition to special lubricants, it is permissible to use various oils as lubricants.
Machine. This is a good option; it will optimally lubricate the moving elements and eliminate unpleasant noise from the cooler. It is recommended to use oils of medium viscosity, for example SAE 10W30.
Oil for sewing machines or electric shavers. If you don’t have special lubricant or machine oil on hand, then this option is quite acceptable.
Vegetable. This is the worst thing you can think of to lubricate a cooler. Due to their properties, such oils do not remain on the surface, like machine oils, but dry out, coke and become very sticky, which contributes to the accumulation of dust and, as a result, failure of the cooler.
Oil selection
It is important not only to properly lubricate the bearing, but also to know what kind of oil to use. It is best to use silicone lubricant
The choice of such lubricants is quite wide. They differ in consistency, but practice shows that it is better to use a product of a thickness that is slightly softer than Vaseline.
The more the consistency differs from this indicator (thickness of Vaseline), the worse its characteristics. If the product is too thick, the cooler engine may not even start, especially after a long period of inactivity. Thick greases are not suitable for such tasks, as they will simply be squeezed out of the bearing. If the lubricant is too liquid, it will simply fly apart.
During operation of the laptop, the cooler accelerates to 5000 rpm. At this speed, the mechanism gradually wears out. Timely lubrication extends the life of the bearing. At the same time, you should not overfill it with oil; 1-3 drops are usually enough.
For lubrication, special service or machine oil for high-speed mechanisms is used. Such products have an adhesive property that allows them to stick to the part and not fly apart.
Any synthetic and mineral oils are suitable for lubrication. You can ask a driver friend for a few drops. Care products for hair clippers or electric shavers are quite suitable for this purpose.
Creaks and noises in fans arise from wear of the mechanism. Therefore, after several lubrications, the cooler will have to be changed. After several lubrications of the bearing, the cooler must be replaced, since its mechanism is exhausting its service life. It is better to change the fan in time than to take the laptop to a service center for repairs in case of more expensive breakdowns.
The properties of lubricants used in computer cooler fans largely determine the wear resistance of the latter. Incorrectly selected lubricant can lead to noise, vibration, and unit failure.
To prevent this from happening, it is important to know what and how to lubricate the cooler of a computer or laptop
What can't you lubricate?
Do not use oil of animal or vegetable origin: olive, sunflower, hemp, etc. It hardens and accumulates dirt, which leads to fan failure.
It is also undesirable to use graphite lubricant. This is an abrasive, particles of which will cause friction during operation and will lead to abrasion of the bronze race of the sliding bearing and failure of the fan. Graphite can also conduct electricity and short circuits will occur.
Do not use vegetable oils or graphite grease
Graphite grease
Numerous computer forums offer advice on how to choose oil for lubricating the cooler. Among the recommended ones are graphite grease lubricants. But professionals have a different opinion about this drug. Graphite lubricant will not make the device work easier, but will only worsen the situation. Due to the high graphite content, the lubricant is an excellent conductor of electricity and can cause a short circuit, which can damage the computer. In addition, the composition is more relevant for hubs and CV joints in a car - it is more effective in loaded mechanisms operating at moderate speeds.
The fan in the computer runs at high speeds. Even the simplest and smallest device, which cools weak processors from Intel or AMD, rotates at about 1500 rpm. The rotation speed of more powerful devices can reach up to 4 thousand per minute.
Therefore, before lubricating your computer cooler with a product containing graphite, you should think carefully. You can do more harm than good. Graphite lubricants will cause a decrease in cooler speed, will contribute to intense wear of the bearings in the mechanism, and will also lead to overheating.
Types of bearings
Before you begin disassembling and lubricating, it is advisable to know the type of bearing that is used in your cooler. This affects the choice of oil and lubrication method.
The following bearings are used in fans of household and computer equipment:
- Sleeve bearing is the most common and simplest type, which consists of a bushing with a rotating shaft. The bushing is covered with anti-friction material. WD-40 is suitable for lubricating them.
- Slides with screw threads (rifle bearing, Z-Axis bearing) - have specific threads on the axle bushing that recirculate the lubricant.
- Hydrodynamic (FDB bearing) - a modernized sliding bearing, where the rotation of the shaft is carried out in a layer of liquid substance, which is held inside the sleeve due to the pressure difference created during operation
- The rolling element (ball bearing, ceramic bearing) consists of two rings (balls), rolling elements and a separator. Ceramics can be used as a material. For rolling bearings, grease (silicone) is used.
- Oil Pressure Control (SSO) - Improved fluid dynamic bearing. A distinctive feature is a large amount of liquid (lubricant). To reduce wear, the shaft is centered by a permanent magnet installed in the base.
- Self-lubricating plain bearing (LDP) is an improved plain bearing. There is IP6X dust protection and a special slot for recovered oil, which increase the service life of the fan.
- Polyoxymethylene bearing (POM Bearing) is a modernized plain bearing. To increase service life, the shaft is coated with polyoxymethylene, which has a low sliding friction coefficient.
The article will discuss the lubrication of coolers with bearings of the first and fourth types: sliding and rolling.
The best lubricants for computer coolers
Molykote lubricants
Molykote Omnigliss is a dispersion of solid lubricants in mineral oil with anti-friction additives and corrosion inhibitors. It is a product with excellent penetrating properties, capable of filling the smallest gaps between parts to form a thin and very slippery film of oil. It is optimally suited for PC fans with plain bearings.
Molykote Omnigliss grease operates in the temperature range from -30°C to 80°C and is not afraid of moisture and dust. The stabilizers included in its composition prevent the gluing of solid particles (dust particles) and the formation of clots.
Molykote G-4700 is a synthetic grease for high-speed, highly loaded joints with high anti-corrosion properties. Well suited for fans with roller and plain bearings.
The product has an extended operating temperature range - from -40°C to 177°C, maintains consistency in humid and dusty environments and prevents the formation of dust clots. A one-time lubrication of a PC fan with Molykote G-4700 oil is enough for several years of active use.
Molykote G-4500 FM is a synthetic grease for high-speed rotating parts, including plain and rolling bearings. The product is very close in characteristics to Molykote G-4700 and differs from it only in the ability to be used in areas in contact with food. Although for PC users this does not matter.
EFELE lubricants
EFELE SG-391 is a synthetic grease with high anti-corrosion properties, compatible with various types of plastics, elastomers and metals. The product maintains its performance in the temperature range from -40°C to 160°C and is suitable for use in humid and dusty environments.
This is interesting: How to find out what motherboard is on your computer or laptop
EFELE SG-391 grease is suitable for both sliding and rolling bearings and is designed for long-term use. A computer fan lubricated with EFELE SG-391 will not require re-treatment for several years.
EFELE SG-394 is a heat-resistant synthetic grease with high anti-corrosion properties, intended for highly loaded high-speed joints. The product is suitable for lubricating sliding and rolling bearings, works in aggressive chemical environments, and is not afraid of dust and moisture.
The product is designed for long-term use. A cooler treated with EFELE SG-394 will eliminate noise for 1-3 years.
Steel CGC SPO lubricants
Steel CGC SPO-1 is a chemically inert synthetic oil designed for lubricating computer fans. Its operating temperature range is from -20°C to 200°C. The oil has good anti-corrosion properties, is suitable for use in dusty environments and is compatible with all types of bearings.
Steel CGC SPO-1, like other products in this line, is sold in 2 gram syringes. Therefore, unlike EFELE SG and Molykote lubricants, packaged in 200-gram aerosol cans, it costs customers very little.
Steel CGC SPO-2 is a fluid silicone grease for computer fans on plain and roller bearings. It forms an exceptionally smooth and stable film with a thickness of several microns at the point of application, therefore it is suitable for lubricating parts that are adjacent to each other very closely.
The product is chemically inert and does not lose its properties when heated. Its operating temperature range is from -30°C to 300°C.
Steel CGC SPO-3 is a restorative composite lubricant based on synthetic oil. Designed for lubrication of fans on plain and rolling bearings. Due to the fact that it contains hard diamond particles (artificial nanodiamonds), it, according to the manufacturer, is capable of restoring parts damaged by friction and extending the service life of fans.
Steel CGC SPO-3 grease retains its properties at temperatures from -30°C to 300°C and can be used in very dusty environments.
How to remove the fan?
When removing the processor cooler, be careful not to damage the chip and surrounding elements. Fans are attached in two ways: using locks or bolts. There are also non-removable ones.
If the cooler is secured to the radiator with latches, simply bend it out and pull it out of the latches. Then disconnect power from the motherboard. The same goes for the bolts - unscrew them with a screwdriver and remove the fan.
With a fixed structure, only surface cleaning can be carried out.
To remove the fan from the power supply, unscrew the power supply from the case and disconnect all wires. Then unscrew the cap and remove the cooler. Remember how the fan is positioned so that you can return it to its original position at the end of the procedure. In some power supplies, the power cable cannot be disconnected because it is soldered to the board - in this case you will have to work in cramped conditions.
There are 120 and 80 mm fans on the power supply, usually small ones are noisy
To remove the cooler from the video card, remove it from the motherboard slot. Then use a thin screwdriver to unscrew the cooling system bolts. Depending on the video card model, the cooler can be built into the radiator or mounted with separate bolts. You only need the fan itself.
Step-by-step algorithm for disconnecting a video card cooler
How to disassemble the cooler?
Having completed these simple steps, proceed directly to disassembling the fan itself:
- Peel off the label on the side where the wires are located.
- Using a sharp object, pry up the rubber plug and remove it.
- Remove the retaining ring with a slot on one side. To do this, insert the tip of a knife or thin screwdriver into the slot and turn it 90° so that it moves apart and lift the ring.
- Remove the rubber sealing ring framing the rod.
- Disconnect the impeller from the fan frame.
- Then you can clean and lubricate.
Remove the sticker and pull out the retaining ring
Following the retaining ring, pull out the rubber seal and separate the parts of the cooler
How to lubricate a PC cooler?
How to lubricate a PC cooler?
First you need to understand what is the best way to lubricate the fan in your computer. The first thing that comes to mind is oil. Naturally, not vegetable, not olive and not animal! After all, if you use such a lubricant, you may completely ruin the cooler. Dust and dirt will simply begin to stick to it intensively.
Therefore, we recommend using the following to lubricate a processor or video card cooler:
- Engine oils (i.e. motor oils - synthetic, semi-synthetic);
- Lubricating oils for sewing machines and various electrical equipment;
- High performance bearing lubricants;
- Special silicone lubricants.
You should not use lubricants that tend to thicken. These are solid oil, cyatim, litol, etc. Will WD-40 be suitable? Again, no. This lubricant option from an American manufacturer is intended only for processing those surfaces that are rarely in motion. For example, a door hinge. Whereas the cooler works constantly and at high speeds.
In addition, on various forums, many users recommend using graphite lubricant to lubricate PC coolers. However, the opinion of experts on this matter is different. It will do more harm than good. Firstly, it conducts current well, which can cause a short circuit. Secondly, graphite grease is designed to lubricate heavily loaded mechanisms that operate at moderate speeds.
However, the cooler is a high-speed device. For example, even the simplest and smallest fan on a weak Intel or AMD processor can rotate at a speed of 1000-1500 rpm. What can we say about expensive and powerful cooler models from such manufacturers as deepcool, zalman, coolermaster, etc.
Therefore, graphite lubricant cannot be used. Because of this, the fan rotation speed will certainly decrease, bearing wear will increase, etc.
What is silicone grease PMS-200
This is also a fairly popular product, most often supplied to the market in small plastic bottles with a screw-on screw cap. Additionally, containers with PMS-200 are equipped with a dispenser-plug with a long spout, through which lubrication should be carried out. You can also find this oil packaged in syringes in stores.
Like the previous product, this lubricant belongs to the group of universal ones. In addition to coolers, for example, it is very often used to process rubber profiles of windows and doors, skis, rubbing parts of exercise equipment, reels, etc. The operating temperature range of this oil ranges from -50 to +200 °C. The viscosity of this product is 200 cSt. This polymethylsilicone liquid is produced in Russia by several manufacturers. In any case, when producing this silicone lubricant, which is used quite often for coolers, companies are required to comply with the standards provided for by GOST 13032-77.
What is important to know about a computer fan?
What is important to know about a computer fan?
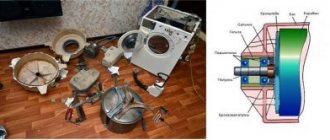
Many system units are equipped with several fans at once. As a rule, there are three of them. These are coolers designed to cool the computer's power supply, processor and video card. All of them are extremely important for the stable operation of the system. If even one fails, there can be big problems due to overheating of the PC.
What to do then? It's simple - carefully monitor whether the computer is overheating, whether it makes strange sounds, or whether additional noise appears during its operation. Each of the listed points is a clear symptom indicating the need to lubricate the PC fan.
Why does a computer cooler periodically require additional lubrication? It's all in its design. As a rule, the device operates using sliding or rolling bearings with a special shaft. It rotates inside a sleeve or cylinder, where there is a lubricant that creates a special oily film. Gradually it evaporates or becomes contaminated, and this leads to the fact that metal parts begin to come into contact with each other. As a result, noise appears, the fan runs much slower and the computer heats up.
Fan operating principle
Most fans are supported by journal bearings, which consist of a shaft that rotates inside a cylinder or sleeve.
The cylinder consists of porous metal lubricated with oil. When the shaft begins to rotate, some of the oil from the bushing moves closer to the shaft, creating an oil film. This way the metal parts hardly touch, are not damaged, and the noise is almost inaudible.
Ideally, there is always enough oil inside the cylinder and the fan does not wear out. But at some production costs, for example, if the bearing is poorly glued, some of the oil evaporates. Then the fan will start to work slower, its parts will begin to rub against each other and wear out, and the computer will overheat. There will be noise.
In this case, you should add one drop of oil into the cooler.
How to lubricate a processor fan (cooler)?
How to lubricate a processor fan (cooler)?
So, you already understand that in order for the cooler not to make noise and various parts of the computer not to get hot, it needs to be cleaned and lubricated. To do this, we offer you the following action plan:
- First of all, we disassemble the system unit case to gain access to the coolers.
- It is usually easiest to remove the CPU fan since it is located in a visible place. So let's start with that. You will need a screwdriver to unscrew the bolts and remove the cooler.
- Along with the processor fan, we also remove the radiator. Separate each one from each other and thoroughly clean it. You can use a vacuum cleaner. Then use cotton swabs soaked in alcohol (cologne or vodka). It is advisable to clean all ribs, parts and accessible surfaces.
- If you have thermal paste, it’s a good idea to apply it to the contact points between the radiator and the processor. However, do not forget to first remove the old paste with alcohol.
- Then we put everything back together. Now we move on to the lubrication procedure. To do this, remove the special sticker located in the center on the processor cooler. Next, you need to pull out the small rubber plug (for example, using tweezers or a screwdriver). Be extremely careful.
- Under the rubber band you will find a bushing and axle. Using a match, toothpick or cotton swab, remove the old grease.
- After which you can start lubrication. Just apply a little oil to the fan shaft. However, remember that there is no need for a large amount of lubricant. After all, when applying a rubber stopper, all excess will be squeezed out. In addition, this may cause the case to become dirty, and the protective sticker will be difficult to reattach.
- As you already understood, the final stage is returning the rubber plug to its place. In this case, you need to make sure that the lubricant does not come out. Then we wipe the cooler body and move on to the sticker. If it is very worn, it can be replaced with an ordinary piece of tape. Just remember to remove all excess adhesive tape, otherwise they will rustle and make additional noise due to the running cooler.
You can also lubricate the internal parts of the fan. But it's quite difficult. Moreover, you will have to completely disassemble the cooler. Therefore, take on such work only if you are confident in your abilities and have some experience. Otherwise, you can easily damage the cooler.
How to lubricate a fan
To lubricate the fan, you need to disassemble the computer and remove the cooler from it.
Place the fan on the table and carefully remove the sticker. Part of the sticker is located just above the gap for the wiring.
From here it is easier to bend it.
Remove the rubber plug from the middle of the fan
To do this, you can use a small screwdriver, carefully placing it behind the edge of the plug.
You will see the end of the shaft inside the cylinder in the resulting depression. Place one drop of oil into the indentation.
Return the rubber stopper to its place and cover it with a sticker on top. Sometimes the sticker stops sticking. Then you can use regular electrical tape. After the fan has returned to its place, the computer must run for several minutes before the oil completely lubricates the cooler. After some time, the computer will become quieter and stop getting too hot.
As you know, a fan or cooler is a very important part of your computer. It regulates the temperature of the processor and prevents it from overheating. Everyone knows the sound of a computer fan running. But if at one point you notice that this sound has changed, for example, your computer began to hum like an airplane taking off, then this means that the fan clearly needs help, that is, cleaning and lubrication.
Instructions
Unscrew the bolts using a screwdriver, disconnect the connector, and remove the fan from the case.
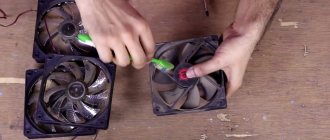
Using a brush or cotton swab, carefully clean the fan blades and fan housing. Remove all accumulated dust and dirt.
Under this rubber band you will find the fan hub and axle, which you should lubricate. To perform this operation, take spindle or machine oil. You can also use a CV joint. For lubrication, apply a little oil to the fan shaft.
The oil should cover it, but do not drip too much, because otherwise, when you put the rubber in place, the oil may leak out of the recess and stain the body, then the sticker will not be able to stick back. To apply the oil more accurately and to prevent it from spilling, you can use a medical syringe. In this case, the lubricating oil must be very thin so that the syringe flows freely.
You can also lubricate the internal parts of the fan, but to do this you will have to disassemble it. We strongly advise you not to do this if you are not a specialist - a non-professional will not be able to cope with such a thin one, and you risk damaging the cooler.
Every laptop owner has encountered a problem in which the device begins to get very hot and at the same time make strange sounds. The reason for this is contamination of the cooler. After all, during operation, dirt and dust regularly enter the laptop. As a result, the fan, designed to cool the “brains” of the computer, becomes dirty and sometimes even stops rotating. What to do? Of course, lubricate and.
The first thing you need to understand is how to lubricate the laptop cooler. Is the oil ok? Maybe. But under no circumstances should it be plant or animal! Of course, for some time such oil will help you get rid of noise, but then the cooler will simply fail. The fact is that sunflower oil dries out very quickly, and all kinds of dust and dirt stick to it with redoubled force.
Also, you should not lubricate the laptop cooler with grease, petroleum jelly and other thick fatty lubricants, which the centrifugal force will squeeze out and scatter throughout the entire inside of the device. Maybe alcohol or tar? No, they will completely worsen the fan’s performance.
Then what kind of lubricant is suitable for a laptop cooling system? It must meet several requirements:
- Have an adhesive base;
- Be of a fairly thick, viscous and light consistency;
- Capable of operating at high speeds (the cooler produces about 4-5 thousand rpm on average);
- Withstand high temperatures (at least up to 100 °C).
Considering everything said above, it turns out that several options are suitable:
- Synthetic automobile oil.
- Lubricating oil for sewing machines, power tools, hair clippers, etc.
- Silicone grease designed for lubricating locks, hinges, mini-gearboxes and other household appliances.
- Special lubricant for coolers (for example, Molykote Omnigliss).
Is it possible to lubricate a laptop cooler with WD-40? We still wouldn't recommend it. Of course, the fan will stop making noise for a while, but WD-40 can damage other internal components. In addition, this product smells quite unpleasant. And don’t forget that WD-40 can be used to lubricate the same door hinge, which does not rotate at such a tremendous speed as a cooler.
How to lubricate the cooler of a video card or power supply?
How to lubricate the cooler of a video card or power supply?
The process of lubricating and cleaning a video card cooler or power supply is often a little more difficult than a processor. This is usually due to the fact that you have to disassemble the body and unscrew more bolts. Otherwise, it is impossible to gain access to the lubrication point.
Also, coolers for video cards and power supplies are not always the same. Some have a lubrication point on top (just under the sealing sticker), while others require you to remove the radiator, disconnect the fan and then just move on to cleaning and lubrication. In all other respects, the procedure is similar to working with a processor fan.
What to do with a non-separable cooler?
What to do with a non-separable cooler?
Modern computers are often equipped with non-separable coolers. Moreover, most often they can be found on some nvidia geforce video cards. Lubricating such fans is much more difficult. After all, there will be no special rubber plug, removing which you gain access to the bushing. Of course, someone, pardon the pun, manages to disassemble a non-separable cooler. However, most often this ends in the breakdown of fasteners and other parts.
A less risky option is to make a hole in the center of the axle to pour grease into. To do this, you can use a drill or a hot needle. If you still decide to disassemble the cooler, then for many models you will have to make several holes at once in order to cut off the latches holding the bearing sleeve.
But you may also come across a non-separable fan, where the impeller can be easily removed with a flat-head screwdriver. Then the procedure for cleaning and lubricating it will not cause any difficulties.
Disassembling the cooler before lubrication
The fans that are installed to cool the CPU, power supply, and graphics adapter have the same design. However, they have different overall dimensions and, accordingly, performance. Therefore, they disassemble and lubricate all computer coolers, adhering to the same scheme.
To lubricate the cooler , it must be disconnected from the radiator and then disassembled. If the cooler is not removed, then it is not possible to lubricate it, because the side accessing the lubrication area is usually pressed against the radiator.
The cooler is often attached to the radiator of the central processing unit with barely noticeable latches. From the side to which the wiring is connected, carefully peel off the label attached to the sticky layer. They tear it off smoothly, without making sudden movements.
Some cooler models are equipped with a rubber stopper. To remove it, carefully pry the cork over the edge with a knife. There is nothing complicated about this , since the plug is inserted without securing it.
The plastic wings in the cooler body are held by a flat split washer, which is fixed in the axial groove. If the washer is not removed, the impeller will not be able to be removed, and this, in turn, will make it difficult to lubricate the bearing. To remove the washer, use two tools at once. The cut is almost impossible to notice, therefore, pressing lightly with the needle, move the washer around in a circle until it catches on the cut site.
Now you need a small screwdriver. Use it to press the washer next to the cut area on one side, and use a needle or awl to pry up the other side, then remove the washer from the groove in a circle. All manipulations must be done carefully so as not to break the washer. It happens that it pops up and you have to spend time searching. Without the washer, the cooler will not work, as the impeller will dangle. After the impeller is disconnected, remove another rubber ring.
With an old cooler, the rubber ring may be significantly worn out, and particles of worn rubber remain in the place where it is fixed. It is impossible to find such a ring on sale, and without it, even lubricated cooler bearings make noise during operation, because there is a longitudinal displacement of the impeller axis. In this case, rubber rings from old coolers, if available, may come in handy.
Replacing thermal paste on a video card
To cool the graphics adapter, a cooler with a radiator and a different number of fans (sometimes without) is used. In order to effectively transfer heat from the chip to the heatsink, a special “gasket” is used - thermal paste.
Thermal paste or thermal interface is a special substance consisting of a tiny powder of metals or oxides mixed with a liquid binder. Over time, the binder can dry out, resulting in a decrease in thermal conductivity. Strictly speaking, the powder itself does not lose its properties, but if plasticity is lost, air pockets can form during thermal expansion and contraction of the cooler material, which reduce thermal conductivity.
If we have a stable overheating of the GPU with all the ensuing problems, then our task is to replace the thermal paste. It is important to remember that when dismantling the cooling system, we lose the warranty on the device, so if the warranty period has not yet expired, contact the appropriate service center or store.
- The first step is to remove the video card from the computer case.
Read more: How to remove a video card from a computer In most cases, the video chip cooler is secured with four screws with springs.
They must be carefully unscrewed.
Then we also very carefully separate the cooling system from the printed circuit board. If the paste has dried and stuck the parts together, then you should not try to tear them apart. Move the cooler or board slightly from side to side, moving clockwise and counterclockwise.
After dismantling we see something like this:
Next, you should completely remove the old thermal paste from the radiator and chip with a regular napkin. If the interface is very dry, moisten the napkin with alcohol.
We apply a thin layer of the new thermal interface to the graphics processor and radiator. For leveling, you can use any available tool, for example, a brush or a plastic card.
We connect the radiator and the printed circuit board and tighten the screws. To avoid distortion, this should be done crosswise. The scheme is like this:
This completes the process of replacing the thermal paste on the video card.
For normal operation, it is enough to change the thermal interface once every two to three years. Use quality materials and monitor the temperature of your graphics adapter, and it will serve you for many years.
We are glad that we were able to help you solve the problem.
Add the Lumpics.ru website to your bookmarks and we will be useful to you. Thank the author and share the article on social networks.
Describe what didn't work for you. Our specialists will try to answer as quickly as possible.
Processor Cooling System Lubrication Procedure
Having disassembled the cooler, proceed directly to lubricating its parts:
- Under the rubber ring there is a bushing and fan axis that need to be lubricated. Apply a small amount of oil to the fan axis.
- The lubricant should cover the axle, but do not drip very much, otherwise, by applying a rubber plug, the liquid may leak from the recesses into the housing itself and stain it. In addition, the previously removed label will not stick to the greasy area. Using a medical syringe will help you avoid all this. It will help distribute the oil more evenly over the entire surface. The lubricant should not be thick, as this will prevent it from flowing out of the syringe.
- You can also treat the inside of the fan with oil, but to do this you need to completely disassemble it. Experts do not recommend doing this at home unless you are sure that such delicate work will not end in damage to the cooler.
- Now you need to return the rubber plug to its original place, making sure that the lubricant does not spread and stain the body.
- Wipe the body from any remaining oil, and then return the label to its place. Often, after peeling off, it loses its shape or does not want to stay in place. In this case, it is advisable to replace it with stationery tape. Cut out a piece of the same shape and size.
- They assemble, install the fan, and at the end connect it to the connectors. That's all, actually.
Cleaning the processor cooler will have a positive effect on its performance. But we must not forget that after a certain period of time, due to thermal effects, the lubricant will evaporate - which is why this procedure must be carried out on a regular basis.
Lubrication
There is a sticker on the cooler - usually it is located on the back of the impeller in the center. There is usually a mechanism underneath the sticker. Sometimes you need to remove a rubber plug to gain access to the hub and axle.
Under the rubber band there is a bushing and an axle. Using a cotton swab or toothpick, thoroughly clean the axle - you need to remove the old grease. It should be cleaned completely. Then they proceed directly to the lubrication process itself, preparing the preparation for applying the composition. Apply a little lubricant to the axle. There is no need to use large amounts of lubricant. After installing the rubber plug, the excess product will be removed. Excessive lubrication may stain the housing. Then it may be difficult to get the sticker back.
Then the cork is returned back. It is important to ensure that the lubricant does not come out from under it. Then the cooler is wiped and a sticker is applied. If it is very worn out, then it is replaced with tape. But the piece must be cut strictly to size, otherwise the tape will rustle.
Laptops and game consoles
If your laptop or console starts to make noise, it is strongly recommended not to carry out maintenance at home. The risk of damaging something due to insufficient qualifications is very high. It is better to contact a service center, and if the warranty has already expired, then many private workshops are willing to service laptops such as ASUS, HP, Acer Aspire and Lenovo; you can also contact them to service PS3, PS4 or Xbox consoles.
Also, do not forget that hard drives make a lot of noise when operating, and if silence is a priority, then they should be replaced with SSD drives. And in order to reduce noise, it is recommended to use closed cases with noise-absorbing inserts and carry out maintenance on the main cooler at least a couple of times a year, clean it of dust and lint, and lubricate it. The procedure will significantly reduce the load on other cooling devices, and you will have to change the thermal paste somewhat less frequently.