Share on social media networks:
Puzzles are a fun activity and a great way to develop a child's imagination, logic and attentiveness. This hobby will be interesting not only for children, but also for adults. The number of details and complexity of the drawing can be varied - from the simplest of several dozen pieces with illustrations of cartoon characters to several thousand, from which amazing pictures are obtained: landscapes, world maps or architectural monuments. This canvas can be used to decorate the interior of your home or office. But how to hang a puzzle on the wall without damage or deformation? What to do if there is no frame and the mosaic was assembled on the floor? In this case, there are some tips. The process may seem complicated at first glance, but in fact, it is easier than you think. The main thing is to do the work carefully and carefully, but first the assembled parts must be secured.
We've completed the puzzle - what's next? Let's decorate the interior: make a picture from puzzles
A little dark humor: putting together puzzles develops not only logic, imagination and fine motor skills, but also myopia and osteochondrosis.
To justify such a hobby, we will decorate the interior with puzzles. How to make a picture from puzzles so that it looks beautiful and neat on the wall? Let's learn some nuances so that the design of pictures from puzzles will be successful. Our tips will help you avoid annoying mistakes so that glued puzzles do not have to be thrown into the trash.
How to assemble puzzles
Those who are not in the know will think that this is just a toy for children, but in fact, adults are mainly interested in assembling puzzles. A great hobby to unwind after work. But a beginner, without understanding the nuances, can, on the contrary, undermine the nervous system.
To enjoy the process of assembling puzzles into a mosaic, you should prepare a little:
- find a place to assemble and store the puzzle;
- learn selection methods;
- sort the parts;
- figure out what to do with the finished puzzle.
It's fun to put together large puzzles, but you'll need a lot of space to lay out and fold the pieces like this. Leaving it on the floor or on the table is not an option, since this is not an activity for one day. The solution is to purchase a special mat for putting together puzzles. See how it looks in the video:
You can make a mat yourself from any thick, non-slip fabric. Replace the inflatable roller with foam rubber, and use elastic instead of belts. It is comfortable to work on even on a soft sofa. After the “meditation” session, the mat with the assembled fragment is wound onto a roller, secured with straps and placed in a corner until the next day or transported, for example, to the country house.
The work begins with sorting the parts by color and individual objects and patterns. As always, there will be a lot of blue details from the sky, sea, and ocean. It is convenient to store individual piles or collected small fragments in organizers or in candy boxes.
There are a lot of techniques on how to assemble them correctly; there is even a forum online for those who like to assemble puzzles. You can search for a part by sample, by puzzle, or by brute force. Everyone chooses their own option, but you need to start with the simplest section. If you want to become a cool puzzle collector, don't think about techniques, try experimenting instead.
Either way, you'll have a good time. It’s natural that one would want to be proud of such titanic work. For example, hang a puzzle on the wall, and how to glue it and arrange it into a picture, read below.
Gluing the puzzle from the front side
Fixation occurs using glue or using a special film for fastening puzzles. Glue is poured between the parts, holding everything together tightly. The disadvantage of the option with glue is that you can’t take anything apart later.
The self-adhesive film for the puzzle is glued to the front side and holds the pieces together well. To make the design clearly visible, choose a glossy film. A good sample does not stretch or bubble. If it sticks unevenly, you can peel it off and try again.
Tips from the pros:
- Choose transparent glue that does not become cloudy or dry out over time.
- PVA glue is fine, but make sure it's a quality product.
- There is no need to skimp on film.
- Don't even think about roll tape unless you have someone nearby.
Before starting the gluing process, it is necessary to clean the painting from dust, lint and other contaminants. To avoid staining the table with glue, place tracing paper, parchment or a piece of wallpaper underneath.
What kind of glue should be used for mosaic?
Even experienced craftsmen prefer the usual PVA glue, which is familiar to all people; the solution has long proven itself to be the best and is also non-toxic. Some puzzle suppliers immediately include a small tube of fixing compound in the kit; these products are excellent for completing the work and can guarantee good adhesion of two planes.
Often, after the next repair, glue remains for applying vinyl wallpaper; it can also be used as an alternative to special means. Transparent household tape is a great way to save money; masking adhesive tape is not popular due to its low adhesion rates.
Gluing the puzzle from the wrong side
The main question is how to turn the puzzle face down. You will initially need to assemble on an easily movable surface if you plan to attach the finished painting from the wrong side. This can be a sheet of fiberboard, plexiglass or a special mat. In this case, simply cover the top with a durable material, for example, another sheet of fiberboard, and quickly turn the entire structure over to the other side.
Another option is to use cling film:
- In this case, the canvas needs to be assembled on a substrate, which is slightly larger in size than the assembled puzzle itself.
- Wrap the finished puzzle together with the backing with cling film. You can make several layers of cling film.
- Then the entire structure needs to be carefully turned over, placed face down, and the cling film cut along the backing.
- Turn the edges of the film to the side and carefully remove the backing. Now you can glue the puzzles, and the cling film will protect the table from glue.
It is better to glue large paintings first from the front side and then from the back side. First, coat the front side with glue and wait until it dries completely. Now turning the mosaic over will not be difficult. Turn over carefully and coat the wrong side with glue.
Gluing from the inside out
Creating a rigid base involves turning the workpiece over. For a small area this will not cause complications, but large fabrics may not withstand such treatment, even after pre-gluing the seams. Therefore, assembly must be carried out immediately on a rigid base, or the workpiece must be pulled onto it using fabric or polyethylene.
The flip is carried out by clamping the picture between two solid plates (plywood, fiberboard, PVC, chipboard) and then changing the position. If there is no shield, then you can fix the structure with cling film. Then the canvas needs to be leveled again, and then connected to the new base.
Depending on the composition of the glue, one or both surfaces are smeared, and the time interval recommended by the manufacturer is maintained before joining. Before further use, the glued puzzles must dry thoroughly so that there is no moisture left in the structure, which can cause deformation of the parts and the development of mold.
Replace glue for puzzles with tape
The use of adhesive tape significantly speeds up the fastening of mosaic parts, but only from the wrong side. At the same time, the number of applied stripes does not in any way affect the strength and quality of fixation. Moreover, the more overlays, the stronger and stiffer the substrate. Gluing should begin from the top from one of the corners, each time making an overlap of at least 10 mm.
Excess material should be cut off immediately, otherwise it will stick to the paint and, if pulled off, damage the laminated layer. If the adhesive tape is intended to be a permanent base, then it is better to choose an aluminum mounting model. This type is characterized by increased strength and adhesion.
How to make a picture from puzzles into a frame
There are many ways to make a picture frame from puzzles:
- The most obvious is to purchase a ready-made frame that fits the size of your mosaic and follow the instructions. Frames for large-sized puzzles can be made to order.
- A beautiful frame emerges from the ceiling plinth. You just need to cut it and glue it to the base around the perimeter of the picture using liquid nails or instant glue. Ideal, because such a frame can be painted in a variety of colors.
- An interesting idea is to make a frame from unsharpened colored pencils, colored slats, pebbles, shells, and buttons. The base in this case should be larger than the drawing itself. The selected material of the required size is glued along the edges and the picture is ready.
What do you glue puzzles onto to make a picture? As a basis you can use:
- fiberboard sheet;
- ceiling tiles;
- Styrofoam;
- cardboard, canvas;
- fabric, gauze, tulle.
You know how to make a picture from puzzles. All that remains is to find out how to insert the glued picture into the frame:
How to hang a puzzle without a frame
The puzzle picture will look good on the wall even without a frame. In some room decor styles, a frame will even be out of place. How to carefully hang a pre-glued and well-dried puzzle on the wall:
- Using double-sided tape. If the canvas is small, it is enough to cut out a few squares of about two by two centimeters. Glue one in the corners and one in the center. Peel off the paper on the other side and apply it to the wall. If the puzzle is large, then glue it with tape around the entire perimeter and one strip in the center.
- Using sewing pins, but this option is suitable for small paintings.
If you are absolutely sure that a puzzle on the wall will be appropriate, you can firmly glue it to the wall. The glue moment in this case is the most suitable. But if anything happens, you definitely won’t be able to restore the wallpaper and will have to repair it.
Pictures from puzzles in the interior
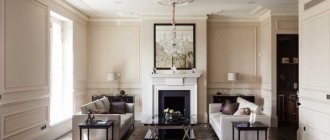
Puzzle mosaics will perfectly decorate the walls of any room. Of decisive importance will be the fact that the picture also depicts the framing option itself:
- For a living room or hallway in a classic style, a baguette would be a good solution.
- For a children's room, you can make a frame from scrap material. Laces, ribbons, colored slats, and pebbles are perfect.
- In the bathroom, you can hang a sea-themed painting framed with shells, pieces of sea salt and corals.
- For the kitchen, a puzzle depicting a fruit still life would be a good option. The frame in this case can be either classic wooden or decorated with twigs, dried leaves or artificial fruits.
The amazing is nearby. It used to be just a children's puzzle, but suddenly for many adults, the puzzle became a hobby for many years. Moreover: it has become interior decor. It's all about the image itself and your perseverance. Go for it and you will definitely be able to collect not only 200 parts, but also 2000!
How can you hang completed puzzles on the wall without a frame? (photo, video)
Puzzles are a great way to develop a child’s logic, motor skills, attentiveness, and eye. This is also an opportunity to occupy him with something safe for a while, and the site https://bontoy.com.ua/catalog/pazly/ will help you purchase interesting models. Moreover, this hobby is interesting not only for children, but also for adults, because the number of pieces that need to be collected, as well as the design printed on the front side, can be completely different, from a banal cartoon character to a map of the countries of the world. Naturally, if you have assembled a gorgeous map of three thousand pieces (or more), you hardly want to take it apart. And we are faced with the question: how to glue a drawing from small pieces and hang it on the wall, with the slightest loss for it, or with such violations that can be easily corrected. The ideal option would be, of course, without any losses at all, with further decoration of the wall in the house. But what to do if the puzzles did not have a frame to begin with; they were assembled on a piece of newspaper on the floor? In this case, our advice will help you. In fact, gluing the assembled puzzle together is much easier than it might seem at first glance. Moreover, there are several ways to do this. The main thing is that after assembly, choose the right option that is suitable, and then act carefully and clearly.
Method one. We use tape. In fact, this is one of the very first options that comes to mind. In order to glue the puzzle with tape, you need the widest tape and a folded pattern. If you are confident in your accuracy and the picture is not very large, then the tape can be applied to the front side. Otherwise, it would be better to turn it over (photo 1). Carefully apply horizontal stripes, then vertical ones. Excess tape can be cut off.
Method two. PVA glue. The advantages of this method are that it is the cheapest, and the puzzle does not need to be turned over. Apply glue directly to the front side. It is advisable to do this quickly as it dries easily. Don’t be afraid of streaks and stains - when they dry, they will disappear, forming a thin transparent film (photo 2).
After you have glued the front side, it is a good idea to glue the large design onto cardboard or any other hard surface using the same type of glue.
Related article: How to make a shelf on the wall with your own hands
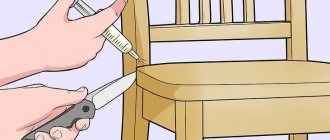
Method three. Special glue for gluing puzzles, for example this one (photo 3).
You can use special glue, which, according to manufacturers, does not harm the front side. This tube is enough for four puzzles with a thousand pieces each. It must be applied with a sponge, which is on the bottle, directly on the front side. To protect the work surface, it is better to place paper under it. The glue dries for about an hour, then the sponge must be washed with water.
Method four. Self-adhesive film. In principle, on the reverse side of such a film, instructions for action are depicted in simple pictures. Separate the paper from the film by about five centimeters (photo 4).
Then we apply self-adhesive tape to the puzzle, glue a separate edge, then evenly and slowly pull back the paper with one hand and cover the entire side of the puzzle. Naturally, you need to glue it on the reverse side. After gluing, carefully smooth the film, pierce the bubbles that were created with a needle to release the air. We cut off the excess (photo 5) and you can broadcast it on the wall.
Review of the best glues for puzzles
Adhesives differ in the quality of their adhesion and the appearance they give to the glued surfaces.
Step Puzzle
- Without smell;
- dries in 2 hours;
- glue consumption – 80 ml per 1 thousand parts;
- applied to the front side of the image in two layers with a break of 1.5 hours;
- after drying it forms a transparent film;
- masks surface defects, neatly connects torn parts;
- To strengthen the painting, you can additionally apply 1 layer of glue to its reverse side.
Ravensburger Puzzle Conserve
- Has an aerosol release form. The glue from the bottle flows onto the foam nozzle. It does not dry out and remains suitable for work for a long time.
- One 0.2 liter cylinder is enough for 4 thousand parts.
- Drying speed of 1 layer of Ravensburger glue is 1 hour.
- After drying, the film is colorless.
Due to the high degree of penetration between the elements of the painting, it can only be applied to one side.
Fix Puzzle Conserver Permanent
There is a sponge dispenser, so no brush is needed for application. After cleaning the front surface, the glue is applied so as to get into the gaps and crevices between the parts. Shake the bottle before application.
Initially it is white. After drying, the layer becomes transparent and the image is brighter. Used sparingly. Dries in 3 hours.
Educa
At the tip of the balloon there is a foam sponge that absorbs and distributes the composition evenly over the image. The drying time of the layer is about an hour. After drying, there are no streaks or other marks left; after drying, the film becomes transparent. Consumption - a 0.25 liter cylinder is enough for 5-6 thousand parts.
Educa glue can be used by children under 3 years of age.
Ginger cat
Packaged in a bottle with a dispenser. 2 hours after application, the painting can be glued to the base and placed in a frame.
KSK-M
- One bottle (80 ml) is enough to cover an area of at least 0.4 square meters.
- Several layers dry in about 2 hours.
- Before the glue dries completely, you can wash it off with soapy water.
- Odorless, forms a glossy film.
How to hang a puzzle on the wall?
Share on social media networks:
Puzzles are a fun activity and a great way to develop a child's imagination, logic and attentiveness. This hobby will be interesting not only for children, but also for adults. The number of details and complexity of the drawing can be varied - from the simplest of several dozen pieces with illustrations of cartoon characters to several thousand, from which amazing pictures are obtained: landscapes, world maps or architectural monuments. This canvas can be used to decorate the interior of your home or office. But how to hang a puzzle on the wall without damage or deformation? What to do if there is no frame and the mosaic was assembled on the floor? In this case, there are some tips. The process may seem complicated at first glance, but in fact, it is easier than you think. The main thing is to do the work carefully and carefully, but first the assembled parts must be secured.
Frames for every taste and for any format
At IKEA you will find a wide selection of frames in a variety of shapes, colors and styles.
Some are very simple in appearance and are standard in size, from A6 (10.5 x 14.8 cm) to A1 (59.4 x 84.1 cm). Others come in fewer formats, but have a more sophisticated appearance. Do not forget that the frame can play no less a role in the interior than the photograph in it.
When choosing a specific option, it is important to consider the style and color scheme of the room. Our advice is to use contrasting colors to make your photo stand out. For example, a black frame will look great on a light wall, and a white or silver frame will look great on a dark one.
Method one - tape
One of the most common options is to assemble and hang a puzzle on a wall in the ground:
- It is best to assemble the picture directly on a solid base - cardboard or plywood.
- After assembly, we put the same pre-prepared plywood (chipboard) on top, the size or larger of the picture, and place it on top.
- We secure it on all sides with money binders - you can use regular clothespins.
- Turn it over.
- We remove the top and begin gluing it with wide overlap tape, grabbing the edges of the base on which we assembled.
- Using a utility knife, trim off the excess along the edges.
- We pierce the bubbles and smooth out the unevenness with a ruler.
Important! If you do assemble the puzzle on the floor or table, you need to place thin paper or newspaper under it, carefully lifting the edge, stretch it diagonally, and then follow the method described above.
Method two - PVA glue
Apply glue to the front side with a sponge. You need to do this quickly so that it does not dry out. Don't worry, stains and stains will disappear after drying and only a thin, transparent film will remain.
Important! For extra strength, it is better to glue your picture to cardboard.
You can also use special glue for puzzles - it dries quickly enough (in an hour) and is convenient for using large mosaics (3000-4000 thousand). The principle is the same as with PVA glue.
Important! To avoid damaging the work surface, you can place newspaper on it.
What you need to glue puzzles
If a person takes the preparation of accessories and components seriously, then everything necessary will be at hand at the time of work, this approach will protect the master from awkward moments.
The list of tools and materials looks like this:
- Glue.
- Base.
- Brush.
- Foam sponge.
- Roller.
- Knife or scissors.
If it was decided to purchase a special glue for the process, then before using the mixture it is important to familiarize yourself with the manufacturer’s recommendations, temperature conditions, and also clearly set the time for complete hardening.
How to hang a puzzle on the wall without a frame?
If you have assembled a mosaic into a couple of thousand pieces, spending several weeks on it, it is completely natural to want to leave it whole rather than take it apart. But what if you don’t have a frame? Made to order? - This is not a cheap pleasure. Buy ready-made? — It’s unlikely that there will be a suitable size. So how to hang a puzzle on the wall without a frame?
Method 1
You can use double-sided tape:
- If the picture is small, it is enough to cut out five squares about two by two centimeters. Glue one in the corners and one in the center. Peel off the paper on the other side and apply it to the wall.
- If the puzzle is large and heavy, then we glue adhesive tape around the entire perimeter and one strip in the center. Glue it in the right place.
Important! The disadvantage of this option is that it will be impossible to remove the painting without damaging the wallpaper or decorative plaster - traces of the tape will remain.
Method 2
A good option for small mosaics is to attach using sewing pins. But this method is suitable for crafts with no more than a couple of hundred parts. Hanging a large puzzle on the wall will not work this way! They will not hold it, or you will have to use needles, which can ruin the appearance.
Aesthetically, such a product will, of course, look better in a frame - you can make it yourself, and quite inexpensively. We will need a ceiling molding and transparent “liquid nails”.
Important! The edges of the base to which you glue the craft should be the width of the baguettes.
- We cut our ceiling plinth into four pieces of the required length.
- In those places where there will be joints, we make a diagonal cut.
- We glue it with “liquid nails” around the perimeter.
- After making small holes in the upper corners, we hang them on nails.
Important! The frame can be left white, or it can be coated with varnish or acrylic paints. Another little trick: if you glue the assembled mosaic onto a Whatman paper larger in size than itself, you will get a visual frame.
What can you glue on?
To make a quality picture, it is important to clearly understand that some fixing bases have a similar effect on the base material and its structure. Therefore, office glue works on the principle of proven PVA, and you can safely use it for work.
If the master has chosen adhesive tape for the process, then the strips are applied overlapping, first vertically, and for greater reliability they are passed horizontally. Adhesive tape is very practical; there is no need to wait until the painting dries and it can be attached to the wall compared to adhesive liquids.
How to glue puzzles: different ways
Assiduous and calm people often spend their leisure time putting together large and complex puzzles. As well as children who develop fine motor skills and logic. And now, when all the parts are installed in their place, the logical question arises about what to do with the assembled picture. Take it apart and put it back in the box? Or leave it as a painting? And then how to glue puzzles so that they do not fall apart? There are several ways to make your dream come true.
Related article: How to hang a cabinet on a wall made of foam blocks
Addresses of framing workshops
Bring your work for decoration to the Lenbaget framing salon closest to your home.
Attention! You can use it in the framing workshop at st. m. Victory Park, st. Frunze 15 and Art. m. Bolshevikov Avenue, Pyatiletok Ave. 14, building 1
Decorating puzzles and photo mosaics in a baguette frame
The popularity of baguette frames dates back centuries, when even in royal palaces the walls were decorated using this interior element. This is a stylish and especially elegant element in the walls of any home.
Puzzles or photo mosaics can be successfully framed into a baguette and the finished product can be placed on the walls of your home. This will give the interior a special zest and will favorably emphasize the overall background of the room. Puzzle frames provide the finished form for a specific piece of art that you plan to display for your guests to see.
Photo mosaic and puzzle design requires the proper style combination, which will be successfully implemented when using a picturesque baguette. frames for puzzles yourself, but the design should be done by creatively-minded professionals. This is exactly the kind of talent that LenBaget workshop specialists possess.
The employees of our framing workshops know exactly which frames for puzzles are best suited to highlight the work and complement the overall background of your home interior. The craftsmen have extensive experience - for more than 15 years they have been framing any objects of art into frames. These are specialists with golden hands and special creative thinking, which is so important for the average client.
How to glue puzzles with glue?
Now in art stores you can find such a product as an adhesive base for mosaics, and puzzles too. It can be either PVA glue or transparent adhesive film. It is advisable to use the latter only for small-sized pictures, since there is a risk that they will turn out with air bubbles or wrinkles. It is very difficult to apply film over a large area. There are two main ways to glue puzzles together.
Option #1: flip the picture
It is very important what the cardboard mosaic was originally assembled on. If it is, for example, a sheet of fiberboard or chipboard, a puzzle mat or cardboard, then turning the finished picture over will not be difficult. To do this, you just need to place another similar sheet on top of the mosaic, press it tightly, and then turn it over. If the picture is very large, then you can additionally fasten the substrates with paper clips or tape. Then you need to apply glue to the wrong side of the puzzle and let it dry completely, as indicated in the instructions. For those who have not purchased adhesive, the same tape may be useful. The strips are laid in width (this will be denser) and overlap. This way the picture will last longer. It doesn’t matter at all whether you get air bubbles under the tape or not. This is still not visible from the inside out, but you should not neglect accuracy.
Option No. 2: without turning over
If the puzzles were assembled on the floor, and the size simply does not allow you to quickly turn over the finished picture, then you can fasten everything together without any turning over. To do this, first of all, you need to slip polyethylene under the future painting. For example, it could be a torn garbage bag. What is it for? To avoid damaging the floor covering with glue. Even the largest painting is not so difficult to drag slowly onto polyethylene, carefully, centimeter by centimeter. After this, you can use various means to hold the puzzle together. For example, thinly diluted PVA glue. Or the same transparent tape. For application it is better to use a wide and flat brush. If you apply transparent tape, you need to do it very carefully so that there are no air bubbles, wrinkles, or folds. It would be a good idea to apply a layer of varnish without color on top of the glue. This will add gloss to the picture and connect the elements even more tightly.
Mixed option, universal method
Universal gluing is often used. Several technologies are used here at once. For example, before gluing puzzles with tape on the front side, fabric is glued to the back side. Due to this, the picture holds up more confidently. But this method requires a double flip of the finished mosaic. The fabric can be made of any material: cotton, linen, cotton blend. It is advisable to give preference to natural fabrics, since they are the easiest to glue.
Another universal option is a mixture of glue and tape, which are attached to one side. For example, the front one. Before gluing the assembled puzzles together, you need to remove all debris, dust and dirt. To do this you will need a fan brush or a simple thick brush. Apply diluted liquid PVA glue, let it dry for 2 hours, then stick on strips of clear tape. There is no need to apply varnish on top. The picture will be glossy.
Some tips for application
Each of the adhesive materials has its own characteristics in operation. For example, it is recommended to apply tape not just across the width of the painting, but also with an allowance. Why? This will ensure greater structural strength. The excess can then be carefully cut off with a blade or a stationery knife. Only sharpened ones.
Before gluing together a picture from puzzles, pay special attention to where it is located. While moving the composition from the table onto the fiberboard sheets is not too difficult, doing it from the floor is more problematic. It is advisable to immediately start assembling puzzles with the calculation of further gluing on a special mat or on a sheet of plywood. In the future, the picture can be inserted into a frame and hung on the wall as a decorative element.
How to properly glue puzzles of any size? After clearing the picture of excess debris and crumbs, apply adhesive and insert it into the frame. Often such mosaics decorate children's rooms. And, of course, it is worth selecting puzzles in accordance with age and development, so that sooner or later the picture will be assembled and not lie in a box.
Puzzle base
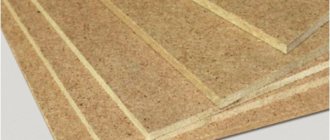
Fiberboard
Wood fiber sheets are a fairly dense material, so it is first adjusted to the size of the puzzles. If you cut and straighten them after gluing, the picture may collapse. The image is glued with regular PVA, the composition is applied evenly in a thin layer over the entire area. Too liquid glue can penetrate between the elements of a folded picture, so its excess is quickly removed from the surface. After applying the glue, the fiberboard is placed on the puzzle, pressed along the perimeter and sharply turned over. The glue that has appeared on the front side of the design is quickly removed with a dry, clean cloth.
Fiberboard is the optimal base for large puzzles with more than 1 thousand pieces. At the same time, they easily sit on PVA, creating an even image while fully preserving the original appearance.
The main difficulty of the method is to cut out the required sheet size in advance, which can only be done with a special tool. Fiberboard adds weight to the picture, so it turns out to be massive and will not stay on the wall without additional fastening.
Styrofoam
To make the whole picture easier, instead of fiberboard, a sheet of foam plastic is taken as a basis. It is light and easy to cut. To cut out the base, use a stationery knife or tailor's scissors. After drying, the painting on the foam will not be distorted, but its thickness will become 1.5 cm larger. Therefore, additional costs for the frame will be required.
Ceiling tiles
Tiles come in different thicknesses and sizes, are inexpensive, and easy to cut. If you choose an option with a flat, non-relief surface, the thickness of the picture will not be too large, which will allow you to insert the puzzle into a standard-shaped frame.
One section accommodates a medium format puzzle containing no more than 500 pieces.
Several tiles are used to glue large puzzles together. It is better to buy cladding with jagged edges for a more reliable connection.
The principle of gluing is the same as on fiberboard.
After gluing, it is advisable to lightly press the drawing onto the base with a board or other weight. Without additional stress, the image may become deformed while drying.
Gauze or tulle
The adhesive mixture is applied to the back of the picture, then a piece of gauze or tulle is tightly applied to it. After pressing the material onto the surface of the puzzles, excess glue is removed with a dry cloth or clean rag. The strength of the painting will be low, so immediately after gluing it must be placed in a frame or stretched onto another more reliable base. To make this possible, the material is cut with a large allowance.
Self-adhesive film
Self-adhesive is sold in rolls. You buy a piece whose width corresponds to the size of the puzzle or is a few millimeters narrower. The required piece is cut out. Dust, moisture, and dirt are removed from the surface of the painting. The film is gradually released from the substrate. First, 5 cm is removed along the entire length, applied to the folded parts, and carefully smoothed out. Next, the paper is removed from the next 5 cm, pressed to the base and ironed again with your hand or a dry towel. These actions remove excess air bubbles from under the self-adhesive. If air chambers do form, they can be easily pierced with a needle.
