Hats can be a fun and stylish way to style an outfit. It happens that you already have a hat in your wardrobe, but it doesn’t fit your size. Don't be upset, this can be fixed! Don't spend a lot of money on a new hat right now. Instead, try a few less expensive products that will effectively stretch your headwear. If you have straw, fabric, or a baseball cap, you can use a hair dryer and water to expand your hat a little. You can also use a soccer ball and a bicycle tire pump, as well as wooden hat racks and steam. You can try using a balloon and some soapy water to expand your hat in just a few hours. First things first!
Is it possible to level the hat?
You can even out the folds on the hat with regular ironing. But do not allow the straw to come into contact with the soleplate of the iron. To do this, wet a soft cloth, wring it well and place it on the material. Heat the iron and iron the straw.
Interesting materials:
How can I change the file format? How to prevent metal from rusting? How to make it not cold outside? How can I stop receiving SMS from a contact? How can I make it so that I don't have to select Windows at boot? How to make sure your laptop doesn't crash? How to make sure that the laptop does not turn off when closed? How can I make the numbering start from the third page? How to make the wallpaper move? How to make windows shine?
Steps
Steaming and dampening the hat
- Consider steaming your hat.
You may want to try steaming your hat first. This is usually done using a clothes steamer or an iron with a steam function. You can also try taking your hat to a specialty hat store that has an industrial hat steamer, but this is not necessary.
Raise the brim of the hat and steam it around the brim.
Keep the steam source at a distance of 15-20 cm from the hat to avoid scalding your hands. Then lower the margins back down.
- After processing the brim of the hat, release steam directly into the crown.
- Steam should begin to seep through the holes in the straw weaves. Do not allow the steamer or iron to touch the hat.
- Continue steaming until the hat is damp. Don't worry about getting your hat too wet, as the moisture will help straighten it out.
- Straighten the shape of the hat with your fingers.
Once the hat is well-wetted and still steaming, begin pressing the warped areas of the hat back into place. Continually shape the hat with your hands as you continue to steam it.
- When shaping the hat, remember to evenly straighten the weaves of straw. You can also use a spoon rather than your fingers to straighten your hat over steam.
- You may need gardening gloves or oven mitts when steaming your hat. Working with steam is quite dangerous, so you must be careful not to get burned.
After steaming the hat, place a round bowl, rolled up towel, or other object in it to help the crown maintain its proper shape.
If steaming the hat does not help you, you can try moistening the hat with water. This method is especially useful when the brim of a straw hat is wrinkled. Spray the hat with water from a spray bottle. When drying, the straw should return to its original shape, since moisture makes it more flexible.
Lay the hat down and let it dry.
Once you have finished steaming or dampening your hat, you will need to dry it.
- If the hat does not take the ideal shape after drying, repeat the steaming or moistening process again.
It all depends on the degree of deformation of the hat. Some hats require only one steaming or dampening procedure, while others require repeated treatment.
Giving the Hat the Correct Shape
- Roll up a towel to straighten the crown.
Instead of steaming or dampening the hat, you can try simply straightening its shape. For the best effect, it will be useful to moisten the towel on which you will straighten it. Moisture will help the straw gain plasticity. And the towel will replace your head.
Place the hat on a round object.
Instead of a towel, you can take a bowl or other suitable object and place the hat tightly on it. This way you can return the crown to its correct rounded shape.
- Iron the hat.
Place the brim of the hat on the edge of the ironing board, back side up. Cover them with a damp cloth. Set the iron to a fairly high temperature.
- Iron the brim with a damp cloth. Do this very carefully and quickly, do not allow direct contact between the iron and the hat. This is very important as you may scorch the straw.
While ironing the brim of the hat, rotate it. Then iron the crown. Ironing the crown requires special care and consideration of its design style. Be careful when using the iron with straw. If you don't put a damp cloth between the iron and the straw, you could burn your hat.
- Try not to wrinkle or deform the hat any more, as the straw will be weakened after the first time. With each successive deformation, the hat will become less durable, and individual straws will begin to weaken and crack.
There is a common belief that a hat is “not for everyone.” Many people think that hats don't suit them. But most likely, they simply did not find a successful model for themselves (which, in general, is not surprising, given the meager selection of hats in Russia). Remember the films that take place in the first half of the 20th century - almost all men wear hats, regardless of age and social status. And with a certain amount of persistence, everyone can now choose a hat successfully.
Like any other item of proper men's wardrobe, a hat should attract attention primarily not to itself, but to the face and must match and compensate for its proportions. A hat has several basic measurements that affect its proportions and how well it fits a particular face type: brim width, crown height, crown taper, and band width. All this can be wider, narrower, higher or lower and in general will give a good or bad effect.
There are no hard and fast rules that determine which hat shape suits which face type. Here you need to be guided by proportions, as if you were choosing a frame for a picture: it should frame the face, but not “outweigh” it; should not be both comically small and comically large. If you have a large face, then the hat should be large enough; for people with a narrow face, hats with a narrower crown and wider brim are suitable; people with prominent noses should choose wide-crowned hats to “compensate” for the nose; wide brims help hide protruding ears and so on.
The way you wear your hat also affects your overall impression. In most cases, tilting your hat a little to the side won't hurt—a couple of degrees can change the whole picture. Experiment with the angle, but don't forget about proportions: if you have a high forehead, don't push your hat back, and vice versa.
The size of the hat is equally important. It should sit on your head tightly enough so that it doesn’t get blown away by the slightest gust of wind and doesn’t fall when you bend over, but it shouldn’t put pressure on your temples or wrinkle your hair. Unfortunately, when ordering a hat online, you can often only guess what size it actually is. Like shoe sizes, hat sizes can vary markedly between manufacturers. You can roughly understand your size by measuring your head with a tailor's meter across the forehead, above the ears and above the base of the skull and comparing the resulting head circumference with the manufacturer's table. But even this does not guarantee a successful landing.
It is better to err on the large side in size, because any good hat has a special leather rim on the inside, which allows you to slightly reduce its size if you put a piece of cotton wool or foam rubber under it in several places. At the same time, if the hat is too small for you, it can be stretched in a hat studio, but the result will depend on the material of the hat and the rim.
Like any other item of clothing, it is desirable that the hat is in harmony with your clothes, but there is no need to select a hat to match the exact tone. The main thing is to try to combine colors at least along the spectrum: warm with warm, cold with cold. For example, a gray or black hat will go with a blue coat, and a dark green hat will go with a brown coat (although, of course, a green hat is quite serious in itself).
FELT HATThe most traditional material for hats is wool, or rather felt, which is made from wool. The fedora is the most formal of all (except for the top hat, but only the Freemasons and guitarist Slash wear that) and requires an appropriate wardrobe. It goes best with a classic suit or coat. But that doesn't mean the fedora is the exclusive domain of people like Don Draper. The softer the felt, the more dents there are on the front of the crown; The warmer the colors and more contrasting the ribbon, the less formal the hat becomes. A dark gray homburg hat with a satin-trimmed brim looks extremely formal, while a brown fedora with a rakishly creased brim and a braided cord instead of a ribbon looks great with a worn shirt and leather jacket (see Indiana Jones films). But no matter how relaxed a felt hat may be, you can only wear it with clothes from a work or classic wardrobe, forget about a sporty style. COTTON HATRecently, hats made of cotton and mixed fabrics have become popular - these are often sold in online clothing stores. They are more correctly classified as Panama hats - they usually have very short brims and a crown without dents. These hats are the least formal and can fit into almost any wardrobe. But at the same time, the chances of becoming like Pavel Volya unexpectedly increase. | TWEED HATA tweed hat is less formal than a felt hat and would be out of place with a business suit, but it goes great (oddly) with tweed jackets and other “country” style elements, such as waxed jackets or rubber boots. According to renowned men's fashion author Bernard Roetzel, "Tweed hats are favored by scholars and intellectuals who do not want their foreheads and thoughts to be encumbered by stiff hats." PANAMAThe Ecuadorian straw fedora - Panama - is made from special straw and has a very dense weave. The higher quality the Panama hat, the tighter it is woven and the smoother and softer it will feel to the touch. It can be worn with either a summer suit or a chambray shirt and chinos. Other straw hats are less formal than a Panama hat and are not suitable for a suit, but they can be worn with everything else - T-shirts, sandals and other summer clothes. The only exception is the boater hat - it's already so retro that it's only suitable for hat-wearing professionals. COWBOY HATCowboy hats are only allowed to be worn by cowboys, role players, system administrators and rockers. |
Don't think of hats as carnival costumes. After putting on a hat, choosing the appropriate angle, try to forget about what’s on your head, treat it the same way you treat shoes. Don't adjust unnecessarily, don't fiddle with the brim, don't look in the mirror at every opportunity - in short, act as if you're not wearing a hat. Then those around you will perceive it more naturally.
Finally, it is worth remembering one simple rule: you should take off your hat indoors if you are going to sit there - in a restaurant, at a movie party. In public places - for example, in a store or at a post office - this is not necessary. The same applies to the halls, elevators and corridors through which you pass, but when you reach your goal - for example, an apartment, you should take off your hat.
It is good form to slightly raise your hat when greeting acquaintances, especially if it is a lady. It may be a little old-fashioned, but a little extra gallantry never hurt anyone. And in situations where you say “thank you”, “you’re welcome” or “sorry”, you can lightly touch the leading edge of the margin - “trumping” is another good way to show respect for the interlocutor.
How to stretch a woolen item if it shrinks after washing: 4 methods and 3 effective remedies
The problem of shrinkage of woolen items can be easily solved by using special means and physical influence.
If not properly cared for, a wool product may become deformed. If a woolen item shrinks during washing, there is still a chance to fix it. I’ll tell you what methods you can use to return its shape and stretch it to its previous size.
How to get things back into shape?
There are two methods for stretching shrunken woolen items:
- Physical - that is, pulling out a wet product with your own hands, or a wet product - by steaming with an iron;
- Chemical - using special means.
The best result will be when combining these methods.
If you discover that an item has shrunk, act immediately without waiting for it to dry.
So, what to do if you take a wool product out of the washing machine and notice that it has shrunk.
- The first step is to stretch it, while still wet, with your hands . Do not dry.
Carefully and slowly pull the product first across, then along.
- Next is soaking in products that give elasticity (more about them below).
Wet weaves will soften from the conditioner and return to their original shape.
- The next step is to re-stretch the wet product.
- The last stage is drying.
Dry the item flat
3 special products
You can solve the problem and return the previous size of a woolen item using products that you have at home:
| Image |
| Remedy 1. Hydrogen peroxide Gives elasticity to wool threads. The instructions are simple:
Achieve the desired result by observing the proportions in the solution, since a high concentration will ruin the wool threads. The price of the product is from 30 rubles. |
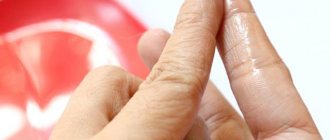
| Product 2. Conditioner for wool fabrics By using a wool conditioner (pictured) after an unsuccessful wash, you will return your clothes to their original size. The fibers will become soft and pliable:
|
| Product 3. Hair conditioner The use of hair conditioner is quite effective in solving the problem of how to restore a woolen item. Its main components are similar to the composition of conditioners that make wool soft. This facilitates easy stretching. Your actions:
|
Physical impact
By pulling with your hands and maintaining the achieved result while drying, you will return the product to its original size.
While stretching, make sure that the clothing does not lose its symmetry. How to stretch a shrunken woolen item after treatment with special products?
Method 1: Use a towel instead of squeezing
The towel will absorb moisture without compressing the fibers and weave, as happens when spun in a washing machine.
This method will help lengthen clothes:
- Take a terry towel and lay it on the table.
- Pull the clothes out with your hands and place them on a towel.
- Roll it up and wait 10 minutes - this will allow the terry cloth to absorb moisture.
- Replace the towel and stretch the clothing again.
- Hang the woolen item on a rope, securing the base with clothespins. As it dries, it will stretch under its own weight.
Method 2: Iron
By steaming and smoothing, stretch the item to the desired size.
This method works if the product has undergone slight shrinkage and has already dried . This is how you can pull out a synthetic item:
- Lay out your clothes on the ironing board.
- Cover with a damp cotton towel.
- Iron while stretching.
- The steam function of the iron will enhance the effect.
Method 3: Put it on yourself
A wool sweater will stretch evenly if you put it on while still wet.
An excellent method is to let the product dry, maintaining its shape while drying . There are several ways to do this:
- Put it on yourself and walk until it dries. Pull out sleeves and hem to avoid shrinkage.
- Build a structure on which to secure the thing stretched by hand with pins. For example, on a cork board.
- Pull it onto a mannequin, the back of a chair or armchair.
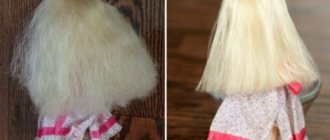
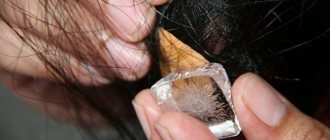
Method 4: for the header
Kitchen utensils will help maintain the shape of the hat when drying.
To stretch a hat that has shrunk after washing, use a common method - dry it by putting it on a kitchen utensil or ball.
- Find a suitable size jar, pan, ball.
- Wet the hat in cold water with conditioner.
- After 10 minutes, squeeze lightly.
- Pull onto a suitable object and leave to dry.
In this way, you can restore the shape of even a very shrunken headdress. The hat will correspond to the size of the item on which it was dried.
To prevent woolen products from stretching and shrinking, they need to be properly cared for.
Source: https://stroymaster-base.ru/hozyayushka/garderob/kak-rastyanut-sherstyanuyu-veshch-esli-ona-sela-posle-stirki-4-sposoba-i-3-effektivnyh-sredstva.html
Softening fibers
This method is used in workshops to restore the elasticity of fibers. Stretching is done using certain compounds. At home, this option is possible in the presence of acetic acid or peroxide.
Wet a wool hat in an aqueous solution containing 1 tbsp. l. vinegar per 10 liters of water. And then pull it onto the balloon. After drying, the problem will be eliminated. Vinegar can also be replaced with peroxide.
Why did the cap shrink?
A leather cap purchased in size, once wet, needs to be properly dried. It should dry in natural conditions without access to direct sunlight and away from heating devices.
To keep the shape and size the same, fill it tightly with newspapers and change them as moisture is absorbed, or stretch them onto a blank and leave until dry. Make sure that it does not become deformed. Failure to comply with storage rules also entails a change in the size and shape of the headdress .
Important! Proper comprehensive care is the key to a long life of a leather product.
A fabric cap can shrink and become tight from improper washing - using an inappropriate cycle, aggressive powder or exposure to high temperatures. Drying near or on a heating radiator can also change the size of the cap downwards.
When should you turn to professionals?
You need to seek professional help either when no method has helped, or immediately, even before the start of all manipulations.
This is up to the owner of the cap to decide. In the salons where hats are sewn, there are special electric blanks and chemical compositions for stretching . The blanks change size, adjusting to the desired size. If you are determined to resort to the services of specialized salons, then be sure that in a couple of days you will receive the hat back in its original condition.
Which men's sneakers to choose for basketball
What is a dress?
Reasons why a hat may stretch
Like any woolen item, a hat can stretch and take on a shapeless, sloppy appearance.
The reasons why this may happen are:
- automatic washing. The knitting of hats is usually weaker than other woolen items and this can cause both shrinkage and stretching of the product. It is advisable to hand wash such items;
- time factor. After some time of wear, the garment may well wear down one or even two sizes;
- improper storage. Some people, after the winter period, in order to maintain the desired shape, pull the hat onto a jar or mannequin, which over time will cause stretching.
How to properly close (reduce) the loops on a hat, depending on the model
There are two fundamentally different ways to knit these items of clothing:
- On circular knitting needles (the product is seamless).
- On straight knitting needles (it is necessary to sew a seam along the height).
Also, the model of the headdress may imply the need to decrease the loops towards the crown, knitting the fabric using the method of shortened rows, as well as the direction of knitting from top to bottom and bottom to top.
Let's take a closer look at the most popular models and the completion features for each of them.
Easy way
The simplest way can rightly be called the option using a needle and thread. This method is especially relevant for completing work on items knitted in one piece, without decreasing or with minimal decreasing loops towards the crown. The main advantages of such hats are the ease of knitting, the ability to knit on straight knitting needles with subsequent stitching of the fabric in height, as well as a sufficient variety of patterns used.
In order to finish such a thing, you just need to thread a large “gypsy” type thread, which is used to knit a hat, and thread it through the last open loops on the knitting needle. The needle is then pulled out of the knitting and the top is tightened with thread. Its ends are brought out to the wrong side and tied with a knot. The hat can be left as is, or you can attach a pompom to the junction of the loops.
Wedges
For a round hat
When knitting a product with a round crown, the main feature is the decrease of loops: they are decreased at a relatively short distance from the crown by knitting every two loops out of four in the first row of decreases.
Afterwards, several rows are knitted according to the pattern without decreasing, then two loops are decreased per row until 8–10 loops remain on the knitting needles. To complete work on such a thing, you should thread it through the loops using a hook or needle.
On a stocking cap
These models are also called beanie hats. The easiest way to knit them is to knit the fabric using shortened rows on straight knitting needles. With this type of knitting, wedges are formed on the hat. After knitting the required number of these elements, the product is sewn together using a hook along the height, and then the top of the hat is connected with the same hook.
With English rubber band
English rib is a very beautiful pattern, voluminous and suitable for knitting almost all models of knitted hats. You can connect it using the description given in Diagram 1.
Pattern 1 – Knitting an English rib
The main feature of working with fabric from this pattern is the method of closing the loops. In order to do this, you need to switch from English elastic to regular elastic, 1*1 format. This transition is made in the row in which the knit stitch ends up with a double crochet. After this, the loops are reduced and closed in the manner suggested by the model you have chosen.
Making a fur hat smaller
https://youtube.com/watch?v=rG9n06Rfl3A
A fur hat is reduced for various reasons, it could be its deformation, or maybe it was an incorrectly selected gift.
It will be somewhat more difficult to make such a headdress smaller than a woolen hat.
Often, fur hats are made by the manufacturer in several sizes, using adjustable elastic bands that allow you to reduce it by a size and a half.
If this kind of convenience is not available, you can make the hat smaller in two ways:
- sew in a fur headdress. This option requires some knowledge and skills in sewing. To begin with, the lining fabric is carefully ripped off, then the fur trim and the seam connecting all the parts, which is located on the back of the head, should be ripped open. The next step is to remove the parts necessary for reduction from both sides. For example, when reducing the cap by two centimeters, one centimeter should be cut off on one side and on the other as well. Here you should take into account the seam allowance and, perhaps, remove not a centimeter, but 8 mm.
- This method involves reducing it using an additional insulating layer of batting or padding polyester. Having decided to use this method, you need to prepare a new lining, since the insulation blank may simply not fit under the old one. After tearing off the “native” lining, the prepared insulation is hemmed onto the insulating cap, after which a new lining fabric is sewn on top. This option is more labor-intensive, however, it allows you to give the hat even better thermal insulation and, if necessary, return it to its original size.
How to make a woman's jacket smaller?
Today I will tell you how to reduce the size of a women's jacket.
Many of you probably have a couple of jackets hanging in your wardrobe, slightly out of fashion, but still very decent. I understand that you may be sorry to part with them, so I will tell you about one way to adjust the jacket to your figure and fashion :).
So, if the jacket is too big, how to alter it?
First, we rip off the shoulder pads. If the jacket is lined, you can get under it by opening the side seam of the sleeve of the lining by 20 centimeters. Then we will carefully sew this seam and nothing will be noticeable.
It is advisable to do the following operation together. Ask your mother, sister or friend to help you. It is necessary to install the shoulder pad on the shoulder so that its thick part protrudes approximately 1 cm beyond the shoulder bone. Now your assistant should raise the sleeve cap (that is, the very seam where the sleeve is sewn to the armhole) so that it matches your shoulders. You need to pin the sleeve cap to the shoulder seam and make sure it sits in place. If not, try again and install the shoulder pad again.
Once the new high point of the sleeve cap is found, pin the cap to the front and back of the jacket in several more places, creating a new armhole line. This applies only to the top of the cover; there is no need to pin the sleeve under the arm.
When a new sleeve sewing line has been found, check whether the new shoulder fits you. At the same time, check whether the sleeve is too wide and whether there is excess fabric that can be tucked into the side seam. If desired, you can mark the undercuts along the front and back. On plain fabrics, try to mark the darts with maximum symmetry and accuracy. On colorful or variegated fabrics, small inaccuracies will not be noticeable, but on plain fabrics they will be.
At the same time, decide on the length of the jacket.
Now take off the jacket and mark with chalk on the front side the “sewing” line for the sleeve where it is marked with pins. Take out the pins. Reach inside the jacket and mark with chalk where the sides and sleeves will be sewn under the arms and in the darts.
Open the sleeve from the jacket, noting the highest point of the cap that was sewn to the shoulder seam and the lowest point that was sewn to the side seam. If the sleeve consists of two parts, mark out the guidelines by which you will install it in place.
Trim off excess fabric on the front and back of the jacket along the marked line, leaving a seam allowance. Line up the armhole line, all the way to the armpit. Measure the lengths of the shoulder seams and make sure they are the same. If you were planning to remove the width of the jacket from the side seams, now is the time to do it. Next, the sleeve is sutured, if planned.
Now we insert the sleeve back into the armhole, pin it and make sure that the sleeve cap is slightly larger than the armhole (the excess is placed at the top of the collar). If not, then you need to sew the jacket along the side seam or take it a little into the shoulder seam. We sew in the sleeve. We install the shoulder pad in a new place so that its thick part protrudes slightly beyond the line of sewing the sleeve. If necessary, the shoulder pad should be reduced. This can be done on both the thick and thin sides. We fasten the shoulder pad by hand, basting it to the protruding part of the seam of the sleeve cap.
Now it’s time to stitch the grooves along the marked lines, and also reduce the length.
To be honest, I hate shortening jackets, but I have to :).
Cut the bottom of the jacket along the marked line (leaving a hem allowance of 5-6 cm), pulling the lining up. Turn the jacket inside out through the open sleeve of the lining. Glue the bottom of the jacket with non-woven fabric. Check with the cut piece. Try to completely repeat what was done there. Sew the lining and main fabric with one seam. Secure the seams of the collar and the bottom of the jacket together so that the collar does not straighten out or come out from under the main fabric.
Turn the jacket onto your face, make sure you did everything correctly. Steam the new seams with an iron.
Try on your jacket. If everything is in order, you can sew up the torn sleeve of the lining. We sew either an overlay on a machine, or a blind seam by hand.
- How to decorate a white jacket Today in the article: the idea of decorating a simple white jacket. A white jacket (or any other color too) is of a simple cut or rather boring.
- How to make a blouse smaller? It happens that you have a favorite shirt or blouse in your wardrobe, which, unfortunately, has already gone out of fashion, or has lost its relevance due to more.
Shaping the Airborne Forces beret: method three, not for everyone
To maintain a more stable shape, you can soak the beret in beer.
You'll need a bottle of beer. A seamless army beret is soaked in beer for half an hour. Remove from the container and squeeze thoroughly. They put it on the head, carefully smooth it out, and set the desired shape.
For the next half hour they wear this strange design on their heads. Carefully remove and place in a secluded place until completely dry.