Removing paint from a wooden surface without damaging it is not an easy task, but you can cope with it if you know some of the features of the work.
There are several methods to achieve your goal. Paint is removed mechanically, thermally and chemically, each of which has its own advantages and disadvantages.
You can learn how to remove old paint from wood at home from this article.
How to properly prepare for upcoming work?
It is wrong to immediately start removing paint from wood. First you need to prepare. Depending on the cleaning method chosen, the following tools and accessories may be required:
personal protective equipment: goggles, gloves, mask, respirator;- rags;
- spatula, sandpaper;
- construction hair dryer;
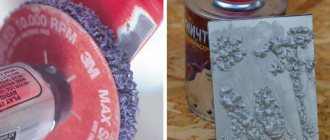
- drill or grinder;
- grinding machine and attachments;
- solvent.
When all the tools are collected, you need to think about the following points:
- Place of work . If a chemical cleaning method is intended, then it is best to do it outside or in a room with good ventilation.
- Protection of surrounding objects and surfaces . They need to be covered with unnecessary cloth or plastic wrap.
- Ease of access . If there is such a need, then the object being cleaned must be moved in advance.
- Thickness of paint coating . If the layer is thin, then new paint can be applied directly to it, without preliminary cleaning. It is better to remove thick coating. The preferred method is mechanical cleaning.
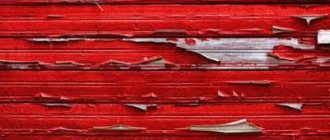
- Recency of coating application . The old layer of paint can be easily removed from wood, so it should not be left behind. Otherwise, the new coating will lie unevenly and will peel off.
If the surface of the product is ribbed or has a complex topography, then preference should be given to the chemical method.
Why do you need to remove old paint?
Why remove old paint when you can just paint on top? It is possible from above, but not always. Here are some compelling arguments:
- Old paintwork may have a composition that is not compatible with new paint. Rejection can be expressed in swelling of the old layer and detachment of the new one. Incompatibility occurs on a chemical level when the relationships between paint molecules simply don’t “gel.”
- The previous layer of paintwork may have unevenness, cracks and chips. If you cover this “beauty” with a new layer on top, you will undoubtedly get a textured surface akin to trendy design solutions. But the difference is that even the most ridiculous design moves are often accompanied by carefully thought-out coating technology. And a painted old peeling wall is unlikely to bring you aesthetic satisfaction.
- Paints, to a greater or lesser extent, have the property of hiding power. There are denser opaque compositions and liquid ones that need to be applied in 2-3 layers. So, it’s unlikely that you’ll be able to paint a dark brown window sill with white paint the first time.
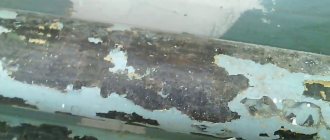
- Mold often grows in wood cracks. Fungal spores are dangerous to health, and the mycelium destroys the structure of the wood. Therefore, it is at least not wise to use a wooden coating without pre-treatment. By peeling off the paint layer, the affected areas are simultaneously removed. And antifungal disinfection prolongs the life of wooden structures.
Which option should you prefer?
When giving preference to one or another method of cleaning, you need to start from the specific task that a person faces, namely:
- If the surface needs high-quality treatment, then two methods are combined: first, the object is treated with a professional solvent, and then the areas are cleaned manually.
- If you need to save money, clean it using sandpaper or using foil and an iron.
- When safety comes to the fore, dry cleaning is chosen.
If a person has enough time to carry out the work, then several methods can be used simultaneously: apply a chemical remover, and then clean off the remaining paint manually.
What to use?
Lining is a “breathing” building material, so it regularly absorbs dust, dirt, soot, and other types of contaminants from the air.
Coating its surface helps reduce damage to wood:
- impregnations;
- wax;
- paints (how to paint lining correctly?);
- varnish (how to varnish the lining?).
But even they will not completely protect the finishing board from stains appearing on it. What can and cannot be used to clean the lining?
Recommended means of removing contaminants from finishing materials include:
- soap solutions;
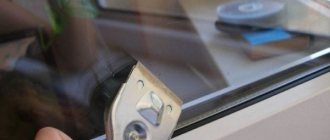
- scrapers with sharp bases;
- brushes for cleaning wood;
- grinding machines.
Before sanding the lining, you need to carry out a test stripping on a separate piece of material or on the least noticeable area of the surface being treated. Otherwise, instead of a clean slate, you may end up with completely damaged material.
What should not be used?
Do not clean the finishing board with:
- Hard metal brushes and sponges. Their aggressive impact will lead to an increase in wood porosity and even deeper penetration of contamination.
- Household chemicals (washing powder, dishwashing detergent, liquid soap). Such detergent compositions are not intended to work with lining, so the result of their impact on it is difficult to predict.
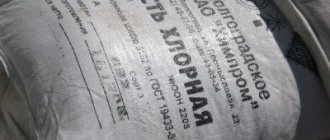
- Acidic, alkaline or chlorinated compounds for household use. For example, Belizna or Domestos are very helpful during cleaning, but they are completely unsuitable for disinfecting finishing building materials.
Firstly, all aggressive cleaning products have a strong, unpleasant odor that is absorbed into the wood literally forever. And, secondly, they reduce the protective functions of paints and varnishes, significantly reducing the service life of the lining.
Features for different types of dyes
Depending on the type of dye, the methods for removing it will vary:
oily compounds can be easily cleaned off with a spatula or grinder;- water-based paints are susceptible to solvents;
- acrylic paint can be cleaned off mechanically or chemically;
- powder paints are washed off with a powerful stream of water, for example, from a high-pressure washer;
- Hair dye that gets on a wooden surface can be washed off with an alcohol solution.
It is most effective to remove several layers of different paint using the thermal method.
Prevention
To prevent the lining from turning black and deforming, it is enough to follow a few simple recommendations:
- if the facade of a building is covered with wooden clapboard, then it must be fixed at a short distance from the surface to be improved;
- after covering a wall, floor or ceiling with special boards, the building material must be processed (primed, varnished, painted, etc.);
- in a room lined with clapboard, you need to equip a good ventilation system;
- if it is impossible to install fans, regularly ventilate the room;
- Once every six months, the cladding board must be impregnated with a special protective compound, which minimizes the risk of mold and mildew and protects the building material from precipitation (how to treat lining with protective agents?).
And lastly: the higher quality lining is used for interior or exterior decoration, the less time and effort will be needed in the future to return the cladding board to its original appearance.
The most common mistakes
The most common mistakes people make when trying to remove paint from wood surfaces are:
- Applying chemicals to the entire area at once. If the composition is used for the first time, then first you need to treat a small area.
- Cleaning wood with too hard brushes or rough abrasive attachments. They can lead to rock destruction.
- Long-term exposure of removers and solvents on a wooden surface. Even the most expensive and effective washes can lead to damage to the product. Therefore, leaving them for longer than 1-2 hours is not recommended.
- Overheating of the surface when trying to remove paint using a thermal method. This situation is a fire hazard.
- Using plastic containers when working with washes. Aggressive compounds can lead to their damage.
Regardless of the cleaning method you choose, you should carefully read the instructions for its use.
Repairing an old wooden floor in a house: options and features
In a private house, there may be the same problems with a wooden floor - creaking, dips. If repairs are needed for the floor of the second floor, and it was done along the beams, you can only level it and paint or varnish it again. With or without reassembling the boards, it’s your choice. But there are usually no other problems other than unevenness and cracks.
How it should be arranged
If you are repairing an old wooden floor in a house on the first floor, then everything is more complicated. We also need to look at whether the steam, hydro, and heat insulation is done correctly.
Installation of the floor on the first floor of the house - with insulation and vapor barrier
The correct design satisfies the following conditions: it is protected from moisture penetration from the room, but does not interfere with the removal of moisture from the insulation. Therefore, steam-waterproofing is installed on the side of the room. It does not allow steam or liquid water to pass through. But no matter how you protect it, some moisture will still get inside. And it must be removed. It will be brought out from the basement/subfloor. Therefore, on this side we need a material that does not interfere with the passage of water and vapor. You can generally only fix the insulation. For this:
- hit with slats;
- tighten with wire in the form of a snake;
- metal mesh.
But this option when using mineral wool as insulation is not very good. To remove moisture, the subfloor must be ventilated. This means that there are drafts there. And they, along with moisture, carry away heat. Lots of warmth. The insulation itself also erodes. But it (the insulation) remains dry. The situation can be improved by sewing a windproof membrane underneath. But it must be vapor-permeable. So that the moisture that gets inside the insulation is removed.
What could it be
If, when checking the floor structure, you find that the boards, joists, beams, and insulation are wet, then something was done incorrectly. In this case, there is usually a problem with the wood. There is nothing to say about insulation. If it is mineral wool, it practically does not perform its functions in such conditions. After a couple of years (or even a few months) it turns into dust. Not because the material is bad, but because it was used in conditions for which it was not intended.
If the picture is something like this, the structure will need to be replaced
If this is the case, and there is a lot of moisture, the wood is rotten, repairing the old floor is only a complete replacement of the structure with correction of errors. The most common mistake is using waterproofing material on the basement side. In this case, moisture may even accumulate on the film. It flows down to the lowest places, the film sags. It is necessary to disassemble the floor from below and leave it without insulation for the boards to dry for several weeks. Then assess the condition of the wood. If everything is fine, restore the insulation, but without errors.
If the underground floor is earthen, moisture will rise from the ground. To prevent it from “wetting” the insulation from below, cover the subfloor with a thick film (at least 350 g/m2). Lift the film onto the foundation and secure it there with planks. Place a layer of sand on the film and smooth it out. The film will prevent the penetration of moisture from the ground, the sand will adsorb what gets in or what falls in the form of moisture condensed from the insulation. In some regions, sand is expensive; you can use bark, forest soil, dry leaves, even sifted soil, but only that which absorbs moisture normally. In any case, the backfill should be free of knots, branches, and stones. They may damage the film.
Important Tips
To ensure that the process of removing paint from wood is effective and safe, the following recommendations must be followed:
Do not press on the surface of the product with great force. This is true for the mechanical cleaning method.- Always use personal protective equipment.
- Protect floors and surroundings with plastic film.
- Do not heat the wall in the area of wiring and electrical appliances.
- After applying the remover, the surface must be washed with clean water.
- If aggressive substances come into contact with the skin or mucous membranes, rinse them immediately with plenty of water.
By following these recommendations, you can efficiently remove paint from any surface.
Removal Methods Not Recommended
Some craftsmen use a thermal method to remove old coating by exposing the treated area of the product to open fire. Using this method is highly discouraged due to the increased risk of possible fire.
Removing old paint using open flame is unsafe
In addition, when processing products from various types of wood using this method, the material dries out and its internal structure is damaged, which significantly reduces the strength of the product and its service life.
Some types of wood during this treatment can release resins that are easily flammable or create a film on the product. This film will significantly reduce adhesion, and may even prevent you from applying a new layer to the surface.
When choosing methods for removing old coating, the main thing is to follow the rules of personal safety, use protective equipment and follow safety precautions when working with electrical appliances.
Mechanical method
One of the first thoughts that arises when looking at a layer of paint that needs to be removed is: “Yes, it will be easiest to clean it off!” And now your hands are already reaching for a grinder or a drill with grinding attachments. We recommend that you take your time and analyze the situation, because mechanical removal is not ineffective, but it is not suitable for all products.
- Can the product be taken outside? There will be an incredible amount of dust and flying pieces of coating, and if you start removing paint indoors, then you will have to do a thorough cleaning later. Plus, you will have to work in a respirator and glasses, which is also not very convenient.
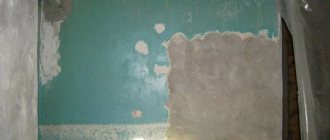
- Is there a thick layer of paint on the product? Previous generations didn’t stand on ceremony with oil paint: if you’re tired of the color, just cover the old layer with a new one. It turns out that on some Soviet doors a layer cake of 4-5 layers of oil paint has accumulated, each of which is much thicker than the layer of acrylic paint that we use now. When mechanically removing such a layer, you will kill more than one skin without achieving the desired result, and this is not only offensive, but also quite expensive.
- Is the product permanent? Removing varnish from chair legs with a sanding machine is not a bad idea, but cleaning a window frame or baseboards that you are not going to knock off the wall in this way is not a good idea - because of the risk of hitting the wall or window with the sanding disc.
- Is the surface of the product smooth? If the product has depressions or protrusions, then the mechanical method will not be the best choice for removing paint, since it will still remain in the joints and recesses.
It turns out that you can remove paint by sanding if its layer is not thick and the surface is smooth, otherwise the effort spent on removing the coating will not be worth the result you get.
Advice
Sometimes for thin layers it is enough to rub the coating with a metal brush and sand it with medium-abrasive sandpaper. If the surface area is small, then this is the best way to remove paint without special tools or substances.
Heat treatment
Another way to quickly remove old paint from wood, for example, from a door or floor, is by heat treating the surface. The procedure is as follows:
- The treated wooden surface is heated to the melting temperature of the enamel. To do this, you can use a regular torch or an industrial hair dryer. In the first case, the process is slower and the wooden surface dries out. The hairdryer instantly heats up the painted item, and it begins to bubble. The method is convenient for large surfaces: old houses, if wooden floors are being processed, doorways.
- After the surfaces have been treated, the coating is removed using a spatula.
- The remaining paint is removed with a cloth.
The thermal method is not suitable for products that have plastic or glass parts. Before ridding the door of the old enamel, remove the handles from it. If they cannot be removed, then it is better not to use a hairdryer and choose another method.
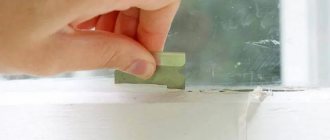
Chemicals
When purchasing, you need to consider that the product is suitable for a specific type of material and paint. If there is a need to leave the room for some time after processing wood, you can take a solvent-based composition. If this is not possible, it is better to take an odorless gel remover. But even the absence of odor does not guarantee the absence of toxicity of the product. Therefore, work should always be carried out in protective equipment and the room should be well ventilated.
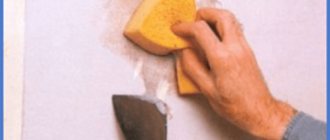
Scheme for removing paint from wood using chemical means:
- Distribute the composition evenly over the surface of the wood with a brush or roller.
- Leave it for some time to take effect.
- Rub the surface until the paint begins to peel off.
- Sand the wood to remove any remaining old paint.
READ Interskol angle grinder 125 1100e disassembly
You can make your own paste from caustic soda and oatmeal to remove paint. First dissolve the baking soda in water. Add oatmeal to it and stir. The mass should have a consistency similar to toothpaste. This product is good for removing thick layers of old paint.
How to remove old paint from wood
Before removing old paint from wood, it is recommended to prepare the appropriate tools for this. Most often, this procedure requires the following (depending on the method of removal):
- simple spatula/scraper (universal tools);
- construction hair dryer (thermal technology);
- power tools with attachments (mechanical technology);
- dye remover (chemical technology);
- protective equipment.
How to make a cleaner with your own hands?
You can prepare the cleaner yourself.
The simplest recipe:
- 2 parts ammonia;
- 1 part turpentine;
- the two components are mixed together and applied to the paint.
The product will begin to act in 20 minutes. The paint will foam and peel. If the layer is thick, then the exposure time is increased to 40 minutes.
Another recipe for preparing a homemade remover that is suitable for treating wooden surfaces:
Removing paint from wood. Grinder circles.
- chalk;
- caustic soda;
- water;
- oatmeal to add thickness.
The third method is mechanical action
Mechanical paint removal is most often used when processing large areas. a grinder is usually used . During the process of removing paint and varnish, a lot of dust and small particles appear, so it is necessary to have protective equipment. Experts also advise not to press too hard on the wooden surface, otherwise you may damage it.
Before removing paint from a wooden surface and proceeding with the subsequent finishing of the coating, it is recommended that you become more familiar with how to treat wood before painting a new layer. For this purpose, primers are used; they should be selected for the corresponding paint and varnish substance, since they must be chemically compatible.
It should be noted that it is not recommended to use open fire to remove paint, as this is very dangerous and greatly harms some wood species, reducing their strength and durability. In addition, resin may appear, which will make it difficult or even impossible to apply a new layer to the surface.
Household repairs
Choose reliable craftsmen without intermediaries and save up to 40%!
Before painting a wooden surface that already has one or more previously applied layers of paint, remove the old coating using available materials. If you don't know how to remove old paint, use step-by-step instructions.
First, prepare the wood for painting by sanding the product and impregnating it with a primer. By choosing the right tools and calculating the effort, you can process up to a meter of painted surface area in 10-20 minutes.
The specificity of wood as a working material is its softness (depending on the type and quality of the wood). When preparing a wooden surface for painting or varnishing, determine whether it is necessary to remove the entire layer of old paint or whether the product can be partially processed. Consider the following characteristics of the paint that is being removed:
- thickness. The single-layer coating does not need to be removed. The varnish (coloring substance) is easier to apply to it, holds better, and the wood is not susceptible to harmful effects once again. At the same time, the creation of very thick layers is fraught with a decrease in strength and density. they are easily destroyed by the slightest mechanical impact
- texture (may not coincide with the quality and functional characteristics of the new coating)
- color - if you apply a layer of new paint that is not thick and dense enough, the old one will show through or change the color of the new one (for example, overlaying blue and red colors will give a purple tint)
- The old coating has been applied for a long time – it can peel off on its own. Painting without removing the old layer, which is flaking, will “make” the treated area lumpy