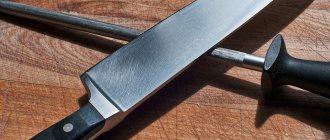
The sharpness of the knife affects the speed of work performed and ensures the safety of users. It is achieved both mechanically and through the use of motorized devices. The second option makes it easier to restore the cutting edge. But working on the equipment is impossible without knowledge of how to properly sharpen knives on a sharpening machine.
Sharpening a knife on a machine.
Cutting angle
As the sharpening angle decreases, the sharpness of the blade increases, but the risk of destruction of the cutting edge by lateral load increases. Typical section angles of a symmetrical tip are about 25−30 degrees. Very sharp knives can be 20 degrees or less. Different knives are sharpened differently depending on the purpose, the geometry of the blade and the material from which it is made.
These features are important when deciding how to sharpen a knife. For example, a surgical scalpel is a sharp but fragile instrument that cannot be restored after losing its cutting properties. Straight razors are also unusually sharp, have a very shallow cutting edge angle, and require stropping once a day or more often. Another extreme case is an axe. It is used primarily for splitting wood or impact cutting, so it can have a blunt point angle that does not require frequent sharpening. Generally, the harder the blade material, the shallower the angle.
The composition and hardening of steel affects the sharpness. The latter is limited by the grain size of the material from which the blade is made. For example, European kitchen knives are usually made of soft materials with an edge angle of 20-30 degrees and a hardness of 52-58 HRC, while tools for Eastern kitchens are traditionally made of hard steel with angles of 10-20. It is not uncommon for these products to have a hardness of 59-60 on the Rockwell scale and higher.
Let's summarize?
At this point, the sound track ended as expected, Shufutinsky stopped warming up his baritone, the characteristic hiss of the record was heard, and now all the sharp objects in the house are in perfect condition...
So what should you remember when starting sharpening?
- Let's decide on a goal.
- Choosing the right type of sharpening machine.
- We make a choice in favor of the most convenient type of sharpening for us.
- We handle the unit carefully, otherwise it may become damaged or break, and this applies not only to the sharpening process, but also to handling kitchen utensils in general.
- Remember about the angle of inclination when sharpening.
- We sharpen ceramic products no more than twice a year, or even less! If the presented conditions are met, ceramic knives will always be in excellent condition!
Types of edge processing
There are several technological operations to restore the cutting properties of the blade. The need to use each of them depends on the type of tool, its condition, and the stage of restoration of properties. They are very important for understanding how to properly sharpen a knife at home. Here are some of the edge processing methods:
- Edge restoration . Removing metal to form a new edge.
- Rough sharpening . Processing using coarse stones or paper according to the method used.
- Fine sharpening . The same as described in paragraph 2, but using fine-grained abrasives.
- Edit . Light sanding to maintain acceptable sharpness.
- Polishing . Achieving a mirror effect without significant changes to the edge.
All these procedures can be applied in stages and simultaneously as stages of complete restoration of the tool or separately, depending on the tasks or purpose of the blade.
For example, straight razors are straightened before each use and even during the shaving process, but they are processed on stones only a few times a year, and the edges do not require restoration for years. A hard steel kitchen knife may need abrasive only once a year, while butchers using carbon steel tools can only get by with sanding every few cuts.
Grinding
During processing, a sharpened knife develops microprotrusions and fractures—burrs. These defects are eliminated at the final stage for kitchen knives - grinding.
The grinding function is usually already built into the machines. It is done manually using a fine-grained abrasive. More professional products are polished at the end of processing.
When polishing yourself, you can use stretched leather - a special paste is applied to it. You should move the blade along the skin with movements toward you (towards the handle).
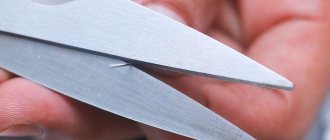
If sharpened correctly, the product will be razor sharp and will last a long time. Universal sharpeners allow you to bring not only knives to this state, but also, for example, scissors.
Types of wear
Typically, the technology of how to properly sharpen kitchen knives is a set of measures consisting of coarse and fine sharpening with possible subsequent polishing if the material of the tool allows the sharpness to be increased by the final procedure. For high-quality steels, before a noticeable loss of cutting properties, the tool is capable of making 200–500 cuts on food products and maintaining an acceptable sharpness for a long time after that.
Intervention in the edge geometry may only be necessary in case of severe wear once every few years, except in emergency cases. The main damage that leads to the need to remove large amounts of metal with abrasives occurs mainly when using the blade as a lever. Such stress can even cause the blade to bend or break.
Great forces on hard objects are no less destructive to the knife. Attempts to cut ice, bones, or accidentally hitting the side of the pan lead to chipped edges. The fabric can also be damaged as a result of severe corrosion, usually from exposure to food acids or from high temperatures and aggressive chemicals in the dishwasher. The corrosion pits that form on the edge require its complete restoration.
To avoid such damage, you should follow simple rules:
- use tools appropriate to the task;
- use only wooden surfaces as boards;
- cut without lateral movements;
- wash the blade immediately after use;
- Keep each separately clean and dry.
Sharpening methods
Knife connoisseurs often demonstrate a fanatical approach to the issue of sharpening. Possessing a large arsenal of devices, they achieve extreme sharpness from cutting tools, thereby turning sharpening into an art or a very expensive hobby. For household needs, the approaches they use are hardly justified, since the equipment used for these purposes can be many times higher than the cost of the knives themselves, while there are many inexpensive ways to obtain razor sharpness.
On the other side of the spectrum are users who have no idea how to properly sharpen a knife with a whetstone or using scrap materials. For people who are not keen on the intricacies of this matter, it will be a pleasant discovery that there are many inexpensive ways to obtain a razor-sharp blade that do not require complex devices or unattainable skills.
On the grinding wheel
An extremely undesirable method for processing. Due to the fact that it is difficult to properly limit the place of contact of the abrasive with the blade from heating, there is always a risk of steel tempering, and therefore loss of the original hardness of the cutting edge. Therefore, for routine sharpening of high-quality tools, rotating abrasives, without properly organized cooling, are unsuitable. In most situations, properly sharpening a knife means handling it by hand.
But in the case of very large chips on a blade without a circle, removing such a large amount of metal can be prohibitively long. If the knife is inexpensive, and the damage indicates that this is an exceptional case, then it makes sense to use an electric sharpening wheel or a grinding machine. The abrasive on the device should rotate without beating and at low speed. Numerous videos about the details of restoring edges using this method are easy to find on the Internet.
On abrasive stones
Sharpening metal tools using stone blocks is a classic method. The stones intended for this differ in shape and abrasiveness. From a geometric point of view, for household purposes it is enough to have flat rectangular bars. The vast majority of knives can be processed on such stones, with the exception of those that have crescent-shaped (concave) sections of the cutting edge or serrated sharpening.
Read also: Wrench with adjustable torque
The technique itself looks like this: it is necessary to make smooth, repeated cutting movements along the plane of the stone, moving the entire surface of the edge along it. In this case, it is necessary to maintain a constant angle of inclination of the blade to the plane of the block. The issue of choosing the grain size of a stone or set of stones is very important. Grit is measured in grit. This unit of measure refers to the number of abrasive particles per square centimeter of stone surface.
If the knife is sharpened on a regular basis and just at the moment when it is still capable of cutting, then one 600 grit stone will be enough to maintain it. To restore a cutting edge or sharpen a very dull tool, you will need a stone of 200-300 grit. The ideal would be sequential processing on a set of several stones with a gradual reduction in grain size. The optimal set of bars looks something like this:
- 300-400 grit. For rough processing.
- 600-800 grit. Sharpening after the previous stone.
- 1000 - 1200 grit. Polishing.
Processing on the last stone on the list allows you to cut loose hair and paper. Although many experts recommend mirror polishing with ultra-fine abrasives of 1000-1500 grit, for most household knives the use of stones with an index higher than 600 grit hardly makes sense. It is also necessary to keep in mind that the price of stones increases with decreasing grain size. In terms of the materials from which the bars are made, they can be divided into natural and artificial by origin, dry and wetted (with water or oil) by method of use.
Sharpening devices
The greatest difficulty in manual sharpening is the need to maintain a constant angle of inclination to the plane of the stone. Various manufacturers offer devices that take over this operation. There are systems that involve mounting on a metal rod passing through adjustable holes. Thus, with their help, it becomes possible to move the abrasive relative to a rigidly fixed knife blade at a strictly defined angle.
No less popular are the so-called V-shaped devices. They look like two replaceable abrasive rods in a vertical plane at an angle to each other, fixed in a wooden or plastic base. To sharpen a knife, it is enough to make sliding movements with the blade along the stones perpendicular to the substrate.
Some manufacturers offer electric sharpeners with several stages of sharpening and even at different angles. These systems are generally designed for kitchen use and have the same disadvantages as a grinding wheel. In addition, even the most expensive models do not provide more than two sharpening angles. Their main advantage is speed. Many models allow you to restore the knife within a few minutes.
Sandpaper or cloth
This is a great way to get acquainted with sharpening simply and cheaply, without the risk of ruining expensive abrasives. There are many methods for conveniently securing a sheet of emery to a block or wrapping it tightly around a wooden block. Abrasive sheets are available in a wide range of grits at the appropriate stores. The home craftsman can only form them into a hard and smooth surface. Compared to stones, when sharpening with sandpaper it is better to use lighter and more frequent movements - strong pressure easily chips away the abrasive grain. Otherwise, the technologies for working with a knife are similar.
In such a matter as sharpening knives, it is important to remember that a sharp blade can cause a lot of trouble and therefore requires careful handling. But, paradoxically, people cut with dull knives more often in the kitchen. This is because an unsharpened tool requires more force and energy to operate, thereby increasing the likelihood of incorrect and unintended movements.
It is simply impossible to describe all the nuances of how to properly sharpen knives in one article, but this is not always necessary. Especially if an ordinary kitchen knife needs sharpening or you are just a beginner who needs to start somewhere.
- In fact, sharpening a kitchen knife to a sharp point at home can be done easily and quickly. But the difficulty is that this must be done in such a way that the sharpness of the blade is preserved for a long time, and at the same time too much steel is not removed from the blade.
In this material we will try to simply and clearly tell you how to properly sharpen a knife with a whetstone. After all, this method is not only basic and accessible to everyone, but also the most effective. In addition to step-by-step instructions for sharpening and finishing, here you will find a selection of training videos and an overview of alternative methods - from sharpening systems to the bottom of a ceramic plate.
A little about choosing stones
Sharpening stones come in the following types:
- Ceramic;
- Diamond;
- Natural;
- Japanese water stones.
If you wish, once you gain experience, you can buy some solid and expensive diamond stones or Japanese water stones. However, it is better to start with ordinary ceramic bars (such as “Boats”), which are sold in every household goods store. They are wear-resistant, durable and affordable. The only drawback is their uneven abrasion.
Here are tips to help you find the right assistant:
- What size should the block be? Ideally, it is 1.5-2 times longer or at least not shorter than the knife blade. The width and shape of the bar is not important.
- When purchasing a block, make sure it is flat and free of chips.
- To start, you can buy one medium-hard all-purpose whetstone. But if you wish, buy one block with two sides of different grain sizes or two stones with a large and half the grain size. In the future, a couple more stones may be added to your collection.
- It's best to try to get a couple of Soviet-made donkeys, say, at flea markets or from your grandfather. Bars marked “Made in the USSR” have uniform-sized grains and high-quality binding material.
To bring your knife to razor sharpness, in addition to sharpening stones, you can also buy GOI abrasive paste, which we will also talk about working with.
Electric sharpeners
Electric sharpeners are a modern alternative to whetstones and whetstones. These devices can be adjusted to suit different types of blades. The knife is guaranteed not to be damaged. Sharpening one product, often together with grinding, takes up to 2-3 minutes.
Electric sharpeners differ in power levels and additional equipment. The most expensive and professional sharpeners are equipped with three grooves with different disks. They provide a three-step process and not only sharpen the cutting edge, but also polish it.
An expensive tool is necessary when you need to sharpen ceramic and exclusive products made from elite materials. Ceramic kitchen knives have become popular, but they are difficult to sharpen without preparation. There is a risk of crumbling and deforming the cutting part.
7-step instructions for sharpening and finishing a kitchen knife
So, in sharpening a knife, one goal is to remove enough metal from the blade so that the cutting edge becomes sharp again. You need to start work with a coarse-grained abrasive and finish with a fine-grained one.
It is important to remember the following principles of sharpening knives:
- The most important thing is to choose the optimal sharpening angle and maintain it along the entire cutting edge while sliding along the block.
- Movements should be smooth, without pressure.
- All bars must be moistened with water, or better yet, with a soap solution: before sharpening (so that the blade glides better and metal dust does not clog the pores), during the process (to remove the resulting suspension) and at the end, to clean the bar.
Read also: Resanta TDP 20000 DIY repair
And one more important tip - the first time it’s better to practice on a knife that you don’t mind ruining. Especially if your main knife is too good and expensive. Well, let's start practicing.
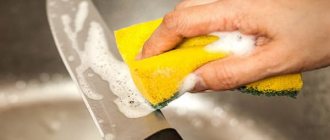
Step 1. Rinse the stone with water, and then run over it, say, with a sponge with a drop of dishwashing liquid.
Step 2. Next, sit down at the table and place the stone on a wooden board, for example, a cutting board. You can place a towel under the stone. For some it is more convenient to place the block perpendicular to themselves, and for others at an angle of approximately 45 degrees. Over time, you will understand how it is more convenient for you to work.
Step 3. Now you need to decide on the sharpening angle and fix the position of the knife. What should the angle be? The general principle is that the smaller it is, the sharper the blade, and the larger it is, the longer the blade retains its sharpness.
- Regular kitchen knives are sharpened to an angle of 40-45 degrees. If you are sharpening a fillet knife (designed for cutting thin pieces of fish, poultry and meat), then you should sharpen it sharper - at an angle of 30-40 degrees. The selected value must be divided by 2, and then we will get the angle that should be between the blade and the surface of the block. That is, to sharpen a blade at 45 degrees, you need to sharpen each side at 22.5 degrees to the sharpening surface.
A simple technique shown in the photo below will help you fix the knife at an angle of 22.5 degrees.
- Remember, you should try to stick to the chosen angle throughout the entire work.
Step 4. Place the knife across the block so that the upper edge of the handle is above the lower edge of the stone. Holding the handle with one hand and the blade with the other, we begin to slide along the block away from ourselves along the trajectory shown in the picture below.
Watch a short and clear video:
- The point is that the cutting edge sliding along the stone should always be perpendicular to the direction of movement.
- At the bend of the blade, the knife handle needs to be slightly raised to maintain the selected angle.
- Remember also that you can’t put pressure on the blade, but you shouldn’t give it any slack either.
Thus, you need to pass the blade along the stone about 40-50 times, namely until a “burr” (burr, microsaw) appears along the entire length of the cutting edge. Its appearance will tell you that the excess metal has worn out and there is no point in grinding further. Then you need to turn the blade over and repeat the same steps. Clearly in the video:
- A burr is a small roughness that is difficult to see, but can be felt by carefully running your finger along the edge of the blade (but not along the edge, so as not to cut yourself).
During operation, a suspension will appear on the blade - metal dust, which must be periodically washed off with water.
Step 5. So, the burrs have appeared, now we proceed to finishing. To do this, we repeat the same manipulations on a stone with half the grain size. An alternative finishing method is using musat.
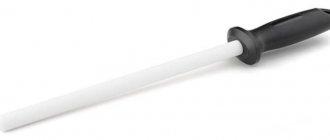
- Musat is a steel rod of oval or round cross-section with longitudinal notches. It is only suitable for editing and maintaining sharpness, but not for sharpening a knife. It is recommended to edit the knife with musat every time before and after work.
How to sharpen a kitchen knife with musat can be seen in the following video master class from the respected knifemaker Gennady Prokopenkov, who, by the way, specializes in making kitchen knives.
Step 6. If desired, you can bring your knife to a razor sharpness. To do this, take any leather or leather belt, treat it with GOI, Dialux or any other abrasive paste, and then do the same steps, but only in the direction from the cutting edge.
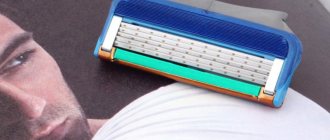
Step 7. Finally, we check the quality of sharpening. This is done very simply. It is enough to cut a tomato or cut paper. If you wanted to achieve razor sharpness, then you should try to shave the hair on your arm. The sharpest knives can even cut hair, as shown in the photo below, but in the kitchen such sharpness is not required for the most ordinary knife.
Methods for checking the blade tip
You can check how sharp the blade is in the following ways:
- Using paper. Using a sharpened knife, try to cut off a strip of thick paper suspended in the air. The steel should cut the sheet without crushing it.
- By shaving. This method is most often practiced by fans of edged weapons. Alternatively, you can try shaving the hair on the back of your arm.
- Using your fingernail. The knife is pulled across the growth of the nail without pressing. If the blade glides easily, it means the work was done poorly.
- Using a tomato. A well-sharpened tool easily cuts tomatoes without crushing them.
- With a finger. Gently draw across the cutting edge with the pad of your finger. A sharp blade has clear edges; if sharpened poorly, a rounded edge will be felt. This method requires certain skills.
Anyone can sharpen knives; the main thing is to choose the right tool and study the technology.
Alternative sharpening methods
If your kitchen knife is a simple and inexpensive “hard worker” and/or you just don’t want to delve into the “knife culture”, then we recommend using an electric sharpener, a roller knife or a sharpening system for sharpening at home. What are their pros and cons?
- An electric sharpener sharpens knives perfectly and quickly, but even the highest quality models remove too much material from the blades, thereby shortening their service life. Another disadvantage of an electric sharpener is that a good device costs more than $200.
- A roller knife is an inexpensive and easy-to-use option. With its help, you can quickly sharpen a kitchen knife, but, unfortunately, the sharpness of the blade will not last long and the knife will deteriorate over time. The most trusted tool among roller scissors is the one from Fiskaris (pictured). Do not confuse a roller blade with a V-shaped blade. The latter is an option for the most frugal.
- Sharpening systems are good because they allow you to more accurately set and maintain an angle. There are different types of such sharpeners - with blade fixation (manufacturers DMT and Lanski) and with fixation of the stones themselves at a certain angle (Spyderco Triangle Sharpmaker). Separately, we can highlight a sharpening system in which you can select the desired angle and control the position of the knife - this is the Edge Pro Apex Knife Sharpening System. Each system has its own pros and cons. For example, on sharpeners with a fixed blade it is inconvenient to sharpen wide chef knives, but on a triangle from Spyderco the knives are straightened rather than sharpened, and you can only choose an angle of 30 or 40 degrees. However, for kitchen knives these are the angles that are needed, and using a triangle is very simple. A detailed review and operating instructions for the Spyderco sharpener can be seen in the following video.
What are the disadvantages of Apex Edge Pro? Perhaps this is just a high price - $245. However, to sharpen kitchen knives, you can buy a Chinese copy of this sharpener (for example, on Aliexpress).
There is another clever way to sharpen a knife at home - using a rough mark on the bottom of a ceramic mug or plate. The principle of operation is still the same - maintaining the angle, smooth movements, maintaining the cutting edge (cutting edge) perpendicular to the direction.
The tool must be in working condition. In the case of a knife, the main characteristic of the working condition will be its sharpness. We will tell you how to sharpen a knife correctly, what tools you will need for this, and give you a number of useful instructions. "Knife sharpening. Basics" is a basic article for those who are just starting to get acquainted with this art.
Read also: Device for circular saw video
Features of professional sharpening machines
Such equipment has several technical and operational differences from household analogues. But it’s worth emphasizing right away that the cost of this machine can be 2-3 times higher than models for home use.
So, we are talking about more productive, functional and precise units that can confidently adjust the shape of an edge made of tool and high-speed steel. As a rule, professional electric knife sharpeners have a durable metal base, a balanced rotor, almost always the ability to install two wheels, and a powerful three-phase motor.
In terms of functionality, it is worth emphasizing the possibility of adjusting the reach, point-by-point adjustment to the dimensions of the tool being processed, and automatic wetting of the working equipment, which protects it from overheating.
How does the blade get dull?
We buy a sharp knife at the store, but over time it inevitably becomes dull if, of course, we work with it. Why does this happen, since the tool is made of good steel and sharpened at the factory? The process takes place at several levels:
- Microscopic, when particles of steel are ground off the cutting edge during friction with the material, making the edge less sharp. You can't see it, but you can feel how more and more pressure is required to cut over time.
- Macroscopic, when the tip encounters solid inclusions, such as grains of sand, particles of stone or metal. They are found in almost any material. The edge either moves the obstacle away or moves away itself, while crumpling.
- If the blade is used inappropriately, its blade can be damaged beyond recognition. This means unscrewing screws, digging soil, etc.
As a result, the working part of the blade is deformed, the edge loses its sharpness and the tool becomes less and less suitable for work. Gradually, hardened steels crumble, and softer and more ductile steels begin to curl.
Rice. 1. The process of blunting and sharpening a knife: 1. When working with a knife, the shape of the cutting edge changes randomly. 2. During the sharpening process, we return the specified shape of the cutting edge or change it. 3. And we give it smoothness, finally removing the burr.
To return the knife to working condition, it is necessary to eliminate the resulting deformation and restore the correct shape of the blade.
Electric sharpener
Modern models of electric sharpeners allow you to achieve high quality sharpening due to the built-in function of automatically determining the angle of the blade. The electric sharpener is perfect for both household use and for sharpening knives in catering establishments. The range of electric sharpeners is presented in a wide range, so the price may vary, but if you want your knives to always remain sharp, then buy more “advanced” and expensive models.
What are knives sharpened with?
When sharpening a knife we use a similar process - friction, but this time we control it. With uncontrolled deformation of the steel, the knife becomes dull, with controlled deformation it sharpens, that’s the whole difference.
You can sharpen a steel wedge with any abrasive tool, and in the beginning it was fragments of stones and pebbles. We are modern people, so we will use a specially designed sharpening stone.
If you use a cheap stone to sharpen good steel, be prepared that it will quickly wear out and lose its flat shape. Therefore, it is better to immediately purchase a good ceramic sharpening tool or a diamond-coated sample.
Three types of abrasive are enough for the job:
- Rough - about 350 units/cm² or diamond marked 160/125. Needed to eliminate severe deformation and is rarely used.
- Fine - about 650 units/cm² or diamond marked 100/800. Needed for normal basic sharpening of a knife that has become dull within reasonable limits.
- Ultrafine - about 1150 units/cm² or diamond marked 20/14. Useful for grinding and final finishing, removing burrs.
For constant work, bars of the last two types are required, because bringing a knife to a state in which a rough stone is needed is blasphemy. However, an experienced master has all three types.
For convenience, the following points are important:
- The length of the bar should be 1.5 - 2 times longer than the blade.
- The width should be 2.5 – 5 cm.
- The height should be such that your fingers do not touch the table.
- The block should stand firmly and not slide on the table.
For example, to sharpen a knife on small whetstones, you can make a device like this.
The listed points are very important for achieving correct sharpening, especially at the learning stage. Then, when you get the hang of it, you will be able to cope with the task in less comfortable conditions, but at first, convenience plays an important role.
How to sharpen a knife?
We've come to the most important thing. Sharpening a knife involves placing its blade on a whetstone at a certain angle and running the entire cutting edge along it from the heel to the tip. Proper sharpening requires compliance with three conditions:
- The angle of inclination of the blade plane to the surface of the sharpening stone remains strictly unchanged (Figure 2).
- The edge line at the point of contact with the block must be perpendicular to the direction of movement (Figure 3).
- The pressure should be moderate and uniform; there is no need to “iron” the sharpener or remove chips from it.
- Figure 2
- Figure 3
So, we place the blade on the stone perpendicular to its long side, set the angle to 15-20˚, and begin to move the blade along the stone, gradually moving it from the heel to the tip. When turning the edge closer to its end, the handle should be slightly raised above the plane of the stone and pulled back, as if lagging behind the tip. This will allow you to maintain the same angle of inclination and perpendicularity of movement.
When the pass along the entire edge is completed, it is necessary to repeat it in reverse order, as when rewinding. This will make it easier to maintain the correct angle and overall the work will go faster. We perform these movements until a “burr” begins to appear on the opposite side of the edge.
The “burr” can be seen or felt with the skin of a finger when running it perpendicular to the tip. When the edge begins to scratch along its entire length, stop sharpening one side and begin processing the opposite side.
The knife is turned over and work begins on the other side. Gradually, a moment will come when, like last time, a “hangnail” will appear. This means the second side is ready. More precisely, almost ready.
Next, we take a thinner abrasive and start the process from the beginning. Similar to the previous stage, we achieve the appearance of a “burr” first on one side and then on the other side of the cutting edge. At this stage it will be much smaller and thinner.
Finally, the blade is polished to the finest abrasive. Here it is necessary to carefully polish the cutting edges, as if stroking them, and remove even the smallest “burrs.”
The position of the blade relative to the sharpening stone: When you lead correctly (position 1), the blade “drags” along the block flat, and when incorrectly, the blade “plows” along the block with its cutting edge (position 3) or the edge between the blade and the main descent of the blade (pos. 2).
In the video: one of the options for sharpening a kitchen knife on a Japanese water stone.
Performing finishing
Having sharpened the chamfer at the desired angle, you can proceed to the finishing operation, during which the cutting edge will be brought to the utmost sharpness, all micro-irregularities and scratches will be removed from the working surface, and it will be polished to a mirror shine.
In this case, grinding is a consequence of finishing, since the main goal at this stage is the linear accuracy of the working surfaces. There are two ways to sharpen the cutting edge at the finishing stage. Either simply bring the working end of the chamfer to the required sharpness, or form a small bevel at its end, a few millimeters wide, with an inclination to the chamfer of approximately 5º. To do this, first the main plane is adjusted, then the sharpening mandrel is set at an angle of 30º, after which grinding continues until the specified bevel width is achieved.
Knife sharpening. Some useful tips
To use your favorite knife as long as possible and efficiently, follow these principles:
- Do not use blunt tools, it is dangerous! Increased pressure causes the blade to break off and injure your hands.
- Do not allow severe deformation, in other words, do not wait until the knife becomes completely dull. A slightly dull knife is easy and pleasant to sharpen, while a neglected one requires skill and time.
- Do not sharpen knives on an electric wheel. At such a friction rate, the blade overheats and loses its hardening.
- Use the tool as intended and it will last you longer.
Summarize. Sharpening a knife requires performing simple steps in the correct sequence. If you are patient, take your time and do everything as written here, you will definitely achieve success.