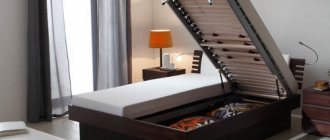
Loft bed with protective side panel
Young children tend to have restless sleep; they often roll around and throw off the blanket, and falls are common. To avoid this, bumpers must be installed on cribs. But if the bed is purchased for growth, its design is usually repeated by an adult and there are no such barriers. The best solution is to install a temporary restraint that will allow the child to sleep without the risk of falling, and can be easily removed when he grows up.
The removable store barrier is mobile, easy to remove and easy to clean
Restrictors can be purchased at furniture stores, where a wide range of different materials and colors are available. Making a removable bed rail to order will provide the best combination with existing furniture, both in size and design - but it will not be cheap.
Wooden bed restrainer, ideal for children's beds
Therefore, the best solution would be to make a fall arrester for a child with your own hands.
Removable limiter that allows you to lower and raise the side if necessary
We prepare the necessary materials
Based on the required functionality, the material from which the products are made is also selected: fairly frequent washing requires the use of fabrics such as linen or calico, and the manufacture of products that have a purely decorative function involves the use of satin, silk or curtain fabrics, which have some dirt-repellent properties and do not tear during processing.
When deciding what to stuff a pillow with, you must remember that cotton wool is not suitable for such purposes, as it quickly cakes and crumples.
It would be nice to use natural feathers and down, but these materials are now quite difficult to obtain. Therefore, it is best to use modern synthetic materials. A pillow made of foam rubber, synthetic down or holofiber will remain soft and densely stuffed for a long time, and the hygienic properties of these materials will allow you not to fear that parasites will appear in them or dirt will accumulate. Making a pillow from foam rubber is also convenient because parts of any shape can be cut out of this material, and then simply covered with fabric - the product will be stuffed evenly. In addition, foam rubber products can be flat, which will allow you to sit on them comfortably - which means that the child will not freeze while playing on the floor.
Materials
Restrictors that have a protective and decorative function can be made of various materials.
Soft restraints are made of durable cotton fabric. The filler used is foam rubber, padding polyester or other soft and voluminous material. Sintepon is a soft hypoallergenic material with high thermal insulation properties, suitable for children from 0 to 6 months.
Soft, but at the same time elastic foam rubber is most often used as a filler. For convenience, it is placed in removable covers.
As a rule, such fillers are decorated with various inserts or applications.
Sometimes in such sides some hard material is chosen as the base. A solid base is upholstered with fabric and filler and the result is a more durable, but at the same time comfortable and safe option.
Solid sides can be made of wood, plastic or metal. As a rule, they look like either a solid canvas, or a slatted type, or a canvas with figured cutouts.
- Wooden options have a fairly durable structure, are environmentally friendly and can be installed in three different positions. Manufacturers use species such as oak, pine, maple or ash. All products undergo careful processing. They must be sanded and coated with varnish or paint that does not contain lead or other harmful components.
- The metal sides are quite reliable and durable. Metal is a cold material and therefore is most often used in combination with other materials.
- The design of combined sides can consist of various materials: solid wood, chipboard, plastic, metal in combination with soft foam rubber and fabric.
How to make a fall protection bed with your own hands
You can easily make a do-it-yourself limiter for a children's bed of any kind at home, both from scrap materials and from inexpensive building materials, despite the fact that this attribute will serve as long and reliably as the factory one.
If the built-in limiter is a series of vertical slats, then the arms and legs of babies can get stuck between them. In this case, a soft border is also necessary.
How to make a bed restrainer from wood with your own hands
First, you need to decide on the method of attaching the limiter; the easiest way is to attach it to the side of the bed, but this may not be a very aesthetic way and will damage the structure of the crib. You can choose any convenient one from the list of mounts listed above.
For older children, who are around the age of three, you can choose low restraints to prevent them from falling while sleeping.
Decide on the future design and shape of the holder. Prepare the necessary material and tools, namely:
- Reliable wooden bars;
- Hacksaw;
- Self-tapping screws and/or bolts;
- Screwdriver;
- Ruler or tape measure;
- Paper and pencil.
To make the simplest U-shaped barrier, which will be fastened with bolts, you will need slats 55 cm long; the height is selected individually, can be from 15 to 30 cm.
For a crib measuring 70x120 cm, a side with a height of 70 cm will be optimal.
Step-by-step description of the side manufacturing process:
- Draw a schematic diagram of the proposed barrier for the crib, taking into account future dimensions;
- Cut the wooden slats according to the dimensions indicated in the diagram;
- Carefully fasten the bars together to ultimately obtain a U-shaped frame.
- Drill holes for fastening bolts on the installed barrier and the side of the bed;
- Screw the limiter to the bed using bolts.
Older children need curbs to prevent them from falling while sleeping.
Side made of material
To do this you need:
- Take measurements of the crib;
- Construct a rough plan of the building on paper;
- Purchase foam rubber or padding polyester, fabric for the cover and fasteners in the required quantity;
- Roll up rolls of material and stitch;
- Sew covers of a suitable size;
- Sew fasteners onto the covers and mattress;
- Attach the restraint to the bed.
The color scheme of the bed limiter, as well as the bed itself, depends entirely on the flight of your imagination.
Plastic side
Pipes purchased from the plumbing department of a hardware store work well here. They are easy to fasten together, the fastenings are strong, and the whole structure is quite simple.
The holder can be attached to the side of the bed, to the bottom of the bed, or under the mattress, if the age and weight of the child allows.
Removable restraints are installed, as a rule, only on part of the bed, and therefore are suitable for older children - approximately three years of age and older.
Mesh side
- Measure the bed;
- Plan the approximate size and design of the limiter;
- Purchase materials: strong mesh, slats made of wood, metal.
- Cut and fasten the frame from the slats;
- Attach the mesh in the middle;
- Cover the frame with a suitable fabric or thoroughly sand the surface of the wood and varnish it, let it dry.
- Attach to the bed in any convenient way.
Parents traditionally prefer pink for a girl and blue for a boy.
Side for newborns
How to make a side for a children's bed so that the child does not fall? Restraints on newborn cribs are necessary not only to prevent children from falling, but also to soften the hard parts of the bed.
This function can be performed by soft woven bolsters and pillows placed around the perimeter of the crib and covering sharp corners.
In cribs designed for newborns, restraints are installed along the entire length, safely limiting the space of the crib.
Natural hypoallergenic materials are suitable for making barriers. It is not advisable to use hard parts to decorate the sides, because they can scratch the delicate skin of babies, or get into the respiratory tract and cause suffocation.
For the little ones, soft models of bumpers are available. They can cover the crib on four sides, or they can only be attached to two long sides.
Varieties
Depending on the intended purpose of the side, structures of different heights, configurations, fastening methods and degrees of protection are used. In cribs for babies, it is recommended to use restraints that completely cover the side or long side of the bed. For preschool children, protective systems are installed to protect them from accidentally falling out of bed during night or daytime sleep. They may not be installed along the entire perimeter of the bed, but cover only part of the long side of the mattress.
Often, a bed restraint is available with a mount that allows you to easily remove the unit from a child's bed and attach it to any other horizontal surface that requires restraint. These bumpers are convenient to use when moving, traveling, and in cases where the child needs to sleep outside of his usual bed. This installation is easy to install and will protect the child even if he sleeps on an adult bed.
All types of bed bumpers to prevent falls are divided into several categories, depending on the material of manufacture:
- Soft;
- Made from mesh-like material;
- Plastic;
- Wooden.
Soft
Soft bed bumpers are made of padding polyester material or foam rubber. A layer of this material is rolled into tubes and fastened together so that the resulting structure is stable and indestructible. By adjusting the number of rollers stacked on top of each other, sides of different heights are made.
In order for such limiters to always look clean and neat, they are covered with covers with a removable snake. The covers are washed in the machine, ironed and put back on foam rollers. This will help to always keep the children's bed clean and the room beautiful.
In order for this design to adhere well to the bed, foam rollers, fastened together, are attached to the mattress. For this, homemade ties, buttons or sew-on zippers are used. Another simple do-it-yourself fastening option is sewing Velcro onto the bed restrainer and onto the mattress. Velcro fastening is one of the most reliable, but at the same time easy to use and operate methods of attaching foam bumpers to a mattress.
Net
A bed limiter made of mesh material is used for cribs if the child is not too small and sleeps separately from his parents. The mesh must be very strong and can support the child if he rests his entire weight on it while sleeping. To securely fasten such protection, you should prepare a frame for the mesh and securely fasten it. The frame is made of wooden slats or metal stops. The restraints themselves are softened by putting fabric covers or foam pillows on them.
Plastic
Plastic protective barriers for beds come in two types:
- Purchased;
- Made by yourself.
The sides, made of plastic, have fairly high strength, combined with the low weight of the protective installation itself. Commercially available plastic restraints have an original set of necessary fittings for attaching the system to the bed.
When making such a system yourself, you can use available materials, such as plastic pipes for plumbing. They are very easy to fasten together, and thus create a side with vertical slats. The height of the slats is adjusted depending on needs and desires, the width of the holes between the slats - depending on the intended purpose of the side. The plastic bed barrier for children is very light, and there is no need to put soft covers on it. But if such a bed barrier is made of plumbing pipes, for ethical reasons it is covered with a cover or a thin blanket.
Wooden
Wooden restraints are the most popular and are often sold complete with cribs. The main advantage of a wooden stopper is that it is durable, versatile, and also that it fits any interior design. In addition, this installation is easy to wash, remove, and is completely safe for the baby. A wooden bed rail can be made in different designs, have different heights and fastening methods. Wooden barriers are not only used for cribs; they can be used as a removable barrier option for teenage or bunk beds.
The most popular fillers: their pros and cons
There are a huge variety of fillers on the market, you can choose the ones that suit your baby.
Pros:
Wear-resistant.
Minuses:
retains moisture.
Foam rubber
Pros:
- easy to wash;
- dries quickly;
- does not change shape.
Minuses:
rolls up if not stitched.
Sintepon
Holofiber
Pros:
- hypoallergenic;
- easy to wash;
- does not retain moisture;
- not deformed.
Minuses:
Just like padding polyester, it rolls up if it’s not stitched.
Holofiber
Pros:
- wear-resistant;
- elastic;
- keeps warm.
Minuses:
may be an allergen.
Holcon
Periotec
Pros:
- allows air to pass through;
- hypoallergenic;
- elastic;
- prevents the proliferation of mites and microorganisms.
Periotec
Step-by-step instruction
The design manufacturing process includes the following steps:
- 5–7 parts of the same size are cut out of the pipe (it is determined depending on the desired height of the side), as well as smaller connecting elements that will be located perpendicular to the main rods. Their size depends on the frequency of arrangement of long parts.
- Using the corners, the structure is assembled into a single whole. L-shaped objects are used in the corners, T-shaped objects are used in the upper part, and products with 4 holes are used at the bottom.
- At the bottom of the product (where another hole remains), the remaining pieces of pipes are inserted, which during operation will be located under the mattress and hold the entire structure.
- The product is painted in the color you like.
This design is easy to install, use and maintain. If necessary, it can be easily disassembled, washed, and then, when it dries, put back in place.
How to attach bumpers to a crib
The bumpers act mainly as a form of protection against damage and falls from the bed. Therefore, for small children they are attached around the entire perimeter. This will also protect the body from drafts, but can also serve as a risk factor if:
A very interesting point is how the sides are attached to a crib, if the protection material is corrugated tubes covered with fabric. This homemade budget option can be ideal if you follow some rules:
If the sides play a more decorative role or are needed for teenagers and adults, then they can be fixed by sewing them to the sides of the bed or using elastic bands.
Bed limiter
The birth of a child is an important and joyful event in the life of every family. Parents try to purchase necessary things for their child that will have an attractive appearance and will be reliable and safe during use.
The highest demands, as a rule, are placed on the crib. It must be made of natural material, meet standard sizes, have an attractive appearance and, of course, be absolutely safe for the baby. Such reliable safety can be provided by a special bed restraint.
Features, advantages and disadvantages
Crib restraints produced by manufacturers are designed for children of different ages.
Using them as a barrier in a crib has many advantages:
- Side restraints tightly fix the mattress and sheet . Very often, when falling asleep, a baby can be distracted by external stimuli, and the limiters block the view and prevent him from being distracted both while falling asleep and throughout the night. Thanks to soft stops, complemented by an insulated insert, drafts and cold walls will be a thing of the past.
- Grown-up children very often twist and turn in their sleep, and therefore can accidentally fall, and the presence of a side stop will prevent a possible fall . The bumpers save you not only from falling, but also from other injuries. Soft restraints prevent the passage of the baby's arms and legs through the twigs installed in the crib.
- In addition to their restrictive function, the sides produced by some manufacturers can be used as storage for your favorite toys .
How to make a baby bed limiter with your own hands
When a small child sleeps, it is very important to create a safe place to sleep. And if the baby sleeps not in a cradle, but in a crib for children over 3 years old, the limiter will ensure the safety of the baby
Crib bumpers can be purchased at any children's store. But it’s much more pleasant to make them yourself, showing care and imagination.
In addition, a self-made limiter for a children's bed will be an original gift.
The appearance can be any, in the form of animals, fairy-tale characters, or matched to the interior of a children's room. Vary in height and method of attachment.
To make sides use:
- Plastic. For assembly you will need plastic water pipes (frame), a special tool for cutting plastic pipes, tees and turns to connect the structure. Cut 7 straight tubes of the same size, and smaller ones (protective grille). Straight sections are connected with tees, corners are secured with rotary joints. Plastic tube fasteners will secure the product. This limiter is easy to maintain and easy to assemble.
- Tree. No special plumbing skills are required. A low side is made from a rectangular laminated particleboard. For an easier option, you can take a rectangle of laminated chipboard and cut the transverse slats. For work you will need: a hacksaw, self-tapping screws, a screwdriver, a tape measure. Having made the drawing, you need to cut out the slats. Drill holes in the side of the bed and the slats where the limiter is attached. You can decorate it with bright fabric or paint it in any color. Screw the finished structure with self-tapping screws.
- Textile. The easiest way. Sew a protective fence from dense fabric (chintz, calico, satin). Cut the fabric into a rectangle (according to the size of the limiter) with an allowance of 5 cm. Baste with a stitch seam, bending inwards by 1 cm. Then stitch on a sewing machine.
Advice. To prevent the filling from bunching up, quilt the product.
Foam rubber or padding polyester is suitable as a filler. It is attached using ties, ribbons or Velcro, stitched along the edges of the limiter. For the aesthetic appearance and hygiene of the child, it is better to sew a side that can be washed in a washing machine. It is better to choose natural and hypoallergenic fabrics.
- Net. It is stretched over a frame made of metal or wooden slats. The material must be strong enough to support the weight of the child.
Note. The frame must be completely covered with foam rubber or synthetic padding and covered with fabric
When making a limiter with your own hands, you need to take into account the age of the child. For children in the first months of life, a low barrier is sufficient.
If the baby stands up on his own, then the height of the protection should be higher than his height.
For children over 2 years old, 20-30 cm is enough (the side will prevent it from falling during sleep). The smaller the little person, the longer the protection should be (along the length of the bed).
For older children, half the length of the bed is sufficient.
For convenient operation, the protective side should be easy to remove and attach.
Even the simplest and most uncomplicated crib stopper cannot compare with the finished product. It will bring individuality and comfort to the interior.
Making a wooden limiter with your own hands
Do-it-yourself limiter for a children's bed
Even if you don’t have much experience in carpentry, making a barrier of the simplest design will not be difficult. Before starting work, you should choose the type of fastening - the simplest involves screwing the holder to the side of the bed. This will save materials and time, but it will not look very aesthetically pleasing and the side of the bed will be damaged.
The child bed restraint is easy to install and securely fastens
The second way is to make holders that will be attached to the bottom of the bed and covered with a mattress on top. This option is more convenient, but the possibility of its implementation depends on the design of the bed.
For work you will need the following materials and tools:
Tools for making a side with your own hands
To make a simple U-shaped side (attached with bolts), you will need fairly short slats - the length of the barrier is 55cm. The height of the limiter is optional; for a removable model, a height of 15-30 cm is sufficient.
Advantages and disadvantages
Such products are in great demand and are extremely popular. This trend in demand for the product has arisen due to the fact that crib bumpers have a number of significant advantages that simply cannot be ignored. Among the main advantages are:
- Safety - soft sides can reduce the risk of injury and impacts on the wooden surface of the bed. Babies begin to be active early and can move even in a lying position; such actions are often accompanied by injuries, and with the sides they are not scary. You can also protect your child’s limbs from dislocations, because you can often see them pulling their arms and legs into the cracks.
- Draft protection - fabric cushions do not interfere with normal air circulation, but at the same time prevent the occurrence of drafts. Therefore, you can do regular ventilation with peace of mind.
- Prevents toys from falling out, which can cause distress in the baby, sudden movements, and attempts to get out.
- Providing the children's room with additional comfort, creating a special atmosphere conducive to harmonious development.
- Additional protection from harsh sun rays that can interfere with a restful daytime sleep.
Using bumpers has many positive aspects.
In addition to the advantages, it is worth mentioning the disadvantages that also exist. Among the disadvantages are the following:
- Dust settles on the sides, which can cause allergies, so regular cleaning is required.
- They serve as an obstacle to the child being able to observe everything that is happening around.
There are also minor disadvantages that also need to be taken into account.
However, it is worth noting that such disadvantages are insignificant compared to such significant advantages.
Limiter options
The side can be made soft from padding polyester or foam rubber rolled into a roll. If you sew a cover on such a roller, it will fit perfectly into the interior of the room. However, it is worth making such a limiter of sufficient length, since it is not attached to the bed, but at the same time it should not roll off it.
A mesh barrier is an effective and safe means of preventing falls, but the tension of the mesh must be calculated so that the child does not fall over it. Typically, such a structure is attached to a metal or wooden frame.
A limiter made of plastic plumbing pipes is a simple and inexpensive design. The elements are attached using corners and, if necessary, can be disassembled quite easily.
A wooden limiter is a more classic option. It is strong and durable, and also fits seamlessly into any interior. Most often, the barrier is designed in the same style as the bed. Using woodworking tools, you can give this element an interesting shape. Wooden slats are used for manufacturing.
Foam tube construction
The lightest and simplest limiter is a design made of dense insulating foam pipes. You can fit one piece on both sides of the bed, connecting them under the mattress with ribbons.
If a larger barrier is required, then you need to take 3 pipes and also tie them together or fasten them with thick gray tape. The design is easy to assemble; even a baby’s mother can do it. The products are quite soft, so a child will not feel pain when hit with a foot or hand. At the same time, the foam rubber is elastic and does not deform when pressed. The parts can be easily disassembled and washed.
Having made a barrier for the bed themselves, parents can be absolutely calm about the safety of the baby. A self-made limiter will serve for a long time, reliably, and its cost is lower than a purchased one.
Making a barrier from plastic pipes
A barrier-limiter for a children's bed can also be made from plastic plumbing pipes. You will need a special tool to cut such products, pipes of small diameter and connecting corners of the same cross-section.
Using this scheme, take from 5 to 7 straight tubes of the same size, cut small connecting ones up to 20 cm, and assemble the structure using corners of different configurations. Straight sections of the barrier are secured with T-shaped corners, the edges with L-shaped corners. To attach the holder of the future barrier, choose them with 4 holes.
Sew the side
Let's try to make a long bumper - the rest can be sewn using the same principle.
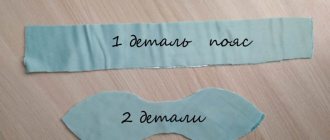
Any cutting begins with taking measurements. You need to know:
- for the entire height of the wall:
- at ⅔ height;
- at ½ height.
Recommendations for cutting material:
- The bumper is sewn from two identical rectangles, the length of each is equal to the length of the product, the width is the approximate height.
- Add allowances of 2.5 cm on each side - that is, for half of the bumper you will need a piece of fabric with a length of DI (length of the product) + 5 cm, and a width of SHI (width of the product) + 5 cm.
- If the fabric width is 140 cm, you will need a cut equal to one length of the product, if 70 cm or 90 cm - 2 lengths.
The edging for the case is an important detail
As for the edging for the cover, there should be enough of it to cover all the segments except the zipper once. You can buy the edging ready-made, but it doesn’t cost anything to make it yourself by cutting it on the bias:
- Cut a strip at an angle of 45° to the transverse thread, the width is 2 times the desired width, plus 0.5 cm allowances on each side.
- Fold the strip in half, right side out.
- Iron the fold.
- Fold the seam allowances inward.
- Iron the folds.
- If the edging consists of several parts, sew them into one ribbon.
When stitching, the ends of the blanks must be folded with their right sides at an angle of 90° to each other, align the edges of the allowances and stitch. Then the allowances should be ironed.
Place the cord inside the ribbon and stitch along the entire length (you can use decorative stitching if your machine can do it).
Making inner covers
The inner case is the simplest part that even a novice needlewoman can handle:
- Cut out 2 rectangles according to the measurements taken.
- Place them right sides together.
- You can strengthen the parts with sheet padding polyester by cutting out 2 of the same rectangles and tying them to the main parts, but this is not necessary.
- Baste the pieces along three sides, leaving a 10 cm long gap on one of the short sides.
- Sew up the details.
- Trim the seam allowance close to the stitching (2mm is enough).
- In the corners, cut the allowances at an angle.
- Turn the product inside out.
- Straighten the corners with scissors.
- Fill the bumper with padding polyester.
- Quilt it with long stitches diagonally, laying stitch lines at a distance of 3-4 cm from each other.
- Quilt again with a different slope - the stitch lines should form diamonds.
- Seal the hole.
Preparing the ties
How will the fall guard be attached to the bed with your own hands?
The most convenient option is ties.
They can be made from wide braid or the same material as the piping.
In the second case:
- Cut a 4 cm wide strip on the bias.
- Fold it in half lengthwise.
- Iron the fold.
- Place the seam allowances inside.
- Iron and stitch again.
As for the quantity, three are enough for the bumper covering the long side of the bed - two are sewn in at a distance of about 2 cm from the corners, one in the middle.
Each tie consists of two identical ribbons - this will make it easier to sew them in.
Sew a cover
It is also made from two rectangles, but there is one subtlety.
You need to sew in a piping and a zipper. For this:
- As in the first case, fold the pieces with right sides facing each other.
- Place an edging between them so that the allowance coincides with the cuts of the parts along the long side, and the stitching is on the line along which the rectangles will be sewn.
- Baste all three pieces together or pin them together with safety pins.
- Fold the ties in pairs and also place them between the parts so that the ends coincide with the cuts of the latter and baste.
- Stitch it all together, leaving a section of seam for the zipper.
- Turn the cover inside out, cutting the allowances at the corners diagonally.
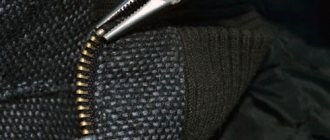
Sew in a zipper
The zipper can also be sewn in before stitching the cover around the perimeter.
But usually beginning seamstresses forget about this and only realize it when the rest is done.
It's okay, it's possible.
So, let's continue working:
- Iron the zipper allowances inside the cover.
- Place the zipper on the inside, with the fold of the fabric lying close to the teeth, but not covering them.
- Stitch on one side as close to the edge as possible.
- Do the same on the other side
- Secure the zipper with double stitching along the short sides.
Decoration
Homemade limiter, with removable fabric cover
The limiter, made of wood, looks aesthetically pleasing; it is enough to polish or paint it with varnish so that there is no risk of getting a splinter. If plywood or chipboard was used, the side must be decorated. A soft cover or case is best. If you lay padding polyester on the inside, the child will be protected from accidental blows during sleep.
Protective edge against falls, decorated with fabric
The limiter can also be coated with a special paint for wooden surfaces.
Do-it-yourself wooden barrier-limiter for a bunk bed
Types of sides
There are a wide variety of safety guards available for babies to prevent them from falling out of their crib while they sleep. The side for a children's bed is made of various materials and is a safe fence. They can be soft, mesh, plastic or wooden. Let's consider each type separately.
Soft
You can either purchase bumpers for a children's bed in a store or make them yourself. The fencing for the crib is made of foam rubber, padding polyester or padding polyester. The soft bed barrier consists of several pieces rolled into a tube, which ensures the stability of the structure. The height of the barrier can be adjusted by the number of such rollers; it is enough to fasten them together.
Net
The use of a mesh barrier is suitable for children who already sleep separately from their parents. The mesh must be strong in order to support the weight of the child if he leans on it while sleeping. To secure such a side, you should prepare a frame onto which the material will be stretched. It is made of metal stops or wooden slats. To soften and provide comfort, covers or pillows are attached to the frame.
The advantages of a mesh restrictor are that, thanks to the properties of this material, the child will be able to see everything, and the air will circulate freely over the child’s sleeping area, which will ensure a safe, sound and healthy sleep.
Plastic
A plastic barrier can be purchased at a store or made at home. Such limiters have increased strength, as well as low weight. The bumpers, which can be purchased in the store, have a universal set of mounting systems for installation on the crib.
To make a restrictive system, you can use plastic plumbing pipes as a material. They are easily attached to each other, which allows you to create a vertical base for the side. The height of the barrier is adjusted in accordance with desires and needs, and the gaps between the slats depend on the intended purpose. To obtain an aesthetic and neat look, such a limiter is covered with a removable cover or a thin blanket.
Wooden
When purchasing a baby crib, the set often includes bumpers made of wood. But if there are none, then you can purchase them, since the choice of such limiters is large. The advantages of such a fall protection device are: safety, versatility, durability, and it also fits any design of a children's room. This side is easy to remove, wash and does not have to be covered with a cape.
Main varieties
Expert opinion Ksenia Petrovna Romanova Expert in the field of interior design, as well as the head of a fabric sales salon
The stationary borders-limiters have shaped cutouts that are used by babies as a stop, allowing them to climb into the crib without the help of adults
For very young children, a barrier that completely covers the side of the bed is recommended. In addition, it should be high enough so that the child cannot fall over or climb over it.
For older children, a small limiter is sufficient, the purpose of which is to prevent accidental falls in their sleep. Such barriers usually cover only part of the length of the bed, and are often made retractable for convenience.
A removable children's bed restraint is considered an ideal solution for arranging a sleeping place
A common option is a removable restraint for a child, which can be conveniently removed when it is no longer needed. This removable barrier will also be indispensable if you are traveling with small children - you can easily take it with you and install it on any child or adult bed.
A built-in border-limiter for a children's bed is purchased along with the rest of the children's furniture
Depending on the material of manufacture, there are several types of protective edges.
- Soft - the simplest design would be a barrier made of foam rubber or padding polyester rolled into tubes. The resulting rollers are attached to each other, gaining the required height of the side. For more convenient care and an aesthetic appearance, such a limiter is covered with removable covers that can be washed in a machine. Such structures are usually attached with Velcro or ties to the bed mattress.
Beautiful soft side for a girl's bed
A net is a fairly effective way to protect your baby from falling during sleep. It is necessary to make sure that the material is strong; the child should not tear or push through the mesh with his weight. For fastening, you can make a frame from wood or metal slats.
Protective mesh on a metal frame
Plastic - such a barrier can not only be purchased, but also made independently. To do this, you will need ordinary plastic pipes for plumbing - they are easily cut and fastened together using corners. The result is an easy-to-use and neat-looking limiter that fits well into any children's room. The advantage of the design is the ability to disassemble it at any time, as well as good tolerance for wet cleaning.
Limiter-barrier for a children's bed made of plastic pipes
Wooden is the traditional option, the most labor-intensive, but best suited to a classic interior. This barrier is also characterized by the greatest strength and durability. A wide variety of designs and designs are possible. A wooden stopper is usually painted to match the color of the furniture, and decorative design options are often used.
Wooden side for baby's bed
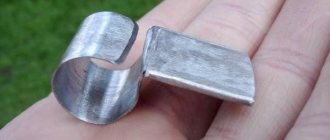
Metal side limiter for loft bed
It is quite easy to make a barrier of any type yourself, it will not require large economic costs, and will serve no less reliably than a purchased one.
Unusual DIY budget limiter
How to make a fall protection bed with your own hands
You can easily make a do-it-yourself limiter for a children's bed of any kind at home, both from scrap materials and from inexpensive building materials, despite the fact that this attribute will serve as long and reliably as the factory one.
If the built-in limiter is a series of vertical slats, then the arms and legs of babies can get stuck between them. In this case, a soft border is also necessary.
How to make a bed restrainer from wood with your own hands
First, you need to decide on the method of attaching the limiter; the easiest way is to attach it to the side of the bed, but this may not be a very aesthetic way and will damage the structure of the crib. You can choose any convenient one from the list of mounts listed above.
For older children, who are around the age of three, you can choose low restraints to prevent them from falling while sleeping.
Decide on the future design and shape of the holder. Prepare the necessary material and tools, namely:
- Reliable wooden bars;
- Hacksaw;
- Self-tapping screws and/or bolts;
- Screwdriver;
- Ruler or tape measure;
- Paper and pencil.
To make the simplest U-shaped barrier, which will be fastened with bolts, you will need slats 55 cm long; the height is selected individually, can be from 15 to 30 cm.
For a crib measuring 70x120 cm, a side with a height of 70 cm will be optimal.
Step-by-step description of the side manufacturing process:
- Draw a schematic diagram of the proposed barrier for the crib, taking into account future dimensions;
- Cut the wooden slats according to the dimensions indicated in the diagram;
- Carefully fasten the bars together to ultimately obtain a U-shaped frame.
- Drill holes for fastening bolts on the installed barrier and the side of the bed;
- Screw the limiter to the bed using bolts.
Older children need curbs to prevent them from falling while sleeping.
Side made of material
To do this you need:
- Take measurements of the crib;
- Construct a rough plan of the building on paper;
- Purchase foam rubber or padding polyester, fabric for the cover and fasteners in the required quantity;
- Roll up rolls of material and stitch;
- Sew covers of a suitable size;
- Sew fasteners onto the covers and mattress;
- Attach the restraint to the bed.
The color scheme of the bed limiter, as well as the bed itself, depends entirely on the flight of your imagination.
Plastic side
Pipes purchased from the plumbing department of a hardware store work well here. They are easy to fasten together, the fastenings are strong, and the whole structure is quite simple.
The holder can be attached to the side of the bed, to the bottom of the bed, or under the mattress, if the age and weight of the child allows.
Removable restraints are installed, as a rule, only on part of the bed, and therefore are suitable for older children - approximately three years of age and older.
Mesh side
- Measure the bed;
- Plan the approximate size and design of the limiter;
- Purchase materials: strong mesh, slats made of wood, metal.
- Cut and fasten the frame from the slats;
- Attach the mesh in the middle;
- Cover the frame with a suitable fabric or thoroughly sand the surface of the wood and varnish it, let it dry.
- Attach to the bed in any convenient way.
Parents traditionally prefer pink for a girl and blue for a boy.
Side for newborns
How to make a side for a children's bed so that the child does not fall? Restraints on newborn cribs are necessary not only to prevent children from falling, but also to soften the hard parts of the bed.
This function can be performed by soft woven bolsters and pillows placed around the perimeter of the crib and covering sharp corners.
In cribs designed for newborns, restraints are installed along the entire length, safely limiting the space of the crib.
Natural hypoallergenic materials are suitable for making barriers. It is not advisable to use hard parts to decorate the sides, because they can scratch the delicate skin of babies, or get into the respiratory tract and cause suffocation.
For the little ones, soft models of bumpers are available. They can cover the crib on four sides, or they can only be attached to two long sides.
Is it possible to make the sides yourself?
To make the simplest limiter, no special carpentry skills are required, just care and precision.
Before you begin, you need to decide on the type of fastening:
- Screwing the barrier to the side of the bed. The simplest option that allows you to save not only materials, but also time. However, it does not look particularly aesthetically pleasing and, in addition, damages the bed material.
- Attaching the barrier to the bottom of the bed using holders. They are covered with a mattress on top, which completely camouflages them. This is a more convenient option, but not any bed design is suitable for its implementation.
The simplest wooden limiter, made by yourself.
The following tools and materials are required for work:
- treated wooden slats;
- self-tapping screws or bolts;
- wood hacksaw;
- screwdriver;
- paper and a simple pencil;
- ruler or tape measure.
For the simplest U-shaped barrier, fastened with bolts, slats 55 cm long are required. The total height can be in the range of 15-30 cm.
The work flow looks like this:
- Creation of a detailed drawing indicating the dimensions of all parts, as well as methods and attachment points.
- Sawing the slats in accordance with the diagram. If desired, they can be sent to a workshop, where this work will be performed using professional equipment and with high precision.
- Assembling the racks to form a U-shaped structure, on which it is necessary to mark places for fastening.
- Drilling holes in the bed side and slats.
- Screwing the sideboard to the bed.
How to sew bumpers for a newborn’s crib with your own hands: step-by-step instructions
If you couldn’t find a suitable option in the store, you can try sewing bumpers yourself. This will require a lot of patience, sewing skills, as well as fabric and filling material. Before purchasing materials, it is recommended to think through the design and calculate the amount of fabric and filling required.
We calculate the number of products and their sizes
Material consumption directly depends on the type of bumper. It is recommended to push off from a completely closed side. In order not to make a mistake with the amount of material, it is enough to measure the perimeter of the crib and add a few centimeters for allowances and errors.
Most cribs have standard measurements, so when purchasing fabric for bumpers, you can use the measurements below as a guide:
- 4 elements measuring 53x63 cm;
- 4 pieces measuring 53x123 cm;
- a piece of 180x7 cm for ties (you can use leftover fabric).
You can also consider an option with removable covers; for this you will additionally need lining fabric and an invisible lock.
Required Tools
To make the bumpers the same size, with even and strong seams, you will need:
- sewing needle;
- threads matching the tone of the fabric;
- centimeter or large sewing ruler;
- chalk or pen;
- pins;
- scissors;
- sewing machine.
When choosing between a centimeter or a ruler, it is better to give preference to the latter. It makes it easier to mark the fabric. Choose sharp scissors that cut the fabric well and do not chew it.
Selection of materials
The choice of raw materials must be approached especially carefully, since the sides will often come into contact with the newborn.
Among fabrics, it is better to focus on the naturalness of the composition. Linen, calico, flannel, chintz, cotton, satin are suitable. In terms of design, preference is often given to calm drawings with large elements so that the child can look at them
It is important to remember that natural fabric shrinks slightly when washed, this must be taken into account when sewing
The filler can be padding polyester, foam rubber, holofiber, polyester or hollcon. All options are non-toxic, do not cause allergies, and do not deform when exposed to moisture.
How to determine size and quantity
The sizes of the sides vary depending on their type and the parameters of the crib. For example, you need to sew a bumper in the form of pillows that will cover one long part of the bed and both short ones. Based on the standard dimensions of a children's bed, we obtain the following data: length - 120 cm, width - 60 cm, height - 50 cm. The result is a bumper based on pillows 30x50 cm: 4 pillows on the main part and 2 on the sides. Following this logic, you can think of other options.
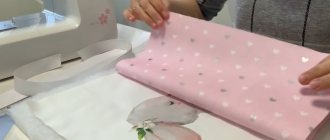
Preparing and cutting fabric
Before cutting, it is recommended to wash and iron the fabric well, because it may shrink. To sew bumper pillows, you need to make a simple marking of squares or rectangles of the desired size, taking into account allowances of 1-1.5 cm on each side.
How to sew
If all the elements are ready, you can start sewing. If there is a lining, it is folded with the main fabric back to back and sewn on three sides. Then the product is turned inside out and the filling is placed inside, after which the last side is closed with a hidden seam. If you have a lock in mind, then it is better to start sewing with it and only then sew the other sides. We repeat the procedure with all elements of the bumper.
The ties are sewn randomly; To save materials, they are made from fabric scraps. At least 20 ties are taken, the length can be different, the main thing is that it is enough for comfortable attachment to the crib.
Decorating Tips
There are many options for decorating the sides of a baby crib. It all depends on imagination and desire. For educational purposes, funny animals with colorful and tactile details are placed. It could be a caterpillar with multi-colored compartments and velvet legs and horns. Or a dog with rustling ears and a bright nose. You can come up with anything that you have enough strength and imagination for.
A simpler option is openwork edging along the upper edge of the protection. It is enough to choose a ribbon in the same color scheme and stitch it along the edge of the side. The same applies to various fabric ruffles. The length of the fabric used to create the frill is taken 1.5 times longer than the length of the element.
It is not recommended to decorate the protection with beads and beads, as the baby can easily tear them off and put them in his mouth or nose.
Types of limiters
Limiters are different; they can either completely or partially cover the side of the bed. Full coverage is important for young children; partial coverage will be sufficient for older children to limit falls.
Such devices can be built-in, that is, the design of the bed provides for the presence of such a barrier in advance.
Bed barriers can be either removable or built-in. Removable ones are especially convenient because you can take them with you on trips, so that you can protect your baby on the road.
There are also limiters:
By material type
Sides are divided into several types, depending on the material from which they are made.
Soft
It is the simplest model of a limiter; it includes: foam rubber, padding polyester, which is rolled into a tube and, if necessary, several rollers are connected one on top of the other to achieve the desired height. Covers can be placed on top; they are usually attached to the mattress using laces or Velcro.
You can choose the material from which the product is made based on your tastes and preferences.
Reticulate
An effective solution to prevent your baby from falling at night while sleeping. Most often, nets are installed in a frame made of wood, metal or durable plastic.
The color variations of such sides are also varied.
Important! Check the strength of the mesh before installing the barrier on the bed. The restraint must be able to withstand the weight of the baby without being damaged.
Plastic
A rather convenient and practical side, despite its lightness, is durable and reliable. It is easy to use, warms up quickly, is easy to clean from dirt, and will not damage the baby’s skin if accidentally broken. Easy to make, you can make it yourself from plastic tubes at home.
As a rule, children's beds designed for very young children are always equipped with a built-in barrier.
Wood
A classic version of a barrier for a children's bed. Strong, reliable, durable. Fits perfectly into the bedroom interior, looks aesthetically pleasing and expensive. There are many variations in appearance and shape, it all depends on the owner’s imagination.
The minimum height can be selected if the child is constantly in a lying position, that is, for infants.
By mounting method
There are several ways to attach the holders to the crib:
In this case, the side is held down by the weight of the child, suitable for children over two years old;
Why do you need bumpers in a crib?
The main purpose of crib bumpers is to protect the baby from injury. Young parents should understand that for the first couple of weeks the baby lies almost motionless in his bed, but before you know it, he will begin to crawl and roll around his crib, and will constantly beat his delicate arms and legs against the hard walls and headboard of the bed.
It’s better to sew a crib protector with your own hands, putting all your mother’s care and love into the product.
For protection, special soft sides are sewn - in the form of pillows, a continuous soft strip of fabric, or in the form of unusual shapes and even animals. They are attached from the inside around the entire perimeter of the children's bed and reliably protect the child from pain and bruises, and the sleeping place will become even more comfortable and beautiful!
Classic protective edges vary in height.
The sides also protect the child from drafts, which is also extremely important, because the baby’s immunity is still very weak, and the baby is susceptible to illness from the slightest draft. Dense soft fabric also provides partial sound insulation, and the crib will be calm and quiet, the child will be calm and will be less capricious
Low sides (their height ranges from ⅓ to ⅔ of the total height of the crib) do not limit the baby’s view and look very neat.
The sides are made from natural cotton fabric or other soft and natural material suitable for the child, for example, from a flannel. Sintepon or holofiber is used as a filler, but it is not recommended to use foam rubber, as it does not dry well and can become a breeding ground for fungus.
Low protection is relevant for babies who have not yet tried to get up in a crib.
How to install a baby bumper on an adult bed
If a child sleeps with parents who are concerned about his safety while sleeping, bumpers on an adult bed for the child will be a way out of this situation.
It is advisable to choose restraints with removable fastenings, because the child will grow up and move to sleep on his own bed after some time.
Universal removable restraints are an ideal solution for arranging a sleeping area in any bed; they are easy to attach and just as easy to remove.
It is necessary to choose the appropriate size, either for the entire length of the bed, or a partially retaining side, depending on the age and sleeping behavior of the child.
Otherwise, the manufacturing recommendations are the same as for the previous options.
The presence of special racks in the design allows them to be adjusted in height.
Sides for a children's bed are a useful and necessary device that does not have to be purchased in a store, but can be made independently by involving an older child in the process, giving the opportunity to choose materials and decorative elements according to their preferences.
Most parents who purchased crib restraints for their children were satisfied with this purchase.
The best manufacturers
The market for barriers for children's beds is represented by many manufacturers. User experience allows us to highlight several trusted brands:
- Lindam is a well-known brand from the USA that produces folding mesh bed barriers. It is distinguished by high quality and a well-thought-out fastening system.
- Ikea is a famous Swedish brand that traditionally produces a wide range of products for children, including removable soft sides in cribs for newborns.
- Baby Safe is a Chinese brand widely represented on the Russian market. Mainly produces mesh barriers.
- Leader Kids is a domestic manufacturer of textiles for children. It is distinguished by a variety of prints and colors, and the high quality of the raw materials used.
- Sweet Baby is a joint Russian-Italian production. The assortment includes a variety of models of fabric bumpers and pillows in trendy colors. High-quality natural fabrics are used in production.
LindamIkeaBaby SafeLeader Kids
Sweet Baby
Making a single wooden crib for children from 3 years old
The frame of the structure for a child includes a base and backrests, which is clearly shown in the drawing of the bed. The width and length of the product are determined by the dimensions of the mattress. The bottom of the bed should be no more than 35 cm from the floor, which will allow the child to climb onto it without effort.
The frame is made of two crossbars, which are made from edged boards measuring 50x100 mm. The required length of the product is measured with a tape measure, which is indicated with a pencil. According to the mark, two boards of a given size are sawn off using a jigsaw. Glue is applied to the side of each crossbar. Using self-tapping screws, 25x50 mm strips are fixed in these places for attaching the lamellas, and they should be 10 cm shorter than the crossbar.
Single children's bed with sleeping place 850x1935 mm
How is the base prepared for the mattress of a children's bed from 2 years old? To do this, boards are cut from slats (20x20 mm), the length of which corresponds to the width of the mattress. Their number is determined based on the complete filling of the base space. Products with a stop are attached parallel to each other to the crossbar strips using self-tapping screws. The step between them should be no more than 10 cm.
Then you need to sand all the holes for the fasteners. In the outer slats there are cutouts for the legs of the bed, which are made from timber measuring 50x50 mm in the amount of 8 pieces. The four elements under the headboard should be longer than those under the footboard. The blanks are glued together in pairs and fixed with self-tapping screws.
Creating bed side elements for children from 3 years old
The next step is to use an electric drill to make holes for dowels in boards with a 25 mm wide groove, which are used to make the footboard and headboard of the structure. They are drilled into the ends of the planks. You should be extremely careful when making holes, which should be located at the same level on all planks. They need to have the same depth, which is equal to ½ the length of the board.
The headboard and footboard of the bed can be made from solid pieces of chipboard or MDF. The first element is longer than the second. The width of the parts is determined based on the value of this parameter of the mattress, to which is added the double thickness of the wall of the longitudinal bars of the bed frame. Products can have a different shape of the end part, which can be round or wavy. If the side elements of the bed are made with railings, then another 25 mm should be added to the width of the product.
Holes for edgings in the bed parts are made using a drill
If wooden boards are used to make the side elements of a bed for children over 2 years old, then the following sequence of actions is required. Parts of equal length are cut from bars measuring 25x50 mm. They are inserted into the grooves of vertical boards filled with glue. The legs have holes for dowels. They house the side structural elements. The parts should be pressed tightly, excluding distortions and cracks.
Having made the vertical supports of the side elements, they should be tied with a frame around the perimeter to create a wooden roof. The last step is to attach the ridge beam, which will connect the base of the bed-house structure with your own hands. After all the parts of the product have been prepared, it is time to assemble them. Each element is first checked for chips and gouges, which are sealed with a putty mixture, and the surface is sanded to a smooth state. Next, all parts are treated with a primer or stain. After they have completely dried, the surface of the products is coated with paint.
Mounting options for a crib
The types of fasteners were listed above, and now we will talk about how they differ and in which products they are most often used.
Fasteners are installed on barriers made of plastic and using mesh, which are distinguished by their reliability. Typically, they are secured by screwing the supplied bolts onto the frame or bottom of the furniture so that they are securely fixed and comply with safety regulations.
They can be made with a folding design, which is used for an older child so that he can climb into the bed himself. This is a durable foldable option. Can only be used on wooden furniture.
It happens that there are fastening elements only on part of the side itself, and it is fixed to the furniture, only by placing another part under a double or any other mattress.
The stationary twist is standardly supplied with the furniture, and is an additional part of it; it is used for bunk beds, or for the beds of teenage children. Being an element of furniture, it is attached securely. Wooden material, or chipboard, is usually used for manufacturing.
Soft sides are secured with textile fasteners; their role is played by ribbon, ropes, zippers, and Velcro
It is important to check how well the product is stitched and the quality of the material. Such fixatives can cope perfectly with the fabric base of the product. Securely fixing the sides to the crib
There are also fasteners that encircle the entire mattress, providing high quality fixation
Securely fixing the sides to the crib. There are also fasteners that encircle the entire mattress, providing high quality fixation.
Protective bumpers for a crib will ensure parental peace of mind for their child. After all, falling out of bed can have unpleasant consequences.
Therefore, it is so important to choose the best option for your child’s sleep so that it is securely attached and does not cause discomfort. Children's products must have certificates of conformity and health safety; when purchasing, you should ask the seller about their availability
Dimensions and safest height
Depending on the age of the child sleeping on a bed with a protective side, one of the following limiters is selected:
- Covering the entire side of the bed;
- Covering most of the long side of the mattress;
- Decorative limiter.
Barriers that cover the entire side of the bed are installed either in cribs for babies or to protect a person sleeping on the second floor of a bunk bed. Even if a bunk bed is intended for teenage children or adults, a restraint should be installed on it, since the likelihood of falling from such a bed is quite high, and much higher than the likelihood of falling from a single bunk bed.
The height of the slats of protective structures for this purpose ranges from 20 to 90 cm, and mostly depends on the age of the sleeping person. For children under one year of age, a limiter with a rail height of at least 70 cm is installed. To increase the level of safety, a limiter with a slats height of up to 90 cm is selected. The height of such sides is designed for a child under 1 year of age who can stand on their own feet. This height of the side will prevent the child from falling to the floor (he will not fall over the railing). For a child who does not yet know how to sit, use 30 cm high sideboards; for a child who can sit, use 50 cm high protection. If there is a possibility that the baby will stand on his feet, it is necessary to use 90 cm high bed barriers around the entire perimeter.
If such a barrier is installed for the bed of a teenager or an adult sleeping on the second floor of a bunk bed, then the height of the limiter is set much less than 90 or even 70 cm. A height of 20-30 cm will be enough to protect the sleeper from falling. Bed safety barriers that are not installed along the entire length of the mattress also protect the sleeping child. Such limiters are installed for preschool children, or on the top floor of bunk beds, if not small children sleep on them. Such a limiter has a number of advantages over those that completely cover the side of the bed. Firstly, getting into such a bed is much more convenient, and secondly, the process of installing and lowering such a limiter is much simpler.
Decorative bumpers are an attribute of beds installed in designer bedrooms. They rarely perform protective functions, and when installing them one cannot count on a high degree of protection. Such design elements are installed several times on one bed, and there are significant gaps between them. If this is a bed for a child, then it is better not to settle on this option. The gaps between the sides are often large enough to prevent a child under the age of two from falling. But even such small sides can protect a teenager or an adult and serve as a kind of restriction.