You can never have too many shoes. Sneakers and formal boots, fashionable high-heeled and rubber boots for wet weather, flip-flops and sandals... The list can be endless - but all this wealth must be stored somewhere. A shoe organizer will allow you to properly plan your space and make living in your apartment more comfortable.
A kaleidoscope of creative shoe storage ideas
For those who are interested in how to make a shoe organizer yourself, we offer information about the simplest and most creative ideas for storing shoes.
- A classic of the genre that has not lost its relevance for decades are wooden boxes. It is better to take those in which the boards fit more tightly to each other. Sizes vary to accommodate both sneakers and boots. And in small decorative drawers you can keep sets of socks.
- If you want to leave your rubber boots at the dacha or in the yard, then simply turn them upside down and put them on a makeshift picket fence. This way they won’t get wet inside, and water won’t linger on the outside.
- Use hangers with clips to hang high-top boots at any level.
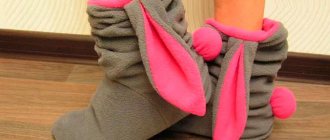
- If you attach bright strips of thick elastic material to the wall, then in this way you will be able to store slippers or cute children's shoes. The system is mounted both vertically and horizontally.
- For lovers of stiletto heels, an ordinary lattice will come in handy to demonstrate all their beauty. When choosing, keep in mind that you need a metal that will not spoil the shoe material. This option looks quite impressive in the interior.
- Equip the hallway with a pouf, without which it is very inconvenient for guests to put on their shoes, but do not let its interior become empty. There is no need to create a mess, just attach couple organizer compartments to the inner surface. It is better to store ballet flats, house slippers or flip-flops in this secluded place.
- The versatile and durable metal is suitable not only for its intended use, but also for displaying beautiful shoes. Arrange an original shelf from an old decorated battery or from the remains of pipes, pre-painted in any color.
It is only important to take a closer look so that there are no nicks or rusty areas left on the surface.
- Rotating shelves, which are often used in stores for comprehensive display of goods, are a great idea for creating a stand. However, it is suitable for shoes without tops.
- Sometimes shoes can become part of a stylish interior, or an element of the image that the owner wants to create. Some pairs you really want to always keep in sight, so for such extravagant specimens you can screw a barbell at eye level in the place where you are preparing to go out.
Interesting! An original idea is to store the most memorable shoes, for example, in which you got married or won a dance competition, under a glass cover. This way you will put the most valuable pair on display for everyone to see.
- If you paint and attach jars that previously contained paint to the wall, you will get a convenient and spacious storage space for slippers, ballet shoes or flip-flops. The design looks stylish and neat.
- A stepladder or ladder in interior design is an interesting way to organize a wide variety of things. This device can store everything from bath towels to stylish ankle boots.
Interesting! You may find a wine bottle organizer useful.
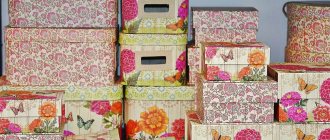
- A shoe organizer made from boxes is for perfectionists. You can attach a photo of the pair that is inside to each box to speed up the search for the desired item.
Important! In cold or rainy seasons, it is better to get a shoe shoe. This device will allow dirt and snow to flow down without dirtying the room and furniture, and all you have to do is wipe your boots with a cloth.
Jewelry organizer
The lid from the box can be as useful as the box itself. For example, it can be used as a jewelry holder. To make such an original thing, you need:
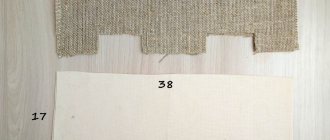
- cover the lid of a shoe box with burlap,
- then attach it to the wall,
- fasten with nails through the cardboard, on which bracelets, chains and other jewelry will be hung.
DIY shoe rack
To conveniently store all your shoe wealth, you won’t need to spend a lot of money, because you can make a convenient rack with your own hands from available materials.
To make a bookcase, take:
- 6 thin planks measuring 1 m x 30 cm;
- thin planks 4 pcs. size 1 m 20 cm x 30 cm;
- roulette;
- pencil;
- saw.
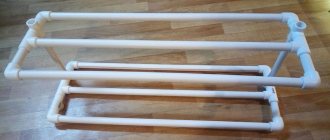
The simplicity of this product lies in the fact that you do not need screws or nails to make it. At any time, you can disassemble this interesting shelf to temporarily remove it or move it to any other place. An organizer for storing shoes is created according to the following scheme:
- Take short boards and measure the middle of the width of each with a tape measure. That is, 30/2 = 15 cm. Draw a midline. Divide the length of the board into 4 parts (1 m / 4 = 25 cm), and on one side make cuts along the marking to the previously drawn midline. You will get horizontal crossbars.
- To design the vertical sides, take 4 longer boards, in the same way find the middle line of each (30 cm/2 = 15 cm), marking it with a pencil, and make 6 cuts to it with equal distances between them. Horizontal shelves will be installed there.
- Assemble the structure by inserting the parts along the cuts into the lock.
Organize your beads
The yokes will find use for the lid, covering it with burlap or velvet. Shiny jewelry looks great against such a background. And the man will attach the hooks or pins - he is always present with the yoke.
Interesting fact. According to an article in Glamor magazine, the average woman will purchase 469 pairs of shoes in her lifetime.
DIY shoe case
Cases differ favorably from all other storage devices in that they can be hung in a place convenient for you, transported, cleaned and washed. Think in advance about how many shelves the height of the working plane will allow you to construct. What kind of shelves will you have: soft or with a dense base, is it important to have a back wall. To work you need:
- fiberboard sheet;
- thick fabric of any color for making walls;
- scissors, thread, saw;
- sandpaper;
- braid for decoration.
We sew a hanging organizer for shoes at home according to the following pattern:
- Saw the fiberboard sheet into the required number of identical shelf parts. Please note that they can be either rectangular or square, if desired. Sand the edges of the boards with sandpaper.
- Let's move on to the cut of the fabric. Cut 2 long side parts with a width equal to the width of the previously sawn boards + 2 cm per hem. Finish the edges of long pieces around the perimeter with braid, hem, or bias tape. Mark lines at equal intervals on the sides. Transverse shelves will subsequently be located in these places.
- We move on to sewing “pillowcases” for the shelves. Attach the cut out shelf board to the fabric. Trace and cut out 2 pieces of fabric for each shelf + 2 cm allowance on all sides.
- Sew 3 sides as you would for a pillowcase, leaving only 1 side unstitched.
- Sew the blanks to the sides at the previously marked distance. Insert a rigid fiberboard base into the resulting “pocket” and fold or baste it to make the edge look neater.
- The last shelf at the bottom should be stitched to the edges of the sides, completing the trunk and shoe organizer.
- Leave the upper part of the textile shelf free. Sew ties to the ends of the sides. If necessary, you can stitch the back wall at any time.
Mobile and reliable shelves on the door or in the closet are ready, you can safely use them for their intended purpose.
Note! Online stores often offer to buy a shoe organizer for 12 pairs. This device costs 350-400 rubles, and is either a suitcase box with Velcro straps, or a soft bag with silicone windows.
From boxes
To design a practical device for storing socks and underwear, you will need the following tools:
- shoe box;
- pen;
- ruler;
- glue;
- decorative paper;
- glue.
Step-by-step creation of crafts:
- First, you should decide on the size of the linen drawer, decide how many things will be placed in it. This determines what size box to choose and how many sections to divide it into.
- You need to put the lid of the package aside; you will need it later.
- On the side walls, mark the height of the future product. It is recommended to take into account the size of the closet in which the underwear will be stored.
- Next, mark the cut lines, then cut off the excess.
- Use the lid and remaining fragments of the box to form internal partitions. To do this, you need to calculate how many parts need to be made. Based on the calculation of the optimal section space, this will be 7-8 cm2.
- The height of the walls is made equal to the level of the box or slightly lower, and the length will be 2-3 mm less than the box itself. In this case, folded items will easily fit into the sections.
- Now it is advisable to decorate the blanks on all sides with wrapping paper or simple white sheets.
- Send them under a press for 2-3 hours to dry.
- Next, decorate the sides with fabric, thick multi-colored packaging or paper material for scrapbooking. For long-term operation, raw materials must be durable.
- For decoration, an allowance of 3-4 cm is made on both sides. It is better to glue the sheets after “trying on” to avoid unevenness and creases. First, for convenience, the sides are folded, then sections are made on the fold lines at the corners of the box so that the material lies evenly. Finally, the decor is glued on.
- Decorate the bottom in the same way.
- On the press-dried planks, mark the locations of future cells.
- On long strips, make a mark from the side of the glued edge, and on short parts, from the opposite edge. Then the assembled grille will take on a neat appearance.
- Make cuts along the outlined contours to the middle of the cardboard. The width of the section corresponds to the thickness of the strip.
- Finally, assemble the lattice and insert it into the box.
Hanging model on the pantry wall
It's quite easy to make a hanging shoe organizer with a double wall that resembles a wall mat with pockets. For this, it is important to select a dense fabric and one that can stretch. With standard door dimensions of 200 cm x 70 cm you will need:
- a piece of thick fabric (like canvas) measuring 100 cm x 50 cm;
- a piece of knitted elastic measuring 100 cm x 50 cm;
- scissors, thread;
- sewing machine (with it, sewing will be better and more convenient);
- chalk for marking.
Important! The size of the fabric directly depends on what size organizer you will sew.
The manufacturing process is quite simple:
- Sew the edges of a piece of canvas to prevent it from fraying later.
- Cut pockets of the size you need from the elastic band (so that your shoes will fit into it later).
- Place the pockets on the canvas the way you want. It is not necessary to adhere to strict geometry.
- Sew 3 sides of the pocket, leaving one untouched.
- Decorate the product with any appliques or braid.
Important! Before placing shoes in the pockets, they must be washed and dried, otherwise you will stain the product.
As you may have noticed, storing shoes can be not only easy, but also beautiful. What ideas are close to you? Describe your experience in the comments.
Drawer divider
Small things like panties, socks, underwear, tights drink a lot of blood from their owners when they feverishly search for what they need in the depths of the closet. Take scissors or a utility knife and quickly zone the space in the drawer. You don't even have to color it.
For perfectionists, of course, here too you can cover the cardboard with cambric or lace.
Decorative wall shelves
If you want to decorate an empty wall in a room, then a shoe box is perfect for this.
- Its inside can be painted or covered with colored paper and the box can be glued to the wall with Moment glue or liquid nails.
- Install the desired decor inside the box, but it should not be heavy so that it does not pull the box down.
Charging station for phones
A shoebox makes a great compact phone charging station. To do this you need:
- just cut holes in one wall of the box and secure them with special metal labels, which can be bought at any hardware store.
- Place the power supply inside the box and attach the box to the wall.
- When you need to charge your phone, you just need to pull the cord through the hole. This way, the wires will be in order and at the same time have an aesthetic appearance.