Purpose of boxes
A lot of things are placed in various boxes in the interior of the premises:
- in the bedroom - bed linen, underwear, cosmetics, perfumes, jewelry;
- in the living room - books, tools and materials for needlework, a folded Christmas tree, chargers for numerous gadgets;
- in the kitchen - cutlery, napkins, dishes, towels, tea, cereals, cookies;
- in the bathroom, toilet - sponges, sponges, washcloths, dirty linen, intimate hygiene items;
- in the dressing room - small items of clothing and linen;
- in the nursery - toys from Kinder surprises, construction sets, stationery, children's books, notebooks, albums;
- in the hallway - gloves, scarves, umbrellas, hats, shoes, spare laces, shoe brushes, creams;
- in the office - office, paper correspondence;
- on the glazed balcony, loggia - clothespins, supports for flowers.
To store various little things in the nursery, they make a box-house, for a girl’s room - a box-box with princesses or flowers made from ribbons.
Gift for a man
The decor of a gift box for a man will additionally emphasize a good attitude towards a person. To create a romantic gift, the box is decorated with photographs of them together, a note with wishes is attached, and the product itself is complemented with a dark bow.
To congratulate a colleague, you can choose your favorite alcoholic drink and place it in a box of a suitable size; the box is decorated with coins and complemented by a postcard with congratulations.
The cardboard case for the stylish pen is decorated with a mustache and hat cut out from a template. For bulky and heavy gifts, you can create the image of a suitcase or sports bag.
From cardboard
After purchasing household appliances, furniture, dishes, shoes, boxes of corrugated cardboard and regular cardboard are often left behind. The easiest way to decorate in this case is to cover the existing box with the following materials:
- wallpaper left over after renovation - if you decorate a box or drawer with it, it will be barely noticeable against the background of the walls and will not visually clutter up the space;
- self-adhesive films - they are highly decorative, have a variety of textures, colors, patterns, are not afraid of moisture, therefore they are used in the bathroom, wiped with a damp cloth to remove dirt;
- colored paper, old postcards, pages of glossy magazines - they decorate a nondescript gray, white, black box, turning it into a unique decorative item.
To glue paper parts you will need PVA glue or silicate, double-sided tape. The container is simply pasted over with sheets, pieces, strips of paper, or paper tubes are rolled up, gluing them sequentially from bottom to top or from any edge, laying each next row after the previous one has set. When decorating with threads or cords, the box is smeared with glue, and the rope is wound turn by turn, pressing tightly.
Depending on the decoration method, such boxes will fit the following styles:
- loft;
- avant-garde;
- minimalism;
- art-believe.
Boxes made of thin cardboard are not suitable for storing excessively heavy items, and for use in the bathroom to store dirty laundry, they should have holes for ventilation.
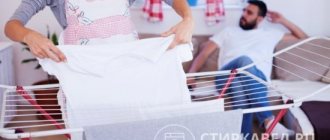
Hanging organizer
Method for making an organizer for needlewomen:
- Steam the fabric piece with an iron and cut out 2 rectangular shapes from it, the width of which is 5 cm + (2 cm for allowances) larger than the hanger, and the length can be adjusted as desired.
- Apply hangers to the upper central zone and trace them along the contour (as an option, attach half of the object, then bend the material in half lengthwise). Step back 2 cm and cut out the part.
- Place the cut segment on the 2nd piece of material and cut it to the silhouette.
- Next, round the lower corners (you can use a plate to create a smooth rounding).
- The next step involves calculating the location of the pockets and their number. Draw lines on the fabric with chalk.
- Then you need to calculate the width of the strips of thick transparent film.
- To form the volume of the pockets, folds must be made. They are laid on both sides of the part, about 2 cm of polyethylene length is laid on each crease.
- If there are 4 pockets in a tier, then the length of the polyethylene strip will be calculated as follows: the width of the fabric blank + 8 folds of 2 cm each. Total 16 cm. If desired, adjust the depth up or down.
- Next, cut out the required number of rectangles from the film, their height is determined by the size of the pockets (markings on the fabric + seam allowances).
- Treat the upper part of the film with finished bias tape.
- Finally, hang the organizer on hangers.
DIY storage organizers for the bathroom
Necessary components for making a hanging fixture for the bathroom:
- oilcloth;
- pencil;
- ruler;
- scissors;
- dense material;
- fixation rod;
- sewing machine;
- hooks
Design method:
- Take a piece of fabric, the scale of which depends on the object where the organizer will be placed.
- Using a pencil and ruler, divide the fabric into a number of segments equal to the number of pockets. As an example, you can take 9 bags.
- Next, take measurements on the oilcloth. It is also worth considering that the pockets should be 2 rubles. wider than the marked rectangles.
- After this, cut off a piece of oilcloth of the required size and divide it into 3 strips, which in turn are divided into 3 more parts.
- Using pins, attach the oilcloth strips to the fabric, leaving 3 pockets on top.
- Cover the rod with material and sew on a side.
- Attach the hooks to the door and hang the craft on them.
Wood weaving
In ancient times, baskets woven from vines and pine roots were one of the very first “storage systems.” They not only collected and stored mushrooms, berries, healthy herbs, vegetables, but also took them with them on trips, putting everything they needed there. Willow branches collected in spring or autumn were usually used for weaving.
Wicker boxes, caskets, chests will perfectly decorate the interior in the style of:
- Provence;
- country;
- ecological;
- vintage.
In the modern world, almost anything is stored in such baskets - balls and knitting needles, clothes and shoes, notebooks and pens, drawings and magazines. They are quite well ventilated; in the kitchen or loggia, dried vegetables and numerous rag bags with medicinal herbs are placed in them. Previously, wicker wooden bread boxes with lids, boxes for cookies, and sweets were very popular. To weave such things well, certain skills are required.
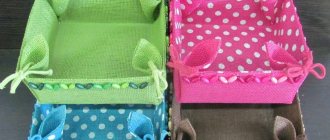
Covering with fabric
The soft fabric gives all items a cozy feel.
This is one of the easiest ways to decorate home storage boxes. To work, you will need the box itself, a piece of fabric you like (you can combine materials), and glue. It is better to use glue rather than staples or paper clips: it is necessary that the fabric fits tightly over the entire area of the walls, does not bulge or form “bubbles”. The material should be dense enough, but not very heavy, so that glue does not bleed through it, but at the same time it should be held on the walls of the case. The most practical option is to use synthetic fabrics.
First, measure the box, recording all the parameters of each element. Then they make a pattern from which the fabric will be cut. It is necessary to leave small allowances along the edges: the material may shrink. It’s better to fill in or trim off the excess than to suffer with the “shortage” later.
The necessary pieces are cut out of the fabric and coated with glue. The box itself is also lubricated with glue. Then the material is carefully applied to the surface and smoothed, removing the smallest wrinkles and air bubbles. Then they let the box sit and the glue harden. This takes about a day.
If the textile box was glued on the outside and inside, then it is better to sew the outer and inner layers of fabric: the joints experience the maximum load, the glue alone may not withstand it.
Weaving from newspapers
First you need a base - a strong box, a corrugated box, of a suitable size. Next, long thin tubes are twisted from newspapers, which are attached to the bottom of the box at the same distance from each other. These tubes will become racks - they should be made thicker and denser than the rest. The stands are attached to the box with clothespins so that it comes out smooth. Then they are wrapped in thin tubes, using any weaving method, to the very top. The tops of the base tubes are carefully hidden, the edges of the box are smeared with glue, the newspaper layer is pressed to the base with clothespins. The lid is made in the same way, the entire structure is covered with paint and varnish. The interior is lined with fabric or paper.
It is not necessary to leave a thick cardboard base, but this will make the structure stronger.
Decor
The decor of finished products should be based on the following basic principles:
- the style of the room for which the box is intended;
- purpose of the box;
- container manufacturing material.
Decor helps complete the box design and increases its appeal. A variety of materials can be used for decoration - cardboard, ribbons, fabric, beads, etc.
Simple budget options for decorating cardboard boxes - in the video:
Chic design of a craft box literally “out of nothing” - in the video:
From plastic bottles
Plastic bottles and plastic candy boxes, if beautifully decorated, will become a container for various things, decorating the living room or bedroom. They are suitable for beads, earrings, rings, buttons, rivets, beads, paper clips, as well as other costume jewelry and sewing items. In the kitchen, cereals, seeds, spices, dried vegetables are poured there, cutlery is placed there.
Five-liter bottles will make large boxes that are not afraid of moisture, so they can be used in damp rooms. The upper edge is decorated with fabric, knitted lace, the base is decorated with self-adhesive film and painted with spray paint. A cap is made from a piece of another similar bottle - it is attached to the base using a “zipper” sewn into the upper part. This design is suitable for styles:
- pop Art;
- industrial;
- loft;
- art-believe;
- modern
If desired, a large shoe or clothing box is made from two bottles; for this, several parts are fastened with a stapler, and handles are cut out in the upper part, decorated with soft fabric.
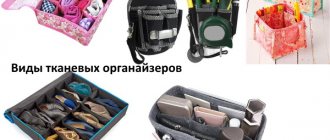
Decor options
There are many ways to transform storage boxes: you can decorate cardboard containers for shoes or equipment with your own hands, turning them into stylish interior elements. For decoration, fabric, lace, decoupage or scrapbooking techniques are used.
The photo shows a compact box with pockets, decorated with fabric and lace.
Using wrapping paper or leftover wallpaper, you can transform the box beyond recognition and store various items inside: books, toys, craft materials. You can cover a cardboard storage box with regular rope and create an excellent eco-style accessory.
Making boxes with your own hands depends not only on the availability of suitable materials, but also on your imagination. The process of creating stylish things “out of nothing” is always fascinating, and the result brings comfort and order to the environment.
How to decorate
You can decorate the boxes with all kinds of available materials:
- fabric, ribbons, colored threads;
- lace, crocheted, knitted;
- straw, rope;
- jute cord, burlap;
- napkins for decoupage;
- seeds, plant twigs, dried flowers coated with varnish;
- pebbles, shells;
- colored electrical tape;
- photographs, stickers;
- using hand painting with paints and markers.
It looks interesting to decorate the top of a round hat box with one or two fans attached to it using double-sided tape or a stapler.
Simple plain boxes, when there are many of the same type, are decorated with stickers with a photo of the contents.
Decoupage
A box with a lid, decorated with decoupage, looks very festive. It is completely covered with decoupage napkins, only on top, or individual details are cut out from them - pictures, letters, inscriptions, figures.
The item will fit well into the following styles:
- vintage;
- classical;
- country.
To work you will need:
- base – box made of cardboard, plastic;
- decorative three-layer napkins for decoupage;
- PVA glue;
- acrylic varnish, paints;
- tassels;
- decorative beads, seed beads, sequins.
The necessary fragments are cut out of the napkin, the box is covered with white acrylic, and dried. Pieces of napkins are placed on the pre-carefully spread glue, and the top is also covered with PVA glue. When everything is dry, empty spaces and the edges of napkins are painted over with acrylic paint, varnished, and the structure is dried again. Afterwards, you can glue any decor - beads, sparkles, beautiful buttons, decorative insects or leaves with Velcro. This box is convenient for storing jewelry, buttons, rubber bands, and hair clips. It will fit perfectly into the living room interior, children's room, bedroom, and will become a holiday decoration.
Decoration with fabrics
For covering with fabric, choose boxes that are strong enough that they will not deform during decoration or subsequent storage. The fabric is cut to the size of the box with allowances of up to two centimeters, and attached with colorless glue or double-sided tape. The lid is decorated in the same way, if you sew a piece of decorative tape, strap, or braid onto it, you will get a handle by which the lid can be removed.
You can make a two-layer box almost entirely out of fabric, placing sheets of cardboard and a special plastic canvas between the two layers of fabric for rigidity. Pockets or dividing fabric strips are pre-sewn inside. The lid is attached with Velcro, zipper, and buttons.Textile organizers with pockets
Organizers for storing things with pockets are not difficult to make. To make the basic version you will need simple materials.
This:
- a large piece of fabric for a 2-sided base of the craft;
- smaller fabric for pockets;
- durable thin plastic for fastening parts (replaced with dublerin, which is glued with an iron);
- bias tape or tape for processing the product;
- eyelets.
Execution order:
- Sewing is done by hand or on a sewing machine.
- First, it is recommended to decide on the size of the fabric model and the size of the pockets. Sheet A4 is used as a standard template.
- Cut out rectangular shapes of the appropriate scale from plastic material, and from fabric - blanks 2 times larger. You should leave 2-3 cm for the volume of the parts and take into account seam allowances.
- Fold each pocket segment in half with the right side out, place a piece of plastic inside and stitch along the top.
- Iron the material on the sides outward in the form of an “accordion” so that there are allowances on the side.
- Next you need to stitch the edge folds of the pocket. Treat each pocket in the same way.
- To make the base of the organizer, you need to place a plastic piece between the layers of a double fabric blank.
- Place small parts on the created base and secure them with pins.
- Sew the pockets to the main module.
- Then take a round object and use it as a template to round the corners of the base.
- Treat the craft with tape or ribbon in a circle.
- Mark the installation location for the eyelets and attach them.
Option for making an organizer for the hallway:
- The first stage involves cutting out 2 rectangles from dense material, measuring 80x40 cm (any size can be chosen as desired).
- Sew the created segments first with the wrong side up, then turn them right side out and stitch along the edges.
- Cut 4 strips from this or another suitable fabric.
- From the stripes, make 4 pocket lines, each with 2 pockets.
- Next, fold the upper edges of the fabric runner and trim it with colorful braid or decorate it with applique.
- Each pocket should be given depth using 2 folds that are not secured at the top.
- Sew the strip with creases on 3 sides and between the pockets.
- Seal the bottom edge of the sewn bags with finishing material or braid. It will cover the edge and secure the folds.
Method No. 1
A box made from an ordinary sewer pipe is quite spacious. Due to its lightness, it will be very convenient when carrying and storing tools.
What will you need?
To make a box, you need to prepare the following list of accessories in advance:
- sewer pipes with a diameter of 15-20 cm and 10 cm;
- PVC pipe with a diameter of 2.5 cm and a length of 25 cm;
- furniture hinges – 2 pieces;
- M6 bolts and nuts – 5 pieces;
- Super glue;
- dye;
- snap latch;
- rivet gun;
- rivets;
- knife;
- pencil for marking;
- construction hair dryer or gas burner.
Manufacturing process
First, four rings 0.5-1 cm wide are cut from the main pipe. For this purpose, it is first marked, and then the rings are carefully cut out.
Afterwards, a piece of the required size for the body of the box is separated from the same pipe (usually 30 cm or more, depending on the dimensions of the tools). For the sides, use a tube with a diameter of 10 cm, which is cut lengthwise, then the workpiece is placed in the oven and the heat is turned on at +200 degrees.
Then proceed as follows:
- After softening, the workpiece is pulled out and pressed with a flat object so that it turns into a plastic plate, and allowed to cool.
- Two circles are cut from the plate according to the size of the internal lumen of the body.
- From below, markings are made for the legs (the role of which is played by M6 bolts), the corresponding holes are drilled and the bolts and nuts are screwed on.
- Markings are made on top for the lid, they are cut through it, and recesses for hinges are cut out on one side.
- For the hinges, drill two holes directly under the notches.
- The previously prepared plastic rings are dissected, tried on inside the case, and the excess edge is cut off so that they can fit freely into the future box.
- Glue the ring onto one side of the chest with superglue, then insert a PVC plate disc and secure it with a second ring.
- Close the side opening of the box on the opposite side in the same way.
When the body is almost ready, they begin to work with a tube with a diameter of 2.5 cm. Markings are made on it: the first mark is 2.5 cm from each edge, the second is 4.5 cm from the first mark on each side. The workpiece is heated with a gas burner or a hairdryer and bent according to the marks to form a handle. As it cools, holes are drilled in the handle for attachment to the box lid.
To decorate, remove the legs from the body and paint all PVC parts in the desired color. After the paint has dried, put the legs in their proper place, attach the hinges, and attach the lid and handle. Drill holes for the snap-on latch and secure it to the rivets using a gun. The tool chest is ready.
Method No. 2
There is another option for making a tool box from PVC. For this purpose, you can also choose any tube, for example with a diameter of 10 cm.
Materials and tools
To work you will need:
- a piece of pipe 70-80 cm long;
- Super glue;
- small canopies - 2 pieces;
- a set of hinges for a padlock and the lock itself;
- a square wooden mandrel with a side of 78.5 mm (for example, a block);
- spray paint;
- pencil and ruler;
- Angle grinder with cutting and grinding attachments;
- construction hair dryer;
- soldering iron with a fine tip;
- knife;
- rivet gun with rivets;
- two boards;
- sharp knife;
- lighter.
Instructions for making a box
First, mark the tube - place a mark at a distance of 27 cm from the edge, wrap a sheet of paper near the mark and match its edges
Draw a straight line around the circumference and carefully make a cut with a grinder. For smoothness, sand the edges with a disc. The pipe is heated with a hairdryer until soft, a mandrel is inserted into it so that the workpiece has a square cross-section
The pipe is heated with a hairdryer until soft, and a mandrel is inserted into it so that the workpiece has a square cross-section.
The rest of the tube is cut lengthwise, heated with a hairdryer or over a gas stove, and a plate is made from it by laying it between the boards and pressing firmly. After cooling, 2 equal parts are cut out of the plate, which are glued to the ends of the first workpiece on both sides. The excess is cut off with a grinder as the glue sets.
The lid of the box is marked with a pencil, the corresponding slits are made, slightly short of the corners
The corners are carefully cut with a knife
A handle is prepared from the remainder of the plate, the ends of which are heated with a lighter and bent down. Glue the handle onto the body of the drawer, and then paint the entire product with paint from a can.
Advice! Holes for canopies and lock hinges are made with a soldering iron, burning through them.
All metal parts are secured with rivets, and then a lock is attached. You can also store any tools in such a chest. To make a useful item you need a minimum of time and financial costs.
Design Basics
The most common design in which you can store vegetables is a regular box. In its structure, it resembles a thermos, since it consists of two main parts - an internal and external box, between which insulating material is placed. A heating device is installed in the box, as well as a small fan that will ensure normal air circulation. The system includes a relay that, if necessary, automatically turns off the heating of the vegetable storage.
If we take the average, then the device for storing vegetables can be equipped with foam plastic with the following thickness:
- 10 cm if the house is located in a region with harsh winters.
- 5 cm if the climate is mild.
An important point is to ensure that the inside of the home-made box has a sufficient level of humidity. In winter, the ambient temperature is very low, even on the balcony, which leads to a decrease in the moisture content in the air. Often the only source of moisture is the vegetables themselves. Therefore, the design must provide for optimal air circulation.
DIY Knitted Storage Basket
- Order in the house cannot be ensured only by the presence of functional furniture. To store various small items, you will need convenient baskets. And it’s good if they are in harmony with the environment.
- In this section you will learn how to knit a simple storage basket. You will save a lot of time that could have been spent searching for a storage container that is suitable in size and color, and, in addition, a thing made with your own hands brings incredible warmth and fills the house with comfort.
Jute storage basket What we need to knit a basket:
- Jute rope (it is preferable to take twine that does not fluff: “Komus”
- Crochet hook (select the thickness of the hook according to the thickness of the rope)
- We decide on the size and shape of the basket.
Let's cast aside all doubts and get to work:
- The first thing that those who first picked up a hook need to master is single crochet and a chain of air loops.
- Here is a knitting pattern for the basic element - single crochets:
Single crochet stitch Pattern for knitting a chain of air loops:
Chain of air loops
Below is a video tutorial on knitting single crochets:
Simple wooden box for storing harvest
You can optimize the space in your cellar with the help of shelving and convenient small drawers. This will allow you to avoid cluttering the floor space, and
First, put together a rack, purchase dried boards for it, it is best if they are pre-processed with a plane. The ideal width of the rack is 50-60 cm. This will allow you to install the maximum number of drawers on it. First, assemble the shelving box, to do this, assemble a rectangle from the boards, nail the burs in the corners, and also mark the location of the shelves with several horizontal bars. Keep in mind that the bars on both sides of the vertical walls must be at the same height.
- timber 1.5 by 1.5 cm or 2 by 2;
- slats;
- hammer and nails or screwdriver and screws;
- saw for adjusting the size of wood;
- carpentry corner.
Depending on the purpose, boxes for vegetables can have different sizes. Most often, tall options are made for potatoes with side dimensions of 80 by 60 cm, side height from 80 to 100 cm. For carrots and other root vegetables, boxes are made with a small height - 40-50 cm.
The principle of making boxes:
- First, assemble the frame of the future box - to do this, cut the bars to the required sizes. With dimensions 80 × 60, you will need 4 bars with a length of 80 centimeters, the same number of 60. You will need another 4 bars with a length equal to the height of the box.
- Connect the bars together to create a three-dimensional frame. Use nails or screws to connect.
- Now all that remains is to calculate the number of slats with which you will have to sew up the bottom and 4 sides. They are packed horizontally onto the body, with small gaps for ventilation - about 2-3 centimeters. For potatoes, you can make a box with large gaps - about 4-5 centimeters.
Experienced craftsmen recommend sewing up the bottom first, and then creating the sides, first long and then short. This way you definitely won’t go wrong with the sizes. When cutting and installing slats, be sure to use a construction angle. If you often use the box or store tomatoes or thin-skinned fruits in it, then you should cover the caps with putty - they will not stick out and disturb you.
The described model can be taken as the basis for a more complex box that will suit
DIY secrets
Those products that are made independently are much more valuable. You just need to take a ready-made cardboard box, for example, from household appliances, and start the process.
Prepare scissors, glue, brush. Decorative elements will also come in handy. You can use wrapping paper, fabric, and ribbons for these purposes. Boxes are often decorated with sequins, fringe or multi-colored beads. It is best to use hot glue for reliable gluing.
Step by step process
It is worth considering several options for making boxes. The first method is easy to implement, the other is a little more complicated.
This option is easy to manufacture:
- You should take a cardboard box of the size you need.
- You will need PVA glue or transparent “Crystal”.
- Prepare a small piece of fabric, paper clips and braid or narrow ribbon for decoration.
In the second case, a more complex method, newspapers or magazines are added to the above components. You also need to take primer, paint and varnish. Prepare your threads and game.
So, to make a box yourself, you should follow the instructions:
- You should cut off the top part or glue the top elements to the side parts of the product. This way you will compact the product and make it more reliable.
- It is necessary to make a mark in the center of the product. Then step back 1.5-2 cm from it, make another cross-shaped marking.
- You should cut out a segment of fabric and iron it. The bottom of the box must be covered with an even layer of glue, then the fabric must be attached. Place the press and do not touch the product for a while. The glue must dry completely.
- Cover the side with glue and attach the pattern to it. The allowances on the side must be folded inward. Secure the top of the canvas with paper clips. Thus, the fabric will not move down when wet. Remove the paper clips only after the glue has completely dried. A similar manipulation should be done with all other parts.
- Corners should be decorated with decorative elements. Most often, tape or braid is used for this. To do this, take glue, apply a small amount to the decorative element and attach it to the corner of the box.
How to choose storage boxes
Universal containers are designed to store various things. It is this criterion that underlies the choice of a particular product. Before purchasing be sure to:
- Determine the dimensions and shape (volume, height, width, length).
- Take into account the communicative features of the contents (for small things and improvised devices, choose transparent boxes with partitions so that you can immediately see the necessary item and easily remove it).
- For clothes and shoes, you should take care of lockable boxes of the same size that will fit comfortably on top of each other.
- When choosing products for a playroom, they prefer bright boxes of different colors and sizes. Children easily associate the size of a toy and a box (small objects fold into small shapes). You can additionally mark the storage areas of toys with special stickers.
- The appearance of the box is important when choosing. Even in storage rooms, a single style determines the feeling of order and organization. In the kitchen, with the help of beautiful plastic products, you can achieve an accented display, which is also an organizer.
Choose boxes of the same size so that they stack comfortably on top of each other.
When purchasing a storage system or separate boxes, you need to focus on the cost of the product. Plastic, cardboard and fabric are the cheapest materials, but the first is the most durable of them. In general, the ratio of consumer qualities to price predetermines the buyer’s choice.
The variety of storage boxes allows you to choose products that can be stored both on open shelves and on mezzanines, in closets.
The market offers a wide range of plastic boxes, any color, imitation wood, wicker, metal. Taking into account the design features of the room, the style, the dimensions of the items intended for storage, and the appropriate cost, making a choice will not be difficult.
By choosing high-quality and beautiful storage boxes, you can not only put your things in perfect order, but even decorate your interior.
Today there are a lot of environmentally friendly products made from high-quality polypropylene, and in the future manufacturing technology will make it possible to launch biodegradable products on the market. The main thing is to purchase a quality product.
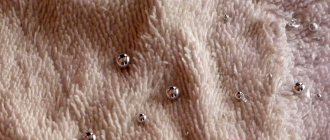
You can choose organizers that are plain, with an unobtrusive discreet print, a bright floral pattern, or painted ones - for children's things.