In order not to fill our closets with things that are not needed for daily use, we try to sort them and put them away until the right moment. For storage, many people buy special organizers, cases, and vacuum bags. It is undoubtedly convenient, and often even looks beautiful. But isn’t it nice to put your own or your household’s wardrobe items in a hand-made trunk for storing things? Don't know how to make it yourself? We'll give you some useful lessons.
Fabric box
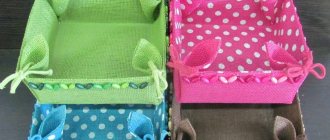
A budget textile box will decorate any apartment and help tidy up the shelves in the bathroom or bedroom.
The photo shows beautiful handmade fabric storage boxes.
What you will need:
- Thick fabric (burlap and double-thread) - 17 cm each.
- Handle tape.
- Threads.
- Sewing machine, pins, scissors.
Step-by-step instruction:
- We cut out the parts according to the pattern as in the photo:
- Having folded the elements, we sew the sides:
- We make a handle by sewing a ribbon of the required length, as shown in the photo:
- We secure the resulting loop with pins along the upper part of the base, sew:
- We insert the double-thread lining into the burlap base:
- Sew both parts along the top edge, retreating about a centimeter:
- Sew an allowance to the inside to secure it inside the burlap cover:
- Let's start processing the bottom. Sew the bottom part:
- And sew the sides together as shown in the photo:
- The textile box is ready!
The photo shows one example of a textile basket that you can sew with your own hands and design it to your own taste.
What do you need for sewing?
It is better to use dense fabric for sewing boxes that can hold its shape well. At the same time, it should not be too heavy so as not to “collapse” under the weight of its weight. Thick cotton or raincoat fabric is ideal.
To make a box you will need:
- 2 types of material: one for the external finishing of the product, the second for the internal;
- cushioning material with a high-density adhesive base;
- chalk or marker;
- scissors;
- safety pins;
- threads, needle;
- Equipment: sewing machine, iron;
- optional elements for decoration.
In this box model, brightly colored fabric is used for the inside and top edge, and plain fabric is used for the outside. If necessary, “bones” (Regilin) can be inserted into the side sections. Then the finished product will be as smooth and stable as possible.
DIY knitted box
This storage box will appeal to crafters who love to crochet.
The photo shows a small round knitted basket in which it is convenient to put jewelry.
Tools and materials:
- Hook.
- Yarn (you can use knitted yarn).
- Wallpaper glue and brush.
Step-by-step instruction:
- We knit the base for the future box. The larger the square, the more voluminous the product will be:
- We tie the base with single crochets, knitting each loop:
- We continue knitting until we reach the required height of the box. Cut the working thread.
- We fix the product with wallpaper glue and dry it with a hairdryer.
You can watch a detailed master class in this video:
Why do we need covers for clothes?
A cover is an indispensable accessory for any expensive clothing, which will become a real assistant and will certainly meet the expectations of its owners:
- Outerwear, in particular fur or leather items, must be stored in covers, since even minor scratches and slight friction with other clothing can ruin their impeccable appearance. If such things are kept in proper conditions, then they will not be afraid of any stains or abrasions.
- The same goes for outfits made from fine fabrics - chic evening dresses decorated with beads, stones, ruffles, and decorative stripes. There are special cases for them made of thin materials that take up minimal space in the closet.
Folding box
An original and practical case that folds and unfolds as needed. This is a convenient option for needlewomen who find it difficult to organize a workplace during the creative process.
The photo shows bright folding storage cases measuring 15x15x20 cm.
What you will need:
- Cotton fabric size 50x45 cm.
- Adhesive interlining 50x45 cm.
- Chalk or water-soluble marker.
- Sewing machine, scissors or roller cutter.
Step-by-step instruction:
- Iron the fabric onto the adhesive interlining and carefully cut it:
- Draw 4 lines at a distance of 15 cm from each side and stitch them:
- We cut horizontal lines from two edges, as shown in the photo:
- We retreat 1.5 cm from the edges and mark the holes on four sides of the rectangle with a marker or chalk:
- We draw lines for the valve:
- And we cut them:
- The next step is to cut out the valves:
- We process the edges in any way:
- We assemble the box by threading the flaps through the side slits:
- After creating your first folding organizer with your own hands, the following products will be much easier to make:
LiveInternetLiveInternet
Quote from TomaMos message
Read in full In your quotation book or community!
Boxes (boxes) for storing things.Sew.MK
The boxes have side handles……. and in front of the window to slide onto the contents of the label.
I slid pieces of plastic canvas between the layers. I was actually thinking about using thick sheets of hard-wearing plastic, but couldn't find anything that worked when I went through the craft store. Until I came across them. Worked like a charm.
So some room for kids, for their craft room, for storing shelves in an office, that one empty space on a bookshelf……..or even tossing it in the car between the seats. Who doesn't need an extra storage box or two.
In any case, would you like to make some for yourself?
So to begin...... I bought all my supplies from Joan's fabrics. But you could buy these items anywhere. The canvas can even be purchased online, I'm sure.
But this is the type of canvas I bought. (This is the kind of material that you can sew through with a needle and thread and create projects and book covers and the like.) And if you click on it to enlarge it, it says that it is an extremely stiff plastic canvas. Sturdy is better because you want your boxes to have a good shape.
The fabric I chose were some home decor fabrics. Since the thick fabrics they sell are for outerwear fabrics, or to restore wooden chairs or stools with. But it's not like the super-thick sofa has fabric upholstery. It would be difficult to work…. and too heavy.
**Each box measures (in inches) 9.5 high x 11 wide x 8.5 deep. **
Start by cutting a piece of outer and lining fabric that is both 40 x 14 1/4 inches. Then cut two pieces of fusible interface to the same size.
Then iron the interface to the “wrong” side of the fabric.
Then sew and fabric pieces in the tubes, sewing the two short ends on the right side together.
Use a 1/2-inch seam allowance, and you can either zig-zag (and trim), raw edges or serger ones.
Do the same with the lining piece and set aside.
Now turn the outer tube of fabric to the right side and iron the seam flat open. Then fold this flat fabric tube, with the side seam exactly along one side. Then place a pin along the other side, at the very top, just to mark the exact other side of the tube. The side seam will be the exact back of the box and the pin you just fit will be the exact front panel.
Then open the tube a little and fold the tube back together, matching the side seam with the pin (PIN blue below), which marks the "front" of the box (which is what you did in the last step), right to center. Press the tube flat again, giving you a new facet. The contact point is on each side at the top (see the yellow contacts?). They are assembled to be exactly centered on the sides of the box. Essentially you just split the pipe in 4/4.
Next, you will attach the handles to the sides. Cut 2 strips of fabric that are 8.5 x 3 inches. Fold each strip together lengthwise and sew the long edges together using a 1/4 inch seam allowance. Then turn each side of the tube to the right
Iron them either flat or with a seam running along the back side.
Then fold each end toward the back about 3/4 inch. Pin in place.
Then flip it over and place the handle about 2cm from the top edge of the top, making sure the center of the middle of the handle is where the pin is at the top edge. And to handle the bubble, place the two edges only 6 cm apart.
Then sew each end down......make a box with an "X" through it to make it nice and strong.
Then cut a piece of clear vinyl (this stuff goes on large rolls of fabric at the store) that is 4 1/2 x 3 1/4 iches (or whatever size you need.
Then attach about 1/4″ of double folded offset tape to the edges.
Then center it on the face of the pipe, right under the pin that you put to mark the center. Place it about 3 1/2 inches below the top top edge.
Then sew 3 windows around the outer edge, attaching it to the main fabric.
Now slide the inner lining of the outer fabrics, on the “wrong” side, together. Match down to the raw edges.
Line up the back seam of the outer fabric with the side seam of the lining fabric.
Now we place the edges of the outer fabric and lining together along the top and bottom. Now place the window fabric back towards you, with that seam right in the center. The front and back of the window will be 11cm wide. So place a ruler right on top of this seam and line 5 1/2 marks (which is half of 11) with the seam, and then place pins on each side, 11cm apart. (So, the "0" sign and the "11" sign.) Place a few pins down the front panel, labeling that back section.
Then connect these pin marks with chalk lines where you will sew the lines later on.
Draw 2 chalk lines on the back that are 11 inches apart. Then do the same to the front, making sure the center is 11 inches below the center of the pin that you placed on the front of the tube. So now you have 4 vertical chalk lines flowing pipes. They are 11 cm apart at the front, which makes them 8 1/2 cm apart on the sides. Now, to sew on these chalk lines, only sew through one layer of outer fabric and one layer of lining fabric with each seam.
Here's a look from the outside. The orange arrows indicate seams that are 8 1/2 cm apart on a side.
And look what you created? 4 small sections that can be opened.
Currently measure to 4 3/4 inches from the base and mark with pins. Draw another chalk line (if desired) around the entire perimeter of the bottom connecting these pins, which is all 4 3/4 inches from the bottom edge.
Sew along this chalk line, all the way around, only sewing through one layer of outer fabric and one layer of lining fabric. So you are sewing one big circle and the pipes should be open. This line simply creates little compartments to slide the canvas later.
Now, turn the pipe from the inside from the top edge at the top and right side on the sides and front and back right to the very center. (The front and rear vertical lines should match at the top and bottom). Then sew along the bottom of the pipe, using a 1/2 inch seam allowance. Finish the raw edges with a zigzag stitch (and trim) or serger.
Now let's look at the bottom corners. Place the pin right on the side where that seam (that is, 4 3/4 inches from the bottom) hits the side.
Now take the bottom corner and pull the front side away from the back side.
Then smooth this corner down so that the seam is finished, today concentrated at the top. Make a nice and pointed tip while lining up the seam, which is now working at the top,
Then turn the fabric over on its side and make the tip pointed nicely and while lining up the seam, which now works at the top, even with the output that you placed on the back side. Just feel your fingers and line them up.
Do you see? Here is the contact center, on the other hand.
As you fold and adjust, you will see horizontal lines and vertical lines that intersect each other on either side of this triangle. They must cross the rights for this new time that you have done.
Then sew right along that horizontal line that is already there (which should be about 8 1/2 inches across). If these aren't accurate, don't worry. Then trim off the excess fabric and zigzag or twill the raw edges.
Do the same with the other corner. You should now have a good area looking down.
Now if you found the same 12 x 18 ultra stiff canvas sheets that I made, you would need 3 sheets to use in one box. But if you want to double the thickness of each side of your car, then you need twice as much. (Doubling it may work better for you, depending on what window you're using.)
Now, cut the canvas to the required size, and roll each section.
Make sure to actually slide it down to each side. You want the canvas pieces to be tight so that the sides of the box have a good shape and are not floppy. Make sure the canvas piece is 1/2" shorter than the fabric (so you can add your bias tape).
Then, using about a 1/2 inch double fold of offset tape along the top edge of the window, adjust the canvas and really push into each crevice as you sew. You will have to start and stop many times to adjust, and that's okay.
Finally, cut out 2 rectangles that fit tightly at the very bottom of the window. Cut a piece of fabric that is a couple of inches larger around all the edges.
Then use a hot glue gun to glue the edges into 2 sheets of canvas.
Then slide the bottom right one down into the box. You can either hot glue it down or just leave it there. It needs to be cozy to stay in place, though.
And it's all. You're ready to make a few more boxes.
(And don't forget to print out some titles to slide into your transparent window.)
Now, fill them out!
Well, hang the pins at one end……. from external to internal. Close the pin…….
………And stick your head into the pin down into the hole.
Now insert the pin down there, puckering the fabric as you go.
Then select in small wrinkles of the fabric, trying to get the fabric past the pin. Getting the first part turned right side is the hardest part. Just be patient and try to get the material to get the latest findings and lie down.
Look how beautiful it is now?
Then push the pin together a little more, creating more wrinkles/ruffles in the fabric.
And then continue sliding the fabric past the pin. It should be easier from here on and should glide nice and fast.
Advice? Make sure not to slide too much fabric at once, like in the picture below. It will be too difficult to slide past your finger and will become too stuck up. Just nice and slow and a little at a time.
Finally, your contact will reach the end. Continue to pull it out…..exposing the right side of the fabric. You can now press your fabric flat and continue with your project.
bias
If you cut straight along the threads of the fabric running perpendicular to the edge, you will get a straight line......and make a nice 90 degree mitered angle. In fact, sometimes fabric printing (such as stripes) are printed onto the fabric a little crooked and will not run exactly perpendicular or parallel to the edge. But if you look closely, the grain will still be ………., and you can use it as a conductor.
And although they knit and weave, they still have grain for them.
And finally, what is offset?
According to about.com, "the displacement of the grain flow is a line that is at forty-five degrees to the longitudinal and transverse grain of the fabric, as on bolts."
So if you have a piece of fabric laying flat and your hem is along the bottom……..
You can then fold the edges of the fabric on the left side, up to the edge edge, creating a diagonal fold.
If you cut right along this diagonal once, you are cutting diagonally......or 45 degrees to the edge.
Then, if you cut a parallel slit next to the original cut, you can create a strip of fabric cut on the bias. (Just don't cut it to make it as long as you need it.)
So if you look closely, you can see that the grain of the fabric is cut at 45 degrees all along the diagonal edge.
And why do we care if the fabric is cut on the bias or not? Well, cutting fabric on the bias actually has more give/stretch to it. If you hold a square piece of cotton fabric in your hands and pull along both sides of the edges away from each other into your hands, your material will not stretch at all. But if you pull along two opposite corners or by bias, the fabric stretches a little.
So ……. I made these storage boxes entirely from old cardboard boxes covered with a little fabric on the front.
Decide how many boxes you want and cut enough for all sides of your box. I give directions for boxes that are 10 inches to 10 inches wide and 11 cm deep. They are perfect for my shelves.....but customized for your shelves. Here are the plays for one box.
The bottom is 10" x 9", two pieces to the side are 11" x 10", and the front and back are 10" x 9"....with a 1.5" x 3" hole on the front. Each piece is 1/2 inch and the two pieces of cardboard are thick......for extra strength.
To assemble, I hot glued (hot set on my glue gun) the bottom inside the bottom front and back piece.
See from below how the bottom piece is glued to the inside of the front and back?
Then glue that section from the inside of the part……. so the sides of the piece cover any and all raw edges. You'll be surprised at how research this new little box does.
Next, I spray painted the sides and top edges white. You can leave your boxes brown or change them up with paint if you like. You can also spray paints inside/back/down, but I didn't.....because they didn't really see.
Then I applied a moderate layer or modeling Podge to the front of the window...
And then a slightly larger piece of fabric is placed on top... and the whole thing is smoothed out.
Then I made slits in the fabric where the hole was on the front panel.
Then I folded these pieces over while applying more Mod Podge.
Once the Mod Podge was dry, I trimmed the edges.....
……. And then apply another layer (thick enough) of Mod Podge on top.....making sure to apply Mod Podge to all the raw edges of the fabric and pressing them tightly against the box.
Let dry completely......
And it's all.
Your boxes are ready to be filled.....
https://www.makeit-loveit.com/
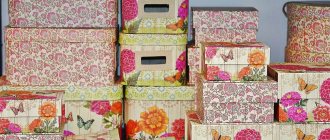
Cardboard box
An affordable, environmentally friendly and very convenient material - cardboard - is perfect for making your own boxes for storing things. Its creation will not take much time.
The photo shows a simple cardboard box for small items that can be decorated with stamps, decoupage or photographs.
What you will need:
- Micro-corrugated cardboard (approximately 1.5 mm thick).
- A printout of the drawing or a ruler and pencil to redraw the workpiece.
- Double-sided tape or glue (PVA or second).
- Scissors.
Step-by-step instruction:
- To make a storage box with a cardboard lid, we will use a ready-made drawing. Transfer it to cardboard and cut it out:
- Carefully bend the workpiece along the dotted lines:
- And we connect the parts together using glue or double-sided tape:
And this video tells you step by step how to make a box for storing things or clothes in a closet:
What are they and what are they for?
The use of the case today is not much different from its original purpose. This was the name of a large travel bag or suitcase made of thick leather. Voluminous, with several compartments, they were constant companions on the trips of wealthy citizens. Now such trunks are made from modern wear-resistant materials that are tolerant of heat, cold and moisture, for example, frost-resistant plastic and special polyethylene. All of them differ in design characteristics and additional elements. They are used to transport things and are installed on:
- bicycles;
- motorcycles;
- cars;
- snowmobiles;
- jet skis and quad bikes.
Coffers designed for storage include: bags for photo and video equipment, hard cases for musical instruments (also used for carrying) and various types of clothing organizers.
Cases for storing things, including clothes, are mainly made of soft textile materials and can be equipped with two or more compartments and a lid with a lock or Velcro. They are designed to protect our things from dust, light and insects, as well as organize their convenient placement. Such organizers may additionally have a decorative function, especially those made by hand.
Wicker wooden box
To make a durable storage box with your own hands, you can weave it from veneer. It will be a wonderful decoration in the kitchen or living room.
The photo shows eco-friendly wicker boxes for storing various small items.
Tools and materials:
- Veneer.
- Clothespins.
- Glue.
- Masking tape.
- Scissors.
- Ruler.
Step-by-step instruction:
- Let's get to work. First, soak the veneer in warm water. Hang dry. Cut into equal strips depending on the size of the desired basket.
- Divide the number of strips in half and secure with masking tape.
- We take one strip and weave it as shown in the photo:
- Using the traditional method of weaving a basket, we continue to increase the square:
- When the stripes run out, we get the bottom of the box:
- We check which side the veneer is not peeling off. To do this, bend one strip like this:
- Using a ruler, bend all the parts in the direction where the material does not flake:
- We take a long strip equal to all sides of the box and weave it along one of the sides:
- In the same way we weave two more details:
- We bend one of the walls, starting to form a basket:
- And we weave long elements into the second wall:
- We continue to weave:
- Leave the ends approximately 5 cm long, cut off the rest:
- We bend the strips inward, embedding them under the third row:
- Glue a long strip along the inner perimeter of the box, securing it with clothespins:
- We weave the remaining strips over it:
- The wicker decorative box is ready!
Sewing process
You can cut out parts in two ways:
- In the first option, the box is made with the least number of seams, but the material consumption is high. In this case, it is necessary to cut out two cross-shaped parts from the main and lining fabric, one from the adhesive sealing fabric. The length of the sides of the “cross” is the size of the height of the product with the addition of 1 cm for allowances.
- The second method is recommended as the most economical. Fabric consumption is reduced, while providing additional rigidity to the ribs of the box. With this option, you need to cut out five squares from the base, lining and adhesive materials. Each side of the part is equal to the height of the box plus 2 cm.
In addition, you need to cut a strip to finish the top of the container: width = 4.5 cm; length = box height × 4 + 2 cm. To make handles, you need to cut out two strips from the main fabric: length = 15 cm; width=4 cm.
Progress of work (cutting was done using the second method):
- Preparation of handles . Stitch the parts so that their right sides are on the inside. Then turn it inside out and iron it.
- Inner part . Using an iron, connect the parts made of adhesive material with the elements made of lining fabric. Sew wall squares to the bottom part on four sides. Cut off the corners of the seam allowances and iron them inward. Sew a finishing stitch around the perimeter of the bottom. Connect the side walls.
- Grinding handles . Using pins, pin the prepared parts to the opposite outer walls of the square. At the same time, bend the open edges of the handles and leave them protruding slightly forward. Customize the elements.
- External part . Sew the seams in the same way as connecting the lining parts. Then insert the inner one into the outer finished box and fasten them along the top with pins.
- Preparation of facing . Along the entire length of the part, make a 1 cm inward fold and iron it. Leave one edge of the facing open. Fold the second one 1 cm and fix it with an iron. The folded edge will subsequently cover the opposite one.
- Stitching the facing . Pin the piece to the top of the box with the non-iron side along the entire top edge. Then stitch at a distance of about 8 mm from the edge. Raise the facing up and iron it. Then fold the part inside out and baste. Make a stitch, retreating 5 mm from the place of initial stitching, while grabbing the folded edge of the part from the wrong side of the container. The box is ready.
If you need to make a box with a lid, then the additional part is made in the same way as the main part. Only without facings and handles.
The video will show you how to sew a fabric box:
From newspaper tubes
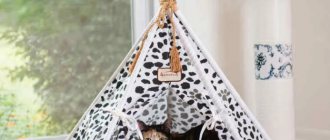
This interesting basket will look great in a nursery, bathroom or living room. If you have a lot of newspapers in your house, you can use them to create a useful and beautiful box with your own hands.
The photo shows a storage basket made of newspaper tubes, painted blue and decorated with fabric.
What you will need:
- Newspapers.
- Knitting needle (you can take a skewer).
- PVA glue.
- Scotch.
- Cardboard box.
- Acrylic paints and varnish, brushes.
- Textile.
- Scissors, ruler.
Step-by-step instruction:
- Cut the newspaper into equal strips measuring approximately 28x10 cm:
- We apply the knitting needle to the edge of the strip at an angle of about 45-60 degrees. We wrap the paper on a knitting needle and secure it with glue:
- We take out the knitting needle. You need to perform the same steps many times to get a sufficient number of tubes:
- We strengthen the bottom of the box with tape and paint it any color:
- We make markings for the main tubes, marking equal segments on the box:
- Glue the tubes according to the markings:
- We fix the additional cardboard bottom with glue:
- We paint the resulting workpiece. Let's start weaving. To create the first row, we braid the outermost tube-stand about the next one. We extend the horizontal tubes by inserting one into the other. We fix the vertical tubes with clothespins.
- If necessary, glue the ends. We braid the whole box:
- We glue the inner walls, securing the ends of the racks to them.
- We paint the basket in two layers, allowing the product to dry. Varnish:
- We sew a removable cover from fabric. The basket is ready!
A detailed master class on creating a storage box from straws with your own hands is in this video:
Linen boxes
If you have large cardboard boxes at home, then they can be turned into cute containers for storing clothes and linen. It’s very easy to decorate them with your own hands, and then they will please the eye anywhere. The decorating principle is similar to that described for smaller boxes. However, when choosing a blank box, you need to take into account that quite a lot of things will be stored here, so it is better to take a stronger base or strengthen it with an additional layer of cardboard or using slats.
In addition to decoration, you can attach handles to the box to make it easier to move. To do this, you first need to determine the place where the handle will be located and attach a plastic or plywood panel to the inside of the box.
After this, you need to cut out a handle of the desired size from thick fabric and attach it with decorative buttons through a cardboard wall with a panel.
If you plan to make a lot of storage boxes, you can attach special holders for inscriptions to them. Such blanks are sold in stores. They are attached directly to the wall of the box. In this case, it is not necessary to reinforce with plastic or plywood. The holder can be pre-painted with acrylic paint to match the paper or fabric.
And one more little tip. You can attach cork legs to the bottom of the box. Special gaskets are sold in stores. However, these expenses can be avoided if you do not throw away bottle caps. They will need to be first cut in half lengthwise and glued to the bottom of the box. Now when moving it will not scratch the floor.
The decorated box can be placed separately or used as a linen box. To do this, you need to make it a certain size so that it fits completely into a rack or on an open shelf. In the same way, a handle should be attached to it to make it easier to pull out. If necessary, you can also attach a holder for a tag with an inscription.
Decor options
There are many ways to transform storage boxes: you can decorate cardboard containers for shoes or equipment with your own hands, turning them into stylish interior elements. For decoration, fabric, lace, decoupage or scrapbooking techniques are used.
The photo shows a compact box with pockets, decorated with fabric and lace.
Using wrapping paper or leftover wallpaper, you can transform the box beyond recognition and store various items inside: books, toys, craft materials. You can cover a cardboard storage box with regular rope and create an excellent eco-style accessory.
Making boxes with your own hands depends not only on the availability of suitable materials, but also on your imagination. The process of creating stylish things “out of nothing” is always fascinating, and the result brings comfort and order to the environment.
Decor
The decor of finished products should be based on the following basic principles:
- the style of the room for which the box is intended;
- purpose of the box;
- container manufacturing material.
Decor helps complete the box design and increases its appeal. A variety of materials can be used for decoration - cardboard, ribbons, fabric, beads, etc.
Simple budget options for decorating cardboard boxes - in the video:
Chic design of a craft box literally “out of nothing” - in the video:
Is it possible to sew a cover for clothes yourself?
Of course yes! The main thing is to find a suitable template or sew a cover following the example of one you already have at home. In fact, everything is extremely simple:
- You need to remove the pattern from the hangers of the desired size, add about seven centimeters on each side.
- If you plan to sew a case to store only one thing, then the front and back parts just need to be sewn together.
- But if you want to place several wardrobe items in it at once, you will have to insert a dividing piece along all sides of such a width that two or three things can fit in the case. Accordingly, more holes will need to be made at the top through which the hanger hooks will pass. The front part will look like a valve, through which clothes will be placed inside. For greater convenience, this hole is made vertical, and then it is closed with buttons or ties.
Important! It is better to sew such things from materials that are easy to iron and wash, and it is desirable that their color is in harmony with the style of the dressing room or bedroom. The ideal choice is a thoroughly washed cotton linen fabric.
What types of dressing rooms are there?
What girl or woman has not dreamed of a separate room filled with dresses, beautiful shoes and handbags? Of course, a dressing room is a much more convenient option for storing things than a simple wardrobe. In addition, there are a variety of storage systems and types of wardrobes. So any fashionista can choose the layout that is most convenient for her.
Types of dressing rooms:
- Linear - a classic dressing room, in appearance reminiscent of a wardrobe. A blank wall is usually allocated for it, and you can separate it from the other part of the room using a plasterboard wall and sliding doors or a thick curtain hanging from the ceiling cornice.
- Corner - located in the corner. By the way, corner dressing rooms are more practical and spacious than linear ones, which is very convenient if there are many tenants in the apartment. All things will fit, and you can allocate a separate part for each, rather than putting everything mixed together.
- U-shaped - this option is suitable for a long and narrow room. This layout allows you to fill all the available space and place a maximum of things. In this case, you can use both corner drawers and shelves, and straight ones, complement your wardrobe with various trouser holders, umbrella stands, key holders...
- Parallel - consists of two storage systems facing each other. The main thing here is to consider the distance between them. After all, if it is too small, then the retractable structure and swing doors will interfere with each other, causing inconvenience.
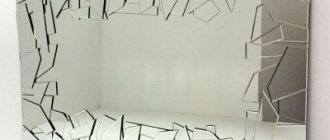
In any case, no matter what type of dressing room you use, it is important to provide places for outerwear, long and short clothes, and shoes. And to make dressing comfortable, you need to install a full-length mirror, put a small banquette and think about good lighting.
For long items, the bar should be placed at a height of at least 1.5 m, and for short items, at least 1 m.
Elfa compact storage system and other popular models
You can arrange your dressing room yourself by choosing the appropriate cabinets, shelves and drawers. But it’s much easier to purchase a storage system that already has all this. You just have to choose what you need.
The most popular storage systems:
- Elfa - this system is known all over the world and confidently holds a leading position. When purchasing such a wardrobe, you can choose its size and composition yourself. In addition, you can add new elements to the design at any time. There are three main types of the Elfa system: the elegant and simple Elfa Classic, the elegant and luxurious Elfa Decor, and the affordable Elfa with Egger chipboard.
- Algot Ikea is a very comfortable, spacious and inexpensive dressing room. Reading customer reviews, you can note that many call it a budget version of the Elfa system. It is very easy to change the composition of the structure; you can choose any elements you like. When disassembled, it takes up very little space; you can assemble it yourself using the included instructions. The only disadvantages include making the wardrobe in a single white color.
- Komandor - this column system differs from others, first of all, in its ease of installation. In addition, even after the design has acquired its final form, you can remove, rearrange or add something at any time. The Commander wardrobe has a fairly affordable price, so purchasing it is quite possible.
- Larvij is another popular wardrobe system. It can be collected in parts or in different rooms. You can change everything at any time. The compact and convenient system includes all the elements that may be needed to store things.
You can adjust the composition of any similar dressing room to your taste, but, as a rule, it includes: drawers and mesh baskets, trousers, trays for small accessories, hooks on which you can hang handbags and outerwear, hangers, holders for belts and ties, special cells for underwear and socks, a rack for shoes.