Stove heating not only does not lose ground, but is also experiencing its rebirth. For this reason, issues of proper operation and maintenance of solid fuel units are no less pressing than they were several centuries ago. Owners of private households do not have any difficulties with how to light a stove and what kind of firewood is best to use. Problems begin when the draft disappears and smoke begins to flow into the room. And the whole reason is a smoke duct clogged with soot and soot. It is difficult to find a chimney sweep today, so you will have to carry out the maintenance of the chimney yourself. All you need for this is a chimney brush, which you can make yourself.
What is a cleaning brush, what does it look like and what does it consist of?
Structurally, the brush consists of the following parts:
- Brush. The main element almost always has a round shape. It is this element that removes plaque from the inner walls of chimneys. Can be made of metal, plastic or nylon.
- Sinker. Only used if the brush is attached to a cable. If it is attached to a telescopic pole, then a weight is not needed. The approximate weight of the weight is 2-3 kg. Its purpose is to add weight to a light brush. Without additional weight, a brush on a cable simply will not properly clean off even a light layer of plaque.
- Cable or handle. A brush is attached to this element, and on it it is lowered into the chimney.
The main quality characteristics include:
- Length of the cable (handle). Cables are usually used 10-15 meters long, handles 1-1.5 meters long.
- Brush diameter (rectangular products are found, but less common than round ones). Can be from 20 to 250 mm. The most common range is 150-200.
Types of products by material and type of design
The main differences between all products are in 2 nuances:
- The material from which the brush is made.
- The method by which the brush will be lowered into the chimney.
The cleaning process, the brush is lowered into the chimney on a rope
Based on the material , the following options are currently used:
- Metal. These brushes last longer, are more durable and reliable. The disadvantages include less convenient use: if the metal bristles get caught on something, it will be more difficult to “free” it. In addition, metal products are more expensive than plastic ones (but since the cost of any brushes rarely exceeds 2000 rubles, this is not critical).
- Plastic. It is easier to make such products yourself - it is done quickly and easily (we will describe how exactly below). Plastic brushes wear out and break easily and quickly. In addition, they cope much worse with complex and old blockages.
- Nylon. A relatively new option, essentially an intermediate solution between plastic and metal.
According to the method in which the brush is lowered into the chimney:
- On a cable/rope. Can only be used from above - the brush is lowered into the pipe under the weight of the sinker. This option is relatively simple, but is not suitable for cleaning horizontal areas. The cable can be metal, nylon or rope.
- On a flexible cable (as for cleaning sewer pipes). Pros: can be used both from above and below, and on horizontal areas.
- On a rigid handle (rod). A universal and more effective option - it allows you to quickly clear accumulated soot and can be used in both vertical and horizontal areas. The length of the handle is usually adjustable - for this they are made telescopic, and, if necessary, folded or unfolded.
What causes clogged chimney pipes?
The advantages of stove heating, such as efficiency, autonomy and the ability to create a special, homely atmosphere, cannot be surpassed by any modern heating device. Thanks to this, stoves and fireplaces are still widely used in both rural areas and cities. However, the use of solid fuel has many disadvantages, one of which is the need to regularly clean the smoke ducts. But the frequency of their maintenance can be significantly reduced if you know where so much soot and soot comes from.
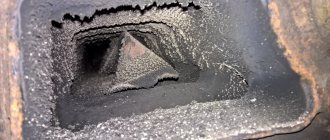
Deposits in the chimney can completely block the smoke exit channel
So, the main factors that contribute to chimney clogging are:
- burning of waste, which consists of high-carbon materials (all types of plastic, polyethylene, polystyrene foam, cardboard, etc.);
- use of wet firewood;
- violation of the operating mode of the heating device;
- heating with wood that contains a large amount of resin (pine, spruce, fir, etc.);
- ash is rarely removed from the working chambers of the furnace;
- violation of the fuel supply mode;
- ingress of third-party debris.
In addition, rapid contamination of the chimney can be caused by increased roughness of the walls of the flues and their incorrect configuration. For this reason, it is better to entrust the construction of the furnace to an experienced craftsman.
Dangers of soot accumulation
It is impossible not to notice problems with the chimney. Most often they will be indicated by the following signs:
- craving decreases;
- firewood does not light well when kindled;
- smoke is coming into the room;
- reduction in the thermal efficiency of the furnace.
All these factors indicate that the gas duct is so clogged that only a narrow hole remains for the combustion products to escape. Using a heating device in such conditions is prohibited, as this often leads to tragic consequences:
- a decrease in the cross-section of the smoke channels can provoke reverse draft, so the room may become smoked with carbon monoxide;
- soot flakes can ignite and fly out of the pipe, creating a fire hazard.
Accumulations of soot in the chimney can lead to a fire
If the soot is not removed in time, then the process of its deposition proceeds like an avalanche, since the combustion mode of the fuel is disrupted and, along with solid particles, unburned tarry secretions and moisture are deposited on the walls of the flues.
How to choose the right chimney brush?
Let's summarize the basic selection rules:
- Rigid handle or cable? Ideally, have both options on your farm: they are inexpensive, and it will be much more convenient to work. If you need to choose one thing, and there are no hatches in the chimney, then it is better to take a cable. If the chimney has hatches and is not high, then it is more convenient to use a rigid handle.
- Which brush material should you choose? For stainless chimneys, you need to choose only plastic - it will not scratch the stainless steel. For brick and asbestos chimneys, it is better to use a metal or nylon brush.
- What brush diameter should be for a round chimney? Selected according to the pipe diameter.
- What brush diameter should be for a square/rectangular chimney? To make the right choice, you need to measure the length and width of the chimney, and select a brush with a diameter equal to the larger side.
- What should be the length of the cable/handle? Selected according to the length (height) of the chimney. It is not necessary to take the cable/handle to its full height: cleaning is carried out not only from above or below (from the fireplace or stove), but also through hatches that are located in different parts of the chimney.
Where is it sold and how much does it cost?
Cleaners of various types and sizes are sold in stores that sell equipment for fireplaces, stoves, and baths.
A tool like this is relatively inexpensive:
- polypropylene brush, diameter 100-120-200 mm: cost - about 700-1000 rubles;
- plastic brush, diameter 200-250 mm: cost - about 1700-2000 rubles;
- metal brush, diameter 150-200 mm: cost - about 1500-1800 rubles;
- metal brush, 250 mm in diameter: cost - about 2200-2500 rubles.
Please note: the amounts given are only for the brush itself and the load. The cable or telescopic extension is usually sold separately. The approximate cost of an extension cord for 1-1.5 meters is about 400-600 rubles, a cable (for 10-15 meters) is up to 100-200 rubles.
A ready-made kit (the brush itself, a cable or extension cord and a weight) will cost around 1500-2500 rubles.
Shop brushes of different types
Among the manufacturers on the market of the CIS countries you can find:
- Hansa.
- Sitecn.
- Biltema.
- Ragar.
Types of ruffs
The selection of these devices is made according to the following criteria:
- Diameter. It can be small (up to 100 mm), medium (100 -250 mm) and large (more than 250 mm).
- Material of manufacture. Heads are made of copper, iron and polymer plastic.
- Form. Round, polygonal, oval, square.
- Type of cable. The working part is attached to a rope, plug tubes or cable located inside the tubes.
You should also pay attention to the weight of the sinker. It varies between 5-20 kg.
How to make a homemade brush?
To clean the stove pipe, you don’t have to go to the nearest store. A homemade brush is quite simple and quick to make. True, the effectiveness of such a product will most likely be lower than a special purchased one. Therefore, it is suitable for cleaning a not very dirty chimney.
There are many ways to create a ruff with your own hands. Below we provide 5 step-by-step instructions:
- From a plastic bottle for a round chimney.
- From a plastic bottle and plywood/board for a rectangular/square chimney.
- From a broom.
- From a metal brush from an angle grinder.
- Made of metal cable.
In all cases we will need:
- A metal cable (about 2-3 mm thick, longer or at least as long as the height of the chimney) with a carabiner.
- A weight weighing about 3 kg - such a size that it can easily pass into the chimney. For example, it could be a small metal rectangle, or an old dumbbell plate, or a plastic bottle with sand.
- A coil of wire with a diameter of about 2-4 mm, or a metal pin (length about 10-12 cm, diameter about 5 mm), with unscrewing eyes on both sides.
- A product from which we will make a brush with our own hands.
Problematic point: on the farm there is a bottle, and a wire, and something for the load, and the rope can be purchased at the nearest store if you don’t have it at home. But finding a suitable hairpin will be more difficult. Therefore, it is easier to take wire instead. It will need to be twisted several times to get a rope 5-7 mm thick and 10-12 cm long (that is, used instead of a hairpin).
From a plastic bottle for a round chimney
In this case, we will make a brush from an empty plastic bottle with a volume of 1.5-2 liters (suitable for cleaning a chimney with a diameter of up to 200 mm).
Step-by-step instruction:
- A hole is burned, drilled or punched in the lid and bottom of both bottles. Its diameter should be equal to the diameter of the stud.
- The sides of both bottles are cut through. It is necessary to make slits not reaching the neck and literally 1-2 cm to the bottom. Between each slot, make a distance of approximately 1.5-2 cm.
- A pin is inserted into the holes made, “pulling” the 2 parts of the bottle together. The cut sides are bent, forming a circle of bent ribbons. It is their edges that will remove soot from the walls.
- Eyelets are screwed onto both sides of the stud. The cable is attached to the upper eyelet. On the bottom there is a load.
From a plastic bottle for a round chimney (video)
From a plastic bottle for rectangular/square chimney
The instructions are suitable for those who have a square or rectangular chimney.
To create a brush for such a ruff we will need:
- Sheet of plywood. Plywood that is not very thick will do; a small sheet 6-12 mm thick will be enough.
- Plastic bottle, volume from 5 liters.
- Screws (such that they can fasten both pieces of plywood together) - 5-10 pieces.
Cut plastic protrudes between the plywood sheets, this is not very clearly visible in the photo
Step-by-step instruction:
- You need to cut 2 identical sheets out of plywood, 1-2 cm smaller in size than the size of the chimney. Example: a rectangular hole with a size of 260x130 mm - cut out 2 pieces of plywood measuring 240x120 mm.
- The neck and bottom of the bottle are cut off, after which a cut is made on the side.
- The plastic is unbent (a rectangular sheet is obtained).
- A piece is cut out of a bent plastic sheet, 3-6 mm larger than the chimney opening. Example: the chimney hole has a size of 260x130 mm, we cut a sheet of 265x135 mm from plastic.
- Along the perimeter of the plastic sheet, cuts 5-10 mm long are made with scissors (or a knife) at a distance of 1-1.5 cm. It is these narrow parts that will remove plaque from the walls.
- The plastic sheet is placed between 2 cut pieces of plywood - so that the “bristles” stick out the same distance on each side.
- Pieces of plywood and a plastic sheet between them are bolted together.
- A hole is drilled in the center into which a pin or coil of wire is inserted (or any other part onto which the cable and load can be attached - this is easier to do with plywood).
This option can be improved. To do this, you need to cut not 2 pieces of plywood, but 3, and 2 sheets of plastic with small cuts. In this case, we will have 2 layers of “bristles” (and 3 layers of plywood).
From the broom
You can make a brush from an old broom. An important nuance: a round broom with synthetic (polypropylene) dense bristles is suitable for us.
Making from a broom
Step-by-step instruction:
- The broom tip is removed (or cut off).
- The bristles are straightened so that all the fibers stick out in different directions (like a toilet brush).
- In the part where the bristles are collected, a hole with a diameter of about 5-7 mm is melted or drilled (for a hairpin or wire).
- A pin with unscrewed eyes (or twisted wire) is inserted into the hole.
- A cable was attached to the eyes (or to the wire) on one side, and a weight on the other.
From a metal brush for an angle grinder
This option is suitable if you have a disc brush for an angle grinder lying around, and its diameter matches the chimney.
In this case, a load is attached to one end of the axle, and a cable to the other.
From a metal cable (complex option)
The instructions are suitable for those who have a welding machine. Using this scheme, you can make a fairly effective brush with your own hands that will not yield
To create a brush you will need:
- Metal cable, about 10-15 mm in diameter.
- Welding machine.
- Saw for metal.
- Pliers.
- Wire cutters (optional).
- A threaded stud, about 8-12 cm long (or better yet, a fully threaded bolt, 8-12 cm long).
- Nuts for a stud (or bolt), 5-7 pieces or more (depending on how dense the bristles need to be obtained).
Step-by-step instruction:
- 2-5 pieces are cut from the metal cable. The length of each piece is approximately 5-10 mm greater than the diameter of the chimney. You can take more, and then, if necessary, trim off the excess with pliers.
- The scraps are unraveled with pliers.
- A nut is screwed onto one end of the stud (so that the thread protrudes slightly from it). This will be the bottom “support” for the first row of bristles. If you use a bolt, there is no need to screw on the nut: the head will play the role of “support”.
- A piece of wire (from an unbraided cable) is placed on top of the nut and twisted crosswise (so that it wraps around the pin). The pieces of wire should protrude
- More pieces of wire are taken and wound in the same way so that the result is a round layer of bristles. An important nuance: the bristles should stick out evenly, forming an even circle.
- A nut is screwed on top and the twisted wire (brush bristles) is tightly pressed to the first nut (or bolt head).
- Several more layers of bristles are made in the same way. Each subsequent layer is secured with a nut. It will be enough to make 3-4 rows.
- Eyelets are welded at the bottom and top - to secure the load and the cable, for which the brush will be lowered into the pipe. As an option, they can also be mounted on a thread.
From a metal cable (video)
Made from plastic
To make a ruff with your own hands you will need:
- thin steel cable, longer than the chimney, 2-3 mm thick;
- two plastic bottles of 1-2 liters, depending on the diameter of the chimney that needs to be cleaned;
- wire with a diameter of 1-2 mm;
- a used or damaged welding electrode with a diameter of 3-5 mm or a piece of straightened wire of the same diameter and length;
- two plastic bottle caps;
- a load weighing 2-5 kg, such that it can easily pass suspended into the pipe that needs to be cleaned;
- cut the wall of each bottle from the bottom to the neck in increments of 1.5-2 cm, like a Chinese lantern;
- make a hole in the center of each bottle cap so that an electrode or the same piece of wire can be inserted into it;
- Screw the caps onto the bottles tightly;
- insert one bottle into another with the caps in one direction;
- attach an electrode or a piece of wire at one end to the load so that, by grasping the electrode, you can lift the load;
- make a hole in the center of the bottoms of both bottles with a piece of wire or a heated electrode;
- pass an electrode or similar piece of wire attached to the load through the holes in the bottoms and caps of the bottles;
- bring the caps and bottoms of the bottles as close as possible and fix their position by bending the free end of a piece of wire or electrode into a ring;
- straighten the cut walls of the bottles, pulling them out;
- attach the cable to the ring on the electrode or the same piece of wire using a clamp;
- We attach any handle that is convenient to hold the cable to the free end of the cable.
All that remains is to climb onto the roof of the house and lower the hand-made device into the chimney for cleaning. By lowering and raising the load with the brush, we clean the pipe. Such a device will clean the chimney of a stove or fireplace that was either heated with high-quality wood, or heated with various types of wood, but using chemical chimney cleaning agents.
What you need to know and do before cleaning: basic rules
Before you start working, you need to know (and follow) the basic rules:
- Cleaning is carried out before the heating season (ideally before each one, at least for the purpose of prevention). This way, you can prepare your furnace pipe to operate efficiently and ensure there are no clogs, leaves, debris, soot build-up, or bird nests.
- The work is best carried out on a windless and dry (and ideally also warm) day. Therefore, at the beginning of autumn it is worth paying attention to the forecast when choosing a suitable date for cleaning.
- Work on the roof must be carried out with safety harness (safety belt) and comfortable non-slip shoes.
- Prepare a more powerful flashlight - with its help you can see the condition of the chimney and the results of your work.
- For work, it is better to change into closed clothes that you don’t mind getting dirty. Even with the most careful cleaning, soot will still end up somewhere.
- Use eye and respiratory protection: wear goggles and a respirator. Naturally, the soot will not cause much harm, but sneezing or washing your eyes from it is not very pleasant.
- Since all the debris and soot will fly down, all the openings on the chimney (hatches), as well as the firebox, must be closed. If you are cleaning a fireplace with an open firebox, it should be covered with plastic wrap.
- The cleaning process is carried out from top to bottom. If you clean the bottom part of the chimney first (through the firebox), then when cleaning the top part, falling debris can again contaminate the already clean bottom.
Specialized kit
You can purchase ready-made cleaning kits. They can be found in special stores. There brushes are available in different diameters; you can choose a different element for each chimney. The kit includes a cable (rope), a core, various brushes, and carabiners.
How to properly clean a chimney with a brush: step-by-step instructions
Cleaning the chimney with a brush is carried out as follows:
- Wear special clothing, work shoes, gloves, goggles, and a respirator.
- Before starting work, you can look into the chimney by illuminating it with a flashlight. This way you can assess its condition in advance and see where it is heavily contaminated.
- All chimney hatches and the firebox are closed, except for the hole through which cleaning will be carried out.
- The deflector (or spark arrestor), if any, is dismantled.
- The brush (it does not matter whether it is on a cable or on a handle) is lowered from above, through the outlet of the chimney. Cleaning is done using up and down movements. If there are blockages in the process, it is better to use a weight on a cable (without a brush).
- Periodically evaluate the result of the work by looking into the pipe.
- When the top of the pipe is clean, go lower to the hatch and work through it.
- Upon completion of cleaning, the firebox is opened and the debris poured into it is removed.
Ideally, it is worth combining two cleaning methods: mechanical and chemical. First, clean the chimney with a brush, and then use any of the means that are set on fire in the firebox.
Cleaning process (video)
Advantages and disadvantages of use compared to other cleaning methods
If we consider existing methods of cleaning a chimney and compare them with using a brush, then this option has a number of disadvantages:
- with a brush you have to work independently, while chemical cleaners only need to be set on fire in the firebox;
- even the most careful work does not guarantee that all deposits will be removed;
- the work takes quite a long time, even if the chimney is straight and low;
- the work is inconvenient, unpleasant, physically difficult, and if you have to work on the roof, it is also dangerous;
- It is safe to clean only in dry (and ideally calm and warm) weather to reduce the risk of falling from the roof.
Clear benefits include more efficient removal of deposits in areas that are easily accessible. These are the first meters from the hatches, firebox and chimney opening on the roof. They are the most convenient to clean - you can see the condition of the chimney, as well as the result of your work.
How effective is a Chimney Sweep log for cleaning a chimney?
How to make a chimney in a garage: rules and instructions
Related Posts
Expert advice
Professional chimney sweeps know the secrets of quickly and efficiently removing blockages of any complexity.
Their recommendations are as follows:
- buy or make a brush so that you can use it to scrape off carbon deposits and break through dense blockages;
- before starting work, use chemicals to weaken the soot structure;
- Periodically remove accumulated dirt and debris from the bristles.
- After finishing work, the tool must be cleaned, lubricated and stored in a dry place.
