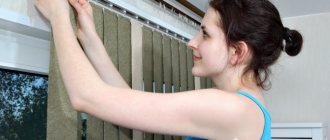
Various designs of blinds - vertical, horizontal, roller - are designed to protect from sunlight and fit perfectly into any interior style. Whichever of them you choose for your windows, it is important not just to hang the blinds, but to ensure that they work correctly: raising and lowering, moving and adjusting the position of the slats.
To hang blinds correctly, you first need to carefully measure everything (blinds are not curtains; if they don’t fit, you won’t be able to make them smaller or larger) and mark the attachment points
Manufacturers offer several types of blinds
- Vertical;
- Horizontal;
- Accordion or pleated;
- Roll type of folding.
Vertical blinds have the form of vertical slats (strips) connected to each other, which move around their axis using a plastic chain. And also, they can be moved left or right.
The operating principle of horizontal blinds is the same as vertical ones. Only folding occurs from bottom to top.
Pleated - they look like an accordion, for this they are impregnated with special means so that they keep their corrugated shape. They can be attached to both a plastic window and a window opening.
Roller blinds - have the appearance of a continuous canvas that can be rolled into a roll, while opening or closing part or all of the window.
Depending on their materials, lamellas can be:
- metal;
- wooden;
- bamboo;
- plastic;
- made from fabric.
How to attach roller blinds to a wall, ceiling or window
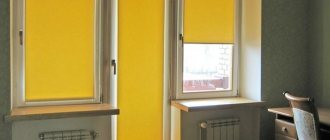
Depending on the type, size of the window, as well as the interior design of the room, roller blinds are attached in the following ways:
The first mounting method is suitable for a small window without a window sill. It will allow you to choose a long cornice that will visually expand the opening. Installing curtains above the window is also good for a small room, especially if you choose roller blinds of the same color as the walls. In this case, the space will visually increase.
For a wide and deep window opening, mounting to the frame is more suitable. Due to this, the window sill remains freely accessible, and a large curtain will not focus attention on itself.
There are roller blinds of open and closed types. The latter are distinguished by the fact that the roll of fabric is located inside a special box, which performs protective and decorative functions. It is especially recommended to hang such curtains on wooden windows. For them, you can choose an option with a box made of material that matches the color and texture of the wood from which the window frames are made.
Cassette roller blinds
When installing closed roller blinds, vertical plastic guides are often additionally installed, which ensure reliable fixation of the curtain and complete artificial darkness in the closed position. Thanks to them, the roller blind hangs parallel to the glass, regardless of how much it is lowered. You can secure the guides using double-sided tape.
To properly hang roller blinds with your own hands, you will need the following tools:
In addition, you need to prepare a pencil, screws or dowels (if the roller blind will be attached to the wall), double-sided tape may come in handy.
This installation is the most reliable, but you need to remember that it will require drilling in the window profile or wall. If you later need to replace the roller blinds with regular ones, holes will remain.
Instructions for installing fabric roller blinds with your own hands using self-tapping screws:
- Installation of roller blinds should begin by removing the packaging and checking the contents.
- Place the inserts with gears in the brackets and connect them to the shaft. It is necessary to ensure that the mechanism is correctly positioned relative to the fastenings.
- Unwind the canvas and attach it to the window at the place of planned installation. Make sure that the fabric tightly covers the light opening.
- Use a pencil to mark the drilling locations for the brackets. It is necessary to ensure that after installing the roller blind, it does not block the window handle.
- Using a level, check the height position of the brackets, and then drill for them. To make sure that the marks are placed correctly, you need to wind and unwind the fabric several times. The fabric should not move.
- Secure the fasteners with self-tapping screws and put plugs on the brackets.
- Lower the curtain completely and check the evenness of the window darkening.
- Adjust the height of the chain and install the lower position limiter for the curtain. If you need to reduce the length of the chain, you need to remove the connector. You can set the lower lowering level of the roller blind using limiters on the chain. To do this, you need to lower the curtain to the bottom position and install a stopper on the chain link so that it prevents further downward movement of the curtain.
- Place a plumb line on the chain.
Do-it-yourself fastening of closed-type roller blinds has a number of features. In addition to the brackets, you will need to secure the box and guides. To do this you will need double-sided tape.
Instructions for installing closed roller blinds:
- Installation of curtains should begin by removing the packaging and checking the contents.
- Thoroughly degrease the installation area of the roller blinds with a white spirit liquid, paying special attention to the places where the guides are attached.
- Define right and left guides. Attach one of them to the glazing bead to make sure that the guide fits snugly to the line of connection of the lower glazing bead with the window frame, unless the design solution for the window design provides for another option. If necessary, you can shorten the guides using a breadboard knife from above to maintain the factory cut.
- Use a pencil to mark the top points of the guide locations.
- Remove the protective tape from the adhesive base of the mounting pads of the protective box and its side covers.
- Attach to the marks for the guides, align the box with them. Lightly secure it with an adhesive layer on the mounting pads. Unwind the fabric to a length corresponding to the height of the glass to make sure that the fabric falls freely parallel to the glazing beads.
- Use a pencil and level to make marks to place the fasteners, and then drill for them.
Fastening roller blinds to spring brackets is only possible for the design of opening sashes. This installation is good because it preserves the integrity of the profile, since it does not require drilling.
Instructions for installing roller blinds with your own hands using spring brackets:
- Remove the packaging, check the contents, and assemble the curtain. Place it on the sash and mark the location of the fasteners.
- Hang the spring brackets on the sash in the marked places.
- Place the side covers on the brackets.
- Insert the shaft with the curtain into the fastenings, unfold and fold the curtain several times to make sure that it is installed evenly and moves freely up and down.
- Install the lower position limiter on the chain and clamps (magnets or Velcro) for the weighting material.
This installation is suitable for the design of small doors, both blind and opening. Thanks to it, the surface of the window profile is also not disturbed. Fastening is carried out using mounting elements with an adhesive layer on the reverse side.
Attaching roller blinds to tape is carried out in the same order as when installing roller blinds on a spring bracket. The only difference is that in order for the fastening to be secure, it will be necessary to first degrease the surface in the places where the fasteners are glued. This installation method is not recommended for large roller blinds, as it does not provide sufficient fastening reliability.
Which blinds are the best option for a balcony?
Before you start placing blinds on plastic windows, you should understand whether they are needed at all.
Will they become a hindrance when closing or opening the window? One thing can be said for sure - if a loggia or balcony is converted into a separate room, then blinds are definitely needed.
When choosing blinds, in addition to design and appearance, special attention should be paid to the following points:
- functionality and practicality of fasteners;
- It should be taken into account that not all types of fastenings are suitable for window units;
- practicality of blinds;
- It is better to choose plastic or fabric material for the balcony; wood and bamboo can create unnecessary noise.
Aesthetics and practicality
Just recently, blinds were perceived as nothing more than some kind of foreign exotica. But quickly enough our fellow citizens, accustomed to traditional curtains and drapes, were able to appreciate the practicality of use and the aesthetic beauty of these structures.
From then on, the “triumphant march” of these light-protective devices, invented back in the 18th century in the USA, began through apartments and offices in our country. Today, we no longer perceive them as something unusual - more and more owners of residential and office premises give preference to these easy-to-use lattice structures.
The only negative that can be pointed out is the higher price of blinds compared to classic fabric curtains. However, the overall cost of the structure can be reduced if you install it on the windows yourself.
How to take correct measurements?
If you decide to install blinds yourself, then you need to know a few important points. Windows do not always have a completely even shape, therefore, for measurements it is better to use a steel tape measure and measure everything down to the millimeter, in different places of the opening.
For a certain type of fastening, there are some nuances in measurements:
- If you are planning to install blinds on the wall, above the window opening, you should understand that the cornice will take approximately 5 cm. The length of the blinds is up to you to determine: either they will completely cover the window opening, or only to the lower edge of the window. According to the width of the blinds, you should set: 10 cm more than the opening;
- When installing blinds on a window sash, you need to measure the distance between two vertical glazing beads (this will be the fastening). You also choose the length yourself, and the width should be 3 cm larger than the glass to avoid unnecessary clearance;
- Placing blinds in the window opening is considered the most difficult procedure. The parameters are measured: according to the width and height of the window, while the height is calculated as the length of the glass with the addition of 1 cm to cover the rubber seals. It is important to consider that when folded, the blinds do not interfere with opening the window.
Drilling installation
In this case, it is better to choose a method for marking the sash by assembling the structure. To do this, put brackets on the cornice. Then they apply it to the surface and mark the points where drilling will be done.
This should be done after preliminary fitting of the entire structure on the window block. It is important to position it correctly and make sure that nothing interferes with the canvas.
For self-tapping screws measuring 3 mm, choose drills of 2-2.5 mm. You can screw in the fasteners without preparation, but in this case there is a risk that the plastic will crack. When drilling, you should try not to touch the glass unit. Do not operate an electric drill close to the glazing beads.
Basic window mounting options
There are two main methods for installing blinds on plastic windows, with and without a drill. The slats of the blinds are located on the cornice, and how this cornice will be held on the window, at the top of the wall or in the window opening, depends on the installation method.
Drilling installation method
Blinds for plastic window sashes are attached separately for each one.
The cornice is applied to the upper edge of the sash and the places for its attachment are indicated. For greater accuracy, at the places of fastening with screws, it is better to drill neat holes in advance. We attach the bracket, screw in the screws and fasten the cornice.
Afterwards you need to fix the fishing line that holds the slats. We make small holes directly opposite the line exit under the glazing beads at the bottom of the sash. We thread the fishing line through the plugs, and fix the plugs themselves into the holes.
The drilling method is used by placing cornices on the ceiling or wall on top of the window. To do this, make appropriate holes into which dowels are driven and brackets are secured with screws.
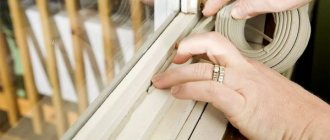
Installation without drilling
Depending on the type of cornice, the shape of the plastic fasteners is selected
. This method is used when you need to hang blinds on a window with opening sashes. It is enough to install the brackets. They are hung directly on the sash. Fix the brackets with strips of double-sided tape. All that remains is to fix the cornice.
How to remove blinds correctly
Over time, like everything else in the house, window structures become covered with dust, so blinds should be removed for cleaning. Each type has its own characteristics when removing.
Removing vertical blinds:
- we transfer the lamellas to the open state, after which we assemble them;
- release the chain from the weights and remove the weights;
- We remove each lamella: lift the slider clip and, moving it a little, remove the lamellas one by one.
Removing horizontal blinds:
- remove the cornice from the bracket;
- We assemble the lamellas at the top and look for the retainer protrusion;
- pull the lock towards you and to the right;
- remove the slats.
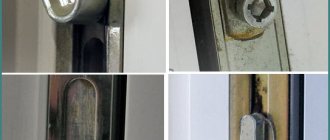
Removing roller blinds:
- there is a tongue on the bracket, you need to bend it using a screwdriver;
- remove the shaft by pulling it towards you.
Instructions for installing horizontal blinds on the wall/ceiling
To correctly install blinds to a wall or ceiling, you need to perform the following steps.
Step 1. Check the complete set of curtains and lay out all the parts on the work surface.
Make sure that the curtain kit includes: universal fasteners for blinds 2 pcs. (or standard brackets), screws, assembled blinds themselves. If you are installing blinds more than 2 m wide, then the set of fasteners should also include an intermediate fastener, which will fix the curtain in the middle, preventing it from sagging.
Step 2. We attach the curtains to the wall/ceiling, determine the exact location of their installation and mark the left and right edges of the curtain rod using a tape measure and level. Next, from each mark (towards the sides from the center) we make an indent of 2-3 cm and also put marks - these are places for installing fasteners-brackets.
Step 3. Now we apply the right and left fasteners to these marks and mark the exact drilling locations directly along the screw holes. We drill these marks with a drill. The drilling depth should be 3-4 cm.
Step 4. Next, we screw the brackets to the wall or ceiling using self-tapping screws. The figure below shows how to do this correctly.
Step 5. If you are installing blinds more than 2 m wide, then at this stage you need to install intermediate fasteners. To do this, mark the middle between the already installed fasteners and repeat the steps from steps 3 and 4.
Tip: to ensure reliable installation of heavy aluminum, bamboo and wooden curtains, intermediate fasteners are installed 10 cm from the adjusting thread, since this place bears a large load.
Step 6. Insert and close the top cornice of the blinds into the bracket locks. If these are standard brackets, then the cornice is simply screwed to them with screws.
Instructions for installing vertical blinds to the ceiling/wall and in the window opening
Installing vertical blinds with your own hands involves the following steps:
Step 1. Check the package and lay out all the parts on the work surface.
The set of vertical blinds includes: fasteners for blinds (brackets) 2 pcs., screws, cornice, curtains themselves in disassembled form (slats with weights, lower connecting chain).
Step 2. Before installing the blinds, you need to make sure that their length suits you. To do this, attach one lamella to the desired location on the ceiling/wall/top plane of the window opening. If the distance from the bottom of the curtains to the window sill or floor is less than 1-2 cm, then it is better to shorten the slats. You can do this yourself: take out the weights, cut off the excess and hem the edges back.
Step 3. Now you need to attach the cornice to the ceiling/wall of the window opening, align and mark its right and left ends.
Then we do the following:
- If you are installing vertical blinds to the ceiling, then from the previously placed marks we make an indent of 2-3 cm towards the center and put the marks again;
- If you want to install blinds to the wall, then from the previously placed marks we make an indent of 5-6 cm towards the center and also place marks.
If you are installing curtains in a window opening, then you do not need to mark the ends of the cornice; you just need to make marks, stepping back from the walls of the opening 2-3 cm towards the center.
Next, we apply fasteners for the blinds to these marks and mark the drilling locations. This way you will have 2 marks on the right and 2 marks on the left. Be sure to apply fasteners to match the sides.
Note: to install curtains with a width of more than 1.6 m, you need to additionally install an intermediate fastener 10 cm from the adjusting cord.
Step 4. Now we drill holes along these marks with a drill. The drilling depth should be 4-5 cm.
Step 5. Screw the right and left fasteners (in accordance with the sides and marks) to the ceiling/wall with self-tapping screws.
Step 6. Insert and close the blind curtain rod into the fastener locks by turning and/or pressing the lever clockwise. If you use regular brackets for fastening, then the cornice is simply screwed to them.
Step 7. By adjusting the cord, we turn the runners so that they unfold across the cornice (as shown below in the left photo) and proceed to attach the slats, simply snapping them into the grooves of the runners.
Step 8. We attach the lower chain to the lamella weights, first from their outer side, then we cut off the excess and do the same on the back side of the lamellas, and then with the second part of the lamellas. Well, that’s all, the installation of vertical blinds is complete, all that remains is to check the operation of the mechanism and adjust the position of the slats.
Below is a video instruction on how to properly install vertical blinds to the wall with your own hands.
Instructions for installing horizontal blinds in a window opening
To install horizontal blinds in a window opening, you need to do the following work.
Step 1. Check the package and lay out all the parts on the work surface.
Make sure that the blinds are supplied with: fasteners for blinds (brackets) 2 pcs., screws, the blinds themselves in assembled form.
Step 2. We try on the curtains to the desired place in the window niche and check whether the blinds interfere with opening.
Step 3. Now we apply the right and left fasteners to the upper inner plane of the window niche, stepping back from its walls 2-3 cm towards the center, then make marks in the locations of the fastener holes. This way you will have 2 marks on the right and 2 marks on the left.
Step 4. Now we drill holes along these marks with a drill. The drilling depth should be 3-4 cm.
Step 5. We screw the right and left fasteners (in accordance with the sides and marks) to the upper plane of the window opening using self-tapping screws.
Step 6. Insert and close the top curtain rod into the bracket locks by simply turning and/or pressing the lever clockwise. If you use regular brackets for fastening, then the blind cornice is simply screwed on.
For instructions on how to install blinds directly on plastic windows with your own hands, watch this video:
You can see how to properly shorten horizontal plastic or wooden blinds with your own hands here: