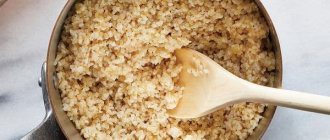
Loose cereals
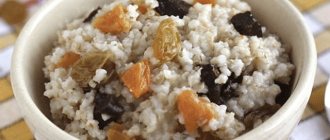
First of all, it's beautiful. Fragrant rice or buckwheat, tiny grains of couscous or golden bulgur, multi-colored quinoa... The crumbly grains look neat and even elegant, and any additive is distributed evenly and further decorates the picture on your plate.
The crumbly grains in the porridge look neat and even elegant
Some grains need to be rinsed to make them fluffy - for example, millet and quinoa (more on that below). Others - say, rice, buckwheat and bulgur - can, of course, be washed, but there is absolutely no need, because there is a much more effective way - frying. The cereal can be dry-fryed in a saucepan or saucepan with a thick bottom over medium heat, stirring frequently, for 2-3 minutes. Or with oil - vegetable, rendered butter or rendered animal fat (fillet tail, lard, chicken, duck, goose) - to give additional taste. Not for long, literally a minute will be enough for each grain to become covered with fat and receive a “vaccination” against sticking together. This fat or oil can have another additional purpose - to impart the aroma of spices or spicy vegetables to the cereal. To do this, you first need to fry the necessary “flavoring” in fat: garlic, ginger, broken cinnamon sticks, slightly crushed cardamom boxes, whole cumin seeds, mustard seeds, coriander, etc. And only then add the cereal and finish frying. Just be careful with the heat - don’t let the spices and spicy vegetables fry too much - they may start to taste bitter.
Cereals can be dry fried
Or with butter to add extra flavor
Well, another way to prepare crumbly cereal is to cook it in a large amount of boiling water, which will remove excess starch, and then put it on a sieve. This method is called “folding”; this is how rice is often cooked for Caucasian and Middle Eastern pilafs.
A folding method for cooking crumbly porridge is to boil the cereal and then throw it on a sieve
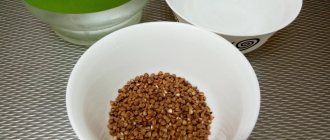
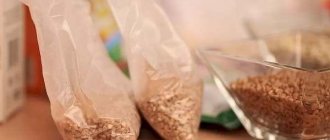
What do cereals do before heat treatment?
Before cooking, the cereals are sorted, separating unhulled grains and other impurities, and small and crushed cereals are sifted through a sieve to remove flour, which gives the porridge an unpleasant taste and spreadable consistency, and washed. Millet is washed especially thoroughly to remove flour from it, which gives the grain a bitter taste.
Interesting materials:
How to enable Screen Share on your phone? How to turn on the volume on your phone? How to turn on speakerphone on a Samsung feature phone? How to enable HDR on your phone? How to turn your phone on and off without a button? How to enable infrared port on your phone? How to enable incognito on your phone? How to turn on the Internet on a Nokia feature phone? How to turn on the Internet on an iPhone? How to turn on the Internet on an Honor phone?
Viscous porridge
The viscosity of porridge is not only the method of preparation, but also the quality of the grain. Not in the sense of “good or bad,” but the variety or method of processing cereals in production. There are cereals (varieties within the same species) that contain more starch than others - and no matter how you cook them, they will be more sticky as a result. A classic example is Fig. Short-grain rice and some varieties of medium-grain rice release quite a lot of starch when cooked, and if used correctly, it turns out to be a delicious risotto or rice balls for sushi. And there is also sticky rice, which is called just that, so that no one tries to make it crumbly - it won’t work at all, and why? Or if you grind the cereal so that it cooks faster, the same effect is possible - this is clearly visible in buckwheat. But crushed wheat (bulgur or dzavar) can be cooked both crumbly and viscous.
Viscous porridge is something from childhood, as they say in English-speaking countries, comfort food, “comfortable”, familiar, cozy food
Why rinse rice before and after cooking?
Washing rice in a bowl of water: Pixabay
Properly cooked rice is not only incredibly tasty, but also very healthy. At the same time, it is very important to prepare the cereal according to the rules so as not to spoil the taste of the rice. And here many questions arise: to wash or not to wash cereals, why wash rice, which varieties do not need such a procedure? In the article you will find detailed information on an exciting topic.
To wash or not to wash?
With a few exceptions, do not wash. Exception No. 1 - authentic varieties of rice for pilaf such as devzira, laser, alanya, etc. Exception No. 2 is rice for sushi, where it is required by technology. Exception No. 3 – millet and quinoa, we will explain why below. The rest of the cereals that you buy in packages at the store have already been washed five times for you. Previously, it was necessary not only to wash the cereals, but also to sort them out from all sorts of foreign objects such as pebbles and unrefined grains. This practically never happens anymore, there is no need to waste time. In addition, you will probably wash the cereal with tap water, and it contains impurities that have a bad effect on the aroma of the final product - for example, bleach. So if you still need to wash some cereals, use bottled or filtered water.
If you still need to wash some cereals, use bottled or filtered water
Other General Principles
With the extremely rare exception of cereals:
- cook in boiling water, and it is easier to salt it in advance (if you salt the water after the cereal is poured in, you need to mix everything very thoroughly);
- cook over medium heat so that the cereal gradually and evenly absorbs water;
- cook under the lid, and the pan should be at least one and a half times larger than the combined volume of cereal and water - so that there is enough space for the formation of steam; in a small saucepan the cereal will “run away”;
- they should (more precisely, it would be good for them) to brew after the end of cooking, also under the lid - this allows the steam to finish its work, and the cereal to become more tasty.
How to store?
To extend the shelf life and preserve the beneficial properties of corn grits, you should remember the storage conditions and periods.
Conditions
After purchasing corn grits, you should pour it into a dry glass jar with a tight-fitting lid. The jar itself must be stored out of reach of direct sunlight at a temperature of -5...+5°C. The closest place to such conditions is the refrigerator.
You should not store corn grits on shelves above the kitchen stove: this is a place of high humidity, and in such conditions the grits will begin to mold faster.
Term
The shelf life of corn grits is 6 months. However, at home it is difficult to maintain the temperature required for storage, so it is better to buy fresh cereal before each cooking.
Rice
There are many types and varieties of rice, and almost all of them are cooked differently, not only based on the variety, but also depending on the dish. For example, medium-grain starchy arborio rice can be used for sticky porridge/pudding, risotto, and paella - and in all three cases the technology will be different.
How to cook fluffy long grain rice (basmati, jasmine varieties)
Use a large pan to allow room for steam to form. Pour rice into boiling salted water in a ratio of 1:1.5 (for 1 volume of rice 1.5 volumes of water). Stir, bring to a boil over high heat, cover the pan with a lid and reduce the heat to medium. Never open the lid again until the rice is completely cooked. Cook for exactly 12 minutes. Remove from heat and wrap the pan in a blanket or thick towel and leave for another 12 minutes. Ready! This rice will remain crumbly even the next day.
Puffy long grain rice
How to cook rice porridge (round and medium grain rice)
The general ratio of rice to liquid in viscous rice porridge is from 1:3 to 1:6, depending on the type of rice. Start cooking rice in low boiling water in a 1:2 ratio. When the water is absorbed, add milk (it doesn’t have to be cow’s milk, rice, nut, soy milk will do) and/or cream. In the first part of “water” cooking, the fire can be medium or even medium-high, and in the second – low, so that the rice with milk does not burn. Don't forget to stir the porridge every couple of minutes. Taste the rice - it should become completely soft; if necessary, you can add milk or cream. If you are cooking porridge for pudding, use as much liquid as possible so that the rice is almost pureed.
The general ratio of rice to liquid in viscous rice porridge is from 1:3 to 1:6
How to cook sushi rice
Rinse the rice in 5-6 waters until the water is clear. Fill with cold (!) water in a ratio of 1:1 plus another 10% water, bring to a boil, reduce heat to low, close with a lid and cook for 13-14 minutes without opening. Cover the pan with a blanket for 30–40 minutes.
How to cook rice for paella (bomba or arborio varieties)
Very carefully pour the rice into the resulting broth in the paella pan between the prepared foods (usually meat, seafood, vegetables), it should all be hidden under the broth - help it with a spoon. Don't mix! Cook until the rice has absorbed all the liquid. For 500 g of rice you will need approximately 1.8 liters of liquid.
How to cook rice for risotto (arborio, carnaroli, vialone nano, etc.)
First, in a heavy-bottomed saucepan or saucepan, lightly fry the onion or leek in a mixture of butter and olive oil, adding other herbs if desired. Then add rice, stir and simmer over low heat for 2-3 minutes. Then start pouring in the hot broth one ladle at a time, stirring all the time and each time allowing the liquid to completely absorb/evaporate before adding a new ladle. Towards the end, add the additives required for the recipe, and at the very end - a mixture of butter and grated hard cheese. For 500 g of rice you will need approximately 2 liters of liquid.
Risotto
How to cook rice for pilaf (variety Devzir, Alanya, Laser, etc.)
As soon as you have recorded the beginning of the very 40 minutes that zirvak will be cooked (meat with onions, carrots and 1.25 liters of water per 1 kg of rice), rinse the rice in 7-8 waters, add warm (37-39 ° C) water and salt generously and leave for 20–25 minutes. The rice should not protrude above the water, otherwise it will become fragile. When the zirvak is ready, drain the water from the rice. Level the zirvak and carefully transfer the rice onto the surface of the zirvak in an even layer. Rice should not mix with the zirvak, but only lie on it. Carefully pour hot boiled water onto the slotted spoon so that the water does not “hit” the rice layer, leaving ruts in it. Pour enough water so that it barely reaches the top grains of rice. Flatten the rice again and add a little salt. Next is a very important moment. Powerful streams of steam must process the rice so that it “takes” as much water as needed. Increase the heat to maximum so that the zirvak and water boil evenly, begin to steam, and steam passes through the layer of rice. The water should evaporate to a layer of zirvak. You can see where the water is by carefully inserting a chopstick (for example, a Chinese stick) between the wall of the cauldron and the rice. When cooking in a cauldron with a flat bottom, it happens that the steam is distributed unevenly or comes out too slowly. It is permissible to very carefully turn the rice in layers, moving the distant layers to the center, the central ones to the edges. Accordingly, you also touch the rice from the bottom and top layers. Triple caution! Firstly, so as not to damage the rice, and secondly, so as not to touch the zirvak layer. It must remain untouched. Now “closing the pilaf”. This means that after 30 min. the pilaf will be ready. How do you know when it's time to close? Try one piece of rice. It should be almost ready, a little dry, but homogeneous inside. If you feel a dense crunchy part inside, then the rice “wants” more water. Add more hot water as carefully as described earlier. Evaporate again and taste again. Using a slotted spoon, carefully collect the rice into a hemisphere from the sides to the center. Using a chopstick, make several holes in the rice to the bottom of the cauldron. This will be a drainage system. If you still think that the rice still needs water, you can use a teaspoon to pour just a little water into the holes. Level the rice layer over the holes. Close the cauldron tightly with a lid and reduce the heat to low. Now wait. At this stage there is no way you can intervene. The lid cannot be opened. Gently mix the finished pilaf.
Rice should not mix with the zirvak, but only lie on it
How to cook brown (brown) rice
Brown or brown is called rice that has not been peeled from some of the useful shells, such as bran. It contains many vitamins and minerals; eating it (as well as any other whole grain) is much better for health than refined grains. But due to these shells, brown rice takes longer to cook and requires more water. In each specific case, you need to look at the shape of the rice - because long-grain, medium-grain, and round rice may not be peeled. To a recipe for cooking a similar variety of white rice, you need to add about 40% of both time and water.
Brown or brown is called rice that has not been peeled from some of the useful shells.
How to cook wild rice
Wild rice is not rice at all, but a different plant, the shape of the grain is just similar. You need to cook it in boiling salted water over low heat, covered. If you cook it over high heat, the grains will boil unsightly. When simmering, they retain their shape better. The ratio of rice and water is from 1:2.5 to 1:3.56, depending on the manufacturer.
What do different varieties of rice go with?
Without pretense, let's say - with anything. There are no products that do not have their place in rice. All types of vegetables (even baked beets are very good with wild or red rice, and beet risotto looks very elegant), any meat, fish and seafood, all mushrooms, all types of cheese, as well as fruits, berries and nuts - everything goes with rice become!
a brief description of
Residents of Central and South America were the first to use corn grits in cooking. Over time, the area of consumption of this cereal gradually expanded, and today dishes are prepared from it all over the world.
Production technology
The corn grits production technology includes 2 stages:
- Grain preparation. At this stage, hydrothermal treatment of the grain occurs, which ensures easy and rapid separation of the germ and shell. The germ is removed because it contains a large amount of fat, and this reduces the shelf life of the cereal. Nevertheless, the germ is an important raw material, since it is from it that corn oil is obtained. Processing is carried out at a temperature of 40 °C and air humidity of 15-16% (to produce polished cereals) and 19-22% (to produce fine and coarse cereals).
- Processing grain into cereal. This stage is a long process of grinding the grain and the final separation of the embryo, followed by the formation of endosperm particles, which are the raw material for polished grits, corn sticks and flakes.
What does it look like?
Corn grits have the appearance of a homogeneous crumbly mass consisting of small grains. These grains are the same size and color, have a specific smell and taste. The grains are characterized by a yellow, sometimes white-yellow matte tint. High-quality corn grits have a calm, neutral color, but bright yellow grits, on the contrary, indicate a low-quality product.
Taste
Corn grits have a neutral taste. © https://ydoo.info/product/kukuruznaya-krupa.html It is not bitter, not sour and without foreign tastes.
Smell
Corn grits have an original smell. It cannot be confused with other cereals. At the same time, a high-quality product does not have the aroma of mold or rottenness.
Buckwheat and green buckwheat
Buckwheat in our area is now sold in three versions: fried kernel (whole grain), fried prodel/seka (crushed grain) and unroasted green buckwheat.
Buckwheat and green buckwheat
How to cook traditional buckwheat
Lightly fry the buckwheat with oil or dry in a saucepan with a thick bottom. Pour boiling salted water in a ratio of 1:2.5 (1 volume of buckwheat to 2.5 volumes of water). Stir, bring to a boil over high heat, cover with a lid, reduce heat to low, and simmer for 25 minutes. Remove from heat, wrap or simply leave in a warm place for at least 10 minutes.
How to cook buckwheat
Crushed buckwheat cooks faster than buckwheat and requires less water, the ratio is usually 1:2. In all other respects there is no difference. It is not necessary to fry the chickpeas - it still won’t turn out particularly crumbly, and this is not its task. Prodel produces soft porridges that children love.
Prodel produces soft porridges that children love
How to cook green buckwheat
Green buckwheat is very different from traditional fried brown buckwheat. It has a mild, not too pronounced taste - it’s not for nothing that it is so loved in the West, where traditional Russian kasha is considered something not too edible. Green buckwheat does not need to be cooked at all. Just fill it with water (not necessarily hot, you can also use cold water) and leave for 8–12 hours - that’s it, all you have to do is warm it up before serving. So this cereal retains maximum of its beneficial properties, for which it is valued.
Green buckwheat
In addition, green buckwheat has completely different adhesive properties compared to fried buckwheat. You can soak it for several hours, drain the water (but do not rinse it!!!), mix it with fresh water in a ratio of about 1:1.5 and grind it with a blender until it becomes a homogeneous dough. And from this dough, without adding anything like eggs or wheat flour, you can fry very tasty and completely non-falling pancakes/flatbreads. Absolutely amazing! Anyone who has ever tried to fry buckwheat pancakes from buckwheat flour without adding all of the above (and more) understands what we are talking about.
Green buckwheat pancakes
What does buckwheat go with?
In our area, buckwheat is usually eaten with something protein: chicken, liver, beef stroganoff, fried pork... Also, of course, fried onions, mushrooms, chopped eggs. In its sweet form, it is usually served only with milk and sprinkled with sugar. But if you experiment, it turns out that buckwheat is very good with caramel-fried apples, as well as with fresh apricots and peaches. Buckwheat also goes well with a mixture of raisins, dried apricots and nuts. And green - much more neutral - buckwheat goes almost like rice, with anything.
Benefits and harm to the body
Corn grits are of high health value, as they saturate the body with useful substances.
When consumed regularly, corn grits exhibit a variety of medicinal properties. It strengthens the immune system and has a preventive effect on the cardiovascular system.
Corn grits help with constipation. It normalizes metabolism, stimulates the functioning of the stomach and intestines, removes waste and toxins from the body, which prevents digestive disorders.
The beneficial substances contained in corn grits strengthen nails and teeth, give strength to hair and improve its appearance. Corn grits also have a special effect on the nervous system: it stimulates its functioning and improves thought processes.
There are some contraindications to consuming corn grits. With an exacerbation of a stomach or duodenal ulcer, croup can be harmful, worsening the course of the disease. It is also prohibited to consume cereals for people with individual intolerance to the product and those who have low body weight or problems with weight gain. This is because cereal reduces appetite, which makes it difficult to gain weight.
Women
For women, the property of corn grits is especially useful in preventing the development of cardiovascular diseases, strengthening hair, nails and teeth. In folk medicine, cereals are used to treat infertility, painful menstruation and to alleviate the symptoms of menopause.
Corn grits are useful during pregnancy. During this period, women more than ever need to saturate the body with useful substances, which cereal does well.
Expectant mothers are worried that corn grits contain gluten. Is this true or not?
Unlike many other grain products, corn grits are gluten-free. This allows you to eat porridge without fear for your health. In addition, corn grits are allowed during breastfeeding. The absence of gluten makes the risk of an allergic reaction on the part of the baby minimal. Those who doubted whether breastfeeding women could eat corn grits should try introducing a few spoons of corn porridge into their diet and see how the baby reacts. With an allergy, which occurs extremely rarely, skin redness, peeling and mild itching will appear.
Men
Corn grits do not have specific properties that are beneficial specifically for men. But the product increases immunity, improves heart function, lowers cholesterol levels in the blood and improves the functioning of the nervous system, which will certainly benefit the stronger sex.
Children
Complementary foods made from corn grits are especially popular among mothers. This is because corn porridge is one of the kids’ favorites. It not only has a pleasant taste, but also great benefits for children: it strengthens the immune system, promotes the harmonious development of the nervous system, does not have a negative effect on the stomach and rarely leads to allergies.
Many mothers know at what age you can introduce corn grits into complementary foods. 7-8 months is the optimal time for this. Cereals are introduced in the form of porridge in the second complementary feeding.
You need to give porridge, starting with a teaspoon during the morning feeding (this way the porridge will be better absorbed, and the mother will be able to observe the baby’s reaction all day long). If the child likes the porridge and there are no allergies or indigestion, you can increase the amount of the product.
Barley (pearl barley, barley groats)
We sell barley in two types: pearl barley (pearl barley, ground and polished whole barley grain) and barley grits (crushed, unpolished grain). Barley does not look as elegant as pearl barley, but it has more benefits - precisely because it is not polished.
How to cook pearl barley
Barley takes a long time to cook and usually after such a long cooking it has a mucous membrane, which is why many people don’t like it. But many people love it! To cook pearl barley in this classic way, pour the grain into salted water boiling in a large saucepan in a ratio of 1:3.5. Bring to a boil over high heat, stir, cover with a lid, reduce heat to low and simmer for 1 hour.
If you want to get rid of the sliminess, you'll have to do a little work. Pour the dry pearl barley into a saucepan or deep saucepan with a thick bottom and place over medium-low heat. Fry, stirring constantly and without leaving the stove, until the pearl barley acquires a dark beige color and smells of nuts, this is about 10 minutes. After this, pour salted boiling water over the cereal in a ratio of 1:2.5 - and cook over low heat, covered, for 30-35 minutes. With this method, the grains are elastic and very tasty.
Barley porridge
How to cook barley
Ground grains cook faster, require less water (both by about 25%), and produce less or no sliminess. But it’s also tastier if you fry it before cooking, not dry, but in melted butter.
Barley grits
What do barley cereals go with?
Like buckwheat, barley is considered a serious grain, and it is cooked with meat, in mushroom soups, pickles, or just like that. Barley really doesn’t go well with sweets (if you want to take a risk, take barley groats - it goes better with dairy options and sugar). But barley is also great paired with roasted vegetables (sweet peppers and eggplants), sun-dried tomatoes, and onions and carrots, chopped and fried as for pilaf - including fat tail, cumin, coriander and barberry.
Is it possible for diabetes and pancreatitis?
Despite all its usefulness, corn porridge has a fairly high glycemic index, which shows the effect of the product on blood glucose levels.
For diabetes mellitus, cereals can be consumed in the form of porridge with water. A serving of side dish should not exceed 150 g in weight, and the frequency of consumption should not be more than 2 times a week.
If you have pancreatitis, eating corn porridge is absolutely undesirable. Even with prolonged heat treatment, corn grits are not cooked enough, and the fiber it contains contributes to irritation of the pancreas. During the period of exacerbation of the disease, this provokes severe pain, and during the period of remission it can cause a worsening of the condition.
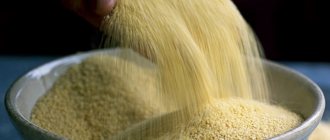
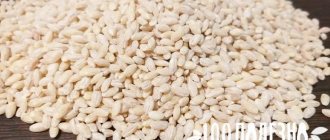
Millet
The main trick in millet is one: a thin film covering every grain. This film adheres tightly to the grain, but at the same time it is very bitter. And if you don’t wash it, the whole porridge will taste bitter. So before cooking, pour the millet into a large container and start rinsing it with cold water, rubbing the grains with your hands. Then you drain the water (it’s cloudy), fill it with new water - and grind it again, and drain it again. And so on until the flowing water becomes completely transparent. Now you can pour the washed millet into boiling salted water. The traditional ratio is 1:1.5 (for 1 volume of millet 1.5 volumes of water). But it’s very good to cook millet using the same folding method: pour the grain into a large saucepan containing about 1:10 water, and throw the cooked grain onto a sieve, let the water drain and return the grain to the saucepan. And it’s better to immediately season with oil or add vegetables/meat or sauce. Without all this, millet tends to stick tightly together.
Millet
Millet porridges have not been very popular lately; for some reason, everyone only thinks about millet and pumpkin, although there are a lot of options for wonderful combinations. For example, crumbly millet with finely chopped smoked chicken, or with baked sweet peppers and garlic, or simply with fried onions.
Instructions for preparing buckwheat
Before cooking, it is sorted to remove large debris and stones. For this:
- They collect the grains in a glass so that they know how much to cook and pour them onto the table.
- Separate small handfuls from the total mass with the palm of your hand and distribute them in a thin layer on the countertop - this way you can better see the fine debris.
- Unprocessed and empty grains, as well as foreign impurities, are removed.
- The cleaned grains are swept off the table into a container in which the buckwheat will be cooked.
It is also convenient to inspect the grains in a shallow pan of large diameter, distributing them evenly along the bottom.
Whole grains (spelt, oats, wheat)
These cereals are minimally processed, which means they are the healthiest – and they are the ones you should eat most often. Stops cooking time: Whole grains take a long time to cook, at least 40 minutes and sometimes more than an hour. How to deal with this problem? There are three ways:
- fry the cereal before boiling it - exactly as described in the story about pearl barley;
- soak the cereal in advance, 2–8 hours in water at room temperature, then the cooking time is proportionally reduced several times;
- Cook the cereal in a pressure cooker - usually 20 minutes is enough.
Another option - an intermediate one - pour freshly boiled water over the cereal and leave it in a very tightly closed container, for example, a multicooker or, even better, a thermos for several hours. Then there is a high probability that it will not need to be cooked at all before serving. Well, or not for long at all.
Spelled
Whole grain porridge is a serious, very filling meal. If you want a healthy diet, eat them with vegetables - fresh or baked. Although, of course, it’s also very tasty with meat or meat gravy.
Volume to weight ratio
During the cooking process, questions often arise about how to measure corn grits and how to calculate the required amount. The best way to measure corn grits is to use a kitchen scale.
If they are not there, you should remember:
- how many grams of corn grits are in a glass (one glass contains approximately 180 g of grits);
- how many grams of corn grits are in a tablespoon (one tablespoon holds 20 g of corn grits);
- how many grams of corn grits are in a teaspoon (the weight of the grits in a teaspoon is 6 g);
- how to measure 100 g of corn grits for a recipe (to get 100 g of grits, you can take 5 tablespoons of the product or measure out a little less than half a glass of grits).
Bulgur
Steamed, dried, and then crushed wheat - bulgur - became popular with us not so long ago, although our neighbors in the Caucasus have been eating such wheat for many centuries. Unlike its relative couscous (a grain of which is semolina “wrapped” in a shell of flour), bulgur is cooked and not simply steamed with boiling water. The ratio with water is usually 1:1.5, cooking time is 15–20 minutes, depending on the manufacturer. To make the bulgur tastier and more crumbly, immediately after cooking it can be seasoned with olive oil and fluffed with a fork. However, they usually do the same with couscous.
Bulgur goes well with meat, poultry and seafood, with fresh and baked vegetables, with olives and capers, as well as with dried fruits and nuts.
Bulgur goes well with fresh and baked vegetables
Is it necessary to rinse rice after cooking and with what water?
It’s rare that a housewife knows whether to rinse rice after cooking. In fact, it all depends on whether it was washed before cooking, how it was prepared, what grade it belonged to, and also for what purpose it was cooked in general.
Quinoa
Quinoa is the new trendy grain. Although in fact it is not a cereal at all, it is a so-called pseudocereal plant of the amaranth family. Its cousin, amaranth, is also sold as a grain and is also prohibitively expensive, and can be treated in the same way as quinoa. Quinoa has the same property as millet: the shell of the grains is very bitter, and quinoa needs to be washed like millet - until the water is crystal clear. Quinoa comes in yellow, red and garlic, they cook for different times, it is better to look at the directions on the package. Cook the quinoa the flip way - in plenty of lightly salted boiling water, usually no longer than 20 minutes.
Quinoa is an excellent base for salads; it goes well with fresh and baked vegetables (sweet peppers, celery root, pumpkin, zucchini, eggplant, onions and garlic). Her best friends are tomatoes of all kinds, including sun-dried and especially cherry tomatoes. Loves kiona and dried fruits, especially dried cranberries and small raisins. But protein is also an option - for example, fried cheese (Adyghe, Suluguni, Halloumi) or a poached egg.
Quinoa salad
How to choose?
When choosing corn grits, you need to pay attention to:
- Packaging integrity. Damaged packaging allows moisture to pass through, which means the cereal may become moldy.
- Color and consistency of the product. Often, cereal packaging has a so-called transparent window, which allows you to evaluate the appearance of the contents. Corn grits should have a yellowish matte tint. A high-quality product has a uniform consistency, without lumps, small debris and other impurities.
- Best before date.
Dishes from “yesterday’s porridge”
Any porridge left over from yesterday can be used the next day in completely different dishes: pancakes, pancakes, krupeniki, vegetarian (or not) cutlets and meatballs.
In meat cutlets and meatballs, cereal can act as an additive in the role of bread. And in vegetarian ones - as a base to which you can add vegetables, say, finely chopped and fried onions and carrots, grated zucchini/zucchini, pumpkin, stewed cabbage... For some types of cereals: millet, starchy rice, green buckwheat - you don’t even need an egg , you can only crush a little starch. Well, and all kinds of spices: cumin, curry, coriander, hops-suneli, paprika - or whatever the recipe requires. Arborio rice is used to make a classic Italian dish - arancini meatballs, often stuffed with cheese, rolled in breadcrumbs and deep-fried until beautifully golden brown.
Porridge pancakes are usually made with yeast, and they can easily be lean (vegan), without milk and eggs - viscous porridge with the addition of flour holds its shape perfectly in a frying pan. The most popular cereal plini are millet, although you can use rice and oats. It is better to make pancakes from buckwheat and different types of wheat with the addition of eggs, flour and baking powder - so that they are richer. You can use ready-made cereals to add satiety to vegetable pancakes - for example, zucchini or carrot.
Crumbly grains - not just rice - can be fried in a wok or large frying pan along with finely chopped vegetables (regular or green onions, garlic, ginger, carrots, stalked celery, cubes of zucchini, eggplant, sweet peppers), and add raw eggs towards the end . You can beat them a little or crack them directly into the hot grits and stir vigorously, keeping the pan over high heat to set the eggs. Or you can use leftover baked meat/poultry or bacon rather than eggs.
Grechaniki are made from boiled buckwheat (they are also grechniks or even sinners) - they mix it with flour and sometimes eggs and fry it in oil or bake it, and then cut it. With sinners, instead of bread, it is very tasty to eat cabbage soup or borscht.
Well, and various kinds of cereals - a mixture of yesterday's porridge with cottage cheese, beaten eggs, sugar or honey, dried fruits or apples and pears (or unsweetened, with herbs and grated hard cheese) - an excellent breakfast or dinner. It is best to bake this mixture in a rectangular cake pan, greased with butter and sprinkled with breadcrumbs at a not very high temperature - 160–170 °C, for 30–40 minutes. Eating krupeniki tastes better lukewarm or completely cooled.
Casserole from yesterday's porridge
Corn grits for weight loss
Corn grits are an excellent component of a healthy diet for weight loss. It helps eliminate cholesterol, improve digestion and speed up metabolism. Corn porridge, which is recommended for people on a diet, accelerates the removal of waste, toxins and excess fluid from the body.
There are diets based on regular and long-term consumption of corn porridge with the complete exclusion of other foods, except water. Such diets do lead to weight loss, but all the lost kilograms are water and toxins, which will quickly return after the end of fasting. In addition to the fact that such diets are not physiological, they can pose a risk for people with gastrointestinal diseases.
Therefore, nutritionists advise including this healthy cereal as an addition to a healthy diet in combination with intense physical activity. The combination of all factors will contribute to healthy and physiological weight loss.
We invite you to watch a video about losing weight with corn porridge.
Recipes
Classic risotto
Classic risotto is quite simple to prepare, but requires constant attention. This is where the difficulty lies! That is, if you want to get a truly impeccable result, be prepared for the fact that you will not be able to leave the kitchen while preparing risotto. What else is important? The right ingredients. Chicken broth should be really tasty and rich. Try to find good Italian rice varieties, such as Arborio or Carnaroli. But butter, wine and cheese simply must be natural and of high quality! And finally, the cooking technology matters, all the subtleties of which you will find below. Each Italian province has its own version of risotto. For example, in Padua it is prepared with meat and vegetables, in Venice - with peas, in Mantua - with pork and sausage. You can give classic risotto a beautiful yellow color using ground saffron. Dilute it with hot water in advance and add it to the broth, which you can then use according to the recipe.
Classic risotto
4-6 servings, cooking time: 30 minutes
What do you need:
- 1 medium sized onion
- 50 g butter
- 2 liters chicken broth
- 340 g round rice
- 125 ml dry white wine
- 60-80 g grated hard cheese
- salt, freshly ground black pepper to taste
- Peel and finely chop the onions for risotto. Heat a large saucepan over medium heat and melt 30 g of butter in it. Add onion and cook over low heat until translucent.
- Pour the chicken broth into a saucepan and bring to a boil. Leave on low heat. To cook risotto properly, we need to keep the broth hot.
- At the same time, carefully pour the risotto rice into the saucepan with the onions and, stirring with wide movements, fry over medium heat for 3 minutes. It should become almost transparent.
- Pour dry white wine into a saucepan with rice and onions. Stir and bring to a boil again over high heat. Cook until the rice has absorbed all the liquid from the pan.
- Carefully pour in a portion of hot chicken broth (about 200 ml). Stirring constantly, cook the risotto until absorbed. Make sure that the rice does not stick to the bottom.
- Pour the next portion of chicken broth into the saucepan and cook according to the same procedure. Don't forget to stir the risotto constantly! When 500 ml of broth remains, add 125 ml at a time.
- Periodically taste the grains of rice, monitoring the degree of its readiness. When it becomes soft on the outside but firm on the inside, the risotto is ready.
- Remove pan from heat. Add the remaining butter and vigorously swirl the risotto around. Add grated cheese and season with salt and pepper to taste. Stir and leave for 5-7 minutes, then serve.
Summer salad with millet
In summer, you especially want lightness, but you won’t be satisfied with grass alone. Add some healthy carbohydrates - millet and protein products - feta, and a green summer salad will turn into a vegetarian superfood. Our native millet will perfectly replace the now fashionable bulgur and quinoa in salads. It will turn out much cheaper, but no less tasty. By the way, millet is now actively gaining popularity among supporters of proper nutrition and, perhaps, will soon become one of the domestic super foods. No wonder - after all, millet is not inferior to wheat in terms of vegetable protein content, but at the same time it is a gluten-free product! Millet also contains a lot of fiber, it has a low glycemic index and an acidity level shifted towards alkali. Complete benefit! Fashionable girls who are passionate about proper nutrition, urgently run to the store for millet!
Summer salad with millet
6 servings, cooking time: 40 min.
What do you need:
- 200 g millet
- 3-4 green onions
- 10-12 radishes
- 100 g fresh or frozen green peas
- 1 large bunch of dill
- 60 g feta cheese
- salt to taste
For refueling:
- 3 tbsp. olive oil
- 3 tbsp. lemon juice
- 1 tsp lemon zest
- salt and ground black pepper to taste
- Mix dressing ingredients, season with salt and pepper.
- Rinse the millet until clean water in a fine-mesh colander, shake off the water.
- Boil 500 ml of water, add salt and add millet. Reduce heat to low, cover pan and cook for 15 minutes. The water will be absorbed, the cereal will become soft, but not boiled. Start checking the doneness of the cereal a few minutes earlier. Once all the water has been absorbed, remove the pan from the stove, fluff the cereal with a fork and leave covered for 5 minutes. Then fluff with a fork again and cool.
- While the cereal is cooking, finely chop the dill, diagonally chop the green onions, and thinly slice the radishes. Pour boiling water over the green peas and leave for 5 minutes, then drain the water.
- Mix all the salad ingredients, pour over the dressing, and stir. Transfer to a salad bowl and sprinkle with crumbled feta.
Quinoa Salad with Salmon
If you want to make the salad more satisfying, boil quail eggs for it and serve it in a bowl with homemade mayonnaise.
Quinoa Salad with Salmon
Serves 4, cooking time: 30 min.
What do you need:
- 400 g quinoa (can be of different colors)
- 400 g salmon fillet in one piece
- 1 large long-fruited cucumber
- 250 g multi-colored cherry tomatoes
- 100 g soft small raisins
- a handful of mint leaves
- half a small lemon
- olive oil
- salt, freshly ground black pepper
- Rinse the quinoa thoroughly and cook according to the instructions on the package, cool. Cut the lemon lengthwise into quarters. Cut off the core, remove seeds and films. Cut into slices, salt and pepper.
- Peel the cucumber, cut it in half lengthwise, remove the seeds with a spoon, and cut the pulp crosswise into small pieces. Cut the cherry tomatoes in half. Finely chop the mint leaves, reserving a few whole ones for serving.
- Mix all prepared ingredients, add raisins, season with salt, pepper, olive oil.
- Cut the salmon fillet in half lengthwise and season with salt and pepper on all sides. Place a piece of parchment in a frying pan, pour a little oil on it, and place over medium heat. Place the fish on parchment and fry very quickly on both sides, literally 1–1.5 minutes. Cool the fish a little and cut it - it should remain pink inside. Place the fish on the salad, garnish with mint leaves and serve.
Alternative uses
Corn grits are used not only as a food product. There are alternative uses for cereals, such as fish bait or slug repellent.
How to make bait for fishing?
Groundbait made from corn grits is used when catching large species of fish. Fish such as crucian carp, carp, carp, carp and roach prefer corn grits.
You can make bait in two ways:
- Cook. To do this, cook a kilogram of crushed cereal over low heat for 5-7 minutes. A couple of minutes before the end of cooking, pour several glasses of corn flour and cake, and 1 glass of corn flour into the saucepan. Add 50-70 ml of sunflower oil there and cook for the remaining time. To enhance the smell of the bait, add dill and anise flavoring. When the porridge is ready, cool it and form small balls. The advantage of this method is that when they fall into the water, the balls are not carried away by a fast current and are not destroyed instantly, which makes it possible to effectively lure fish in a certain area.
- Steam it up. The desired amount of crushed cereal is poured into a pan, poured with boiling water and the dishes are wrapped in a warm blanket for 2-3 hours. At this time, the second component of the bait is prepared. A piece of stale bread is soaked in warm water until completely limp. Dry flour and a little sunflower oil are added to it. After 2-3 hours, corn grits are mixed with stale bread and left until the morning.
Corn grits against slugs
To get rid of slugs, you should use an old folk method - a trap made from corn grits. It can be done as easily as possible: several grains of corn grits (finely ground or, even better, corn flour) are poured into 0.5-liter jars, which are placed in places where slugs are most concentrated. It is better to place the jar on its side so that the mollusks can climb inside. The smell of corn grits attracts slugs, but after tasting the bait, the pests die.
Corn grits have many beneficial properties and are gluten-free. Thanks to this, corn porridge is a safe, and most importantly, favorite dish for kids and adults.