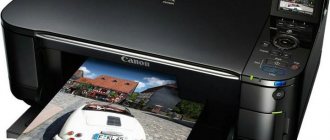
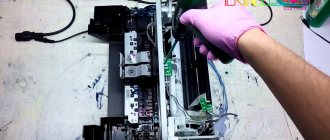
On this page we show how to clean the HP printer head. But we warn you right away that HP heads are very complex devices. Without understanding how they work, it is better not to touch them. If no attempt was made to clean the dried head, it can be restored. But amateurish cleaning of the HP head most often kills it.
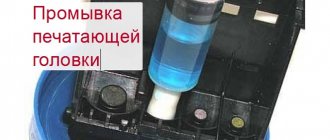
First, the head is always soaked in washing liquid, then cleaned. Cleaning the HP head can be done using the dripping method, also using ultrasound.
HP head cleaning steps
It is best to clean the HP print head in several stages.
Stage 1 - soaking the head. Place the head on a napkin soaked in cleaning liquid. We drip the appropriate washing liquid onto the metal mesh filters to dissolve the ink. In a few hours we begin the second stage.
Stage 2 - cleaning the head channels. If the input strainers are wet and become passable, then we clean the channels. We put special devices on the filters and pump out the old ink. Each master comes up with his own devices. Then we use an ultrasonic bath.
Stage 3 - digging channels.
We drip all the colors and repeat cleaning in an ultrasonic bath until the liquid passes onto the napkin easily.
Cleaning your HP laser printer
A laser printer is different from a dot matrix and an inkjet printer. The action is based on a photosensitive drum with powder toner. Electric charge and high temperature transfers the image to paper. A laser printer can also produce defects when printing and can also be cleaned.
The first thing you need to do is unplug the printer and let it cool down. The toner cartridge can then be removed and gently cleaned with a brush or wipes. The cartridge can also be vacuumed. After which you can put the printer back together and do a test print. You cannot clean the drum yourself, as it contains fragile parts. It's better to leave this to the professionals.
Advice! Do not run the printer head cleaning function too often! Do this only when clearly necessary. Otherwise, you'll just waste ink and shorten the life of the print head.
Cleaning the HP head in an ultrasonic bath
For HP and Canon heads, ultrasonic cleaning is very effective. But it is important to control the power of ultrasound radiation. Because you can damage the head if the emitter power is too high.
This scheme can be used to clean all types of HP printheads.
If at least one color channel is very different in hydraulic resistance from the others, there will most likely not be a good print. Because when cleaning with printer products, it will not be possible to fill all the channels with ink. The explanation is very simple. Typically, a printer uses a single system for head cleaning for all color channels. Black is cleaned separately. For example, a color tray is brought and pressed against the color nozzles, then the ink pump pumps out ink from all the colors at once. If one channel passes ink very easily, and the rest poorly, the main pumping will go through it. Other colors will not clear and fill with ink.
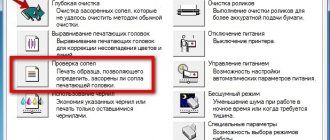
Software head cleaning
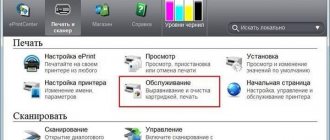
The HP Solution Center program, which is installed from the included disk or downloaded from the official website, provides this feature. The Taiwanese manufacturer has made sure that the printer head is easy to clean.
You just need to run the program with the printer turned on. In the program menu, you need to go to the “Printer Control Panel”, where you can start cleaning the cartridge. If the printer has been idle for a sufficient amount of time, you can repeat the procedure several times until the print test no longer produces errors.
Windows also contains a similar utility, which can be found in the printer control panel by going to the printing settings. This is the first thing you need to think about when repairing your printer. This is how all HP models are cleaned, for example, the 3535 without disassembling it.
Unfortunately, such cleaning will often not be enough, because the print head nozzles cannot be cleaned in this way. In this case, you will have to clean the head and other parts of the printer manually.
HP printers are divided into inkjet and laser. The printing principle, as well as cleaning methods, differ for these printers.
Cleaning HP heads with damper chambers
The heads of different devices need to be cleaned differently. For example, heads with damper chambers first require filling the chambers with ink or flushing fluid. Heads with damper chambers are less likely to clog and dry out.
We fill the head chambers with valves by opening and closing the rows with valves one by one.
This head has a complex device. It takes a lot of effort to clean it. Moreover, you need to imagine how it works. The most unpleasant thing is that the cameras are inside the head and we cannot see them.
The heads CB863-80013A, CB863-80002A, CB863-60133 also have damper chambers.
But the chambers are located outside the head and are easy to fill through the fittings. The head can also be washed through these fittings.
Signs you need cleaning
Any printing equipment requires timely maintenance to avoid malfunctions, operational problems or complete failure. Carrying out preventive measures is a sign of good form in modern realities. If in a large office the services of specialized companies are used for such purposes, then at home everything can be done independently.
The printer itself will “inform” its owner about the need for cleaning due to the poor quality of printed text or photographs. The first signs may be:
- If, when printing a test sheet for checking the nozzles (head nozzles), gaps, white lines, and incorrect color reproduction are visible (for example, the printer prints in a red or pink tint), while one of them may be completely absent, then there is a high probability that a blockage has occurred. This problem occurs from time to time when printing equipment is used intensively.
- The printer head deals with liquid ink, which due to its physical properties can dry out. If you don't use your device for a long time, this is guaranteed to happen. For different models, the drying time is different - from several days to a month.
- Using different types of ink or refilling with ink from another manufacturer may cause the chemical solutions in the printer to mix. Due to internal reactions, the ink may harden and even damage some parts of the print head.
- For preventive purposes, cleaning is recommended after each ink refill.
If you decide to use consumables from another manufacturer, then before refilling it is necessary to completely flush the ink containers, delivery channels inside the device and the head itself.
Clean HP print cartridges
HP cartridges have a head made of a head at the bottom, and ink areas with a filler like foam.
There is no need to disassemble them. If the color cartridge is empty and dry, you need to fill it with water or rinse and immerse the head in water for several days. Then we rinse the filler and clean the cartridge through the filling holes under the sticker.
The black cartridge cannot be washed with water. Because it contains pigment ink. In general, pigment inks are not friendly with water, forming poorly soluble compounds.
To clean them we use pigment liquid.
How to clean an hp printer head: software and manual options
The more we buy technology for our own comfort, the more skills we need to use and maintain all these technical devices.
If you have an hp printer or MFP, you need to know how to clean an hp printer head. When print quality drops, the first thing you can do to fix the printer is to clean the print head. This can be done via a computer using software.
Sometimes, cleaning the head manually cannot be avoided, but hp printers, like many others, provide an excellent opportunity to clean the printer without disassembling it.
HP Head Cleaning Fluid
The most important thing to know when choosing a wash fluid is the type of ink that was used.
For example, if the black cartridge contained pigment ink, then the flush should also be for the pigment. When using water-soluble ink, you can wash with a base fluid, but it is also possible for pigment. You just need to take into account that liquid for pigment is at least twice as expensive.
For water-soluble ink we use OCP RSL - a basic service fluid.
The liquid dissolves ink best at a temperature of 35-50 degrees. But these are all conventions, because after 5 minutes it will cool down to room temperature.
For pigment inks we use OCP LCF III - a pigment service liquid. It has a pungent smell of ammonia.
Prevention is always better than repair
To avoid problems with the printer nozzles, it is better to use it for its intended purpose at least twice a week. This way the paint will not have time to dry and the life of the print head will be longer.
Never operate the printer in extreme weather conditions. In hot weather, it can overheat when printing, and in cold weather, ink and lubricants can become hard, which can damage the entire device.
Dust around the printer is also not harmless, and it is better to keep it clean.
High-quality ink is an important condition for the functioning of nozzles. Only original ink from the manufacturer guarantees high-quality printing and long service life of the printer. By buying cheap analogues, you will have to solve problems with the printer yourself.
Shaking off
For light stains, the shaking method works well.
To do this, take the cartridge, move to the bathroom, and, holding the cartridge over the bathtub, with a sharp movement, “shake off” it with the nozzles down. The movements should be exactly the same as if you were shaking off a mercury thermometer.
I highly recommend not doing this in the room, because parents may not appreciate the multi-colored ink blots on the wallpaper.
The point is that the ink, due to centrifugal force, pushes the blockage in the nozzles and makes its way out.
You will see the result immediately - the flying ink drops are hard to miss.
Dry cleaning
There are three types of compounds:
- Acid. Consists of 10% acetic acid essence, 10% alcohol, 80% distilled water. Suitable for HP color printers.
- Neutral. Consists of 10% glycerin, 10% alcohol, 80% distilled water. Can be used for cleaning any cartridges.
- Alkaline. Ingredients: 10% ammonia, 10% alcohol, 10% glycerin, 70% distilled water. Suitable for Canon and Epson printers.
The user can prepare the appropriate composition himself if he discovers that the cartridge has dried out. What to do with homemade cleaner?
The liquid must be poured onto a paper towel. Place the cartridge with the nozzles down on a napkin with a special composition. Wait 2 days. The empty cartridge can be placed entirely into the solution. It is worth noting that foam filler cannot be immersed in the composition.
Preventing cartridge drying out
If none of the recovery methods help, then the user will have to purchase a new replacement ink unit.
What measures should be taken to prevent the cartridge from drying out? What should I do for this?
- Print the drawing weekly to control the availability of all colors.
- Do not keep the printer near a heater, in a draft, or in the sun.
Do not cover the nozzles with tape or adhesive tape. If the printer will not be used for a long time, it is recommended to close all covers of the device. Replacement cartridges should be stored in a cool, dark place.
How to clean Epson printer head?
Inkjet printers are convenient for many reasons. Full color inkjet printers are inexpensive compared to laser ones. They provide good quality for both regular and photo printing. However, the design of the device has a weak point: the print head has a high chance of becoming clogged. It is worth knowing how to clean the Epson printer head and how cleaning differs from other manufacturers.
Manufacturers of printing equipment are well aware of this problem. Therefore, printers are equipped with self-cleaning tools, and these tools can be controlled through proprietary software. If this method does not work, manual cleaning helps.
Burying
The first thing you can do is turn the cartridge over with the nozzles facing up and apply a few drops of cleaning liquid to them. Not everyone has the latter and is much more expensive than window cleaner, which can also be used. Experts recommend blue Mister Muscle .
Leave for 5-10 minutes. We wipe everything. Press the nozzles onto toilet paper or a napkin and check the print (see the first photo in this article). If the print is unclear or is not there at all, move on to the next step.
Alternative methods
Many users get upset when they find that their ink cartridge is dry. What should I do if I cannot restore normal print quality using the above methods? A completely unusable cartridge can be placed in the bath with the nozzles facing up. Then you should open hot water. A small stream should fall directly onto the print head.
The cartridge should be moved so that the water passes through all the nozzles. The jet will wash dry holes that were not amenable to regular cleaning. After 2 minutes you need to close the tap. After this, you need to place the cartridge on a piece of cloth with the nozzles down, let it dry, wipe it thoroughly with a napkin and install it in the printer. Print a test page.
Pressure
You can pressurize the cartridge chamber to force ink through the nozzles and clear them. To do this, use pliers to break off part of the syringe needle so that a piece 1-2 cm long remains. Find a piece of elastic. You can cut off a piece of the eraser. We put a rubber band on the shortened syringe needle. This will be our seal. We fill the syringe with air.
Place the cartridge on a napkin or toilet paper. The nozzles must be free. Insert the needle into the filling hole and press down. A piece of eraser will seal the hole. We press in the piston.
Ink should come out through the nozzles. If all else fails, you can try removing the cartridge cover (see video below), pull out the foam and fill in the flushing liquid. Lower the nozzles into the lid with the flushing liquid. We close the whole thing and leave it for 1 day. If it doesn’t help, then you need to think about buying a new one.
To prevent the ink from drying out, it is recommended to either print regularly and refill it on time, or, if you are leaving for a long time, remove the cartridges from the printer and seal it tightly in a small container.
The ink cartridge may dry out due to the printer being idle for a long time or as a result of untimely refilling. Manufacturers of inkjet printers are categorically against any manipulation of cartridges (except for their complete replacement), but in most cases this expensive procedure can be avoided.
Recovery methods
If this procedure does not help the first time, you can repeat it or try another recovery method.
The recovery process for black and color cartridges with built-in print heads is the same, but it is easier to restore a black cartridge than a color one, because If it contains one color, then the chances of getting a positive result are greater.
Epson
One of the leading manufacturers of printers for home and office is the Japanese company Epson (more precisely, Seiko Epson). The devices of this company are popular largely due to their simple maintenance.
Let's look at an example of a built-in service using Windows as an example.
- Find your model under Devices and Printers in Control Panel
- Right-click on Epson and select “Properties” from the context menu
- Go to the "Service" tab and click "Print Head Cleaning".
- Select “Clean” and click “Start”, then wait until the process completes. In this case, a characteristic noise will be heard.
- Select “nozzle test” when the system reports completion. The printer will print a test page. If the head is cleaned correctly, there will be no gaps or smears in the printed image.
- If the image still has defects due to contamination, try the Advanced Cleaning mode.
If intensive cleaning also does not help, you will have to clean the head manually. To do this, you will need a standard dropper, a syringe, a special washing liquid, as well as napkins, gloves and scissors.
- Cut off a section of 5-10 cm from the dropper tube. Fill the syringe with flushing liquid, then put a piece of tube on it.
- Turn on the printer and open its cover.
- When the cartridge carriage slides out to replace them, turn off the power to the device
- Move the head to the right and place a napkin so that it covers the head nozzle (so as not to stain anything with the remaining ink in it)
- Remove the cartridges as described in the documentation for the device or the CISS (if you have one installed)
- Insert the system from a syringe covered with a tube into the connector of the contaminated cartridge and inject about two milliliters of flushing liquid. Do this for each dirty cartridge.
- When the flushing is complete, return the printer to working condition by returning the cartridges and head to their place
- Launch the software and do a soft clean twice (as described in the previous section). If the simple one does not help, try using the enhanced one.
This method is quite troublesome, but not as much as completely washing the head outside the printer. Knowing how to clean the print head of your Epson printer will help you do basic maintenance yourself. However, if it is seriously contaminated, it is better to contact a specialist.
Method 3. Steaming
You take a dead, dead cartridge from an inkjet printer, which has been lying around no matter how long and has dried up tightly and all sorts of soaking, blowing, and ultrasonic baths do not help and everyone says throw it away and buy a new one - try this method and everything will work. This method applies to HP, Canon, Lexmark cartridges with a built-in print element. Take a kettle, boil water, when it boils and pour it into some bowl, the water depth is about 1 cm in and immediately lower the dried cartridge into this boiling water with the nozzles downwards, just before that remove the top sticker covering the holes as the paint will expand greatly and can flow out through top filling holes, hold in boiling water for 30 seconds and do this three times (carry out all operations with a refilled cartridge). Then you wipe the cartridge nozzles with a napkin and put some photo into the printer to print at the best quality, it will immediately turn out to be anything, then you make 4 main color sheets completely of the same color and print to run each color, the quality will still not be very good for In order to eliminate this, print any photo and in the printer settings set the quality to normal (not fast, not draft, but REGULAR). I would be most grateful if you leave a review here; I would also be grateful if you recommend this site to your friends.

