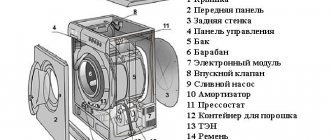
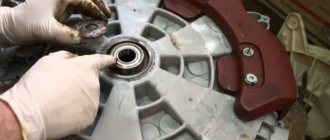
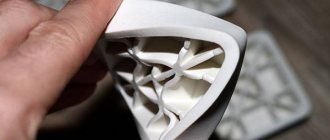
Replacing bearings in an automatic machine is a rather labor-intensive process, because in order to replace them, you have to disassemble the plastic tank. But a serious problem that may arise already at the first stage of the procedure is the non-separable design of the latter. Today, owners of modern SMA brands such as Zanussi, Samsung, Ariston, and Siemens are increasingly faced with a similar situation. Therefore, in order to replace the bearing, you have to cut the washing machine tub. How to disassemble a non-separable part and the best way to do it, says the author of the video on the MasterPlus channel.
Why do you have to glue it?
Sealing and gluing the washing machine tank is a forced process that owners of some SMA models have to deal with. Washing machines with a non-removable tank are offered, for example, by brands such as Ariston and Indesit. Manufacturers, making this element monolithic, do not intend to disassemble it. If the bearing breaks, the unit must be completely replaced. But such a replacement costs a lot of money and our people simply cannot agree with this order of things. As it turned out, you can halve the drum, remove the bearing, replace it with a new one, and then connect the halves. It is important to know how and with what to seal the tank.
Practical application of tools
The first device tested is a hacksaw for working with metal, which the master uses in 90% of cases.
She coped with the task: the cut turned out smooth, neat, and also as thin as possible.
The only downside to using it is physical labor.
The disassembly option using an angle grinder turned out to be quick, but not practical and far from safe.
For the most part, the plastic was not cut, but melted, scattering to the sides. The seam itself turned out to be thick.
The circular saw turned out to be inconvenient to use, since the screwdriver itself (during testing was used instead of a drill) had to be constantly held so that it did not fly off to the side.
And the cut itself, left by the saw, turned out to be torn.
The results of testing the renovator turned out to be almost the same as in the case of the grinder.
As the speed increased, the power tool melted the plastic more than it cut it. There is only one conclusion - it is inconvenient and ineffective, and the cut itself turned out to be of poor quality.
Using an electric jigsaw, we were able to saw through the plastic structure without much effort.
It was convenient and easy to operate. But the author notes that lowering the jigsaw deep down is dangerous, since there is a risk of damaging the drum. Therefore, the main thing here is not to overdo it and control this process as much as possible. The seam turned out more or less normal.
A hacksaw (with a wide blade and fine teeth) coped well with the task.
But, as in the case of the first tested instrument, the master had to put in a lot of physical effort to do this.
The author of the video replaced the chain saw with a Bosch EasyCut 12 cordless mini saw.
The power tool made the cut efficiently and quickly. The seam turned out smooth, but wide.
Requirements for glued joints
When new bearings are installed, the question arises - how to repair a plastic tank that has been sawed in half. How to seal the drum to prevent leaks? What to choose - glue or sealant? It is better to use glue, since no sealant can provide the necessary strength characteristics of a glued structure.
Reliable connection of parts requires two operations:
- The halves are connected using bolts and nuts. To do this, holes are made in the plastic - evenly along the entire seam.
- The gap between the parts to be joined is filled with glue or sealant.
Not every composition will work. It is important to know what sealant to glue the halves together with. In this case, the operating features of the unit are taken into account:
- Strong vibrations - the connection must withstand severe mechanical loads.
- Extreme temperature conditions - the unit either heats up or cools down.
- Contact with aquatic environment. Including water supplied under pressure.
If the purchased composition fails you, leaks are possible. Then you will again disassemble the machine and fix the problem.
Features of replacing drums in washing machines
The main difference between automatic washing machines with vertical and horizontal loading is the method of attaching the drum, which is attached on one side for the “front” machine, and on both sides for the “vertical” machine. It is this circumstance that must be taken into account when disassembling a specific model.
In conclusion, I would like to note that repairs that involve replacing the tank, removing the drum, bearings, oil seal and cross take a lot of time. Therefore, be patient and be sure to film the process of disassembling the unit on your mobile phone camera, so as not to make a mistake or forget anything while assembling an expensive device.
How to glue a plastic water tank?
Below are adhesives and sealants that are suitable for bonding the drum. These compositions easily withstand the difficulties characteristic of SMA - temperature extremes, vibration attacks, high pressure, contact with water.
Permatex 81730
This is a flowable adhesive-sealant designed for hermetically sealing headlights and glass in a car. The composition is characterized by transparency. Frozen seams do not allow water to pass through and are not afraid of extreme temperatures. The operating range of the composition is from minus 62 to plus 232 °C. Great for the task. Costs on average - 175 rubles.
Kraftool
The composition is highly elastic. Withstands strong vibrations and heating up to plus 250 °C. Its main purpose is to seal connections in electric motors. Reliably fastens the halves of the product even without bolted connections. One tube can glue 4 tanks together. The cost is about 200 rubles.
Glue F
This is polyurethane glue. If you use it, then you won't need bolts. But it is so strong that if you need to disassemble the machine again, you will have to saw it again. The second disadvantage is the price, it costs much more than sealants, a 310 ml can costs almost 700 rubles.
ABRO 11AB-R
An ultra-resistant sealant that can withstand the harshest conditions. He is not afraid of very high temperatures, and is not afraid of chemically aggressive substances, including acids. The cost is approximately 350 rubles.
Connecting the halves of the tank
After the tank is cut, you can proceed to replacing the bearings, installing a new oil seal, repairing the cross, etc. At the end of the work, another important task remains - to assemble the monolithic tank of the Indesit washing machine. To glue the tank, you need to prepare:
- silicone moisture-resistant sealant;
- two clamps for securing the halves (for example, you can use a regular awl);
- screws with nuts.
The algorithm of actions will be as follows:
- degrease the seam on both halves of the tank;
- Apply moisture-resistant sealant to the connecting seam.
The surface must be lubricated thoroughly, without missing the slightest area. To glue the tank, you need to choose a sealant that can withstand temperature changes, pressure, vibration, and exposure to water.
- connect both parts of the tank. When placing the lid on the base, press it down lightly;
- To prevent the halves from slipping during further actions, fix them. The clamps (in our case, awls) are installed in two places on the sides of the tank, in the holes located on the welding seam;
- Take the screws and insert them into the holes around the perimeter of the seam. Twist them. Thus, the two halves of the tank will be securely fastened together.
Leave the tank for a few minutes until the sealant is completely dry. Next, you need to attach the drain hose to the tank. The hole for it is also treated with sealant, after which a hose is inserted there. Afterwards, a counterweight, shock absorbers, etc. are attached to the tank. These works no longer relate to the topic under consideration, so we will not focus on them.
As you can see, you can disassemble and solder back the tank of an Indesit washing machine in a couple of hours. The work will proceed especially quickly if you choose a non-standard cutting method. If you cut the tank with a jigsaw, you can save not only time, but also your energy. Using a hacksaw, you will have to press on the seam, constantly work with your hand, but in our case you just need to hold the jigsaw tightly, direct the movement of the file and make sure that it does not go too deep.
Interesting:
- DIY washing machine tank repair
- Which washing machines have a collapsible tank?
- Dimensions of the Indesit washing machine
- Reviews of Indesit washing machines
- Disassembling the washing machine drum
- Which is better: LG or Indesit washing machine?
Reader comments
- Share your opinion - leave a comment
How to glue the halves?
There is nothing complicated here. The main thing is to properly prepare the parts for gluing. Before sawing, you need to make 30–40 small diameter holes across the seam. They are then precisely aligned when gluing, and the halves fit together flawlessly.
The joint of the halves is smeared with the selected composition, and then the bolts are screwed on. Moreover, they tighten the bolted connections without waiting for the glue/sealant to dry. The seam will dry completely in about two hours.
Preparatory work
Before getting down to work, you should prepare your workplace and stock up on the necessary tools. We need to start with the car. Removing the drum is a large-scale undertaking; the machine must be moved away from the wall, preferably installed in the middle of the room to gain access to all its parts.
Immediately you need to worry about lighting. Even if you have a bright room for work, it would be a good idea to prepare a portable lamp or lantern.
In order not to be distracted by searching for tools during work, everything you need must be prepared in advance. The list can be adjusted depending on the brand and model of the device, but in any case you cannot do without the following:
- screwdriver or universal screwdriver with a set of attachments,
- pliers, preferably several with different jaw widths,
- metal and wooden hammer (mallet),
- a set of keys or sockets with a knob,
- car bearing puller.
If the task is to disassemble a non-separable drum, you will have to prepare something else:
- electric drill and drills,
- metal hacksaw,
- hot melt adhesive.
As a result of prolonged use in a damp room, the bolts are guaranteed to be covered with a thick layer of oxide; to remove them quickly and painlessly, you must also stock up on WD-40 or its equivalent. A blowtorch or gas torch will help you quickly and easily dismantle the bearings. Of course, you should not work with open fire in the house. It would be better to go out into the yard or work in a ventilated workshop.
How to get it?
Disassembling and cutting the tank may be necessary when:
- bearing faults and seal wear;
- bearing wear, which leads to shaft deformation.
To cut a product, it must first be removed. Disassembly of SM from Indesit:
- Disconnection from the mains.
- Dismantling the panels - top and rear, by unscrewing the bolts.
- Removing the drive belt from the pulley.
- Disconnecting the wiring connected to the heating element.
- Loosening the clamp holding the drain pipe. Eating the last one.
- Unscrewing the shock absorber nuts.
- At the top of the SM, unscrew the suspension fasteners.
- Removing the powder container - unscrew the screw.
- Removing the panel and removing the detergent tray.
- Removing the cuff and pressure switch.
- Removing the product from the hangers and removing it.
Sawing time and result
A modified jigsaw will help you spend a minimum of time cutting. Before moving on to the main work, it is necessary to cut off all the “ears” from the surface of the tank, that is, the protrusions present on the welding seam that will interfere with sawing. Next, the blade is placed on the seam, after which you can start the jigsaw.
It is important to monitor the location of the file; it should run almost parallel to the tank so as not to damage the elements.
Also, if you are doing work in this way for the first time, then it is still better to go through difficult areas of the tank (for example, the place shown in the figure above) manually. This will help cut the tank as neatly as possible.
A master who has already become skilled will be able to cut a tank using a jigsaw in literally 45-50 minutes. If you are spending more time dividing the tank for the first time, remember that the work will go faster each time. The cutting method using a jigsaw is very effective and does not require much effort from the “sawing” person.
How to cut?
- The element intended for cutting is placed on the floor. The surface must be flat.
- Place marks under the screws.
- Drill holes in the plastic - 3 mm in diameter. Only 15–20 pieces.
- Place the product on its side. Using a metal file, they start cutting from the top.
- The maximum depth is 5 cm. A large cutting depth can damage the drum.
- As sawing proceeds, the seam is sprayed from time to time to make sawing easier and prevent the plastic from heating up.
- Having cut the product into two halves, pull out the drum. For this purpose, unscrew the fastening bolt and disassemble the shaft - the drum is attached to it. Remove the pulley and remove the drum. Now you can change the bearings and seals. After replacing the parts, gluing begins.
How to disassemble a soldered tank
Why do manufacturers still use one-piece plastic drum shells? The answer is simple: this technology simplifies and reduces the cost of production. In addition, it is beneficial for them to use this type of tank due to the fact that if the bearing assembly wears out, the consumer will most likely purchase a new washing machine rather than choose to pay for repairs that cost almost the same as a new device.
Therefore, this trick is often used: the body is sawed, the necessary replacements are made, and it is glued back together with special glue. Here's how to describe this process.
- In front of you is a plastic tank of a machine with a drum inside. Inspect it to determine the location of the weld. To mark the sawing site, make small indentations around the entire circumference. Use a drill with a thin drill bit for this.
- Armed with a hacksaw for cutting metal, begin to carefully cut the tank along the prepared marks. Separate the cut section from the drum.
- When you turn the drum over, you can see the wheel that connects the parts together. Remove it and you will finally be able to free the drum from the body.
- After the new parts are installed, the two halves of the disassembled tank can be glued together with silicone sealant, and additional screws can be installed.
Subsequent assembly and installation of all removed systems can be done in the reverse order.
Thus, now you have the opportunity to carry out repair work yourself and save on service costs.
What to do if the tank body is deformed?
First of all, you need to analyze the nature of the damage and the scale of the work.
If the tank is plastic
If the tank is plastic, it may have cracks and cause water leakage.
We immediately dismiss the option of soldering the crack, because this is a conditional repair of washing tanks that will not last long.
The best option is to replace it with a new tank. The price of a metal tank is more expensive than a plastic one.
If the tank is made of stainless steel
If we consider the possibility of repairing a stainless steel tank, then the option of using welding is quite justified. Of course, it is better to trust an experienced welder who will do everything carefully and quickly. After welding, you can paint over the seam with waterproof enamel to increase the service life of the part.
Keep in mind that sealant, no matter what quality, and cold welding will not solve the problem.
Deformation repair
If the tank is deformed, repair occurs as follows:
- You will need a hammer with a block of wood. If the damage is minor without holes, no other tools are needed.
- The dent needs to be heated using, for example, a gas burner. The outside of the tank heats up.
- The block is struck with a hammer not to create a dent, but to create a bulge until the metal has cooled.
Why do you need sealant?
In most modern units, such as Indesit or Samsung, the drum is non-separable. It is understood that if a minor part such as a hose or a bearing fails, the user will contact the Indesit service workshop and have the drum assembly completely replaced.
The main difficulty that DIYers face is the need to disassemble or saw the drum into pieces to get to the desired area, especially if the axle, bearings or seal need to be replaced. The repairman needs to replace the parts, and then assemble and seal the dismountable halves of the drum so that the structure is completely sealed, otherwise the unit will not work at all.
To seal the halves of a non-separable tank, it is often suggested to use only sealant, but glue alone will not be enough to hold the parts together. It is best to use bolts and clamps to repair a non-separable tank, which will hold the structure together, and use adhesives only for waterproofing and protection against leaks.

