Over time, all mechanical devices break down due to wear and tear or improper use. In this article we will tell you how you can troubleshoot Samsung washing machines (hereinafter also referred to as SM, SMA) with your own hands.
Samsung is expanding the capabilities of its technology; for example, in the latest models of washing machines, laundry can be added to the drum during washing through an additional door in the hatch
How to disassemble a Samsung machine yourself?
Instructions for disassembling a Samsung washing machine:
Remove the cover.- Remove and distribute for detergents.
- Remove the control module.
- Remove the service panel.
- Remove counterweights.
- Dismantle the heating element.
- Remove the belt.
- Detach the center and rear panels.
- Remove the tank with the drum, disconnecting it from the springs.
- Remove the bottom cover and unscrew the motor with counterweight.
The wires must be disconnected carefully, being careful not to damage them. It is better to record the entire disassembly process on camera so as not to get confused during subsequent installation. Detailed instructions for disassembly are here.
Samsung washing machine device
Let's get acquainted with the structure of a washing machine using the example of the well-known Sensor Quick model. Main front elements of the model:
- removable front panel;
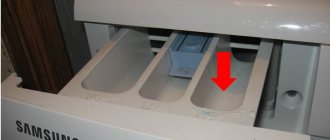
- distribution hopper for powder and special products;
- control Panel;
- electric valves;
- level relay;
- laundry tank;
- adjustable stand legs;
- drain pump with filter;
- drain hose;
- drain hose plug.
Rear elements:
- power cable;
- counterweights;
- tank suspension springs;
- shock absorber;
- engine;
- pulley with drive belt.
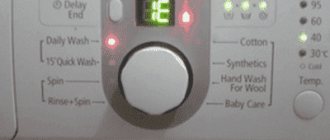
The control panel is a board with buttons and indications that turn on the washing mode, change the temperature, spin speed, washing time, and delay start. It is also possible to manually set all these parameters with the “Manual program setting” button. The display shows the current washing status and error codes.
When does the drain hose need to be replaced?
Replacing the drain hose is required in three cases:
- the hose is too short, connection difficulties arise;
- there is mechanical damage on the hose;
- the hose is so clogged with debris and scale that the blockage cannot be removed.
If the blockage is minor, you can get by by cleaning the hose. Read about replacing the drain hose here.
heating element
Hard water causes the heater to break down, resulting in scale formation. On the heating element, due to constant heating, it turns into stone and damages the surface. Note that in regions where there is soft water, for example, in St. Petersburg and the surrounding area, heaters practically do not fail. Moscow has hard water, and such damage is a pressing issue.
Removing the heating element
In order to extend the service life, use anti-scale products: Calgon, professional converters, or folk ones in the form of citric acid.
The malfunction manifests itself in two ways:
- The heating element burns out;
- leakage occurs on the housing.
In both cases, diagnosis is carried out with a multimeter. In order to gain access to the contacts, you must remove the front panel. See the disassembly sequence here. Unhook the wires. We put the tester to check the resistance.
First, we examine the contacts that receive voltage. If there is infinity between them, then replacement is necessary. Then we set the maximum limit.
Expert opinion
I work in the household appliance repair industry. Extensive experience in restoring washing machines and dishwashers.
Ask a Question
Important! Reliable results can be obtained if the multimeter measures up to 40 MΩ.
We look at the resistance between ground and each contact. If the value is different from zero, then the heater must be replaced. Operation with current leakage will lead to incorrect operation and damage to the control module.
What to choose: fix it yourself or call a repairman to your home?
If a breakdown occurs, the owner of a Samsung washing machine is faced with the question of whether to repair it himself or call a technician. To make the right decision, you need to carefully analyze the situation.
If the device is under warranty
If the device is under warranty, you should not attempt to repair it yourself . There is also no need to pay for the services of private masters.
Damage that occurs through no fault of the buyer is subject to warranty service. It is free, at the expense of the manufacturer.
If the device breaks down due to external factors, for example, it was dropped or connected incorrectly, you will have to pay for repairs yourself.
Repair it yourself
You can handle minor breakdowns on your own, for example:
- Replacing the pressure switch.
- Clearing the blockage.
- Rebooting the machine due to a controller malfunction.
- Replacing a pump, door hinge or hatch, etc.
If you have experience and capabilities, you can try to carry out more complex repair work, including:
- replacing the heating element,
- hatch cuffs,
- motor,
- shock absorbers.
The cost of repairs on your own is affected only by the price of the part and amounts to 2-3 thousand rubles.
If during the repair process you realize that something is not going according to plan, it is better to call a specialist.
At the service center
to entrust your washing machine to professionals in the following cases:
- controller is faulty;
- bearing replacement is necessary;
- dismantling of the tank or cross is required;
- The tank support broke.
Repairs that require complete disassembly of the washing machine are complex and time-consuming. Only experienced craftsmen can cope with it. If you try to intervene on your own, you can completely damage the washing machine.
The cost of repair by specialists will be from 2 to 7 thousand rubles for each breakdown, depending on the cause.
You will find all the most important and useful information about Samsung washing machines in this section of the site.
Fault codes and main breakdowns
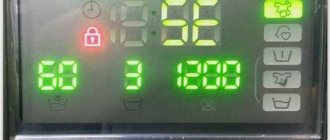
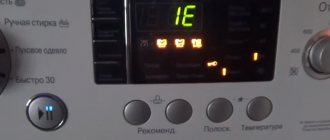
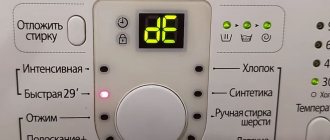
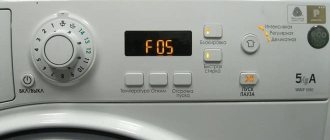
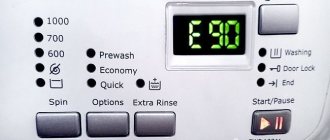
The self-diagnosis system is designed to make repairing the washing machine easier. Therefore, if there is a malfunction in the operation of the equipment, an error code is displayed on the control panel (1E, 3E, 3E1, 3E2, 3E3, 3E4, 4E, 4E1, 4E2, 5E, 8E, 9E1, 9E2, Uc, AE, bE1, bE2, bE3, CE , dE, (door), dE1, dE2, FE, HE, HE1 (H1), HE2, HE3, LE (LE1), OE (OF), tE1, tE2, tE3, EE, UE, Sud/SUdS). If your model does not have a display, then the machine will indicate a breakdown by flashing indicators.
The most common codes:
- 5E (SE), E2, 5C - problems with draining water from the tank.
- H1, H2, NOT, HE1, HE2, E5, E6, NS, NS1, NS2 - the heating system is not working correctly.
- DE, ED, DOOR, DE1, DE2, DC, DC1, DC2 - problems with opening/closing the hatch door.
- 4E (CHE), E1, 4C - water intake error.
- LE, LE1, E9, LC, LC1 - a leak has been detected, the water drains by itself.
- tE, Ec, tE1, tE2, tE3, tC, tC1, tC2, tC3, tC4 - temperature sensor problems.
- 1E (IE), E7, 1C (IC) - pressure sensor (pressostat) error.
Based on the listed codes, as well as statistics from service centers, most often the following components and parts break in Samsung washing machines:
- drain pump;
- heating element (heating element);
- solenoid valve;
- drive belt.
Filler and drain systems also become clogged. It is worth noting that electronics in equipment of this brand break down half as often.
To repair a Samsung washing machine, you need to understand how it works. The design is not particularly different from other washing machines. This is what it looks like in the picture:
Having examined the device, you can carry out repairs yourself, without calling a technician.
Drive belt
Over time, it “breaks apart” and tears. Overloading with laundry speeds up this process. Please note that the belt may stretch. In this case, it scrolls and washing will be impossible.
Replacement instructions:
- Remove the cover from the back, first unscrew the screws.
- Pull the belt towards you and at the same time rotate the pulley. We're filming.
- It's more difficult to install. First we put it on the motor shaft and hold it.
- With the other hand we place it on the pulley, twisting it at the same time.
Expert opinion
I work in the household appliance repair industry. Extensive experience in restoring washing machines and dishwashers.
Ask a Question
Important! Select the belt exactly the same!
Belt pulley
Step-by-step instruction
Unscrewing a soured washing machine filter is sometimes very difficult.
It is necessary to act carefully, not to apply too much force, so as not to break the machine parts.
In addition, you need to make sure that the rotation is in the right direction - counterclockwise. To resolve the issue, you can use several methods.
Using a tool
One of the easiest options is to try to grab the filter handle with pliers and unscrew it
Caution is required here as the force is quite large.
Without proper calculation, you can break the handle of the knot. You need to act slowly, rocking, turning the plug in both directions and gradually increasing the amplitude.
If the filter can be turned a quarter turn but does not go any further, do not apply force. It's better to try another way.
Removing the drain pump
If you cannot unscrew the cover using the usual method, you can try dismantling the entire pump. As a rule, it is attached to the machine body with two screws, but there are a lot of manufacturers, so any options are possible.
Getting to the node from the other side is much more difficult. Partial disassembly of the machine body will be required. In order to determine the location of the device, you need to look inside the case.
The easiest way is to tilt the car and look from the bottom. Sometimes it is not there at all, or it can be easily removed. Then you can support the housing on a wall or other strong object and disassemble the pump from below.
Another option is to turn the car around, remove the back wall and disassemble the pump from the back. This method is somewhat worse, as you will have to reach for the part through the entire thickness of the machine, which is filled with other parts.
However, the issue is completely solvable. The main thing is to acquire the necessary tools and ensure maximum ease of work.
The insides of the machine should be well illuminated, act carefully, trying not to damage the plastic tank of the machine.
Deflection of the machine and tapping on the filter unit
One effective way is to carefully rest the machine on the wall at an angle of approximately 45° and tap the filter with something soft.
The easiest way is to use your own fist. Shock may cause debris and particulates to fall off the filter cover. After this procedure, it is often possible to unscrew the filter without much difficulty.
Sometimes things don't work out the first time. You can try repeating the procedure several times if any positive changes are noticeable.
The main thing is not to overdo it and not to drive the lid in even harder. Then the only option left is to completely break out the problem unit and replace it with a new one.
Breaking out
Sometimes situations arise when no methods help. For example, the filter cover broke immediately (or during previous attempts), or when unscrewing, parts of the housing, pipes and other elements were damaged.
If such situations arise, all that remains is to resort to the last, most drastic method - break out the filter in order to get rid of the defective unit and replace it with a new one.
To perform the work, the machine is placed on its side and work begins from the bottom. Unscrew the mounting screws. If this cannot be done, they are drilled out or carefully cut off.
Some craftsmen destroy the plastic case from the inside and gradually break off pieces of plastic from it. After some time, the filter and pump can be disconnected from the machine body.
Immediately you need to unscrew and disconnect the pump - it is in order, it will still serve. Be careful with the terminals, they are fragile and can be damaged! The remains of the housing with screws are removed, the spring clamps are pressed out and the pipes are disconnected.
It is necessary to remember which of the rubber pipes leads where, since for an untrained person they are all the same.
ABOUT
Often it is possible to completely disconnect the filter with the pump, but the cover still does not unscrew.
In such situations, you can try to disconnect the filter from the pump, clean it from the inside and soak the housing in a basin or bucket.
Take warm water, dissolve liquid soap or washing powder in it and leave the body for several hours. Fatty deposits and dirt will become wet and fall away from the inner surface of the lid. Now you can try again to unscrew it in the usual way.
Replacing the snail
The washing machine pump (pump or “snail”) sooner or later fails. In addition, when removing a soured filter, it is easy to damage the pump, which will require replacing the entire assembly.
The procedure is simple if the old filter and pump are already disconnected and turned off. The main problem is to find suitable replacement elements.
Then all actions will consist of sequential installation of the filter and pump in their standard places in the machine body.
Motor
Quite a reliable item. It is characterized by the following malfunctions:
- interturn closure;
- brush wear.
The first problem is caused by improper use, namely: constant overload of laundry. Another reason for the occurrence is frequent use during the day. You must understand that you bought a household machine, not an industrial machine. And it is designed for 2-3 washes per week. Repair of this fault is unlikely. We change the motor.
Washing machine motor
In the second case, simply change the consumables. This problem is inherent only to commutator motors. But in washing machines, in 80% of cases they are used. The procedure requires certain skills, but it can be done independently. Read more about replacing electric motor brushes.
Expert opinion
I work in the household appliance repair industry. Extensive experience in restoring washing machines and dishwashers.
Ask a Question
The service life depends on the intensity of use, and it can be estimated by the following period - 8-12 years.
Pump
The drain pump must be in use for 8 years or more. Constant blockages lead to malfunction. They occur in the following elements:
- drain hose;
- pipe branch;
- pump.
The pump itself and the filter must be periodically washed and foreign objects removed. To carry out this procedure, open the small hatch on the lower right and unscrew the lid. There is a filter under the cover. We take it out and rinse with running water. We look inside and make sure that nothing is wound around the impellers. Otherwise we delete it.
Snail with drain pump
Important! There is always a small amount of water in the pump, so apply a cloth before cleaning!
With a clogged pipe or drain hose, everything becomes more complicated. To eliminate it, dismantling is necessary. There are two options:
- remove the front panel;
- turn the car on its side.
Both cases have their pros and cons.
Expert opinion
I work in the household appliance repair industry. Extensive experience in restoring washing machines and dishwashers.
Ask a Question
Important! If you turn it over, be sure to cover the electric motor with plastic wrap!
Preventive measures
To avoid damage to the heating element, first of all, you should carefully read the instructions and use the device as described in it. It
is also important to properly care for the unit. For example, detergents should only be used that are intended for automatic washing machines.
Scale forms when water is too hard. This problem is inevitable, so you should periodically use special chemicals to solve it. It is also necessary to clean the internal parts of the washing device from scale and dirt.
Hatch handle
Trivial breakdown. This is caused by improper use. Most inexpensive models are equipped with thermal plate locks. It is she who blocks the hook and prevents the hatch from opening during the washing period.
But after the end of the cycle, the plate needs time to cool down - 2-3 minutes. If you read the instructions carefully, it is written there. But people usually don’t wait and pull the handle. Since it is plastic, it breaks over time.
Handle in a disassembled hatch
Actions:
- remove the hatch;
- unscrew the screws in a circle;
- divide into halves;
- changing the hatch handle.
Important! Different repair kits for different models! We select by serial number!
Are you using citric acid?
Oh yes! No

