make an air humidifier with your own hands using improvised materials or using additional materials and devices. In this material we have collected the most interesting options for such a useful device for the home.
For information on how to choose a humidifier in a store, what types of humidifiers exist and which ones are considered the best, see here.
You can make the humidifier yourself in different ways, so as not to delay, you can immediately watch some of the methods in this funny video:
The role of the humidifier
Before you make an air humidifier at home , you need to understand why it is needed in general. It is especially difficult to maintain the air of normal humidity in a room in winter, since centralized heating dries it out, and breathing dry air is fraught with consequences. These include respiratory tract disease, allergies and other troubles.
DIY air humidifier
It is especially important to have it in a home where there is a small child, since his body is still imperfect and requires special conditions for normal growth and development.
All humidifiers perform one important function: they maintain the humidity level in the room at 40-70%, which is considered optimal for humans.
How to humidify the air in an apartment
Wet cleaning
Cleaning dust from the floor, furniture and other parts of the interior of your apartment will not only remove dust and microorganisms located in it.
Also, frequent wet cleaning will increase air humidity in a short time, as water will evaporate from a large area.
This is done using damp cloths; they can also be left on heating radiators after cleaning; this will also speed up the process of air humidification.
Often people simply do not have the free time for constant wet cleaning to maintain moist air, so this is considered a disadvantage of the method. This is due to the fact that you will have to allocate too much time for wet cleaning.
Air humidifiers for battery
an air humidifier for a battery yourself ; for this you need to have a heating battery that is not walled up in the wall. Materials for production will be required: water bottle (1.5-2 l); tape, preferably wide; a piece of fabric; meter long gauze.
The advantage of this option is that it does not consume any resources, except perhaps water, it can be made in a matter of minutes, and the effect is no worse than from a store-bought one.
So, the manufacturing sequence:
- Cut a window in the bottle up to 12 cm long and up to 7 cm wide. This should be done in the side part.
- Hang the bottle with the slit facing up from the pipe that extends from the battery. To do this, use a rope or a piece of fabric. To prevent this design from turning over, cover the place where the bottle comes into contact with the fabric with tape.
- Take the gauze and fold it several times so that you get a strip up to a meter long and about 10 cm wide.
- We lower the resulting piece of gauze into the bottle with one end, and wrap the other around the pipe; if you wish, you can make several such cuts, then the effect will be enhanced.
- After preparation, you can start the humidifier by pouring water into it.
Another option for a battery humidifier is this: using a rope threaded through the holes, you need to attach containers to the battery accordion, from which water will not spill. You can use light oblong vases; in addition to their main function of humidification, which will occur as a result of the evaporation of moisture from them, they will definitely become a decoration for the interior.
Air humidifier for battery
If you don’t want to look for such decorative elements, you can do it even simpler - place a metal container with water on the battery and that’s it. True, in this case, you may have to say goodbye to it at the end of the heating season, since serious scale forms in the container after tap water, so use several as a solution, while one is “working”, the second is going through the cleaning process.
The simplest ways to increase indoor humidity
Ventilation
Try to ventilate the room several times a day. Why breathe stale, stuffy air? In the morning, as soon as you get out of bed, open the window and go about your morning routine. The air from the street will fill your home with humidity and freshness.
Open a window when exercising or cleaning. Be sure to ventilate well before going to bed. And it’s easier to breathe, and your sleep will be deeper.
Many people believe that frosty air is already too dry and therefore will not be beneficial. When it enters the room, it mixes with warm water, creates condensation and provides sufficient humidity.
Wet cleaning
Cleanliness is the key to health! Who doesn't know this? Regular wet cleaning will only benefit both the apartment and its inhabitants.
Wash the floor, wipe off the dust with a damp cloth, and spray curtains and curtains with a spray bottle. And always with the window open - you won’t feel hot from physical work, and the stagnant air will disappear.
After cleaning, sit in a chair and take a deep breath. Do you feel the freshness and pleasant smell of dampness? Wet and clean!
Water tanks
Sometimes, in severe frosts, central heating radiators simply fry mercilessly. Of course, the house is warm, but at the same time unbearably dry. And now the grandfather began to cough, and the child began to sniffle. Opening the window is not an option; the frost will quickly freeze the room.
Take a basin or wide pan of water and place it under the heating system. Fasten a wide bandage or gauze with one end to the battery, and lower the other into water. The wider the fabric, the greater the volume of evaporation. Who's stopping you from hanging entire garlands of gauze?
If you don’t want to bother with basins and clutter up your apartment with them, use your imagination. Take out transparent vases and crystal from the sideboard, fill them with water and decorations - pebbles, seaweed, flowers. Beautiful compositions will fit into the interior and be beneficial. The main thing is not to forget to change the water with fresh water from time to time and wash the containers well.
Damp cloth on batteries
Wet a large terry towel and place it on the hot radiator. You will immediately feel how the air is humidified by evaporation from a large surface. The big disadvantage is that you will constantly have to run to the bathroom to wet a dry towel. But you will lose extra calories!
After washing, some of the laundry can be dried on the central heating radiators. Here you get double benefits - quick drying and good moisture. You need to look for benefits in everything!
Ventilation
If ventilation is a daily habit, then you can forget about problems with the microclimate. After all, the air becomes not only moisturized, but also fresh. In this case, the atmosphere inside the house will be directly influenced by the indicators outside. Therefore, the best effect can be achieved after rain, when the air outside is as humidified as possible. However, you should not keep the window open all day.
Especially in winter, when the temperature outside is low. It is enough to ventilate for 10-15 minutes. And do this 1-3 times a day. During cold months, you should not be near an open window - drafts and cold can lead to the occurrence of acute respiratory infections. For the same reason, it is best to ventilate when there are no children or pets nearby.
Pros:
- does not require much effort or time;
- accessibility;
- the air inside the room is humidified and filled with freshness.
Minuses:
- in winter, ventilation leads to drafts and a sharp decrease
- temperatures;
- in the summer, due to the heat, the air in the room remains dry;
- the result greatly depends on the atmosphere outside the window;
- When the window is open, extraneous sounds can be heard from the street, which can distract you from your work.
Fountain
Fountains have long ceased to be the privilege of wealthy houses. Today this cute decorative element is available to any family. It will not only decorate any room, but also humidify the air in it. Fountains come in different sizes and styles, so choosing the right option is not difficult. This solution will allow you to keep the air moist without making any effort. After all, all that is required from the fountain owner is to add water to the reservoir on time and clean it periodically. An additional bonus is that the sound of water is calming. However, it is worth considering that not everyone will like these extraneous sounds.
Pros:
- a fountain is not only functional, but also a decorative element that will decorate the room;
- no time or physical expenditure is required from the owner for
- fountain maintenance;
- The sound of water relaxes.
Minuses:
- takes up space;
- you will have to spend time searching for a suitable model;
- The sound of water can be distracting.
Homemade air humidifier made of expanded clay and a bucket
Expanded clay material has excellent qualities that make it an excellent basis for a humidifier.
Such a homemade air humidifier can both absorb and release moisture, so to speak, two in one.
This option will require additional materials, such as:
- Four mesh buckets (the kind used for garbage), two slightly larger and two smaller.
- Bucket, optimally 12 liters.
- Aquarium pump.
- Computer cooler with a diameter of 14 cm.
- Hairdryer (construction) which has a high heating temperature.
- Ties (plastic).
The first step in making such an air humidifier will be gluing the smaller buckets together. This can be done using a household hair dryer; if you don’t have one, then plastic fasteners will do.
Air humidifier made of expanded clay
Thus, we get a humidifier body that is empty inside. Large buckets also need to be connected. Before you do this, place your first creation inside.
To fill the voids in the humidifier with expanded clay, you need to cut off the roof of the top container or cut a hole into which it will be convenient to fill it. Please note that expanded clay must be selected with a fraction such that it does not spill through the mesh bucket.
Now a 12-liter bucket comes into play, an aquarium pump is placed at the bottom, and its tubes are brought to the top of the structure of mesh buckets, then we install a plastic ring with holes on top.
On top of this whole creation you need to mount a cooler, which will pump air into the expanded clay structure, which are saturated with moisture, and then through the holes the moisture will enter the room.
In this type of humidifier, it is very important to qualitatively select the main ingredient - expanded clay; the granules must be selected carefully and rinsed under running water before filling.
Spray
For this method, any spray bottle is suitable, for example, from an air freshener and other liquids, you just need to wash it well. Otherwise, traces of chemicals may remain after evaporation.
Curtains, plant leaves, etc. should be sprayed with a spray bottle; the surface area is large, so moisture will evaporate quickly.
Humidifier from a plastic bottle
There is an easy-to-implement DIY air humidifier made from a plastic bottle that will give the effect of cold steam. To do this you will need a large (10L) plastic bottle, a computer cooler and tape. Assembly sequence:
- You need to cut the neck of the bottle so that the cooler fits into the resulting hole.
- Now you need to secure the cooler, this can be done in two ways: simply put it in the hole and wrap it with tape or cut out fasteners from thick cardboard. Namely, take it, attach the cooler and cut a hole a little smaller than the cooler, and then attach it all to the bottle with the same tape. The second option will be more reliable.
Humidifier made from a plastic bottle - Now all that remains is to plug in the cooler and enjoy the “correct” air.
Such a humidifier can be made from a large plastic container; due to the fact that such containers have legs and a tight lid, as well as a significantly larger volume, it will be more convenient for you to use this option.
In this case, you need to cut a hole directly in the roof of the container; all other steps are similar to the previous one.
Humidifier from a plastic bottle, video:
Humidifier made of plastic box
A slightly more complicated option, but also more effective. For such a humidifier you need to take 2 plastic boxes, one larger - 30 liters, the second smaller, it should be mesh and fit into the larger one. In addition, you need gauze (bandage), wire or fishing line, and a fan.
It is made in this way:
- Wire or fishing line is attached to the top of the mesh box so that it is taut.
- Cut bandages or gauze are hung on the fishing line (wire) so that they reach the bottom.
Air humidifier made of a plastic box - Water is poured into a large container and a small one is placed so that its lower part is dipped into water, thereby moistening the suspended bandages.
- A hole is cut in the lid of a large container to the size of the fan, then the fan itself is fixed in it.
- The resulting structure is covered with a lid, and the fan is connected to the network.
Thanks to the use of a fan, the system operates very quietly, without creating discomfort for the residents of the apartment, water consumption is about 1.4 liters in 6 hours, per day it will be 5.6 liters - a very good option, and most importantly, effective.
Humidifier-air purifier, video:
Decorative device
A decorative air humidifier for flowers, created with your own hands, fits any interior of the room and is invisible from the outside. But due to the lack of heating elements, the air is less humidified compared to other devices. The design consists of two containers: decorative and for water. You will also need multi-colored sand, stones, leaves and other decorative elements. Glue is used to fix the parts.
Manufacturing instructions:
- Wicker baskets (for a picnic or bread) are used as decorative containers. They are decorated with stones and other necessary elements.
- An empty water container is attached to the inside of the decorative container with glue.
- The bottom is decorated with sand and stones. You can use figurines and other decorations. All elements are fixed with glue.
It is not difficult to create an air humidifier with your own hands. All you need is a minimum of knowledge, imagination and time.
How do you like the article?
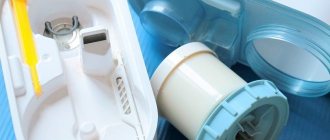
Ultrasonic humidifier
to create an ultrasonic air humidifier with your own hands , but for this you will have to use some special materials. For this humidifier you need:
- Ultrasonic transducer.
- Computer cooler.
- Plastic container for 5-10 liters.
- Plastic cup.
- Bagel from a children's toy pyramid.
- Power unit.
- Corrugated pipe or any flexible pipe.
- Stabilizer.
- Aluminum corner.
You will have to spend a little money on this version of the humidifier, but in any case it will be several times cheaper than buying a factory one.
DIY ultrasonic humidifier
Once you have purchased everything you need, you can begin assembly. Using a drill, make holes in the lid of the plastic container. You will need to insert the fan mount, the outlet tube, and the steam generator wire into them. After this, screw the fan to the container and insert the corrugated tube.
For the steam generator, make a special floating platform that will be constantly in the water, thereby ensuring uninterrupted operation of the ultrasonic humidifier.
But what is such a platform made of? It’s simple - take a plastic cup and a round piece that will have a hole in the middle. You can take one from your child, namely a part from a pyramid.
Ultrasonic humidifier is ready
Insert the glass into the donut, drill a hole in the bottom, and then attach a piece of fabric to the bottom with an elastic band. The fabric will act as a filter, then insert the steam generator into the glass.
Such an ultrasonic humidifier operates by supplying a current with a voltage of 24V; the fan, in turn, requires 12V to operate; it is for this reason that it can be powered using a stabilizer microcircuit.
Its best performance will be ensured by a constant or variable resistor. It is better to hide the microcircuit and speed control knob under an aluminum corner.
Such a unit does not require special care, the only thing you need is to ensure that there is always water in it, and another important point, it must be distilled.
Humidifier from a floor fan
If you don’t have time to make something at all, but you want to breathe normal air right now, then you can make such a humidifier: attach a thick mat to the pipe, which you pre-moisten, hang this structure, for example, on a floor lamp, a little higher than the height of your fan . Place a regular floor fan behind such a structure and turn it on. It is important to constantly keep the mat damp, only then will it have an effect, however, at the end of the season, it will most likely have to be thrown away, since ingrained salts and rust are unlikely to be washed off.
Air humidifier made from scrap materials, video:
Cost-effective device
An important feature of such a device is the fact that it does not require any energy resources. In this case, only water will be consumed.
You can assemble such a unit in just a few minutes, but it will provide the necessary effect at the same level as a store-bought humidifier.
Humidifier with antibacterial filter
For such a device, you naturally need a filter, in addition, a low-speed fan (12V) and a plastic box.
A moisturizing sponge with antibacterial impregnation is a key part of such a humidifier; it is capable of trapping large particles, dust and hair. Impregnation prevents germs from spreading.
The assembly process is not particularly difficult. In a plastic container, you need to make a cutout in the side about half the height of the filter, then it needs to be secured with a plastic tie or any other way.
A fan is attached to the lid of the container, for which a hole is cut out prematurely. The last stage is pouring water; its level should be slightly lower than the height of the side slot. Everything is ready, all that remains is to plug it into the outlet.
Do not forget that such a filter needs to be changed regularly; this need can be seen by its color - it darkens, but at least once every three months.
Another version of the humidifier will have a similar design, only instead of a filter there will be gauze, and for the convenience of pouring water, you can make a hole in the container lid with the same diameter as the neck of a watering can.
Its advantage is that there is no need to purchase a filter. For an additional effect, you can add a few drops of essential oil to the water, which will provide both moisturizing and aromatization.
Decorative air humidifier
All these designs are not very attractive, but if you crave aesthetics in everything, then this humidifier option will suit you.
In order to make it, you need to take a bowl, preferably blue or light blue. You can stick pebbles inside it and on the edges using special glue; if you have plastic fish, then they will go too - in general, to create a marine ambience, you can throw pebbles on the bottom. Fill the whole thing with water and place it near the battery.
You can make any stylization that you like and what you have enough imagination for. It will be especially interesting for children to watch such a humidifier, and they will certainly help you replenish the water resources in it.
Replacement of humidifying vessels
The only inconvenience of this solution is the fact that at the end of the heating season the bowl may simply become unusable. It will be covered with a layer of salt deposits and scale.
To avoid such a development of events, you should replace the bowls every week and thoroughly wash those that have already been used as evaporators.
Efficiency
A photocatalytic air purifier is many times more efficient than its predecessors - devices with carbon filtration. As experts have been able to prove, carbon “air washers” cannot neutralize some organic compounds, for example, carbon monoxide, formaldehyde compounds, and nitrogen oxide. But it is these substances that are present in the greatest quantities in city air, where there is a lot of smog and exhaust gases.
The catalytic cleaner is able to cope with such types of complex and dangerous contaminants as:
- Tobacco smoke, fumes, carbon monoxide and any other toxic gas.
- Industrial toxic exhausts.
- Dust mites.
- Pollen from flowering plants.
- Vapors from household and other chemicals.
- Unpleasant odors caused by organic decomposition (rotting food, animal corpses and insects).
- Microparticles of human and animal waste products (particles of skin, wool).
- Pathogenic microorganisms (viruses, bacteria, fungi).
The device can protect people from infection during seasonal flu epidemics, and it also greatly increases the chances of not contracting the disease if an infected person is nearby. The unit is very useful for people suffering from allergies and asthma. This is a real lifesaver for a home with small children.
On a note! Photocatalysis can be supplemented with other types of filters (carbon, HEPA filter, electrostatic), this only improves their characteristics.