Creating comfort in your home is greatly facilitated by various electrical assistants.
Unfortunately, their owners forget that they are designed to operate under certain operating conditions and periodically violate the planned operating conditions.
As a result, household electrical appliances break down and fail.
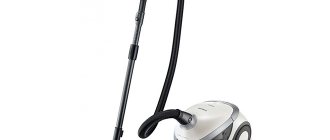
Based on our own experience, we have prepared tips for the home craftsman on how to repair household appliances with his own hands, disassemble and restore a Samsung vacuum cleaner after cleaning up construction dust with detailed pictures, diagrams and a video.
In order to correctly eliminate any malfunction, you need to have a good understanding of the processes that occur during the operation of working household appliances.
The principle and design of the vacuum cleaner
The choice of vacuum cleaners is expanding. Main options:
- For dry cleaning;
- with aquafilter;
- washing vacuum cleaner.
The most common and lightweight is a dry cleaning vacuum cleaner. The operating principle of modern vacuum cleaners and old ones is the same.
After starting, all debris is sucked out using a vacuum fan. Once inside, the garbage goes through several stages of filtration. Often, this is: at the debris inlet, in the engine part, and at the outlet. Each stage protects the vacuum cleaner from damage by large particles.
The first sign that the filter is clogged is that the suction power drops.
All dust and dirt are collected in a special bag. They can be reusable and replaceable from paper. There are models of vacuum cleaners that use a container system instead of a bag. All the dirt settles on the walls of the container, and then purified air also comes out.
Manual
Recommendations for equipment maintenance:
- Press the locking plate by hand and fold the top cover of the housing forward. For ease of operation, it is recommended to first disconnect the flexible hose.
- Close the inlet of the bag with a standard plate to prevent dust from escaping into the air. Then remove the container from the cavity of the vacuum cleaner. It is strictly forbidden to close the top cover and turn on the vacuum cleaner without a dust collection tank.
- The reusable fabric bag is equipped with a plastic U-shaped plate located on the bottom of the product. Once the plate is removed, the sides of the bag open, allowing accumulated dust to be removed. After removing the debris, you need to put the plastic retainer back in place. Paper bags cannot be cleaned from dust and must be disposed of together with household waste.
- Replace the bag or new paper bag. The product takes the form of a dust collector after turning on the turbine.
- Close the lid until the latch engages, and then fix the flexible corrugated sleeve in the socket.
The design of the vacuum cleaner uses a Hepa 11 motor filter located at the inlet of the air flow into the turbine. Access to the element requires removal of the dust bag. The design of the filter does not allow washing with water; dust is removed with a brush, tapping on the edge of a trash can or a stream of compressed air. Regular cleaning of the unit is recommended; the product is replaced at least once a year.
The most common malfunctions
If it is not possible to take the vacuum cleaner to a specialist to disassemble and assess its condition, you can find out what you need to pay attention to in the event of a malfunction. After problems arise, the first thing to check is the bearings, which help the engine operate.
A specialist can quickly determine the problem of a vacuum cleaner breakdown.
The sound that is characteristic of them: a sharp hum, roar, burning, overheating of the body. In addition to them, attention is paid to the armature and motor brush. A common problem is that the hose does not draw in contaminants.
Vacuum cleaner hoses often fray.
The reason may be a clogged hose, an overfilled dust bag, or a problem with the HEPA filter. A problem that often arises is when the unit draws air, but the debris is not removed properly. The problem may be a worn brush or a broken roller position.
Motor failure is a serious problem.
If the equipment does not turn on and the electricity does not disappear, then the reason lies in: the overheating protection or malfunction of the power circuit, plug, wire, internal wires, or a snag in the switch itself. If the problem occurs with the electronics, it is better to entrust this matter to a professional.
Only a professional service center will quickly repair your vacuum cleaner.
An indicator of this lies in the fact that during operation they discovered smoke, knocked out plugs, and short circuits. This all suggests that the problem is centered on a short circuit inside the device. And frequent problems with collector sparking lead to rapid wear of the device.
Use the drawings to disassemble the vacuum cleaner.
Preparatory stage of disassembling the Samsung vacuum cleaner
You can notice the problem if you have been using the equipment for some time. You know what sound is typical of your Samsung and the smallest changes in it or in the operation of the device will be noticeable to you.
The breakdown of many parts will lead to financial problems.
A broken motor in a vacuum cleaner is noticeable by: intermittent sounds, throws out dust, smells burnt. If it is not possible to give it to a specialist, then disassembling a Samsung 1800 w vacuum cleaner with your own hands, videos and photos will be assistants.
What tools will you need?
Need to clean the dust bag or replace it? No special equipment or skills are needed. They are needed in cases of problems with the motor, wires, and board elements. They will be:
- file;
- awl;
- pliers;
- sandpaper;
- vice;
- construction knife;
- spare connectors and wiring.
Use tools to disassemble the vacuum cleaner.
In cases of replacing small parts, you won’t have to spend a lot. But to replace a large and expensive component, you can pay attention to an alternative. With the condition of good material from which it is made.
Sequence of disassembling a vacuum cleaner using the example of Samsung 1600w
Disassembling any equipment begins with preparation. And the right sequence. We cannot reach the heart of the device until we remove everything that covers it.
You can disassemble the vacuum cleaner yourself using the instructions.
You can open it like this:
- Disconnect anything that might be in the way and unscrew the case. Use a screwdriver to unscrew all the screws, including the hidden ones that may be near the buttons. After unscrewing all the parts that can hold the shell of the vacuum cleaner, remove it. If it doesn't work, look again to see if there are hidden latches.
- Disconnect the electrical installation. You can see it on the connectors.
- We remove the engine from the entire plastic body by unscrewing it from the frame.
Correct diagnosis is the key to success.
Engine disassembly
The heart of the vacuum cleaner has a step-by-step opening process.
- First you need to remove the impeller. But for this you need to perform certain actions. Remove the front part of the casing. Use a thin screwdriver to bend the side of the casing so that the screwdriver gets inside. Pull back the top of the casing and the impeller becomes accessible.
- Unscrew the nut on the impeller.
- We remove the housing screws, but by this time the brushes need to be removed.
- Pull out the anchor.
- Use thread pullers to remove the bearing.
Filters become clogged, debris is poorly drawn in, there is additional load on the motor and eventually it breaks.
Electric motor repair
If you decide to restore the old electric motor, lubricate or change the bearings, perform a complete disassembly.
First, unscrew the screws with a screwdriver and remove the impeller casing. Use a socket wrench to unscrew the nut. In most engines it has a left-hand thread. The impeller is pryed from opposite sides with two screwdrivers, trying to remove it from the anchor.
Unscrew the tightening screws on the body and remove the brushes. The motor will split into two parts: one will contain a stator with a copper winding, and the other half will come out with an armature and bearings.
All parts are carefully wiped off dust with a dry cloth or brush. Use a puller to remove the bearings and install new ones. If necessary, lubricants are pushed into the seat with the balls and separator. Assembly occurs in the reverse order of installing new brushes.
How to repair a vacuum cleaner with your own hands
In order to repair all the elements with your own hands on a Samsung vacuum cleaner, you need to determine the place where it formed. The motor may need to be disassembled if: there is a burning smell, poor dust suction power. Follow the sequence when removing the housing.
The hose in vacuum cleaners often gets clogged.
The cause of this breakdown is often poor performance of the brushes on the motor. You need to pay attention to them. If the hose or brush is clogged. We clean them. First, remove the brush and check how the hose pulls without it.
You can replace the vacuum cleaner tube with a new one.
If everything is fine, then you need to clean the brush. If not, you can remove the hose and do the same steps. Often, a large item can get stuck inside: a chain, a watch. Clogged filters and waste container.
You do not necessarily need to replace the filters in your Samsung vacuum cleaner if the device begins to work poorly.
To determine, we take everything out and check the draft of the vacuum cleaner. If everything is in order, clean the filters. As for replacing and repairing the motor, here you need to evaluate your skills and abilities. An example of this could be a broken motor winding. To determine problems with it, you need to have the ability to use a multimeter.
The filter must be washed regularly and replaced every two years.
Only with its help can you identify the problem. Other problems that you can solve yourself include:
- Button failure;
- Broken wire in the extension cord;
- Poor contact at brush terminals and winding.
When it comes to engine repair, then you need to evaluate your strengths and financial capabilities. It's easier to buy a new component, although buying bearings is much cheaper if they are the issue.
Check the terminals on the brush.
Checking the motherboard
The control board in a vacuum cleaner does not look the same as in a computer. This is a triac. From the part to the motor there are 2 wires on one side and on the other 2 wires are attached to the socket. The triac itself is located between them.
Only a specialist can repair the motherboard.
Remove it and connect the motor to the wires from the outlet. If everything is in order, you just need to replace the board. Some owners use a vacuum cleaner without it.
Cleaning the vacuum cleaner
The vacuum cleaner also needs to be cleaned. Starting with the lint you use to vacuum, and ending with the insides. Empty your dust bag promptly, whether it's a reusable bag or a disposable one. If you were removing construction dust and it was clogged, after removing all the parts, you can clean the insides.
An odor may occur if the dust container is full and has not been emptied for a long time.
It is convenient to do this with another vacuum cleaner, but carefully. You should be careful with the boards. Do not use the wet cleaning method.
Preventive measures
It is better not to treat the problem, but to prevent it. This applies to everything and vacuum cleaners too. How does she look? Basic care: replace or empty the dust bag on time.
Each technique has its own weaknesses.
An important detail is the brush. Cleaning its lint should also not be a waste of time. If the vacuum cleaner is intended for dry cleaning, do not suck in water and other liquids, they will accumulate inside. This leads to breakdown.
Clean your vacuum cleaner more often to increase its shelf life.
Keep the warranty receipt after purchasing the vacuum cleaner, if you have one. Most types of breakdowns can be repaired by specialists. If it is missing or there is another type of breakdown, do not be afraid to use videos from the Internet, where craftsmen will tell you how to repair a broken Samsung vacuum cleaner with your own hands.
Weak "pull"
As we have already found out, if the vacuum cleaner does not suck in dust well, then you will most likely have to repair the vacuum cleaner hose (you have a Samsung or a product of a different brand - it doesn’t matter). First of all, make sure that nothing is stuck in it - foreign objects caught in the hose greatly reduce traction. Simply put, look into the hose and remove the clog.
If you are sure that the hose is not clogged, carefully inspect it and check the integrity of the corrugation. Very often, housewives are too lazy to bend down to move the unit from place to place, and they simply drag it around the room “by the tail.” This causes gaps to appear between the turns of the corrugation, resulting in reduced traction.
If everything is fine with the hose, check all the filters and the garbage bag - they may be very dirty. Clean the filters thoroughly and replace the bag with a new one. Also, do not forget to check the position of the power regulator - it may be out of order. Return it to the desired position.
