The fox is the most striking and recognizable character in children's fairy tales. Therefore, more and more parents are choosing a fox outfit for their child. In addition, even adults themselves are not averse to turning into this fairy-tale heroine during a corporate event.
Probably, many have encountered the problem of finding a suit - when you comb store after store, but there is no item you need. Sewing a festive outfit yourself will help solve this problem.
There is no need to be afraid. It's not as scary as it might seem.
Even a novice needlewoman can make a red-haired rogue costume. Let's figure out how to sew a fox outfit with your own hands.
Fox masquerade outfit
How to make a fox costume on your own? For this you will need:
- felt fabric or fleece in two tones - red and milky;
- rubber;
- padding polyester
- Sequence of steps:
- Lay out the red felt and make a pattern using the old dress. Make the front cut deeper.
- Sew the sides and shoulders.
- Take white material, apply it to the shelf and outline the fox’s chest.
- Carefully cut along the line and sew to the base using a zigzag stitch.
- Make a slit on the back and sew two ribbons - this will make the process of putting on and taking off the outfit easier.
- Make a tail from orange felt - two blanks. Don't forget to cut out the tip for it from white fabric.
- Sew both tail blanks, first connecting elements of different colors in pairs, and then all together. Stuff the part with padding polyester and stitch the edge. Fold it over and make a “pocket” for the elastic.
- Take a hoop as a basis for the ears. Cut 2 smaller triangular pieces from white fleece and 4 larger ones from red fleece. Sew ears from them and attach to the hoop. Your DIY fox costume for a girl is ready!
Skycloud's Diary
- Architecture (114)
- Bodyflex, yoga (57)
- Videos (1,397)
- All about coffee (492) Sunday coffee with newspaper (45)
- My knitting patterns (7)
- Pancakes (57)
- and talk? (258)
- Interior things (149)
- Cat housing (19)
- Restaurants (46)
- Yellow Brick Road (13)
- My MKs (11)
- Shoes (67)
- Maidan, Ukraine, Crimea (109)
- Interesting places on the planet (85)
- Other materials (128)
- Jewelry (115)
Outfit option for adults
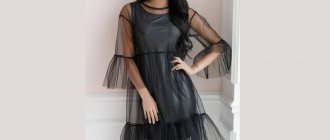
DIY adult fox costume comes in different varieties:
- Flirty (with a full skirt).
- In a modern style (with trousers and a fashionable jacket).
- Daring (with a dress - the sun).
And also romantic, in a retro style, avant-garde, etc. However, as you can see in the photo of a DIY fox costume, the main thing is that two main elements are present - ears and a tail.
Makeup that matches the look is also required. All these details together will emphasize individuality and personal characteristics. In other words, this will allow others to determine what kind of animal you are portraying.
You can find many interesting patterns on the Internet. Therefore, it is not difficult to find the option that suits you. To add exclusivity to your outfit, use decorations - fur inserts, beads, rhinestones, beads, embroidery. But keep it in moderation.
How to sew an orange vest?
To sew a vest, you also need a piece of orange fabric. The pattern for it can be made in the manner described above - trace a jacket from the girl’s wardrobe to the contour of the waist, supplement the pattern with planned neckline cuts, and round off the openings for the arms.
The resulting two parts are sewn together and decorated along the contour of the bottom, neckline and slits for the arms with fur or orange Christmas tree rain.
The front front of the vest can be divided into two, complementing the suit with beautiful black buttons.
Making a mask
The easiest way to give your appearance the desired look is to use a masquerade mask. They can be of three types:
- completely covering the face;
- covering only its upper part (the most suitable option for a DIY Alice fox costume);
- put on the head like a hat (for children).
The simplest model is a mask that partially covers the face. It can be cut from a sheet of cardboard or thick fabric. First you need to draw a stencil, and only then cut out the workpiece.
The slits for the eyes must be made with special care. For greater aesthetics, the mask can be painted, covered with fabric, fur, or decorated with appliqués. The final step is to attach ribbons or elastic.
How to sew an orange sundress (dress), skirt?
You should start creating an outfit with the selection of fabric. A fox costume for a girl made from thick fabric that holds its shape looks great. To sew a sundress or dress, you need to lay out the fabric on a flat surface (table or floor), lay out the sundress from your daughter’s wardrobe that she wears on it, trace its contours to the waist with a marker, and then draw the desired version of the skirt part of the dress. The resulting pattern is cut out in two parts and sewn on the sides.
Making a tail
Fox pride can be sewn not only from felt, but also from other materials. The most impressive tail is made of tulle. To make it, you need to take a ribbon, gather it on one side and sew it in a spiral, not forgetting to cut the free edge.
Another option that deserves attention is a yarn tail. Prepare a medium-length ribbon and attach to it bunches of yarn cut into pieces of equal length.
petticoat
To make the fox's skirt fluffy and beautiful, you need to sew a petticoat for it. It is best to use tulle as a material.
The length of the petticoat should be 2 - 3 cm shorter than the main skirt. The width is 2-4 times the waist circumference. The greater the difference, the more fluffy the skirt will look.
After cutting off the required amount of tulle, stitch the sides. Fold and hem the top edge and thread the elastic through. Hem the bottom edge. All that remains is to steam the finished product.
Note!
How to make a craft with your own hands: what you can do with your own hands at home
DIY foam crafts: snowman, Christmas tree, sculptures, original figures with instructions (photo + video)
- Papier mache from egg trays, boxes, cassettes: the best ideas on what can be made from egg packaging
Additional attribute
You can complement the look with gloves stylized as fox paws. Although these could be mittens. The latter are quite easy to do.
You will need to prepare a piece of material in the shape of a rectangle. Its width should be equal to the circumference of the palm, and the length can be any of your choice.Measure the distance of your palm from the edge that is smaller and cut the material diagonally. Sew the sides. Thread an elastic band through the smooth edge and sew a loop onto the sharp edge to secure the glove on your hand.
In conclusion, we note that no matter what version of the fox costume you choose, you should remember that all work must be done carefully, without haste.
Take the time to think through every little detail. Only then will you have confidence in the ideality of the invented image.
Chanterelle makeup for a carnival look
- If for some reason you decide not to make a mask for the fox costume, then artistic makeup can perfectly cope with the task of completing the image of the little fox-sister. A cute fox face is what you need!
- To apply makeup, use orange, white and black aqua paints. First, you need to apply an orange base to the face, then paint the area around the mouth with white, and draw in black the mustache, the outline around the white spot and a large dot on the nose.
- When depicting the ears, do not forget that the inside of them should be white.
Chanterelle Makeup
When applying makeup, you can tint the entire face, or you can get by with just the upper part - with proper makeup application, in both cases you will get a very beautiful Chanterelle!
We will also tell you about the following costumes:
- Indian
- Prince
- Witches
- Ryaba chickens
- Bullfinch
DIY fox costume photo
a href=”https://vsesvoimirykami.ru/wp-content/uploads/2019/02/Kostyum-lisy-svoimi-rukami-71.jpg”>
Bookmarks in the shape of animals
For those who love animals as well as bookmarks, paper origami allows you to combine your preferences by creating funny paper animals that will carefully ensure that the right place in the book is not lost in the bustle of everyday life.
The cute faces of these origami crafts will not only serve their intended purpose, but will also certainly lift your spirits, both during the assembly process and during intended use. Making such bookmarks is very easy, especially if you have detailed instructions with photos and video tips at hand.
Bookmark in the shape of a cat
To work you will need:
- square sheet of paper, it is better to use colored one-sided paper;
- patience.
The process of assembling a bookmark step by step. For ease of use, the sheet is folded diagonally and then unfolded. The marked fold lines will help you navigate your work. The sheet is placed with the angle up, then folded to the horizontal fold line, as shown in the figure number 1. Then the remaining “ears” are also folded towards the center, connecting on the same fold line.
After this, the sharp nose is bent twice along the dotted lines, first inward, then outward. The resulting figure is folded in half along a horizontal line. Fold according to the dotted line indicated in the figure at number 5. The folded part is opened and leveled. The almost finished cat is turned slightly.
Form a tail by bending the part outward. The triangles at the bottom, which prevents the cat from sitting upright, are bent inward. Now you can start folding the muzzle. The lower part is folded along the dotted line (Fig. 10). The tip of the curved part is bent back to form a nose.
The ears are made with a double bend (first the triangles are bent back, then forward, forming a fold). The origami bookmark in the shape of a cat is almost ready. All that remains is to provide him with eyes - you can draw them yourself or use store-bought ones.
Another version of a bookmark in the shape of a cat, made using the origami technique, can be seen in the video.
Video: Origami cat bookmark
Origami bookmark in the shape of a panda
The materials used are the same as those used by the cat. The paper must be colored (black) and one-sided to get the correct coloring for the panda.
Scheme for assembling a bookmark: fold the sheet in half, iron the fold, and fold it back. Then one half is also folded in half, ironed and unbent. And after that, a quarter of the sheet is folded in half again, the fold is ironed, and folded back.
The sheet is turned with the corner at the top. Fold in half, forming folds. The upper and lower corners are folded inward towards the center fold line. And then fold it again towards the center. The sheet is unbent to its original position. Finally, the preparatory work is completed, the process of folding the panda itself begins. The lower corner is folded along the third fold line.
Then the part is folded along the dotted line (Fig. 10) and the fold is ironed. The top corner is folded in the same way. The side parts are bent inward by about 1 cm along the dotted line (Fig. 12). The blank is folded in half with the black side of the paper facing inward. Turn counterclockwise. The part marked with a white arrow is opened and ironed. The result is a panda face.
The workpiece is turned face down (the muzzle is at the bottom). Make a fold along the dotted line and bend it back. Again, the corner is bent along the dotted line, the fold is smoothed out and returned to its place. The part marked with a white arrow (Fig. 19) is opened and smoothed. The panda is turned face up again. Pull out the panda's paws (in the place marked with red stars in Fig. 21). The lower “tail” is folded inward and hidden under the paws. The upper part of the head is folded back, forming a flat “top of the head.”
The entire process of assembling the bookmark can be viewed in detail in the video; everything is shown there very slowly so that it is easy to see.
Video: Panda using origami technique - bookmark
Manufacturing technique
If you are an experienced needleworker, then it will not be difficult for you to figure out the format of a costume for a theatrical performance. Alternatively, the costume technique can be divided into two types.
- Making a suit from scratch
- Making a costume based on existing items.
First, let's look at the basic principles in decorating and creating a fox costume for a girl of our own “production”.
Creating an image
As the basis of the image, choose what you feel most comfortable working with. As we have already mentioned, sometimes there is simply no time for high-quality tailoring of a suit. Then in this case you can use original clothes, blouses, skirts and add elements of a decorative patch or a full-fledged patch of orange fabric to it.
Convenience and comfort
Be sure to not forget about wearing comfort. Beauty is beauty, and practicality and the ability to move freely in a suit are also important for little children.
Adding Decor
In addition to the image of a fox, you can use patterns of a red sundress or a fox mask. For Max, by the way, it’s enough to just make it according to a template, which is simply cut out of cardboard, covered with paint and varnish. For ease of wearing, you can put the mask on with an elastic band.
Character's entourage
A headband made from fox ears will be a great addition to any look. To make it, we will need a regular hair hoop, red fabric, hairpins, threads and needles.
Making such a hoop is quite simple. Cut out the shape of the ears on the fabric and fold them. Next, we try on the headdress and use a hairpin to mark the position of the ears on the hoop. Carefully remove the product and sew up the ears on the hoop. That's all! An alternative to a hoop can be an elastic band or hairpins on which ears will be sewn.
Tulle tail
Tulle is a fairly inexpensive and interesting material that handicrafts often use in their products. To make it, you can use a bunch of tulle and dye it red. The tip remains original white. The structure is now sewn together and allowed to dry completely before use.
Glove paws
In addition to the image of a fox, you can always use an original and interesting patch on gloves. Thin fabric gloves are perfect for this, they breathe and allow you to sew on the necessary elements. You can add paw pads, claws, or just make an original red glove under the paw.
Face painting
Don't forget about the possibilities of makeup and, of course, face paints. Thanks to this ambient decor, you can paint your face, draw a nose, mustache and simply add a red themed color.
As you can see, you can approach creating an image from different angles, from creating a full-fledged costume, ending with altering finished products and painting your face in the form of a fox’s face. There are no restrictions here, and for comfort and convenience of choice, we provide you with a large assortment of photo ideas for every taste and color.
Please note that thanks to the wide variety, you can create unique images simply by alternating furnishings with each other.
Source
Decoration
In terms of crafts, the words decorating and creativity are actually synonymous. Decorating a fox costume is not so difficult, just like showing originality in the image of Basilio the cat. It’s enough just to remember everyone’s favorite movie “The Golden Key,” which will allow you to make your own fox costume more original and memorable.
The first thing that catches your eye when looking at the image is the bright red colors and fur. You can make an imitation of a fluffy fox tail using artificial fur, threads or wool, which will allow the image to acquire the very thing that everyone loves a fox for.
The ability to wag the tail can be taken from the previous idea of using an “invisible” ring.
What you need in terms of materials and tools:
- The fabric is red and white.
- Scissors.
- Pencil.
- Centimeter.
- Buttons and other decorative elements.
When making a fox costume for a girl with your own hands, you should take into account not only the image of the hero, but also the manner in which the fairy tale is presented. As a rule, fairy tales are divided into two types: Classic and new. In the classic format, we see the standard fox from all the fairy tales we are familiar with.
When presenting an image in a new way, you can always make a few omissions from the original image. Typically, such elements act as a complement or basis for the image.
That is, if in the usual image we imagine a fox in a blouse, with a beautiful vest and a tail, then in the format of a fairy tale, in a new way you can make a fox in jeans, where there will be a tail behind her or a fur collar.
Images
Costume for kids
Mask in the shape of a fox's face
Brown or orange socks
Bright dress
A cute costume that will delight your guests
Suit for boy or girl
An option that is suitable not only for girls, but also for boys, very convenient and practical
Bright hat with ears
Comfortable soft overalls
For an adult woman
Fluffy fox ears
Blue stockings
A playful option for ladies. The suit is modern and stylish
An interesting image for women. Perfect for leading children's matinees and family parties
