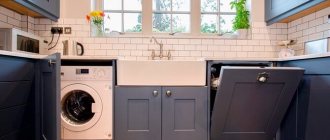
Samples of MDF wall panels for a kitchen apron
The front side of MDF panels is covered with polyvinyl chloride film, imitating various types of wood or a cut of natural stone. The panels can be plain or with any pattern applied. The surface can be either matte or glossy.
Often, wall panels are finished with natural veneer of valuable wood species, which in appearance do not differ from those made of natural wood. It is the cladding that gives MDF a decorative look and provides protection from moisture. Polyvinyl chloride film is easy to clean and does not change its original color for a long time .
MDF wall panels can be used in the kitchen to fully or partially cover walls, as well as aprons between the work table and wall furniture.
An MDF kitchen apron performs the main functions: protects walls from moisture and food waste, covers the gap between the table and the wall, preventing kitchen items from falling, and serves as a decorative decoration.
An MDF kitchen apron is almost no different in appearance from panels made of glass, tiles, mosaics and other materials.
How to install an apron in the kitchen from MDF
There are several ways to attach an MDF kitchen apron, and each of them has its own advantages and disadvantages:
- Installing MDF panels with glue directly to the wall.
- Installing panels with glue to the timber sheathing.
- Fastening panels using self-tapping screws or dowels.
- Fastening panels using aluminum profiles.
The fastest way is to install an MDF apron in the kitchen using glue. The wall on which the panel is installed must have a flat surface.
If there are significant deviations in plane, then the wall should be leveled by any available means.
Important! If you replace a damaged panel when removing the adhesive from the wall, the plaster layer may be destroyed. In this regard, fasteners using baguettes, self-tapping screws and plastic dowels are preferable; replacement is easier and does not require additional costs. This point should be taken into account when choosing how to secure an MDF apron in the kitchen.
DIY MDF apron installation
In order to attach MDF panels to the wall, calculations are first made. They are important for safe further operation both for the apron itself and adjacent surfaces. What are they:
- Height measurement from floor to MDF panel. This is important, since sockets for household appliances are almost always located below, and the stove should in no way interfere with safe access.
- Apron height. As in the case of ceramics, the edges of the panels or slabs extend beyond the lower and upper set of fittings by 3–5 cm. The size of the hood is also taken into account - according to GOST, its height is at least 75 cm and the panels should be fixed taking into account this feature.
- The number of sockets coming out through the apron. You should pre-drill holes for them in the slabs.
When all the required dimensions have been transferred to the drawing (it makes sense to compile one), they begin preparing the wall and cutting out the slabs.
Marking and cutting MDF sheets
Often, a kitchen apron made of MDF consists of several panels, which can have different heights due to different configurations and sizes of wall cabinets.
Scheme for marking the dimensions of an MDF wall apron for the kitchen, taking into account the height for the hood
In this case, the vertical joint between the panels should be in the same alignment as the junction of the walls of the wall cabinets. When measuring and marking, you should adhere to the golden proverb: “Measure twice, cut once.”
Marking a kitchen apron with a metric tape measure
Important! Before marking, you should check the horizontal position of the kitchen cabinets and the plane of the countertop using a building level or a laser level. If necessary, adjust the position of the kitchen furniture.
Selection of MDF boards
Despite the fact that there are quite a lot of different options for MDF panels on the construction market, only two are suitable for decorative work:
- laminated MDF,
- veneered MDF.
As an option, you can decorate an MDF apron yourself, but this procedure has nothing to do with savings, since the total cost will be much higher than the price of finished slabs.
The laminated MDF facade is covered with a special melamine film, which makes the surface not only beautiful, but also practical. In order to damage it, you really need to make an effort; the possibility of accidentally damaging the integrity of the cover is excluded.
Such slabs are a pressed block, the back side is covered with construction cardboard or pressed paper, and the front side is covered with decorative vinyl. There are a variety of options on sale, from simple monotonous drawings to real works of art. A photo will help you get a visual idea of what an MDF apron looks like.
Veneered MDF is much less common. Since its front side is covered with natural veneer, it is most often used for furniture production. Using it in the kitchen is a controversial issue. If cooking occurs 1-2 times a week, the material will withstand the load, but with daily use of the stove, the veneer will very quickly lose its appearance and begin to crack and peel off. This has nothing to do with the quality of the product and is explained purely by the physical properties of the material.
Cutting MDF sheets
MDF is cut quite easily with any tool designed for cutting wood with a small and sharp tooth. The use of a large tooth leads to crumbling and delamination of the material, as well as unevenness of the cut end. Recommended Tool:
- Hacksaw for metal.
- Hacksaw for wort.
- Electric jigsaw.
- Hand-held electric circular saw with fine pobedit teeth.
Cutting MDF sheet with a circular saw
If there is an image on the panels, you should carefully adjust the details of the picture, both horizontally and vertically. The joint of a correctly fitted pattern will be less noticeable and, conversely, the displacement will introduce an imbalance in the image, which will be noticeable at first glance.
Using glue when installing MDF panels
Note. For those who do not know how to attach an MDF kitchen apron using glue: so-called liquid nails are used as the latter.
To apply the glue evenly, a special mounting gun is used. Liquid nails are applied to the back surface of the panel, sometimes additionally to the wall, after fifteen minutes the panel is pressed tightly and firmly against the wall. Thin wooden wedges inserted between the bottom of the panel and the tabletop will help prevent downward movement under the weight of the weight.
The glue is applied evenly over the entire surface of the panel
Preparatory work and installation of the apron
Taking measurements
Before installing the apron, of course, it is necessary to measure the area that it should cover. Some prefer to cover the entire wall with panels from the floor to the wall cabinets or behind them. Others only cover the space between the countertop and cabinets. Decide which option suits you best. And measure the height of the kitchen apron.
Count the number of sockets that are in the apron area. You will need to cut holes for them. Please note that where the hood hangs, the height of the apron will be greater. The length of the panels will be the same as the length of the working area.
If your kitchen set is corner or U-shaped, then it makes sense to cover the wall adjacent to the work wall with an apron.
Preparing the surface
Once you have decided on the dimensions and purchased the material, you can begin preparing the surface. The main thing to do is level the wall . Perhaps a perfectly flat surface is not needed. But, if there were tiles on the wall and after dismantling it there were pieces of mortar left, this needs to be removed.
You also need to remove protruding screws and nails. Fill holes, cracks, chips. Go over the surface with putty and, when it dries, apply an antiseptic. This kind of wall preparation does not require very much time.
For ease of installation, you can install an auxiliary rail as a support for the apron using self-tapping screws. After its installation, the rail is removed.
Installation of an MDF apron
Installation of a kitchen apron to the wall can be done in different ways:
- With the help of clamps. That is, “ears” are attached to the back side of the panel and simply hung on the wall. The same technology is used here as when hanging cabinets. The wall should not have large differences.
- On construction staples using a construction stapler.
- On an aluminum profile. A profile structure is attached along the entire perimeter of the panels and MDF is inserted into it.
But probably the most common methods are: fastening with self-tapping screws or “liquid” nails . Let's take a closer look at them.
To secure the kitchen apron with self-tapping screws, you need to make a frame of wooden slats on the wall. The slats are attached to the wall with dowels and aligned in the desired position. Don’t forget that they, like a wall, need to be treated with an antiseptic. After this, you can attach the MDF apron to the screws.
To hide the screws, put decorative caps on them to match the panels. Correctly selected hats are almost invisible on their surface.
Also common is the method of attaching panels to “liquid” nails. In this case, a more even wall is necessary, since differences will be noticeable . If the apron will go behind the cabinets, then you need to install it first, and then hang the cabinets. If the height is up to the cabinets, then it doesn't matter what you hang first.
So, “liquid” nails are applied to the entire surface of the MDF panel. First along the perimeter, and then in stripes in the center at intervals of 30 cm. After application, press the panel against the wall. This method is even simpler than fixing it with self-tapping screws. The main thing is to close the joints where moisture can get under the panel. As you can see, installing a kitchen apron is not that difficult.
But some experts say that over time, due to the composition of the “liquid” nails, the panels may become deformed. Therefore, choose your product carefully.
How to care for an MDF apron
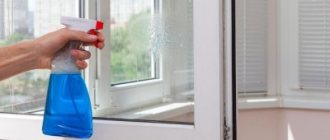
MDF panels are not a capricious material, but there are still some nuances in care. It is strictly forbidden to wash an MDF apron so that water flows over it. Be especially careful around the edges . Moisture getting under the panel can lead to peeling (if secured with “liquid” nails) or deformation (if secured with self-tapping screws). And the surface itself can absorb moisture. Therefore, only a slightly damp cloth.
Do not use coarse abrasives. Over time, they will erase the top decorative layer. Also exclude any acids or alkalis. They can delaminate the panel, then only replacement will save you.
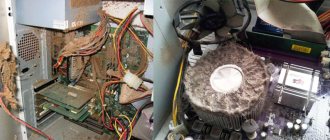
And lastly, try to place hot household appliances away from the apron . Constant exposure to high temperatures leads to damage to the panels.
If you follow the rules of care, your kitchen apron will last you a long time.
Fastening the apron with dowels and screws
Fastening an MDF apron in the kitchen with self-tapping screws or mounting dowels is done as follows.
- First, holes are marked on the panel blank and holes are drilled for the inserts of the decorative caps.
- Then, having positioned the panel at the installation site, mark the marks of the holes for the nylon dowels. This method will avoid displacement of the holes.
- Having removed the panel, drill technological holes and then install nylon dowels.
Installing a decorative cap
The panel is secured with self-tapping screws or screws through inserts onto which decorative chrome caps are screwed onto threads. Of course, this fastening method requires accuracy and more time, but in the future, if necessary, it allows you to quickly replace partially or completely the wall elements of the kitchen apron.
Required tool:
- Metric tape measure.
- Pencil.
- Screwdriver.
- Drill.
- Hammer.
A set of fasteners for attaching an MDF apron in the kitchen
Note: It is recommended to use plastic dowels with a diameter of 6-8 mm.
First, a plastic dowel is installed in the technological hole flush with the wall surface, then a brass bushing with a silicone damper is put on, and secured with a self-tapping screw. The last thing to install is the chrome decorative cap.
Kitchen apron made of MDF, secured with dowels
Apron fastening with aluminum profile
MDF panels are installed in the groove between two aluminum profiles
Important. Using an aluminum profile as an apron fastener eliminates the process of drilling panels, which ultimately simplifies installation, but slightly increases the cost of consumables.
The profile is attached to the wall with dowels around the perimeter of the apron. Corner joints are made with an internal angle of 45 degrees. The profile has mounting grooves with a silicone seal, ensuring tight installation of the panel.
Tips for using MDF apron
MDF panels for a kitchen backsplash are the fastest, most inexpensive and fashionable way to decorate a room. Performing not only practical, but also aesthetic functions, it should look as beautiful as possible. Therefore, a few words should be said about their decoration and care process.
The only additional element that may be needed is an overlay for the top edge. Aluminum corners are most often installed. There are quite a lot of varieties on sale to suit every taste. If the apron is designed in the form of a shelf, then the design will need an ordinary wooden board or a smooth door frame. To attach the base, you need to screw a corner of the shelf to the wall for every 30 cm. The board is attached to the slab with screws and just lies on the corners.
Caring for MDF is quite simple; any detergents except abrasive ones are suitable. The best way to wash problem areas is with dishwashing detergent. Window products are ideal for preventative cleaning, as they create an antistatic film on the melamine surface that repels dust and dirt.