Calling a professional gas fitter to repair the slightest malfunction of the stove can be inconvenient, don’t you agree? You need to meet him at home during working hours, often wait for your turn, and also pay for the work and the house call. So wouldn’t it be better for Hephaestus to learn how to repair gas stoves himself?
After reading our article, you will be able to repair the stove yourself and carry out preventive maintenance so that the kitchen assistant works like new. We will tell you how to disassemble a gas stove yourself and name the most common breakdowns. For those faults that you can fix yourself, we will provide detailed repair instructions.
Where to begin
Before starting the main procedure, the following sequential manipulations are first required:
- Cooling the oven.
- Wiping the outside of its door with a towel.
- If plaque appears, use a razor to thoroughly scrape it off.
- Cleaning glass using conventional means.
After these steps, you can begin cleaning the inside of the door. The outer surface, as a rule, does not cause any difficulties, but it is much more difficult to reach the space between the glass.
There are 2 ways to deal with this task. The first, most optimal way out is to unscrew the top glass, secured (which depends on how the particular oven is designed) with 1-2 bolts. It is used when the structure is well understood. When the door is removed, the carbon deposits and stuck-on grease are washed off.
The second method is used otherwise , it is to get to hard-to-reach places. Read more about each of them below.
How to glue glass in a gas stove oven
On the Internet, on various forums, there are often questions related to broken or cracked glass in the oven of a gas stove. Fortunately, there are many ways to glue glass.
When is it necessary to glue glass?
Most ovens have two or three glasses. All oven glass is heat-resistant, but despite the increased heat resistance over time, frequent temperature changes can easily cause it to lose its strength and crumble. Or, over time, constant exposure to high temperatures (especially in ovens with pyrolysis), grease, vapors, and detergents getting into the original glue - the sealant loses its original properties and the glass simply peels off.
Reference! Mechanical damage can also cause destruction. A blow from a metal object, a skewed door, or a scratch from a pan or other kitchen utensil can cause the glass on a gas or electric oven to break.
What to do if glass peels off or breaks
If the oven glass is damaged, replacing it with any durable glass using universal glue will not lead to the desired result.
- To begin with, use non-heat-resistant glass (even in a door with three layers, but it will be the outer one). It may not withstand the temperature and burst.
- Most heat-resistant adhesives are not intended for use in food storage or food preparation areas. Because they emit toxic fumes and this happens not only when heated.
Glass selection
When choosing, you need to take into account two main criteria: its heat resistance and size (not all glass can be carefully cut with a household glass cutter). The best option would be to order it on the websites of the manufacturer, service centers, or contact them directly. Especially if it has uneven shapes.
Cleaning with glass removal
Ovens made by different companies sometimes have different designs, so the disassembly process may vary. In any case, it is recommended to look at the instructions for your own oven. Typically, disassembly requires either pressing buttons or applying force.
Attention: the work is done with glass, so you need to be very careful.
In one of the design options, you need to lightly press on the sides with your fingers.
Then remove the top cover.
Expert opinion
Valery Garmash
Chef of the Grill House restaurant, griller
This is just one design option. Sometimes you may encounter glass being secured using screws, bolts and other fastening methods.
There's probably some dirt and grease underneath that needs to be removed before proceeding.
Now the first step is to prepare a place to put the glass.
It is important to note: as soon as it is pulled out, the door may slam shut. In the meantime, it is held in place by the weight of the glass.
It’s better to call a second person for help, but it’s possible to do it alone if you’re careful. Remove the glass by pulling it towards you.
Place it on the prepared place. For example, a folded blanket. It is better to have one person remove the glass and another to hold the door.
To get the second glass, you should remember or photograph which grooves it is in, so that later, during assembly, you don’t get confused.
Pull it towards you and up. Transfer to prepared place.
Now there is an opportunity to wash both everything inside and the removed glass itself. First use dishwashing detergent, and then use specialized detergent for washing glass surfaces.
When everything is ready and dry, you need to start assembling the oven. Do not forget that when lowered, the disassembled door will bounce back, so it should be constantly supported with an unoccupied hand.
Next, insert the first glass, remembering or looking at exactly what position it was in. This will help place it in one clear movement.
Install the second glass. It is inserted into the base and lowered.
When everything is done, you can let go of the door - it will no longer bounce.
Take the plastic cover and return it to its original place.
In order not to do all this by weight, some cabinets provide the ability to remove the door. Then it is transferred to a horizontal surface, where it is much more convenient to wash it. However, it is necessary to calculate the forces: if removal is difficult, then it is better to leave it in place, otherwise you may not be able to return the cover to its original position on your own.
Review of gas stove Gefest 5300-03 0046
The question of buying a stove has long arisen. Manufacturers chose Belarusian, which is now in almost every apartment. Gefest 5300-03 0046. It took us a long time to choose. We immediately decided that the stove would be gas, but with electric ignition, since there were problems with the wiring. We were worried that the electric stove would put a large load on the network, which was already regularly knocked out. Therefore, the only choice was among gas ones. At some point it became clear that the choice was quite simple - most of the models are similar: only the design and size change. So the first criterion was size. Unfortunately, only the 50th was suitable. Honestly, I would take the same model, but 60k. Indeed, these ten centimeters make a big difference when you cook several dishes at once in a large bowl. For example, a five-liter saucepan will not fit next to a 28 cm frying pan. Photos with frying pans 22 and 28 cm in diameter:
Wash without removing the door
There is a way to wash the inner surface of the glass without disassembling the door itself, because sometimes it is very difficult or impossible to “unwind” it.
Take any wet wipes from 1 piece to 10 or more (as needed).
At the end of the door there are holes through which the largest amount of dirt passes: grease, dust, etc. The second most dirty places are the side crotches.
The third zone is the holes at the bottom.
However, it is difficult to clean them by hand: it simply will not fit there. A good option is to use long thin sticks. You can look for other suitable items.
A wet wipe is placed on the sticks from one edge and inserted through any of the holes described above.
Glass is washed very well using this method. Fresh dirt is best, so we don’t recommend delaying cleaning. It is convenient to remove used napkins even by hand.
Thus, you need to go around all sides. The oven will look like new.
Precautionary measures
- Glass is slippery, so you need to be careful when cleaning it.
- Be careful with fasteners. If you apply force when removing the door, they can be damaged.
- The door is quite heavy. Therefore, it is advisable that two people film it.
- Do not use powders or chemicals to clean materials.
- If you used the oven before cleaning the glass, you should wait until the inside has cooled down.
- You can use rubber gloves when cleaning.
On a note
The methods discussed are only part of a complete oven cleaning. Maintaining cleanliness and order for a long time should also include mandatory compliance with the following measures:
- To prevent fat from splashing, it is recommended to use special bags and sleeves;
- when cooking is finished and the oven has cooled down, wipe the glass so that it remains dry;
- Use a cleanser once every 7 days.
If the owner or housewife washes their own oven for at least 10 minutes a week, they guarantee themselves that it will remain tidy for a long time, and will get rid of the need to carry out lengthy manipulations, scrubbing away old grease for a long time.
Expert opinion
Valery Garmash
Chef of the Grill House restaurant, griller
Almost all detergents can be used for cleaning. Any household chemical store will do. When working with these substances, you must wear protective gloves to protect your hands from the acids and alkalis contained in these substances.
With the right approach, greasy deposits from glass can be easily removed, but the surface must then be rinsed thoroughly, otherwise the chemicals remaining on it may subsequently end up on the food being prepared.
Why might you need to remove the door?
- Long-term operation of the oven. If the oven is used for several years, dirt and grease will get inside and remain on the back of the glass.
- Violation of technological processes during the manufacture of a gas furnace. If the glass has been strained too much, cracks may appear.
- Damage during transportation. Even telescopic cracks can lead to failure.
- Mounting error.
- The glass may break if the oven inside is hot and cold water comes in contact with the outside.
You can make the replacement yourself. You should buy glass in special stores.
FAQ
What products should I buy to clean my oven?
Everyone has different preferences. To find “your” remedy, it is better to try several popular ones. For example: Amway Home, Reinex, Top House, Sanita. To make a quality comparison, try to test them under equal conditions. You can even keep a journal where you can make notes about the success of a particular product.
Can you tell me the best cleaning product at hand?
1. Pour soapy water into a baking tray and place in the oven for 15 minutes at 110 degrees. 2. Wait for the carbon deposits to soften from the water vapor. 3. Apply the baking soda solution with a rag for 15 minutes. 4. Rinse off. 5. If the dirt remains, you can also wipe it with a vinegar solution.
How to fix the Hephaestus stove timer?
You can only remove and repair a mechanical timer yourself; with an electronic one, it is better to contact a specialist. The alarm clock mechanism looks like a large metal tablet.
To get it, remove the handle, lift the stove table and unscrew the fasteners. Then open the timer case, blow it out and brush off the dust, lubricate the pendulum and gears.
To avoid pouring too much, use machine oil in a special oil can with a thin spout or an ordinary syringe
Try turning the knob to start the timer. Started ticking? This means you can assemble and install in place. No? Try taking it to a watch repair shop, or buy a new one.
Video: how to wash the oven door between the glasses
Recommended by topic
Ovens
Which type of oven self-cleaning is best? Read more How to choose a built-in electric oven and rating of the best models Read more
Ovens
4 effective ways to clean the oven from grease and carbon deposits Read more
How to install and connect an oven
Should you install the oven yourself or is it better to trust the experts? This is the question that torments the home handyman. This material will show that even a beginner can handle installing an oven. It is important to pay attention to the fact that we will be talking about the installation and connection of an electric oven, since connecting gas ovens is the domain of specialized organizations that have permission to carry out work of this kind.
Preliminary preparation
Installation of an oven and other built-in kitchen appliances is the final stage of designing the kitchen work area. At this stage the user will be required to:
- A clear understanding of the location of the oven. There is the possibility of a classic layout of kitchen appliances (the oven is located below the level of the countertop) or the location of the oven at chest level, which is more rational from an ergonomic point of view. This solution will be appreciated by those who often use the oven.
- Knowledge of oven model. You need to decide on the model before starting to design furniture, since understanding its geometric dimensions for calculating the built-in niche depends on this.
In the case of using narrow or compact (low) models, knowledge of their overall dimensions is simply necessary! It is not difficult to find the exact dimensions of a particular model online.
- Indicating the optimal location for the electrical outlet to connect the oven. The location of the holes on the back walls of the furniture for the power cable and access to the outlet will depend on this.
When ordering furniture, it would be useful to inquire about the technical characteristics of the materials from which it will be made. It must be a heat-resistant material capable of withstanding thermal loads up to 100 ° C. The use of PVC materials and materials with reduced heat resistance is not allowed.
Electrical connection
The ideal case when connecting the oven to electricity is when the outlet is located in close proximity to the installation site and the length of the supplied cable is sufficient to connect the oven to the network. Otherwise, the power cable will need to be replaced.
The use of extension cords and surge protectors is unacceptable! Most models simply will not be able to provide long-term operation under a load of 3–3.5 kW, and this is fraught with melting of the filter housing, thermal destruction of the insulation, and, as a result, a short circuit and fire!
If the design of the oven allows you to gain access to the terminal box without breaking the warranty seals, then you can do the work of replacing the cable yourself, otherwise you need to contact a service center.
All cable replacement work is carried out with the oven disconnected from the electrical network!
To replace the cable, you need to remove the back wall of the oven or simply open the terminal box cover.
Loosen the screws securing the conductors and remove the electrical cable.
Replace the removed cable with a similar one of the required length.
A home craftsman does not always have a tool for measuring the cross-section of conductors, and this parameter is very important for ensuring the safe operation of an electric oven! In order not to make a mistake and purchase a cable with the required conductor cross-section, you should use the following table:
| Apparent Power (W) | Network cable cross-section (mm 2 ) |
| maximum 1380 | 3 x 0.75 |
| maximum 2300 | 3 x 1 |
| maximum 3680 | 3 x 1.5 |
Preparation for connecting (cutting) a new cable is carried out as follows:
- the sheath of a three-wire cable approximately 4–5 cm long is removed;
- the conductors are stripped of insulation and connected to the appropriate contacts. Blue wire to terminal “L”, brown to “N”, yellow-green to ground terminal;
- The ground wire (yellow-green) should usually be a couple of centimeters longer for easier connection to the ground pin.
Before first use
Manufacturers recommend preheating the oven to 250°C for 30 minutes, then washing with warm water and a small amount of dishwashing liquid.
Don't forget to remove the protective film from the telescopic guides. Open the window, turn on the hood, when it first warms up there is an unpleasant smell and smoke.
- Lighting – light bulb and fan working.
- Quick heating - (the instructions say “the upper heater, baking function and fan” work - what a “baking function” is in this context is not clear) - auxiliary mode, allows you to quickly heat the oven to the set temperature.
- Defrosting - only the fan runs, no need to set the temperature. If you choose a temperature of 50-60 degrees, then you can dry herbs, mushrooms and other products in this mode. In this case, you need to leave the oven door ajar.
- Turbo grill and convection - the upper grill heater and fan work. This mode speeds up the frying process. Recommended temperature 190 °C.
- Reinforced grill – the upper grill heater is working. Recommended temperature 250 °C.
- Grill – only the grill works. The mode is required for frying a small amount of food, or is used as an auxiliary mode to create a crust on the finished product.
- Bottom heating – the lower heating element works. The mode is needed to heat food; manufacturers recommend using it for steam cleaning of the oven.
- Upper and lower heating elements – classic mode for baking.
- Upper and lower heating elements fan – mode with additional convection. Ideal for roasting poultry and meat, it allows you to cook faster and at a lower temperature.
Everything is quite traditional.
- There are two recessed regulators on the panel - temperature and modes.
- Between them is a large display, on the central part of which there is a clock with an indication of options, and below them there are three sensors.
There are no markings around the regulators on the body. All information is located on the switches themselves. It's a little unusual at first, but you quickly get used to it. All inscriptions are large, clear, the paint does not rub off. The pintograms of the modes are clear.
There are two indicator lights on the oven panel.
One signals that the oven is operating, it lights up all the time the controls are turned (even if the oven light is just turned on), the second lights up when heating is in progress, and goes out when the temperature inside the oven matches the set one.
Possible causes of failure
A broken oven door is a common problem.
Many reasons were discussed above when describing the visible signs of failure. The main reason is incorrect or careless operation.
- Sometimes heavy dishes are temporarily placed on an open door and children sit on it, which leads to excessive stress on the hinges and brackets. Deformed parts must be replaced.
- Problems sometimes arise due to loose fasteners or defects in the rubber seal. The fasteners can be tightened and the gasket replaced. On some stove models, you have to remove the door from its hinges to replace the seal.
- Sometimes repairs are necessary due to problems with the glass. It may crack or burst. Causes:
- manufacturing defects;
- damage during transportation and installation of the slab;
- temperature difference (heated oven and drops of cold water falling outside).
This leads to the formation of microscopic cracks; over time, the glass wears out more and more, and at a certain point it may finally crack.
Preparation
Disassembling and washing the oven door is a labor-intensive procedure, so it is advisable to do it at the very end of cleaning.
Before you begin removing the glass, you must:
- Cool the oven completely after cooking or hydrolytic (steam) cleaning;
- wash the internal surfaces, completely removing traces of foam and cleaning sprays;
- inspect the door for leaks, grease stains and other contaminants;
- inspect the fasteners and, if necessary, treat them to remove grease or rust.
During general cleaning, you can remove the door before processing the internal surfaces of the oven in order to wash hard-to-reach areas at the joint.
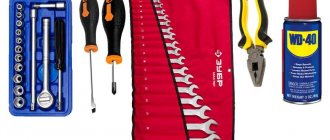
To clean glass from all sides you will need the following tools:
thin or Phillips screwdriver (depending on the type of fastening);- soft sponge or microfiber cloth;
- paper or cloth towels;
- cover;
- thin knitting needles or long bamboo skewers;
- old toothbrush;
- cotton wool or gauze;
- protective gloves.
Some housewives use a steel wool or blade to scrape off dried grease, but this is not recommended. Sharp metal edges leave scratches into which dirt and detergent residues become trapped. In addition, a large amount of damage leads to cloudy glass.
The most stubborn stains can be removed from glass using a plastic scraper.
The burners are burning weakly
It happens that no matter how you turn the knob, the burner burns only at minimum power. If no measures are taken, over time it may stop burning altogether. Most likely, the reason is that the nozzle supplying gas is clogged.
Escaped food rarely gets into the nozzle, because during cooking it is protected by the upper part of the burner. More often, the cause of blockage is cleaning products, especially those based on soda.
Cleaning the jet is quite easy: first you need to remove the top of the burners and raise the table; in some cases, you may need to replace the jets on the stove. A burner nozzle is a small part, the top of a gas pipe, with a thin hole in the middle.
This hole needs to be carefully cleaned. This is best done with a toothpick. It is not recommended to use metal objects for cleaning, so as not to damage the hole.
Escaped food rarely gets into the nozzle, because during cooking it is protected by the upper part of the burner. More often the cause of blockage is cleaning products, especially soda-based ones.
To ensure that the cleaned dirt flies out and does not spill into the gas pipe, we recommend periodically opening the gas supply to this burner - literally for half a second, but at full power. For safety, you need to open a window or turn on the hood.
You can read more about how to increase the power of a gas burner in this material.
Is it possible to clean the inside of the door without disassembling it?
If disassembling the door is impossible or complicated, you can try to clean the glass without dismantling it.
For this you will need:
- thin skewers or plastic knitting needles;
- wet wipes for cleaning kitchen surfaces;
- pieces of cloth or gauze.
Cleaning without disassembly occurs through the ventilation holes at the top and bottom of the door. This method is suitable for removing dirt from end openings, but if there are large stains on the glass it will not be effective.
The video will show you how to clean the inner glass of the oven without dismantling the door:
Recovery instructions
It doesn't matter how the glass was damaged. It cannot be restored, which means it needs to be replaced, since operating a slab with such damage is dangerous, sometimes even impossible.
Replacement procedure:
The broken part is removed, freeing it from the fastenings.
The difficulty depends on the model of your stove. The new glass sheet is carefully inserted into the grooves. The fasteners are returned to their place.
Important
Sometimes you have to remove the oven door to replace the glass.
Removing the damaged part
In most slabs, the glass is held in place by a lower stop, and from above it simply fits into a special groove on the bar. And it is fixed on the door with secret screws.
Rubber gaskets are not used for fixation, except for small rubber inserts that are located in the middle of the sides of the door. The stops are steel profiles that are attached to the oven door with regular screws (how to fix oven doors on a stove yourself?). To dismantle it is necessary to unscrew the screws.
- Take a Phillips screwdriver and carefully unscrew the screws, holding the glass so that it does not fall down.
- The removed fasteners release the lower stop, which falls and allows you to pull out the glass.
- The glass itself must be carefully pushed out of the groove of the upper stop. To lift it, you can slip a screwdriver into the gap formed.
On some stoves, the glass is attached with a sealant, so you will have to “cut” it with a knife, separating the glass sheet from the door.
Replacement
Replacement is simple: you need to take a new workpiece and place it in place, carefully moving it into the space under the upper stop. But replacement on slabs where the use of sealant is provided is performed differently:
- The new fragment must be degreased and dried for better gluing with sealant.
- After gluing, excess glue that has come out must be removed immediately: after hardening, this will be more difficult to do.
- Press the structure for 10 minutes to set.
Attention
You can use the oven after gluing only after 24 hours.
TOP 6 popular cleaning products
Despite the popularity of folk remedies, today there are no less effective commercial sprays and substances on the counter. Among them are time-tested ones.
There are many proven products for cleaning oven glass.
Amway Cleaning Gel
Unlike powder and a simple cleaning agent, it does not violate the integrity of the enamel. It lasts for a long time and fully pays for its cost. For housewives who don’t have time to scrape off carbon deposits, this is an indispensable tool.
The cleaning gel is gentle on the surface.
Cif Anti-Fat
A special spray for glass that will help cope with even the most neglected oven. If the problem gets worse, you first need to steam the glass. Suitable for cleaning other surfaces as well.
Cif Anti-Fat has proven itself well.
Faberlic cleaning product
The line is full of modern solutions for cleaning the whole house. It is advisable to choose a separate product that is simultaneously suitable for cleaning the stove and oven. There is one drawback - you will have to buy the dispenser separately.
The product from Faberlic is sold without a dispenser.
GRILL.NET
One of the most effective means for removing old deposits and cleaning the glass of gas and eclectic stoves. A relatively inexpensive spray that completely pays for itself.
GRILL.NET is a fairly budget-friendly tool that has proven its effectiveness.Reinex - oven spray
This product can often be found in large kitchens. It is also used at home. It has fully justified itself over the years of effective fight against fat. If the problem gets worse, it is advisable to steam the surface in advance.
Reinex spray is effective in the fight against fat.
Sanita R
It is in the first positions of the national rating. This product can be found in the kitchens of every third housewife. Suitable for cleaning not only the gas oven, but also other kitchen surfaces. There is a minus - a strong chemical smell. It is advisable to spray the surface and leave the kitchen for a few minutes.
One of the most popular oven cleaning products.
It is advisable to work with released chemicals wearing gloves and respirators. Despite the advertising campaign about the safety of the products, any chemicals have a negative effect on the skin and respiratory tract.
When working with cleaning products, remember to be safe. Wear gloves and a respirator.
In order not to waste time cleaning the oven and glass, it is advisable not to start the problem. After all, it’s better to spend time with loved ones on your day off than to scrub the oven of monthly grease and residue.
